Welcome to our WordPress tutorial on how to programmatically activate a plugin! Whether you’re a developer looking to simplify plugin management or just someone curious about the inner workings of WordPress, you’ve come to the right place. In this post, we’ll dive deep into the intricacies of activating plugins without lifting a mouse. Let’s get started!
Understanding WordPress Plugins
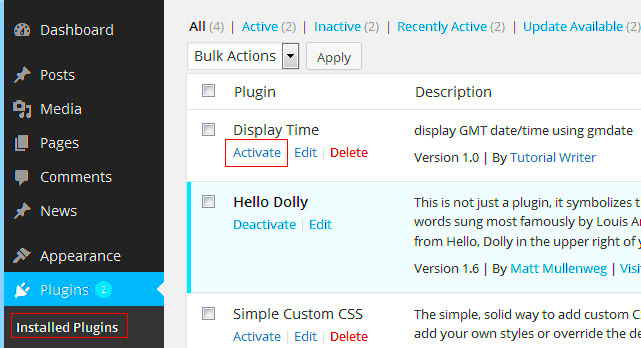
Plugins are the secret sauce that makes WordPress so powerful and flexible. They extend the functionality of your website, allowing you to add features like contact forms, e-commerce capabilities, SEO tools, and much more. Understanding them is essential for anyone looking to enhance their WordPress experience.
Here are a few key points to help you grasp the concept of WordPress plugins:
- What Is a Plugin? A plugin is essentially a piece of software that ‘plugs into’ your WordPress site, enhancing its functionality. With thousands of plugins available, you can tailor your site to meet almost any requirement!
- How Do They Work? Plugins work by executing specific functions based on WordPress hooks and filters. When activated, they can modify your website’s behavior or appearance.
- Where Can You Find Plugins? The official WordPress Plugin Directory offers thousands of free plugins. Additionally, many developers sell premium versions with advanced features on their websites.
- Best Practices for Using Plugins:
- Only install plugins from reputable sources.
- Limit the number of active plugins to avoid performance issues.
- Regularly update your plugins to ensure security and compatibility.
Pro Tip: Always keep a backup of your site before installing or activating a new plugin. This will save you a lot of hassle if something goes wrong!
In the next sections, we’ll explore how to programmatically activate these powerful tools with ease. Stay tuned!
Why Activate a Plugin Programmatically?
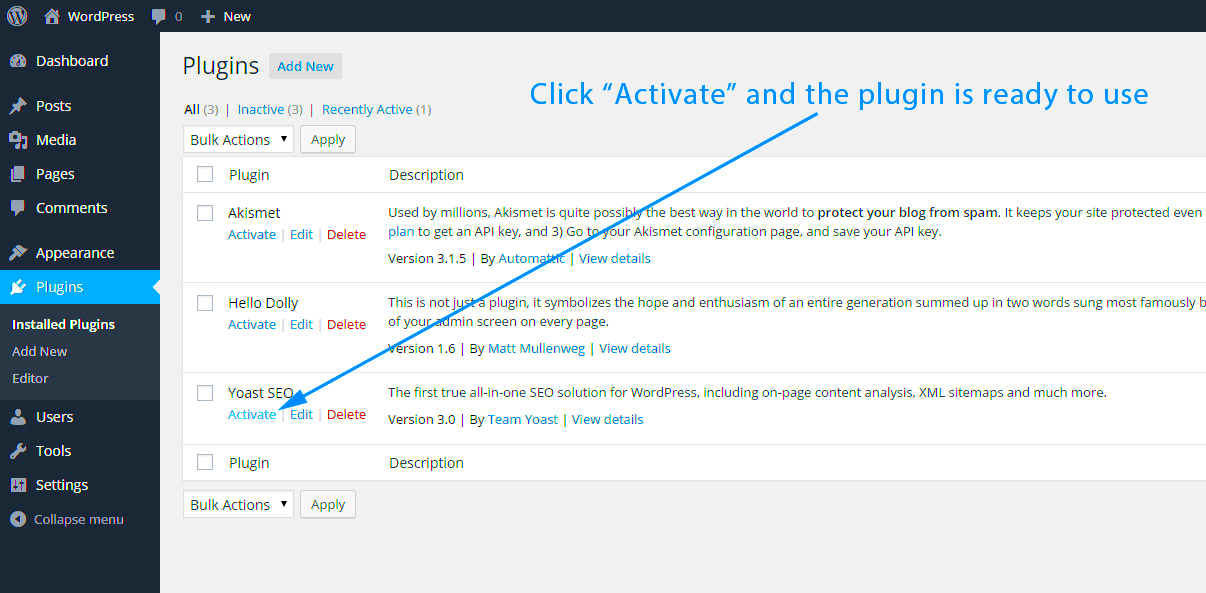
Activating a plugin programmatically might seem like an advanced move reserved for seasoned developers, but it brings several compelling advantages to the table. Let’s explore why you might choose to go down this road:
- Automated Deployments: When you’re working in environments where automated deployments are essential, activating a plugin programmatically can save you time and effort. Imagine setting your plugins to activate automatically as part of your deployment script—no need for manual clicks!
- Dynamic Activation: There might be scenarios where the decision to activate a plugin depends on specific conditions. For instance, if your site is multilingual and you only want to activate a translation plugin when another language is selected, programmatic activation makes this seamless and straightforward.
- Development Flexibility: When developing custom themes or plugins that depend on other plugins, programmatic activation allows developers to ensure that required plugins are active without relying on the end-user to remember to do so. It ensures that everything runs smoothly, enhancing user experience.
- Provisioning Testing Environments: If you’re setting up a testing environment, programmatic activation ensures that your plugins are active whenever you spin up a new instance, allowing for consistent testing conditions.
- Reduced Human Error: Manual activations are prone to human error—whether it’s forgetting to activate a critical plugin or misconfiguring settings. Automating the activation process reduces these risks significantly.
In summary, activating a plugin programmatically not only streamlines workflows but also enhances flexibility, making your WordPress site management a lot smoother.
Setting Up Your Development Environment
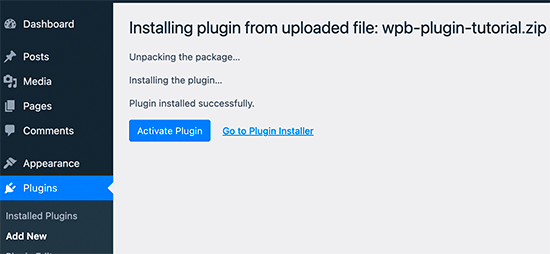
Before diving into programming and activating plugins, setting up a robust development environment is crucial. This will help you test your code effectively without affecting your live site. Here’s a step-by-step guide to get you started:
- Choose Your Local Server: You can choose solutions like Local by Flywheel, MAMP, or XAMPP. These tools help you create a local server environment for WordPress development on your computer. It allows you to work on your site offline.
- Install WordPress: Download the latest version of WordPress from the official website and install it on your local server. Follow the setup instructions and create your database when prompted.
- Set Up Your Code Editor: Choose a code editor like Visual Studio Code or Sublime Text. This will be where you write and edit your code efficiently. Make sure to install useful extensions to enhance functionality.
- Install Essential Plugins: Before activating any custom plugin, install other essential plugins that can assist you in the development process, like debugging tools (e.g., Query Monitor) or plugin template creators (e.g., Plugin Boilerplate).
- Version Control: Use Git to keep track of changes and versions of your code. Setting up a Git repository will help you manage your code more effectively and collaborate if needed.
- Testing Tools: Depending on the complexity of your development, consider using tools like PHPUnit for unit testing and Vagrant for maintaining consistent development environments.
Once your development environment is set up, you’ll be ready to dive into the world of WordPress plugin development and start activating plugins programmatically. Happy coding!
5. Creating a Custom Plugin for Activation
So you want to dive into the world of WordPress and create your very own custom plugin that can be activated programmatically? Awesome! Crafting a plugin is a fantastic way to extend the functionality of your WordPress site without modifying the core files. Let’s break down the steps to create a simple plugin for this purpose.
First things first, you need to set up your plugin folder and file:
- Navigate to the wp-content/plugins directory in your WordPress installation.
- Create a new folder for your plugin. You can name it something like my-custom-plugin.
- Inside this folder, create a PHP file. For example, my-custom-plugin.php.
Now, let’s populate the PHP file with some essential code:
<?php/** * Plugin Name: My Custom Plugin * Description: A simple plugin for demonstrating activation. * Version: 1.0 * Author: Your Name */?>Once you have your header comments set up, you’ve got the base of your plugin down! Now, to add the functionality that allows the plugin to activate another plugin programmatically, you need to hook into WordPress’ activation process. You’ll want to use the register_activation_hook function which lets you execute code when your plugin is activated.
Here’s an example of how you might extend your plugin to activate another plugin:
function activate_my_plugin() { activate_plugin('example-plugin/example-plugin.php');}register_activation_hook(__FILE__, 'activate_my_plugin');This tiny yet powerful snippet is all you need to get started! Just remember to replace example-plugin/example-plugin.php with the path to the plugin you wish to activate. Now, whenever you activate your custom plugin, it will automatically activate the specified plugin as well!
6. Using the `activate_plugin` Function
Alright, let’s get into the nitty-gritty of the activate_plugin function. This handy-dandy function is part of the WordPress core and allows you to activate any installed plugin directly from your custom code. It’s crucial for more complex setups, especially when you need to manage multiple plugins dynamically.
The syntax for the activate_plugin function is quite straightforward:
activate_plugin($plugin, $redirect = '', $silent = false);Let’s break down the parameters:
- $plugin: This is a string specifying the plugin’s file path relative to the plugins directory. For instance, plugin-name/plugin-name.php.
- $redirect (optional): This parameter can be a URL to redirect users to after activation. If not provided, it will redirect to the plugins page.
- $silent (optional): This boolean flag, when set to true, will suppress any feedback messages.
Here’s an example of how you can use it in your custom plugin:
if ( ! function_exists('activate_plugin') ) { require_once ABSPATH . 'wp-admin/includes/plugin.php';}$plugin_to_activate = 'example-plugin/example-plugin.php';$redirect_url = 'admin/plugins.php'; // redirect to plugins page after activationactivate_plugin($plugin_to_activate, $redirect_url);It’s always a good idea to check whether the function exists before you call it, just to avoid any fatal errors! And by including the wp-admin/includes/plugin.php file, you’re ensuring that the necessary functions are loaded. With this knowledge, you are now equipped to create plugins that not only serve your needs but also help streamline the activation process for better user experience.
7. Code Example: Activating a Plugin Programmatically
Activating a plugin programmatically in WordPress can seem daunting if you’re not familiar with the underlying structure. However, with a bit of code, you can easily activate any plugin. Let’s take a closer look at how we can achieve this with a practical example.
First things first, you need to ensure that you’re familiar with using WordPress hooks and the core functions that facilitate plugin management. The function you’ll primarily use is activate_plugin(). This function allows you to activate a specified plugin directly from your code.
Here’s a quick code snippet to get you started:
function activate_my_plugin() { activate_plugin('my-plugin/my-plugin.php');}add_action('init', 'activate_my_plugin');In this example:
- activate_plugin(‘my-plugin/my-plugin.php’): This is the function that actually performs the activation. Replace
my-plugin/my-plugin.phpwith the path to your plugin’s main file. - add_action(‘init’, ‘activate_my_plugin’): Here, we hook our function into the WordPress initialization process, ensuring it gets executed at the right time.
Always remember to deactivate any plugin before trying to activate it programmatically. WordPress doesn’t allow reactivating a plugin that’s already active; hence, you’ll want to check its status first. You can do this using the is_plugin_active() function:
if (!is_plugin_active('my-plugin/my-plugin.php')) { activate_plugin('my-plugin/my-plugin.php');}With this knowledge, you can confidently automate your plugin management tasks!
8. Testing the Plugin Activation
Now that we’ve written the code to activate a plugin programmatically, the next step is testing the activation process. Testing is crucial because it ensures that everything works as expected without any hitches. Here’s how to go about it.
First, you’ll want to access your WordPress admin dashboard. Navigate to the “Plugins” section to see if your plugin is activated. If everything is set up correctly, you should see your plugin listed as active.
If it’s not showing up as activated, you might want to do the following:
- Check your code: Double-check the plugin path in your
activate_plugin()function to ensure it’s correct. - Error Logging: Consider enabling debugging in your WordPress installation. This can be done by modifying the
wp-config.phpfile and settingdefine('WP_DEBUG', true);. This will provide insight into any errors that may arise during activation.
It’s also a good idea to test this in a staging environment first. This way, any faults in the code won’t affect your live site. Once you confirm the functionality works smoothly, you can confidently implement it on your production site.
Lastly, after activating the plugin, it’s essential to ensure that any settings or configurations needed for your plugin are also in place. Some plugins might require additional setup steps after activation, which you’ll want to consider in your overall testing process.
Troubleshooting Common Issues
Activating a WordPress plugin programmatically can sometimes lead to unexpected hiccups. But don’t worry; we’ve got your back! Here’s a quick guide to some common issues you might encounter, along with solutions to get you back on track:
- Plugin Not Found: If you’re trying to activate a plugin, but it isn’t recognized, double-check the plugin’s file path. Ensure that the plugin folder is located in the
wp-content/pluginsdirectory. - Fatal Errors: You may face fatal errors due to conflicts with existing plugins or themes. Check the error messages, which can usually be found in the debug logs. Address any conflicting functions or code in your custom implementation.
- Insufficient Permissions: Even programmatically activated plugins need the right permissions. Make sure the user role has the capability to activate plugins. You can run a check using
current_user_can('activate_plugins')before attempting to activate the plugin. - Deactivation Issues: If a plugin refuses to deactivate, check if there are dependencies or if it’s being called elsewhere in your code. You might need to explore the options to force deactivate the plugin manually through the database.
- JavaScript Conflicts: Sometimes, activated plugins might introduce JavaScript conflicts that hinder functionality. Open your browser’s console to check for errors and debug accordingly.
If you’re stuck, don’t hesitate to consult the plugin’s documentation or seek help from the community forums—there’s a vast network of helpful folks on WordPress. Remember, troubleshooting can be frustrating, but it’s part of the learning curve!
Conclusion
In conclusion, programming a plugin activation in WordPress can significantly simplify management and enhance your site’s functionality. By leveraging code to activate plugins, developers can automate processes and customize the user experience more effectively.
Throughout this tutorial, we’ve covered:
- Understanding plugin activation and its importance.
- How to programmatically activate a plugin using hooks.
- Troubleshooting common issues that may arise during this process.
As you dive into programmatic activations, keep in mind:
- You will learn the ins and outs of WordPress.
- Make backup copies of your files and database before making changes.
- The WordPress community is always there to help!
So equip yourself with the knowledge and skills you’ve gained here. With practice and patience, you’ll become more proficient in customizing your WordPress experience. Happy coding!
Further Reading and Resources
To enhance your understanding and skills in programmatically activating plugins in WordPress, it’s essential to explore additional resources and readings. The following materials can provide you with valuable insights and practical examples to help you delve deeper into this subject:
- WordPress Plugin Handbook – A comprehensive guide that covers all aspects of plugin development.
- activate_plugin() Function Documentation – Official WordPress documentation on the function used for activating plugins programmatically.
- Using Plugins in WordPress – An informative article detailing how to effectively manage and utilize plugins.
- Creating WordPress Plugins (SitePoint) – A tutorial that guides you through the basics of plugin creation and management.
- WordPress – Plugins Tutorial (TutorialsPoint) – A beginner-friendly overview of how plugins work and how to use them.
Additionally, consider joining WordPress development communities such as:
| Community | Focus Area | Link |
|---|---|---|
| WordPress Stack Exchange | Technical questions and answers | Visit |
| WPBeginner | Beginner tutorials and guides | Visit |
| Advanced WordPress Facebook Group | Networking and advanced discussions | Visit |
By exploring these resources, you’ll not only enhance your technical skills but also become part of a thriving WordPress development community.

