If you’re running a WordPress website, chances are you’ve dealt with redirects at some point—whether to improve user experience, fix broken links, or update your site structure. Managing redirects effectively is key to maintaining a clean URL structure and ensuring your visitors land exactly where you want them to. Sometimes, however, you might want to undo or remove certain redirects, especially if they’ve become unnecessary or are causing issues. In this post, we’ll explore how to manage and undo redirects on WordPress so your URLs stay neat, optimized, and user-friendly.
Understanding Why Redirects Are Used and When to Remove Them

Redirects are like digital signposts—they tell browsers and search engines where to find your content. They serve several important purposes:
- Fixing Broken Links: When a page is deleted or moved, redirects help visitors find the new location without hitting a 404 error.
- Site Restructuring: As your website evolves, you might change URL structures. Redirects ensure old URLs point to the new ones seamlessly.
- SEO Optimization: Proper redirects preserve search engine rankings when URLs change, preventing loss of traffic.
- Consolidation: Combining content or removing duplicate pages often requires redirects to maintain link equity.
However, there are times when you want to remove redirects:
- Redundant Redirects: If a redirect no longer serves a purpose—say, the target page has been deleted or the redirect was set up incorrectly—it’s best to remove it.
- Redirect Loops or Chains: Multiple redirects pointing to each other can slow down your site and confuse users. Removing unnecessary redirects can fix this.
- Updating Your URL Strategy: If you’re aiming for a cleaner, more straightforward URL structure, undoing old redirects helps achieve that.
Knowing when and why to remove redirects is essential for maintaining a healthy, user-friendly website. Removing outdated or problematic redirects not only improves site performance but also ensures your visitors enjoy a smooth browsing experience. In the next sections, we’ll cover how to identify, manage, and undo redirects on your WordPress site effectively.
3. Identifying Redirects on Your WordPress Site

Before you can undo redirects, it’s important to first identify where they are happening. Redirects can be sneaky; they might be set up in various places, and understanding where they originate is key to removing them effectively.
There are several common sources of redirects on a WordPress site:
- Plugins: Many SEO and redirect plugins (like Redirection, Yoast SEO, or All in One SEO) handle redirects. If you’ve installed any of these, check their settings.
- Server-side redirects: Sometimes, redirects are configured directly in your hosting environment or via .htaccess files (for Apache servers) or server configs (like Nginx).
- Hardcoded redirects in theme or custom code: Rare, but possible—your theme or custom snippets might be redirecting pages.
To start identifying redirects, consider these steps:
- Use online tools: Tools like HTTP Status Code Checker can help you see if a page is redirecting. Just enter the URL, and it’ll tell you if it’s a 301, 302, or other redirect.
- Check the URL manually: Visit the URL in your browser and watch for redirect behavior—does it forward you to a different page? Note the destination.
- Review plugin settings: Head to your WordPress admin dashboard and look at any redirect or SEO plugins you’ve installed. For example, in the Redirection plugin, you can see a list of all active redirects.
- Inspect your .htaccess file: Access your site via FTP or your hosting file manager, and open the .htaccess file. Look for lines starting with “Redirect” or “RewriteRule” that might be causing redirects.
- Consult your hosting provider: Some hosts provide tools or logs to see redirect rules or server configurations.
Remember, identifying all redirects is the first step towards a cleaner URL structure. Take notes or screenshots of where redirects are set up, so you know what to remove or modify later.
4. Step-by-Step Guide to Undo Redirects in WordPress
Now that you know where your redirects are coming from, let’s walk through how to remove or undo them step-by-step. The process varies depending on the setup, but here’s a general guide:
Step 1: Backup Your Website
Before making any changes, always create a full backup of your site—files and database. This way, if something goes wrong, you can restore your site easily.
Step 2: Identify the Redirect Source
Refer to the previous section to pinpoint where the redirect is configured: plugin, .htaccess, or server settings.
Step 3: Remove Redirects from Plugins
If a plugin manages your redirects:
- Log in to your WordPress admin dashboard.
- Navigate to the plugin’s settings page (e.g., Redirection > Redirects).
- Locate the redirect rule you want to undo.
- Delete or disable the specific redirect.
- Save your changes.
For other plugins like Yoast SEO, check their redirect management options and remove any unwanted redirects.
Step 4: Edit the .htaccess File (for Apache Servers)
If the redirect is set up here:
- Access your site via FTP or your hosting file manager.
- Locate the .htaccess file in your site’s root directory.
- Download a copy for backup.
- Open the file with a text editor.
- Find the redirect rule. It might look like this:
Redirect 301 /old-url https://yoursite.com/new-url
- Remove or comment out the redirect line by adding a “” at the start:
Redirect 301 /old-url https://yoursite.com/new-url
- Save the file and upload it back to your server.
Check your site to ensure the redirect no longer occurs.
Step 5: Adjust Server Configuration (for Nginx or other servers)
If redirects are set up in your server config, you might need to:
- Access your server via SSH or control panel.
- Locate the configuration files, such as
nginx.conf. - Find redirect rules similar to:
rewrite ^/old-url$ /new-url permanent;
- Comment out or remove these lines.
- Restart your server to apply changes.
Note: Be cautious when editing server configs—consult with your hosting provider if unsure.
Step 6: Clear Caches and Test
After removing redirects:
- Clear your website’s cache (if you use caching plugins or CDNs).
- Clear your browser cache or try incognito mode.
- Visit the URLs to confirm the redirect has been undone and your URLs are clean.
And that’s it! With these steps, you’ll have successfully undone redirects and restored a clean URL structure on your WordPress site.
5. Using Plugins to Manage and Remove Redirects Effectively
When it comes to managing redirects on your WordPress site, plugins are your best friends. They make the process straightforward, especially if you’re not comfortable editing code directly. Plus, many plugins come with useful features like bulk management, logging, and easy undo options. So, if you want a quick, hassle-free way to clean up your URLs, plugins are the way to go!
One popular plugin for managing redirects is Redirection. It’s free, widely used, and packed with features. Here’s how you can use it to remove redirects:
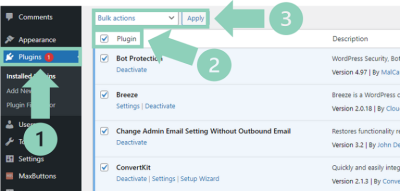
- Install and activate Redirection. Just go to Plugins > Add New, search for “Redirection,” then install and activate.
- Access the plugin settings. You’ll find it under Tools > Redirection.
- View existing redirects. The plugin shows all current redirects in a simple list. You can easily identify which ones you want to remove.
- Remove unwanted redirects. Simply click on the redirect and delete it, or select multiple redirects to delete at once.
Another good option is Yoast SEO Premium, which includes redirect management features. If you already have Yoast SEO Premium, just navigate to SEO > Redirects, and you’ll see a user-friendly interface to create, edit, or delete redirects. Removing a redirect is as simple as clicking delete or clearing the destination URL.
Using plugins like these offers several benefits:
- Ease of use – No coding required.
- Bulk management – Handle multiple redirects at once.
- Logging and monitoring – Track redirect activity and fix issues quickly.
- Undo options – Easily reverse changes if needed.
Just remember, while plugins are super helpful, it’s good practice to keep your plugin list clean and only install trusted, well-rated tools. Regularly reviewing your redirects ensures your site stays tidy, fast, and user-friendly.
6. Manual Methods to Remove Redirects in WordPress
If you prefer to have full control or want to avoid adding extra plugins, removing redirects manually is totally doable—though it requires a bit more technical know-how. The good news is, with some basic knowledge of WordPress and server files, you can tidy up your URL structure without much fuss.
Here are the main manual methods:
1. Editing the .htaccess File
The .htaccess file, located in your website’s root directory, often contains redirect rules, especially if you’ve set up redirects via plugins or custom code. To remove redirects:
- Use an FTP client or your hosting file manager to access your site’s root directory.
- Download a backup of the .htaccess file before editing—this is crucial!
- Open the file in a text editor.
- Look for lines that start with Redirect or RewriteRule. These lines define redirects.
- Delete or comment out (by adding a at the beginning) the redirect lines you want to remove.
- Save your changes and upload the updated file back to your server.
Afterward, clear your site cache and test the URLs to ensure the redirects are gone.
2. Removing Redirects from WordPress Plugins
If you set up redirects using a plugin, simply deactivate or delete the plugin, and the redirects should be removed. Alternatively, check the plugin’s settings for options to disable or delete specific redirects.
3. Clearing Caches and Browser Data
Sometimes, redirect issues persist due to cached redirects in your browser or server cache. To ensure you’re seeing the latest state:
- Clear your browser cache.
- If you’re using a caching plugin or CDN, clear those caches as well.
- Test URLs in an incognito window or different browsers to verify that redirects are truly gone.
Manual removal gives you granular control but also comes with risks—like accidentally deleting important rules or causing server errors. Always back up your files before making changes, and if you’re unsure, consider consulting a developer or your hosting provider for assistance.
In summary, whether you choose to use plugins or handle redirects manually, cleaning up your URL structure is a smart move for SEO and user experience. Take your time, double-check your work, and your site will be on its way to a cleaner, more efficient setup in no time!
7. Verifying Your URL Structure After Removing Redirects
Once you’ve removed redirects from your WordPress site, it’s essential to double-check that everything is in order. You want to make sure your URLs are clean, direct, and functioning as intended without unnecessary redirections. This step helps you catch any issues early and ensures your visitors and search engines are seeing the correct links.
Here’s a simple process to verify your URL structure:
- Use a browser or online tools: Visit your URLs directly in a browser to see if they load smoothly without redirects. Alternatively, tools like HTTP Status.io or Redirect Checker can show you the redirect chain and HTTP status codes.
- Check for proper redirects: If you still see redirects, identify if they’re intentional or accidental. Your goal is to have URLs that load directly with a 200 OK status, not 301 or 302 redirects that you no longer want.
- Review your sitemap: Make sure your XML sitemap reflects your current URL structure. An outdated sitemap can confuse search engines and hinder your SEO efforts.
- Use Google Search Console: Submit your updated sitemap and run a URL Inspection for key pages to see how Google views them. Look for “Indexed, but blocked” or “Not indexed” messages that might indicate issues.
Remember, after removing redirects, your URLs should directly point to the intended content. If you encounter broken links or errors, revisit your redirect removal process to ensure everything is correctly updated. Taking these steps ensures your site’s URL structure is clean, user-friendly, and optimized for search engines.
8. Best Practices for Maintaining a Clean and SEO-Friendly URL Structure
Maintaining a clean URL structure isn’t a one-and-done task—it’s an ongoing process that plays a pivotal role in your site’s SEO and user experience. A well-structured URL not only looks better but also helps search engines understand your content better and improves click-through rates.
Here are some best practices to keep your URLs tidy, clear, and SEO-friendly:
1. Use Descriptive Keywords
Incorporate relevant keywords that describe the page content. For example, use /wordpress-seo-tips instead of /page1. This helps both users and search engines understand what the page is about.
2. Keep URLs Short and Simple
A concise URL is easier to read and remember. Avoid lengthy strings of unnecessary words or numbers. Aim for clarity and brevity—think of it as a quick label for your content.
3. Use Hyphens to Separate Words
Hyphens (-) are preferred over underscores (_) because search engines recognize hyphens as word separators. For example, /best-restaurant-in-ny is better than /best_restaurant_in_ny.
4. Avoid Dynamic Parameters When Possible
URLs with long strings of parameters (like ?id=123&ref=abc) can be confusing and less SEO-friendly. Use static URLs that clearly reflect the content.
5. Implement a Consistent URL Structure
Consistency is key. Decide on a URL pattern and stick with it across your site. For example, whether you prefer /category/page-name or /page-name, keep it uniform.
6. Redirect Old URLs Properly
If you change URLs, set up proper 301 redirects from old to new links. This preserves link equity and prevents 404 errors, ensuring a smooth user experience and maintaining SEO rankings.
7. Regularly Audit Your URLs
Use tools like Screaming Frog or Ahrefs to crawl your site periodically. Check for broken links, duplicate URLs, or outdated structures. Regular audits help you catch issues early and keep your site optimized.
By following these best practices, you’ll ensure your WordPress site maintains a clean, logical, and SEO-friendly URL structure. Remember, your URLs are like the address of your content—they should be inviting, easy to understand, and aligned with your overall SEO strategy.
9. Common Issues When Undoing Redirects and How to Troubleshoot Them
Undoing redirects in WordPress might sound straightforward, but it can sometimes lead to unexpected hiccups. If you’re facing issues after trying to remove redirects, don’t worry—many of these problems are fixable with a little troubleshooting.
Common issues include:
- Broken links or 404 errors – When redirects are removed improperly, visitors might land on non-existent pages.
- Caching issues – Sometimes, browsers or caching plugins store old redirects, causing confusion even after you’ve undone them.
- Plugin conflicts – Multiple redirect or SEO plugins might interfere, making it tricky to manage redirects cleanly.
- Persistent redirect rules – Sometimes, redirects are set at server level (like .htaccess) or via hosting features, which may require additional steps to remove.
How to troubleshoot these issues:
- Clear your cache – Always start by clearing your browser cache and any caching plugins you use. This ensures you’re seeing the latest version of your site.
- Check redirect status – Use online tools like HTTP Status Checker or browser extensions to see if redirects are still active.
- Review your plugins – Disable redirect-related plugins temporarily to see if the issues resolve. If they do, the plugin settings need review.
- Inspect your .htaccess file – If you’re comfortable with editing server files, check your .htaccess for lingering redirect rules. Remove or comment out any lines related to previous redirects.
- Test in incognito mode or different browsers – This helps ensure the problem isn’t local to your device or browser cache.
- Use debugging plugins – Plugins like Query Monitor can help identify conflicts or errors related to URL redirects.
Pro tip:
If you’re unsure whether a redirect is still active, consider temporarily disabling plugins one by one or switching to a default theme. This process can reveal conflicts or hidden redirect rules.
Remember, patience is key. Sometimes, it takes a little time for DNS propagation or server cache to clear. With these troubleshooting steps, you’ll be back to a clean, user-friendly URL structure in no time!
10. Conclusion and Tips for Managing URL Redirects in WordPress
Managing redirects might seem daunting at first, but with the right approach, it becomes a powerful tool to maintain a clean and SEO-friendly website. Whether you’re undoing redirects to clean up your URLs or setting up new ones, the goal is to keep your site user-friendly and search engine optimized.
Here are some final tips to help you manage URL redirects effectively:
- Plan your redirects – Before making changes, map out which URLs need to be redirected and where they should point. This prevents accidental broken links.
- Use reliable plugins – Popular redirect plugins like Redirection or Yoast SEO are user-friendly and safe for managing redirects without messing up your site.
- Keep backups – Always back up your website before making bulk changes to redirects or editing your .htaccess file.
- Monitor your site – Regularly check your website’s analytics and crawl reports to identify and fix any broken URLs promptly.
- Be cautious with bulk changes – When removing multiple redirects, do it carefully to avoid accidentally breaking important links.
Quick summary:
| Tip | Why It Matters |
|---|---|
| Plan your redirects | Prevents broken links and preserves SEO value |
| Use trusted plugins | Ensures smooth management and reduces conflicts |
| Regularly audit your URLs | Helps catch issues early and maintain site health |
| Backup your site | Safeguards against accidental data loss or errors |
In summary, managing URL redirects in WordPress doesn’t have to be complicated. With careful planning, the right tools, and a little bit of troubleshooting know-how, you can keep your website’s structure clean, user-friendly, and optimized for search engines. Remember, a well-organized URL structure not only improves user experience but also boosts your site’s SEO performance. Happy redirect managing!


