Are you looking to make your website more organized and user-friendly? Embedding a calendar into your WordPress site is a fantastic way to keep your visitors informed about upcoming events, appointments, or deadlines. Whether you run a business, a community group, or a personal blog, adding a calendar can streamline scheduling and boost engagement. The good news is, with just a few simple steps, you can seamlessly integrate a functional, attractive calendar directly into your WordPress pages or posts—no complicated coding required!
Benefits of Adding a Calendar to Your WordPress Site
Incorporating a calendar into your WordPress website offers a range of advantages that can enhance both your site’s functionality and your visitors’ experience. Here are some key benefits:
- Improved Organization: Keep track of events, appointments, and deadlines in one centralized place, making it easier to manage your schedule.
- Enhanced User Engagement: Visitors appreciate having quick access to upcoming events or important dates, encouraging them to stay longer and interact more.
- Better Communication: Share essential information about upcoming webinars, sales, or community gatherings without needing to send emails or create separate pages.
- Professional Appearance: A well-designed calendar adds a polished look to your site, showing visitors that you’re serious about your organization or brand.
- Ease of Updates: With the right tools, updating your calendar is straightforward—no need to modify multiple pages or posts.
Plus, many calendar plugins come with features like automatic reminders, RSVP options, and integration with other tools, making your scheduling even more efficient. Whether you’re managing a small team or a large event schedule, embedding a calendar makes your website more dynamic and helpful. It’s a simple step that can significantly boost your site’s professionalism and user satisfaction.
3. Choosing the Right Calendar Plugin for WordPress
When it comes to embedding a calendar into your WordPress site, the first step is picking the right plugin. With so many options out there, it can feel a bit overwhelming. But don’t worry — I’ll help you narrow down the choices and find the perfect fit for your needs.
First, consider what features you really need. Are you looking for a simple, straightforward calendar to display upcoming events? Or do you need something more robust that allows for user registrations, booking appointments, or syncing with other apps? Think about your goals and how the calendar will be used.
Here are some popular WordPress calendar plugins to consider:
- The Events Calendar — Great for comprehensive event management, with options for recurring events, venues, and organizers.
- All-in-One Event Calendar — Offers beautiful, customizable calendars with filters and RSVP options.
- WP Simple Calendar — Ideal if you want something lightweight and easy to set up, especially for displaying Google Calendars.
- Calendarize it! — Packed with features like event filtering, booking, and multiple calendar views.
- Google Calendar Embed Plugins — Perfect if you already use Google Calendar and want a simple embed solution.
Key considerations include:
| Feature | Questions to Ask |
|---|---|
| Ease of Use | Is the plugin user-friendly for beginners? How steep is the learning curve? |
| Customization | Can you customize the look and feel to match your website’s design? |
| Compatibility | Does it work well with your current theme and other plugins? |
| Features | Does it support recurring events, bookings, notifications, or integrations? |
| Pricing | Is it free, freemium, or paid? What’s your budget? |
Remember, the best plugin is the one that fits your specific needs and makes managing your schedule easier. Take some time to read reviews, test demos if available, and even try out a couple of options before settling on the one that feels right.
4. Step-by-Step Guide to Embedding a Calendar in WordPress
Now that you’ve chosen the perfect calendar plugin, it’s time to get it onto your website. Don’t worry — embedding a calendar is usually straightforward, and I’ll walk you through each step.
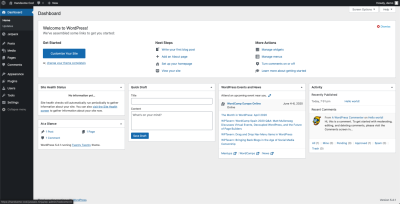
Step 1: Install and Activate the Plugin
Head over to your WordPress dashboard, navigate to Plugins » Add New, and search for the plugin you selected. For example, if you chose The Events Calendar, just type that in the search bar. Once you find it, click Install Now, then Activate.
Step 2: Configure the Plugin Settings
After activation, you’ll typically see a new menu item in your dashboard for the plugin. Click on it and explore the settings. Here, you can customize how your calendar displays, add your events, and set other preferences like time zones or calendar views.
Step 3: Create Events or Add Calendar Data
Depending on the plugin, you might need to create individual events or connect to an external calendar (like Google Calendar). Follow the plugin’s instructions to add your upcoming events, recurring schedules, or import external calendars.
Step 4: Generate the Embed Code or Shortcode
Most calendar plugins provide a shortcode or an embed code that you can place anywhere on your site. Look for options like Shortcode or Embed within the plugin’s interface. For example, it might be something like [your-calendar] or a block of HTML code.
Step 5: Place the Calendar on Your Page or Post
Next, navigate to the page or post where you want your calendar to appear. If you’re using the WordPress block editor (Gutenberg), simply add a Shortcode Block and paste your shortcode inside. If you’re editing classic pages, switch to the Text tab in the editor and insert the embed code there.
Step 6: Preview and Adjust
Save or update your page, then preview it to see how the calendar looks. If needed, go back and adjust settings or styling to better match your website’s design. Most plugins also allow you to customize the appearance through CSS or built-in options.
Extra Tips:
- Test on mobile: Make sure your calendar looks good on smartphones and tablets.
- Keep it updated: Regularly add new events and keep your calendar current for your visitors.
- Use widgets: Many plugins support widgets, so you can place your calendar in sidebars or footer areas for better visibility.
And that’s it! With these simple steps, your calendar will be live and ready to help your visitors stay updated on your schedule. Embedding a calendar not only boosts your site’s professionalism but also makes event management a breeze.
5. Customizing Your Embedded Calendar for Better Functionality
Once you’ve successfully embedded your calendar into your WordPress site, the next step is making it work for you. Customization is key to ensuring your calendar not only looks good but also fits your specific needs. Luckily, most calendar plugins and embed tools offer a range of options to tailor the calendar’s appearance and functionality.
Here are some common customization options you might want to explore:
- Color Themes: Match your calendar’s colors with your website’s branding for a seamless look.
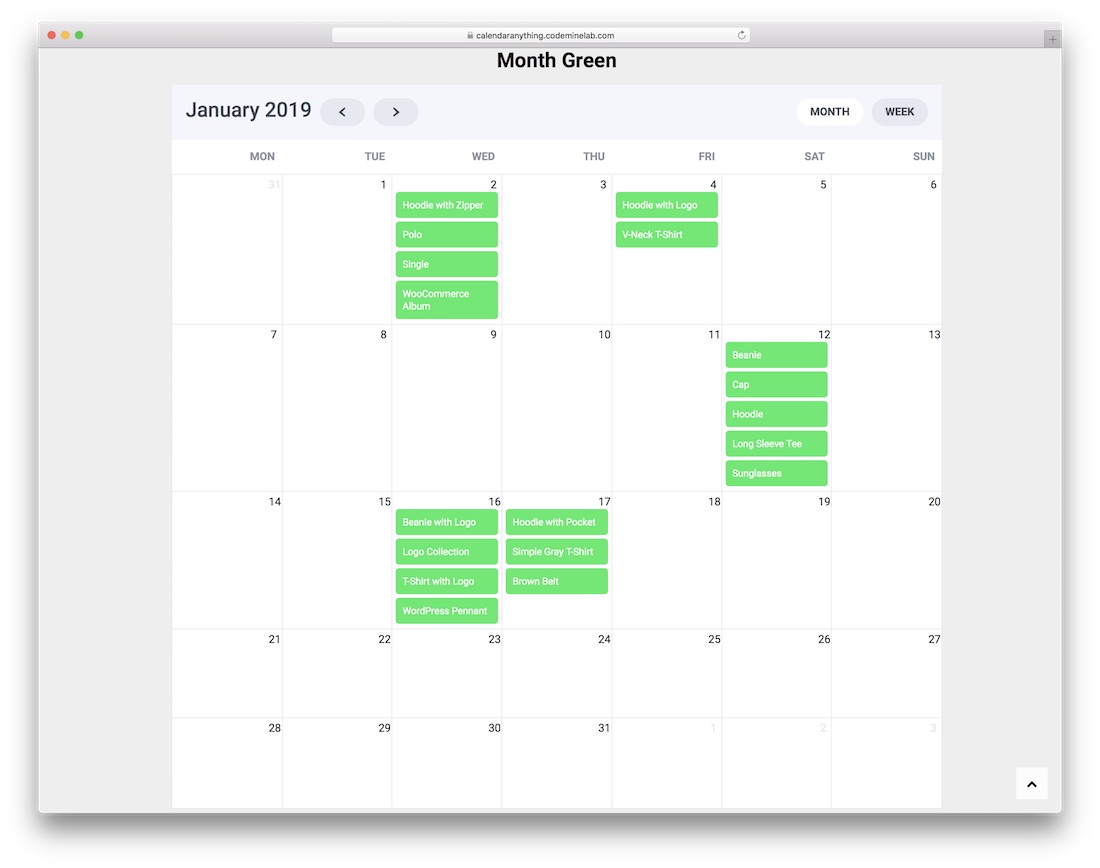
- Display Modes: Choose between month, week, or day views depending on how detailed you want your visitors to see upcoming events.
- Event Details: Decide what information appears when someone clicks on an event—such as location, description, or RSVP options.
- Filtering Options: Allow visitors to filter events by categories like workshops, webinars, or community events.
- Adding Custom Fields: If your plugin supports it, include additional fields like speaker names, ticket links, or registration forms directly within event entries.
Most popular plugins like The Events Calendar or WP Simple Booking Calendar come with a settings panel or customization options in the WordPress dashboard. Take some time to explore these settings—often, a few clicks can dramatically improve usability and aesthetics.
A quick tip: If you’re comfortable with CSS, you can further tweak your calendar’s look by adding custom styles. For example, changing fonts, adjusting spacing, or highlighting specific event types can make your calendar more engaging and aligned with your site’s design.
Remember, the goal is to create a calendar that’s easy for your visitors to read and interact with while giving you all the control you need to manage your schedule effectively. So don’t hesitate to experiment with different settings until you find what works best for you!
6. Tips for Managing and Updating Your WordPress Calendar
Embedding a calendar is just the first step—keeping it current and well-managed is what truly makes it valuable for your visitors. Here are some practical tips to help you stay on top of your WordPress calendar and ensure it remains a reliable resource.
1. Regularly Add New Events
Set a routine to review and update your calendar. Whether it’s weekly or bi-weekly, adding upcoming events promptly helps your audience plan ahead. Use your calendar plugin’s features to duplicate recurring events or set reminders for upcoming activities.
2. Keep Event Details Accurate
Double-check event information—dates, times, locations, and registration links—to avoid confusion. Clear and correct details build trust and ensure your visitors have a smooth experience.
3. Use Clear Categories and Tags
Organize your events with categories or tags. This makes filtering easier and helps visitors find what interests them quickly. For example, you might have categories like “Workshops,” “Meetups,” or “Webinars.”
4. Enable Notifications or Reminders
If your plugin supports it, set up email notifications for upcoming events or updates. This keeps your audience engaged and informed, reducing no-shows or missed opportunities.
5. Monitor and Analyze Engagement
Some plugins integrate with analytics tools. Keep an eye on which events attract the most interest, and adjust your scheduling or promotion strategies accordingly.
6. Backup Your Calendar Data
Regular backups of your WordPress site ensure that your calendar information isn’t lost due to technical issues. Use reliable backup plugins and schedule backups frequently.
7. Keep Your Plugins Up to Date
Developers release updates to fix bugs, improve features, or enhance security. Regularly check for updates to your calendar plugin and apply them promptly.
A little bit of management goes a long way in maintaining an effective, user-friendly calendar. By staying organized and proactive, you’ll ensure your schedule remains accurate, relevant, and useful for your visitors—and that your website continues to serve as a valuable resource for your community.
7. Common Troubleshooting Tips for Embedded Calendars
Embedding a calendar into your WordPress site can sometimes come with its fair share of hiccups. Don’t worry—most issues are pretty straightforward to fix once you know what to look for. Here are some common problems and easy troubleshooting tips to get your calendar running smoothly:
1. Calendar Not Showing Up
If your embedded calendar isn’t appearing on your page, double-check these:
- Embed Code: Make sure you’ve copied and pasted the correct code snippet. Sometimes, copying from certain sources can miss parts of the code.
- Placement: Confirm that you’ve inserted the code into the correct spot in your page or post editor (preferably in the Text or HTML tab if using the Classic Editor).
- Plugin Conflicts: Deactivate other plugins temporarily to see if there’s a conflict causing the issue.
- Cache Issues: Clear your site cache and browser cache to ensure you’re viewing the latest version.
2. Calendar Displays Incorrectly or Partially
When your calendar appears broken or incomplete, consider:
- Responsive Design: Ensure the container where you embed the calendar is wide enough. Sometimes, a narrow container causes display issues.
- CSS Conflicts: Custom CSS on your site might interfere with the calendar’s styles. Try disabling custom styles temporarily.
- Update Plugins and Themes: Outdated themes or plugins can cause incompatibility problems. Keep everything updated.
3. Calendar Not Syncing or Updating
If changes made in your calendar platform aren’t reflected on your site:
- Refresh Embed Code: Sometimes, re-generating the embed code from your calendar service helps.
- Clear Cache: Again, clearing cache is key—both plugin-based cache and browser cache.
- Check Permissions: Make sure your calendar’s sharing settings are set to public or accessible via embed code.
4. Permissions and Privacy Issues
If your calendar is not visible to visitors:
- Privacy Settings: Verify that your calendar is set to public sharing in your calendar provider.
- Embed Restrictions: Some services restrict embedding or require API keys—double-check their documentation.
Quick Tips Summary:
| Issue | Solution |
|---|---|
| Calendar not appearing | Check embed code, placement, conflicts, cache |
| Display errors | Ensure container width, disable custom CSS, update plugins |
| Not updating | Regenerate embed code, clear caches, verify sharing settings |
| Privacy issues | Set calendar to public, review embed permissions |
8. Conclusion and Final Recommendations for Effective Scheduling on WordPress
Embedding a calendar into your WordPress website is a fantastic way to streamline scheduling, boost user engagement, and make your site more professional. Whether you’re managing appointments, events, or bookings, a well-placed calendar can be your secret weapon.
To wrap things up, here are some final tips to ensure your calendar integration goes off without a hitch:
- Choose the Right Calendar Service: Pick a platform that fits your needs—Google Calendar for simplicity, or specialized booking plugins for more advanced features.
- Use Reliable Embed Methods: Follow the official instructions from your calendar provider to generate accurate embed codes.
- Test Thoroughly: Always preview your pages on different devices and browsers to ensure responsiveness and accessibility.
- Keep Everything Updated: Regularly update your WordPress core, themes, and plugins to avoid compatibility issues.
- Optimize for Performance: Cache your pages when possible and avoid overloading your site with too many scripts that could slow down loading times.
Remember, a well-embedded calendar isn’t just about aesthetics—it’s about making scheduling easier for your visitors and yourself. With a little setup and some troubleshooting know-how, you’ll have a seamless scheduling system right on your WordPress site in no time.
Happy scheduling!