Hey there! If you’re managing a WordPress site, you probably spend a lot of time in the admin area. Customizing this space can make your workflow smoother, more personalized, and even a bit more fun. Whether you’re a developer, a site owner, or just love tweaking things to fit your style, learning how to customize your dashboard is a game-changer. In this guide, I’ll walk you through the essentials of personalizing your WordPress admin area—step by step—so you can work more efficiently and enjoy your admin experience even more.
Why Customize the WordPress Admin Area
So, why bother customizing your WordPress admin dashboard? Well, there are quite a few good reasons. First, a tailored admin area can boost your productivity. When you hide unnecessary menus or reorder items, you spend less time hunting for the right tools and more time focusing on your content or projects.
Second, customization helps create a more professional look, especially if you’re running a client site or a multi-user environment. It’s a great way to add your branding, making the backend feel more aligned with your business or personal brand.
Third, it improves user experience. If you have team members or clients who access your site’s backend, customizing the dashboard can simplify their workflow, reduce confusion, and prevent accidental mistakes. For example, you can remove options they don’t need or add helpful links and shortcuts.
And finally, a customized admin area can be a fun way to learn more about how WordPress works. Playing around with settings, plugins, and code can deepen your understanding of the platform, turning an ordinary admin area into a powerful, personalized workspace. Overall, customizing your WordPress admin isn’t just about looks—it’s about making your site management easier, more efficient, and a little more enjoyable.
3. Preparing Your Website for Customization
Before diving into customizing your WordPress admin area, it’s essential to get your website ready. Proper preparation ensures that the process runs smoothly and that you can easily revert changes if needed. Think of it as setting the stage before a big performance—having everything in place makes the customization experience much more enjoyable.
First things first, backup your website. Customizations, especially those involving code or plugins, can sometimes lead to unexpected issues. Using a reliable backup plugin like UpdraftPlus or VaultPress can save you a lot of headaches. Just imagine, if something goes wrong, you can restore your site to its previous state with a few clicks.
Next, update your WordPress core, themes, and plugins. Running the latest versions not only ensures compatibility but also keeps your site secure. Outdated software can cause conflicts or even open security vulnerabilities. So, head over to your dashboard, check for updates, and make sure everything is up to date.
It’s also a good idea to activate a child theme if you’re planning to make theme-related modifications. This way, your changes won’t be overwritten when the parent theme updates. Think of the child theme as a safe sandbox where you can experiment without risking the core code.
Finally, disable unnecessary plugins. The more plugins you have active, the more potential conflicts or slowdowns. Deactivate those you don’t use regularly. This not only improves site performance but also reduces the chances of compatibility issues during customization.
To summarize, your prep checklist includes:
- Backing up your website
- Updating WordPress, themes, and plugins
- Setting up a child theme (if applicable)
- Deactivating unused plugins
Getting these steps out of the way makes the subsequent customization process much more straightforward and stress-free. Now, with your site prepped, you’re ready to start customizing your admin area to better suit your workflow and preferences!
4. Using Plugins to Customize the Admin Layout
One of the easiest and most flexible ways to customize your WordPress admin area is by using plugins. No need to dive into complex code—there are plenty of tools out there designed specifically for tweaking the admin interface. Whether you want to reorganize menus, add custom dashboards, or tweak the look and feel, plugins make it simple.
Let’s start with some popular plugins that can help you customize the admin layout:
| Plugin | Features | Ideal For |
|---|---|---|
| Admin Menu Editor | Rearrange, add, or hide menu items in the admin sidebar | Personalizing menu structure for easier navigation |
| WP Admin UI Customize | Change color schemes, login page, dashboard widgets, and more | Giving your admin area a branded or unique look |
| Admin Columns | Customize the columns displayed in admin tables | Improving data management and visibility |
Let’s walk through a few popular plugins:
Admin Menu Editor
This plugin is a favorite for customizing the admin menu. Want to hide certain menu items for clients or move important pages to the top? Simply install and activate it. Then, go to Settings > Menu Editor, and you’ll see a drag-and-drop interface. Rearrange menus, create custom submenus, or hide items you don’t need. It’s user-friendly and doesn’t require coding skills.
WP Admin UI Customize
If you’re looking to give your admin area a fresh new look, this plugin is perfect. It allows you to tweak colors, fonts, and even upload your own logo. You can also customize the login page to match your branding. This is especially handy if you’re managing client sites or want a more professional appearance for your team.
Admin Columns
Sometimes, managing content in WordPress involves sifting through lots of data. Admin Columns lets you customize the columns shown in post, page, or custom post type lists. You can add new data points, reorder columns, or hide unnecessary ones, making your admin screens more efficient.
Using these plugins is straightforward:
- Install and activate the plugin from the WordPress repository.
- Navigate to the plugin’s settings page in your dashboard.
- Adjust the options to suit your needs—drag, toggle, or upload as needed.
- Save your changes and view the admin area to see your customizations in action.
Remember, always keep your plugins updated and review your customizations periodically to ensure everything continues to work smoothly after WordPress updates. With the right plugins, you can transform your admin area into a streamlined, branded workspace that makes managing your site a breeze.
5. Customizing the Admin Menu and Sidebar
One of the best ways to make your WordPress admin area more user-friendly is by customizing the admin menu and sidebar. When you have a clear, organized menu, you can navigate your site more efficiently and focus on what really matters. Plus, if you manage multiple sites or have team members working with you, customizing menus can streamline workflows.
So, how do you get started? WordPress offers some built-in options, but for deeper customization, you’ll likely want to use a bit of code or plugins. Here’s a quick rundown of your options:
- Rearranging Menu Items: You can change the order of menu items to prioritize the most-used sections. For example, moving “Posts” closer to the top.
- Adding Custom Menu Items: Want to add links to custom pages or external sites? You can do this via code or plugins.
- Removing Unnecessary Items: Simplify the interface by hiding menu items that aren’t relevant to your workflow.
To achieve this, you can use the functions.php file of your theme or a custom plugin. Here’s a simple example to get you started:
// Reorder admin menu itemsfunction custom_rearranged_menu() { global $menu; // Example: move 'Posts' to the top $new_order = array(); foreach ( $menu as $index => $item ) { if ( $item[2] == 'edit.php' ) { continue; // Skip for now } $new_order[] = $item; } // Add 'Posts' at the beginning $posts_item = array( 5, 'edit.php', 'Posts' ); array_unshift( $new_order, $posts_item ); $menu = $new_order;}add_action( 'admin_menu', 'custom_rearranged_menu' );Alternatively, for those who prefer a no-code approach, plugins like Admin Menu Editor make customizing your admin menu straightforward — just drag and drop to reorder, hide, or add items without touching code.
6. Modifying the Dashboard Widgets
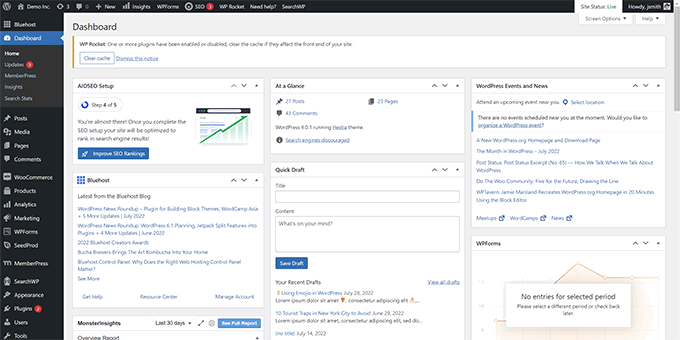
The WordPress dashboard is your starting point every time you log in. It displays a bunch of widgets with useful info, recent activity, quick drafts, and more. But sometimes, you might find it cluttered or not tailored to your needs. The good news? You can customize these dashboard widgets to show only what’s relevant—and hide what’s not.
To do this, you have a few options:
- Removing Widgets: Hide unnecessary widgets to declutter your dashboard.
- Adding Custom Widgets: Display custom information, links, or metrics that matter to you.
- Rearranging Widgets: Change the order in which widgets appear for quicker access.
Let’s look at how to remove unwanted widgets first. You can add some simple code to your functions.php file:
// Remove default dashboard widgetsfunction remove_dashboard_widgets() { remove_meta_box( 'dashboard_quick_press', 'dashboard', 'side' ); remove_meta_box( 'dashboard_primary', 'dashboard', 'side' ); remove_meta_box( 'dashboard_recent_drafts', 'dashboard', 'side' ); remove_meta_box( 'dashboard_activity', 'dashboard', 'normal' );}add_action( 'admin_init', 'remove_dashboard_widgets' );This code hides several default widgets, giving you a cleaner workspace. Want to add a custom widget? Here’s a simple example:
// Add a custom dashboard widgetfunction add_custom_dashboard_widget() { wp_add_dashboard_widget( 'custom_widget_id', 'My Custom Widget', 'display_custom_widget_content' );}function display_custom_widget_content() { echo 'Here’s some personalized info or quick links you want to see at a glance.
';}add_action( 'wp_dashboard_setup', 'add_custom_dashboard_widget' );Alternatively, for a more visual approach, plugins like WP Dashboard Notes or Ultimate Dashboard allow you to drag and drop widgets, add custom ones, and arrange everything without touching code. This makes it super easy for non-developers to tailor the dashboard to their workflow.
Customizing your admin area isn’t just about aesthetics—it’s about creating a workspace that helps you work smarter, not harder. Whether you’re rearranging menus, hiding irrelevant widgets, or adding new ones, these tweaks can make a big difference in your daily management tasks.
7. Adding Custom Dashboard Widgets for Better Workflow
One of the coolest ways to make your WordPress admin area work for you is by adding custom dashboard widgets. Think of these as personalized tools or shortcuts that give you quick access to the information or actions you use most often. By customizing your dashboard, you can streamline your workflow and keep everything you need right at your fingertips.
So, how do you get started? First, you’ll need to add some code to your site, usually via a custom plugin or your theme’s functions.php file. Don’t worry—it’s pretty straightforward! Here’s a quick rundown:
- Hook into the Dashboard: Use the
wp_add_dashboard_widget()function to create your widget. - Define Your Content: Write a callback function that outputs what you want your widget to display.
- Place Your Widget: Use the
dashboard_setuphook to add your widget when the dashboard loads.
Here’s an example snippet to add a simple “Upcoming Tasks” widget:
function add_custom_dashboard_widget() { wp_add_dashboard_widget( 'upcoming_tasks', // Widget slug. 'Upcoming Tasks', // Title. 'display_upcoming_tasks' // Callback. );}function display_upcoming_tasks() { echo '<ul>'; echo '<li>Finish client report</li>'; echo '<li>Review new submissions</li>'; echo '<li>Backup website</li>'; echo '</ul>';}add_action('dashboard_setup', 'add_custom_dashboard_widget');And voilà! You now have a custom widget right on your dashboard that displays your important tasks. You can get even fancier by pulling data from your site’s analytics, recent comments, or other custom data sources. There are also plugins like WP Dashboard Widgets or Admin Dashboard Widgets that offer drag-and-drop interfaces if coding isn’t your thing.
Remember, a well-tailored dashboard can save you time and make managing your site much more efficient. So, spend some time thinking about what info you want front and center, and then customize accordingly!
8. Changing the Admin Area Appearance with Themes and CSS
If the default WordPress admin area feels a bit dull or not quite in line with your brand, you’re in luck—there are plenty of ways to spruce it up and make it uniquely yours. Customizing the appearance can make your admin experience more enjoyable and even boost your productivity by reducing visual clutter.
Let’s start with themes. Yes, you can install admin themes that completely overhaul the look of your dashboard. Some popular options include:
- Admin Themes plugins like WP Admin UI Customizer
- Branded themes that match your website’s style
To install an admin theme:
- Go to your WordPress dashboard.
- Navigate to Plugins > Add New.
- Search for “Admin Theme” or the specific plugin name.
- Install and activate the plugin.
- Follow the plugin’s instructions to choose your theme or customize the appearance.
If you prefer a more lightweight approach or want more granular control, adding custom CSS is the way to go. You can do this by using a plugin like Admin CSS MU or by adding code to your site that enqueues custom styles.
Here’s a simple example to change the admin bar background and font colors:
function my_custom_admin_styles() { echo '<style> wpadminbar { background: 222 !important; } adminmenu, adminmenu .wp-submenu, adminmenuback, adminmenuwrap { background-color: 333 !important; } adminmenu a { color: fff !important; } .wp-core-ui .button-primary { background: 0073aa !important; border-color: 006799 !important; } </style>';}add_action('admin_head', 'my_custom_admin_styles');This code injects custom styles directly into the admin area, giving it a darker theme with white text and custom button colors. You can tweak the colors and styles to match your branding or preferred aesthetic.
Another tip: if you’re comfortable with CSS, you can create a custom stylesheet and enqueue it properly, ensuring your styles stay intact during plugin updates. Combining themes and CSS tweaks allows you to craft an admin area that’s not only functional but also visually consistent with your brand or personal taste.
Remember, customizing the admin area isn’t just about looks—it’s about creating a workspace that feels right for you and helps you work more efficiently. Whether you choose a plugin, custom CSS, or a combination of both, a little effort here can make a big difference in your daily workflow.
9. Best Practices for Admin Area Customization
Customizing your WordPress admin area can make your workflow more efficient and tailored to your needs. However, it’s important to follow some best practices to ensure your customizations are effective, safe, and maintainable.
Start with a clear plan before diving into customization. Think about which features or sections you want to modify, hide, or enhance. It helps to outline your goals so you can focus on the most impactful changes.
Backup your site before making any significant changes. Customizations, especially using plugins or code snippets, can sometimes cause conflicts or errors. Having a backup ensures you can restore your site if something goes wrong.
Use child themes or custom plugins for modifications. This way, your changes won’t be lost during theme updates. For example, if you’re customizing the admin area via functions.php, consider creating a custom plugin for your tweaks.
Limit the number of plugins. While plugins are helpful, too many can slow down your site and introduce security risks. Choose well-coded, reputable plugins for customization, and deactivate or delete ones you no longer need.
Maintain consistency in your design and layout. Keep your admin interface clean and simple. Avoid cluttering it with unnecessary options or widgets, which can distract or confuse users.
Test changes thoroughly on a staging site before applying them to your live site. This way, you can see how your customizations behave and fix issues without affecting your visitors.
Finally, document your customizations. Keep track of what you’ve changed, which plugins you’ve used, and any code snippets added. This documentation will save you time in future updates or troubleshooting.
10. Tools and Resources for Advanced Customization
If you’re looking to go beyond basic tweaks and venture into advanced customization of the WordPress admin area, there are some fantastic tools and resources to help you along the way.
Custom Admin Theme Plugins: These plugins allow you to create completely custom admin themes without coding. Examples include:
- Adminimize: Lets you hide unnecessary menu items, widgets, and options to streamline your admin dashboard.
- WP Admin UI Customize: Offers drag-and-drop interface elements to personalize the admin area.
Code Snippets and Custom Scripts: For those comfortable with PHP and JavaScript, using code snippets can unlock powerful customizations. Resources like WordPress’s official documentation provide guidance on safe implementation.
Developer Tools and Frameworks: If you’re building a highly tailored admin experience, consider frameworks like:
- React or Vue.js: To create dynamic, modern admin interfaces integrated into WordPress via REST API.
- WP REST API: Enables you to fetch, update, and manage data asynchronously, making your admin area more interactive.
Custom Plugin Development: Building your own plugin gives complete control over admin features. Use the WordPress Plugin Developer Handbook (https://developer.wordpress.org/plugins/) as a comprehensive resource to learn best practices and coding standards.
Debugging and Testing Tools: Use tools like Query Monitor or Debug Bar to identify performance bottlenecks or conflicts caused by your custom code.
Finally, stay engaged with the WordPress community. Forums like WordPress Support and developer communities on GitHub or Stack Overflow are invaluable for troubleshooting and learning from others’ experiences.
Remember, advanced customization requires careful planning and testing, but with the right tools and resources, you can create a highly personalized admin experience that boosts your productivity and fits your workflow perfectly.
Conclusion and Final Tips for a Tailored WordPress Admin Experience
Customizing your WordPress admin area can significantly enhance your workflow, increase efficiency, and create a more personalized environment suited to your specific needs. Throughout this guide, we’ve explored various methods such as using plugins, custom code snippets, and leveraging built-in features to modify menus, dashboards, and overall layout. Remember, a well-tailored admin interface not only improves productivity but also provides a more enjoyable experience when managing your website.
To wrap up, here are some final tips to ensure you get the most out of your customization efforts:
- Backup Before Making Major Changes: Always create a backup of your site before implementing significant modifications to prevent data loss.
- Test Customizations in a Staging Environment: Use a staging site to experiment without affecting your live website.
- Use Reliable Plugins: Opt for reputable and regularly updated plugins to ensure compatibility and security.
- Document Your Changes: Keep track of custom code snippets or settings adjustments for future reference or troubleshooting.
- Stay Updated: Regularly update WordPress and your plugins to benefit from new features and security improvements.
By implementing these tips, you can create a streamlined, efficient, and personalized admin area that enhances your overall website management experience.