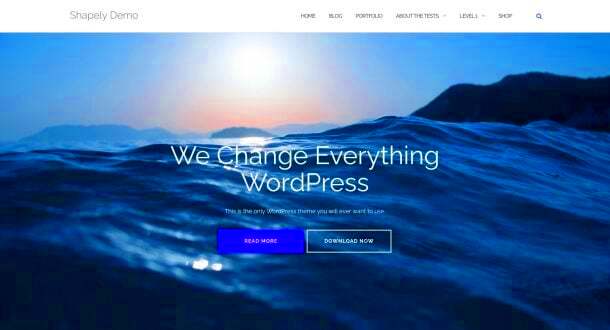
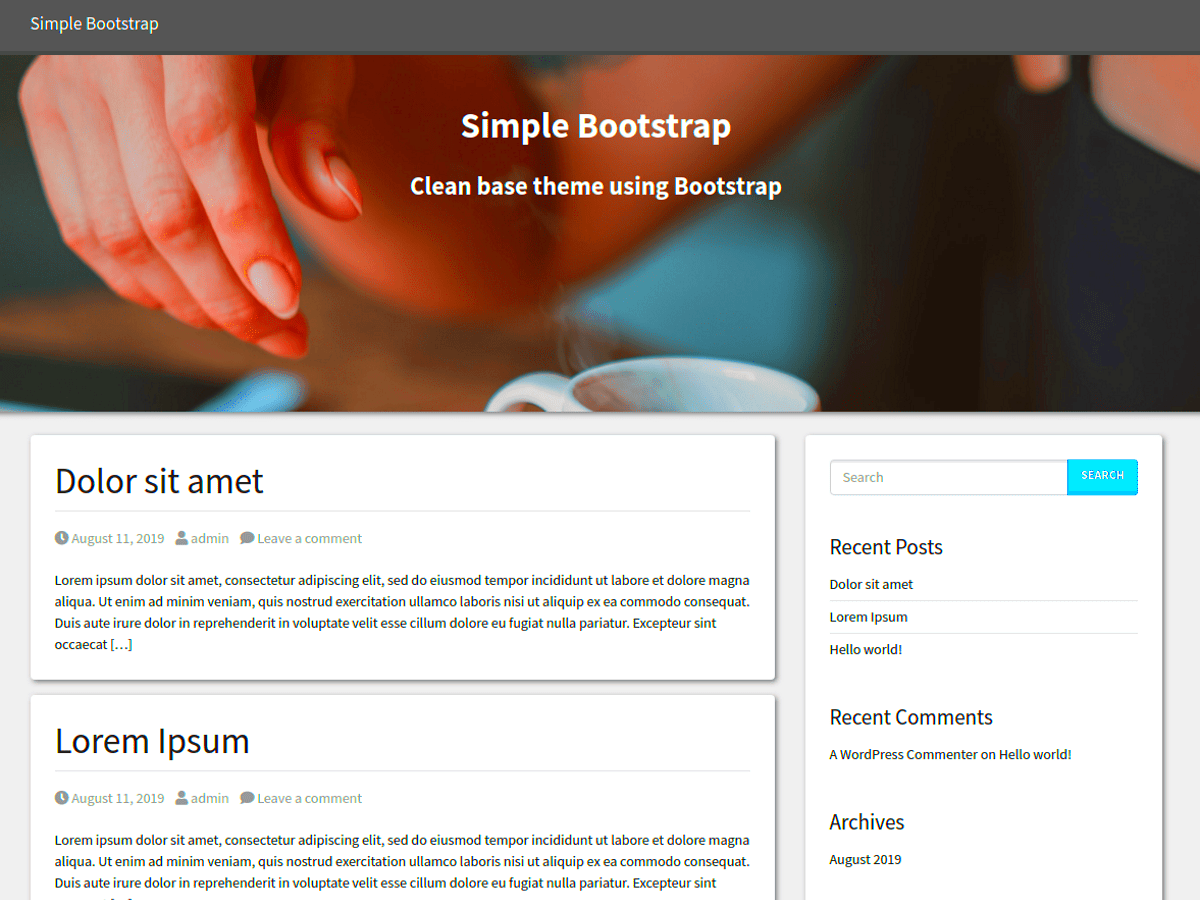
Bootstrap and WordPress might sound technical, but they’re really user-friendly tools that can help anyone create stunning websites. Bootstrap is a powerful front-end framework that simplifies the process of designing responsive and mobile-first websites. On the other hand, WordPress is a versatile content management system (CMS) that powers over a third of the web!
Combining Bootstrap with WordPress can elevate your website-building game. You don’t need to be a coding expert to create beautiful layouts and functional designs. Let’s dive deeper into what Bootstrap WordPress themes are, and how they can make your life easier.
What Are Bootstrap WordPress Themes?

Bootstrap WordPress themes are specially designed templates that utilize the Bootstrap framework within the WordPress environment. They help you achieve a responsive and aesthetically pleasing design without having to write a lot of custom code. Here’s why they’re gaining popularity:
- Responsive Design: Thanks to Bootstrap, these themes automatically adjust to fit any screen size—whether it’s a desktop computer, tablet, or smartphone!
- Pre-designed Components: Bootstrap comes with a variety of UI components like buttons, forms, navigation bars, and more, which speed up the design process.
- User-Friendly: For beginners, Bootstrap WordPress themes are easy to customize, allowing even those with no coding background to create a professional-looking site.
- Consistency: Using Bootstrap ensures design consistency across your pages, making your site look cohesive and polished.
- Community Support: Both WordPress and Bootstrap have large communities. So, you’ll find plenty of tutorials, forums, and resources to help you along the way.
In summary, if you’re looking for a straightforward way to create a sleek and responsive website, Bootstrap WordPress themes are a fantastic option for beginners. They blend functionality and aesthetic appeal seamlessly!
Advantages of Using Bootstrap for WordPress Themes

Bootstrap has transformed the way developers approach themes in WordPress. Here are some key advantages that make Bootstrap a popular choice for creating WordPress themes:
- Responsive Design: One of Bootstrap’s standout features is its mobile-first approach. This means that your WordPress themes will automatically adjust to fit any screen size, ensuring a smooth viewing experience on smartphones, tablets, and desktops alike.
- Grid System: Bootstrap’s grid system allows for easy layout adjustments. You can create complex layouts without having to delve into heavy CSS, making it perfect for developers of all skill levels.
- Pre-built Components: With a plethora of pre-designed components, such as buttons, navigation bars, and forms, you can craft visually appealing interfaces quickly. This not only saves time but also enhances the overall look of your theme.
- Customization: Customizing Bootstrap themes is relatively simple. While Bootstrap comes with default styles, you can easily override these with your own CSS styles to create a unique theme that reflects your brand.
- Community Support: Bootstrap boasts a large and active community. This means that you’ll find countless tutorials, forums, and resources available to help you troubleshoot issues and enhance your skills.
- Consistency: Because Bootstrap provides a consistent framework for design and functionality, developers can achieve uniformity across different pages and sections of a WordPress website.
In conclusion, using Bootstrap for WordPress themes comes with an array of advantages that make the development process not only efficient but also enjoyable. Whether you’re a beginner or a seasoned developer, Bootstrap equips you with the tools you need to create stunning WordPress themes.
Getting Started with Bootstrap
Are you ready to dive into the world of Bootstrap and start crafting your own WordPress themes? Here’s a simple guide to help you get started!
- Understand the Basics of Bootstrap: Before you dive in, take some time to familiarize yourself with Bootstrap’s core concepts. Visit the official Bootstrap website to explore the documentation. Understanding grids, components, and utilities is essential.
- Set Up Your Environment: To utilize Bootstrap in your WordPress theme, you need a development environment. You can use local servers like XAMPP or tools like Local by Flywheel. Install WordPress and create a new theme folder.
- Include Bootstrap: There are two main ways to include Bootstrap:
- CDN: You can add Bootstrap via a Content Delivery Network (CDN) link in your theme’s header file.
- Download Bootstrap: Alternatively, you can download Bootstrap and include the necessary CSS and JS files in your theme’s directory.
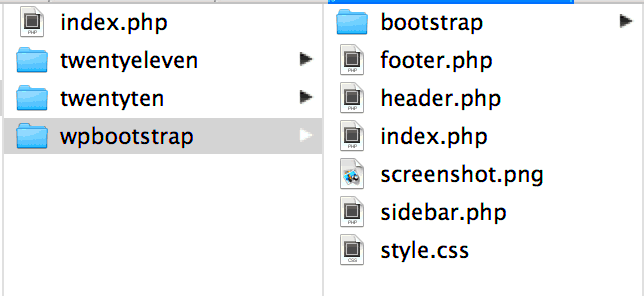
- Create Your Theme Structure: Begin by creating essential files like header.php, footer.php, and style.css. Utilize Bootstrap’s grid system to structure your layout within these files.
- Customize and Enhance: Start utilizing Bootstrap’s components to add functionality to your theme. Customize your styles with CSS to make the theme uniquely yours.
- Test and Debug: Use tools like Chrome DevTools to inspect and debug your theme. Check for responsiveness across devices and fix any layout issues.
Getting started with Bootstrap might feel overwhelming, but take it step by step, and soon you’ll be on your way to creating eye-catching WordPress themes!
5. Setting Up Your WordPress Environment
Getting your WordPress environment up and running is crucial for using Bootstrap themes effectively. To kick things off, you’ll need a few essential ingredients: a domain name, web hosting, and the WordPress software itself. Let’s break it down into manageable steps.
- Choose a Domain Name: This is your website’s address on the internet. Think about something catchy, relevant to your content, and easy to remember.
- Select a Web Hosting Provider: Look for a host that supports WordPress installations. Some popular options include Bluehost, SiteGround, and WP Engine. A good host can make your website faster and more secure.
- Install WordPress: Once you’ve secured your domain and hosting, installing WordPress is usually just a one-click process with most providers. Follow their specific instructions and you’ll be up and running in no time.
- Access Your Admin Dashboard: Once WordPress is installed, log in to your admin dashboard. This is your control center where you can manage your themes, plugins, and content.
- Set Up Basic Settings: Before diving into theme selection, it’s a good idea to adjust settings like your site’s title, logo, and permalink structure in “Settings” under the dashboard.
And voilà! Your WordPress environment is set up, and you’re ready to start exploring the exciting world of Bootstrap themes.
6. Choosing the Right Bootstrap WordPress Theme
Now that your WordPress environment is all set, it’s time to choose the right Bootstrap WordPress theme. The theme you select will not only impact the visual appearance of your site but also its functionality and user experience. Here’s how to navigate this process.
- Consider Your Content Type: Think about what kind of content you’ll be showcasing. Will it be a blog, portfolio, or an e-commerce site? Depending on your needs, different themes will cater to different purposes.
- Look for Responsive Design: In today’s mobile world, it’s essential that your theme is responsive. Bootstrap themes generally adapt well to different screen sizes, making them a great choice.
- Check for Customization Options: A good theme should offer plenty of customization options. This allows you to tweak colors, fonts, and layouts without needing to code.
- Review User Ratings and Feedback: Delve into reviews, ratings, and support forums. A well-rated theme with active support usually means a better long-term experience.
- Compatibility with Plugins: Ensure that your chosen theme is compatible with essential plugins you might need, such as SEO tools, form builders, or caching plugins.
Remember, your theme is essentially the face of your website, so take your time exploring options until you find one that feels just right!
7. Installing a Bootstrap WordPress Theme
So, you’ve found the perfect Bootstrap WordPress theme and are eager to give your website a fresh look? Great choice! Installing a Bootstrap theme is a pretty straightforward process, but let’s break it down step by step to make sure you don’t miss anything important.
First off, you’ll need to have a WordPress site up and running. If you haven’t done that yet, you can easily set up WordPress on a local server or through a web hosting provider. Once you have that in place, follow these steps:
- Download the Theme: Navigate to the website where you found your Bootstrap theme and download the theme files. Typically, these come as a ZIP file.
- Log into Your WordPress Dashboard: Go to your WordPress admin panel by visiting yourwebsite.com/wp-admin and logging in with your credentials.
- Go to Appearance > Themes: On the left sidebar, hover over “Appearance” and then click on “Themes.”
- Upload the Theme: Click on the “Add New” button at the top. Next, hit the “Upload Theme” button, choose the ZIP file you downloaded, and click “Install Now.”
- Activate the Theme: After the installation is complete, you’ll see a success message. Hit the “Activate” link to make your new theme live on your site.
And there you have it! Your Bootstrap WordPress theme is now installed and ready to go. Take a moment to explore the theme settings, and get ready for the next step—customizing it to fit your needs!
8. Customizing Your Bootstrap Theme
Congratulations on successfully installing your Bootstrap WordPress theme! Now comes the exciting part—customization! Every Bootstrap theme comes with its own set of options, specifically designed to help you create a unique look and feel for your website. Here’s how you can get started:
First things first, you’ll want to check if your theme includes a dedicated options panel. This can usually be found under Appearance > Customize. This panel allows you to adjust various settings without delving into the code. Here are some common customization options:
- Site Identity: This is where you can set your site title, tagline, and upload your logo. A compelling logo helps convey the essence of your brand!
- Color Scheme: Many Bootstrap themes allow you to tweak the color palette to suit your brand’s aesthetics. Make it vibrant or keep it minimal—it’s up to you!
- Typography: Adjust font styles, sizes, and weights to ensure your text is both readable and aligns with your overall design.
- Header & Footer Settings: Customize the header layout and footer widgets to enhance navigation and information display.
- Additional CSS: If you’re feeling a bit adventurous, you can add custom CSS to fine-tune your theme even more.
Another fun way to customize is by utilizing page builders like Elementor or WPBakery. These plugins give you drag-and-drop functionality, making it super easy to rearrange elements, add new ones, and create a fully personalized page layout.
Finally, don’t forget to preview your changes! Most customization panels allow you to see what updates look like in real-time before making them live. This is a great way to ensure everything looks just right!
With all these tools and options at your disposal, get creative and make your Bootstrap WordPress theme truly yours! Happy customizing!
9. Essential Bootstrap Components for Your WordPress Site
When it comes to building a WordPress site using Bootstrap, there are several essential components that can help elevate your design and functionality. Utilizing Bootstrap’s built-in components can save you time while also ensuring a responsive and sleek appearance. Let’s go over some of the most important components you’ll want to incorporate:
- Navigation Bar: A responsive navbar is key to good user experience. Bootstrap’s navbar is highly customizable and adapts beautifully across devices.
- Grid System: The Bootstrap grid system allows you to create responsive layouts with ease. It’s a 12-column layout that helps you organize your content effectively.
- Buttons: Bootstrap provides a variety of predefined styles for buttons, which can be easily used to guide users through your site. You can customize colors, sizes, and hover effects.
- Cards: Cards are flexible content containers that can include various types of content. They help to display information cleanly and are particularly useful for showcasing posts or products.
- Modals: Modals are great for displaying information without navigating away from the current page. Whether you’re offering sign-up forms or image galleries, a modal will do the trick.
- Alerts: Use alerts to get messages across to your users, whether it’s a warning or confirmation. Bootstrap provides various alert styles to suit your needs.
These components form the backbone of many successful Bootstrap-powered WordPress themes. They are not just crucial for aesthetics but also for enhancing the usability of your website.
10. Best Practices for Using Bootstrap with WordPress
Using Bootstrap in WordPress can be a game-changer for your website, but there are some best practices you should adhere to in order to fully leverage its power. Here are some essential tips to help you along the way:
- Keep It Updated: Always ensure you’re using the latest version of Bootstrap. This not only guarantees the latest features but also patches any security vulnerabilities.
- Customize CSS: While Bootstrap comes with a great set of styles, don’t be afraid to customize your CSS for a truly unique look. You can override Bootstrap’s default styles to better align with your brand.
- Minimize Dependencies: Limit the number of jQuery libraries and other scripts you’re loading. This helps in achieving better performance and faster load times.
- Use Child Themes: If you’re modifying Bootstrap in a WordPress theme, consider using a child theme. This way, your changes won’t be lost when the theme gets updated.
- Mobile First: Bootstrap is built mobile-first, so always design with mobile users in mind. Test your site on various devices to ensure a smooth user experience.
- Leverage Grid System Wisely: Use the grid system to create a clean layout. Avoid too many columns as they can make your site look cluttered.
By following these best practices, you’ll be well on your way to creating a responsive, user-friendly WordPress site that utilizes the powerful features of Bootstrap effectively. Happy building!
Common Issues and Troubleshooting Tips
As with any web development tool, Bootstrap WordPress themes can sometimes throw a few curveballs—especially for beginners. Here are some common issues you might encounter and how to tackle them like a pro:
- Responsiveness Problems: Sometimes, your theme might not render correctly on smaller screens. Inspect your elements using browser developer tools to adjust your CSS, or check for any missing Bootstrap classes that handle responsiveness.
- Plugin Conflicts: It’s common for plugins to clash with your theme. If you notice that elements aren’t behaving as expected, try deactivating plugins one by one to identify the culprit.
- Loading Speed: A sluggish site is never fun. Optimize images, use caching plugins, and limit the number of HTTP requests by reducing the number of stylesheets and scripts to speed things up.
- Customization Issues: If you’re having trouble customizing your theme, ensure that you’re using a child theme to prevent losing changes during updates. Alternatively, you can look up Bootstrap’s documentation for the right classes to use.
- Browser Compatibility: Sometimes, what looks good in one browser may not in another. Always check your site on multiple browsers to ensure consistency. Browser-specific prefixes can sometimes be a solution for CSS issues.
Remember, troubleshooting is part of the learning process. Don’t hesitate to reach for community forums, which can be a treasure trove of solutions as you embark on your Bootstrap WordPress journey!
Conclusion and Further Resources
Congratulations! You’ve taken a significant step into the world of Bootstrap WordPress themes. While the learning curve may seem steep initially, remember that every expert was once a beginner. By following this guide, you now have a solid grasp of the basics, from installation to customization.
As you continue on this journey, here are a few resources to help you expand your knowledge and skills:
- Bootstrap Documentation: Official documentation for the latest Bootstrap version. A must-read for insights and updates.
- WordPress Codex: The official resource for all things WordPress. It’s packed with tips, how-tos, and a wealth of knowledge.
- Smashing Magazine – Bootstrap: Offers articles, tutorials, and tips focused on Bootstrap, written by industry experts.
- WordPress Plugin Directory: A treasure trove of plugins to enhance your site’s functionality.
- YouTube Tutorials: Channels dedicated to WordPress and Bootstrap can provide visual and practical insights into the development process.
Remember, practice makes perfect. The more you experiment with Bootstrap themes, the more comfortable you’ll become. Don’t hesitate to create, break, and recreate as you fine-tune your skills. Happy theming!


