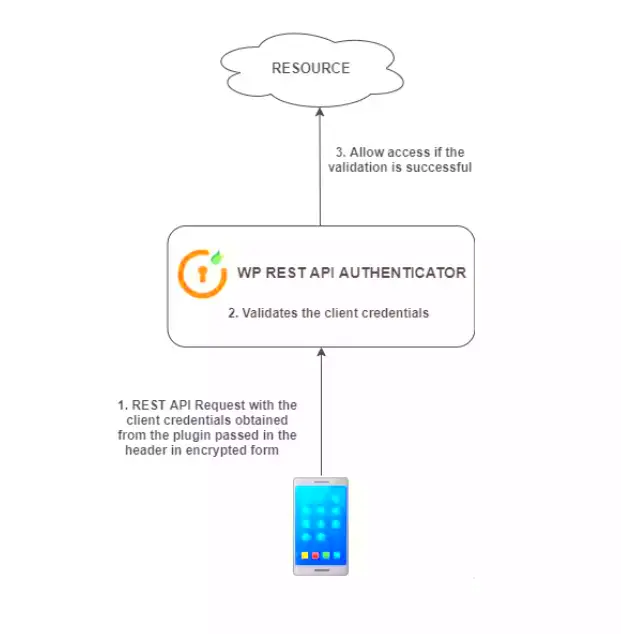
WordPress Basic Authentication is a straightforward method to secure your REST API endpoints, ensuring that only authorized users can access sensitive data. Imagine you’re locking your front door; Basic Authentication does just that for your WordPress site’s APIs. It makes your site more secure by requiring users to provide a username and password before they can interact with your site programmatically through the REST API. This isn’t just a fancy tech term; it’s a vital security measure that adds a layer of protection against unauthorized access.
Understanding the REST API and Its Importance

The REST API (Representational State Transfer Application Programming Interface) is an essential feature of WordPress that allows developers to interact with their site programmatically, just like a website talks to a browser. Think of it as a way for different software applications to communicate with each other, kind of like friendly neighbors exchanging recipes. Here’s why it’s so important:
- Data Interchange: REST API allows different systems to share data seamlessly. For example, a mobile app can fetch your blog posts without needing to log into WordPress directly.
- Enhanced Functionality: Using REST API, developers can create intricate functionalities by interacting with WordPress data. This includes creating custom plugins and themes that integrate external services.
- Flexibility: Whether it’s mobile applications, desktop applications, or other web services, the REST API provides the flexibility to work across different platforms while using the same WordPress backend.
- Performance: Instead of loading a whole page, the REST API can fetch just the necessary data, leading to improved performance and better user experience.
Understanding the REST API is crucial if you want to leverage the full potential of WordPress. With the right authentication methods, you can ensure that your application remains secure while still being flexible and easy to use.
3. Prerequisites for Setting Up Basic Authentication

Before diving into the setup of Basic Authentication with the WordPress REST API, there are a few essential prerequisites you should consider. Ensuring that you have everything in place will help streamline the process and minimize potential hiccups.
Here’s a handy checklist to consider:
- WordPress Installed: Make sure you have a functional WordPress site. Basic Authentication works on any self-hosted WordPress installation, so having a host that’s compatible with it is key.
- Minimum PHP Version: Ensure your site is running on PHP version 5.6 or higher. This is crucial for both security and compatibility with plugins.
- Access to the Server: You need to have access to your server, either through FTP/SFTP or a control panel like cPanel. This is important for uploading files or making any necessary configurations.
- Knowledge of REST API: Familiarity with the WordPress REST API will make things easier for you, as Basic Authentication facilitates secure data transactions via REST endpoints.
- Backups: Always remember to back up your WordPress files and database before making significant changes. This ensures that you can restore your site if anything goes wrong.
Once you have these prerequisites sorted, you’re ready to move on to the exciting part—installing the Basic Authentication plugin!
4. Installing the Basic Authentication Plugin

Installing the Basic Authentication plugin is a straightforward process. This plugin is essential for enabling Basic Authentication on your WordPress website, which is crucial for making secure API requests.
Here’s a step-by-step guide to help you get started:
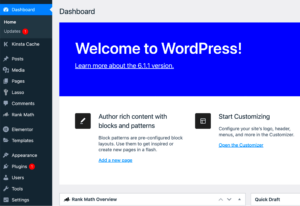
- Log into Your WordPress Dashboard: Start by accessing your WordPress admin area at
yourwebsite.com/wp-admin. - Navigate to Plugins: On the left sidebar, click on “Plugins,” then select “Add New.” This will take you to the plugin installation page.
- Search for the Plugin: Type “Basic Authentication” in the search bar. Look for the official plugin name “Basic Authentication” developed by WP REST API.
- Install the Plugin: Click the “Install Now” button next to the plugin. After it’s installed, the button will change to “Activate.” Go ahead and click that!
- Confirm Activation: Once activated, you’ll see a confirmation message. Now the plugin is ready to be utilized alongside the REST API!
And voilà! You’ve successfully installed the Basic Authentication plugin. With this in place, you’re well on your way to secure API communication with your WordPress site. Stay tuned for the next steps on configuring and testing your setup!
Configuring Your WordPress Site for Basic Authentication
Getting your WordPress site ready for Basic Authentication is like unlocking a new level of security and control for your REST API. Let’s break down the steps in a way that feels simple and manageable. Trust me; you’ll be up and running in no time!
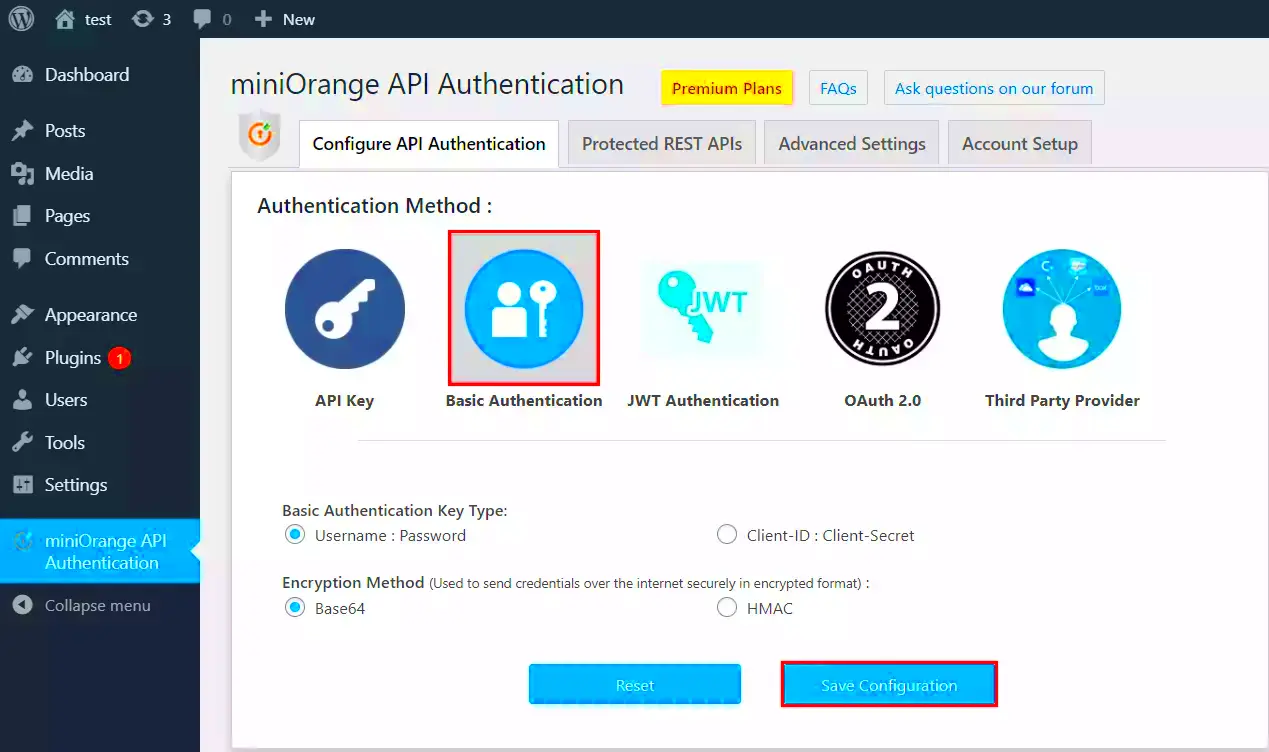
The first thing you need to do is install a plugin that supports Basic Authentication. There are several options available, but WP REST API Controller or Basic Auth for WP REST API are popular choices. Install your preferred plugin by following these steps:
- Log into your WordPress dashboard.
- Navigate to Plugins > Add New.
- Search for your chosen plugin by typing its name in the search bar.
- Click Install Now and then Activate once the installation is complete.
Next, you’ll need to add your Basic Authentication credenitals, which usually involves updating your site’s `.htaccess` file or tweaking your server configuration. If you’re using Apache, here’s a quick sample configuration:
AuthType BasicAuthName "Restricted Area"AuthUserFile /path/to/.htpasswdRequire valid-userRemember to create a `.htpasswd` file with valid users and passwords (you can use online generators for this!). If you’re on an Nginx server, the configuration will look slightly different, so be sure to check your setup.
And that’s it! With these steps, your WordPress site is now secured for Basic Authentication, ready to handle any REST API requests that come your way.
Testing Basic Authentication with REST API Requests
Now that you’ve configured your WordPress site for Basic Authentication, it’s time to test if everything is working as expected. This is crucial because ensuring that your REST API is secure means making sure your authentication is effective.
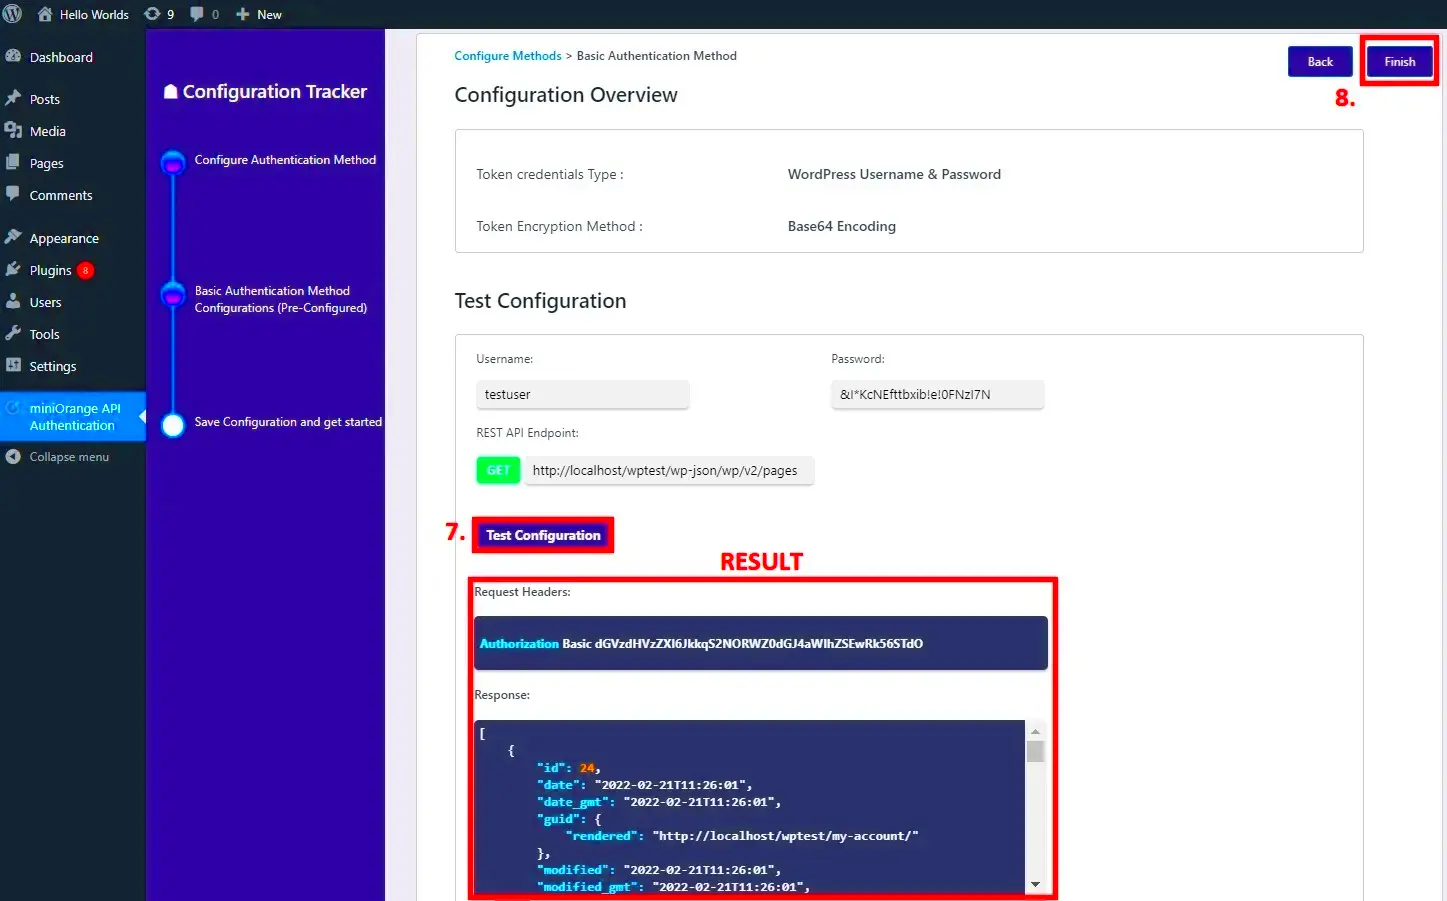
The best way to test it is by using tools like Postman, curl, or even your web browser’s built-in tools. Let’s break it down step-by-step:
- Open Postman and create a new request.
- Select the type of HTTP method you want to use (often GET for retrieving data).
- In the URL field, enter your WordPress REST API endpoint, for example,
https://yourdomain.com/wp-json/wp/v2/posts. - Navigate to the Authorization tab in Postman.
- Select Basic Auth from the dropdown menu and enter your username and password.
- Click Send to make the request.
If everything is set up correctly, you should see a response in JSON format with the posts from your WordPress site!
| Status Code | Meaning |
|---|---|
| 200 | OK: Your request was successful! |
| 401 | Unauthorized: Your credentials are incorrect. Check your username and password. |
| 403 | Forbidden: The server has understood your request, but refuses to authorize it. |
Remember, these status codes can help diagnose issues, so keep an eye on them. If you see a 200 status code, congratulations! You’ve successfully set up and tested Basic Authentication with your WordPress REST API.
7. Common Issues and Troubleshooting Tips
Setting up Basic Authentication for the WordPress REST API can sometimes lead to unexpected issues. Here’s a rundown of common problems and how to resolve them, ensuring a smoother experience while you configure your system.
- Authentication Failure: This often happens if your username or password is incorrect. Double-check your credentials and ensure they meet WordPress security requirements.
- Access Denied Errors: If you encounter a 401 Unauthorized response, it may be due to incorrect header formatting. Make sure you’re sending the authorization headers in the right way. The correct format is:
Authorization: Basic base64_encode(username:password)
- Plugin Conflicts: Sometimes, other plugins can interfere with authentication processes. Temporarily deactivate other plugins to see if the authentication works without them. If it does, reactivate them one by one to identify the culprit.
- CORS Issues: Cross-Origin Resource Sharing (CORS) problems can arise when your REST API calls come from a different domain. Adjust your server settings to allow requests from your particular domain.
- Server Configuration: If you’re on a shared hosting environment, your server configuration might restrict Basic Authentication. Contact your hosting provider for help with the necessary configurations.
By keeping these common issues and solutions in mind, troubleshooting your Basic Authentication setup will feel less daunting. If problems persist, consider reaching out to the WordPress community forums or checking their official documentation for further assistance.
8. Conclusion and Next Steps
Congratulations on navigating the setup of Basic Authentication for your WordPress REST API! By now, you should have a functional authentication method in place, enhancing your site’s security while allowing for smooth API interactions.
As you wrap up this process, here are some next steps you might consider:
- Explore the REST API: Now that you have authentication set up, delve deeper into the capabilities of WordPress REST API. Experiment with GET, POST, PUT, and DELETE requests to understand how you can manipulate your site’s data.
- Implement Custom Endpoints: Create custom endpoints for your specific needs. This can tailor the API functionality to suit your project requirements.
- Monitor Security: Regularly check your security settings. Basic Authentication is a good start, but consider implementing more robust security measures as your application or website scales.
- Stay Updated: Keep your WordPress version and plugins up to date. Regular updates help prevent vulnerabilities and ensure your API functions smoothly.
With Basic Authentication in place, you’re better equipped to build and integrate applications with your WordPress site. Happy coding!


