The Classic Editor is a timeless approach to managing your WordPress content, appealing to those who appreciate a simple, no-frills editing experience. While the newer Block Editor offers a more visual layout, the Classic Editor allows you to focus solely on your text without distractions. This familiar setup is not only easier for beginners but also preferred by experienced users who wish to maintain control over their content layout. With the Classic Editor, you can style your WordPress theme more intuitively, making it a suitable tool for anyone wanting to enhance their site’s appearance effectively.
Getting Started with the Classic Editor
Ready to dive into the Classic Editor? Let’s get you set up step-by-step so you can start styling your WordPress theme effortlessly. Follow these guidelines:
- Install the Classic Editor Plugin:
To use the Classic Editor, you’ll first need to install the plugin. Here’s how:
- Log in to your WordPress dashboard.
- Navigate to Plugins > Add New.
- Search for Classic Editor.
- Click Install Now and then Activate.
- Setting Up the Classic Editor:
After activation, you can set the Classic Editor as your default editor:
- Go to Settings > Writing.
- Select the option for Classic Editor under the Default Editor dropdown.
- Creating a New Post or Page:
Now, let’s create content:
- Select Posts or Pages from the dashboard.
- Click Add New.
- You’ll be greeted with a familiar text editor window!
- Utilize Formatting Options:
The Classic Editor comes with rich text formatting options:
- Text Formatting: Bold, Italics, and Underline to emphasize your text.
- Lists: Create bullet or numbered lists to organize thoughts.
- Insert Media: Easily add images, videos, and audio files.
With these steps, you’re well on your way to styling your WordPress theme using the Classic Editor. Enjoy experimenting with your content and have fun making it uniquely yours!
Understanding Your WordPress Theme Structure
When it comes to styling your WordPress theme, understanding the underlying structure is essential. Think of your WordPress theme as a neatly organized mansion; each room has a unique purpose and style that contributes to the overall aesthetic of the house. Let’s break down the components of a typical
- Header: This is the top part of your website where your logo, site title, and main navigation menu reside. A well-designed header sets the tone for your visitors.
- Footer: Located at the bottom of your site, the footer often includes copyright information, additional navigation links, and sometimes a widget area for extra content.
- Sidebar: Found on the side of your content, sidebars can host widgets like search bars, recent posts, and social media links.
- Content Area: The core of your website where all your posts and pages are displayed. This is where your main content lives.
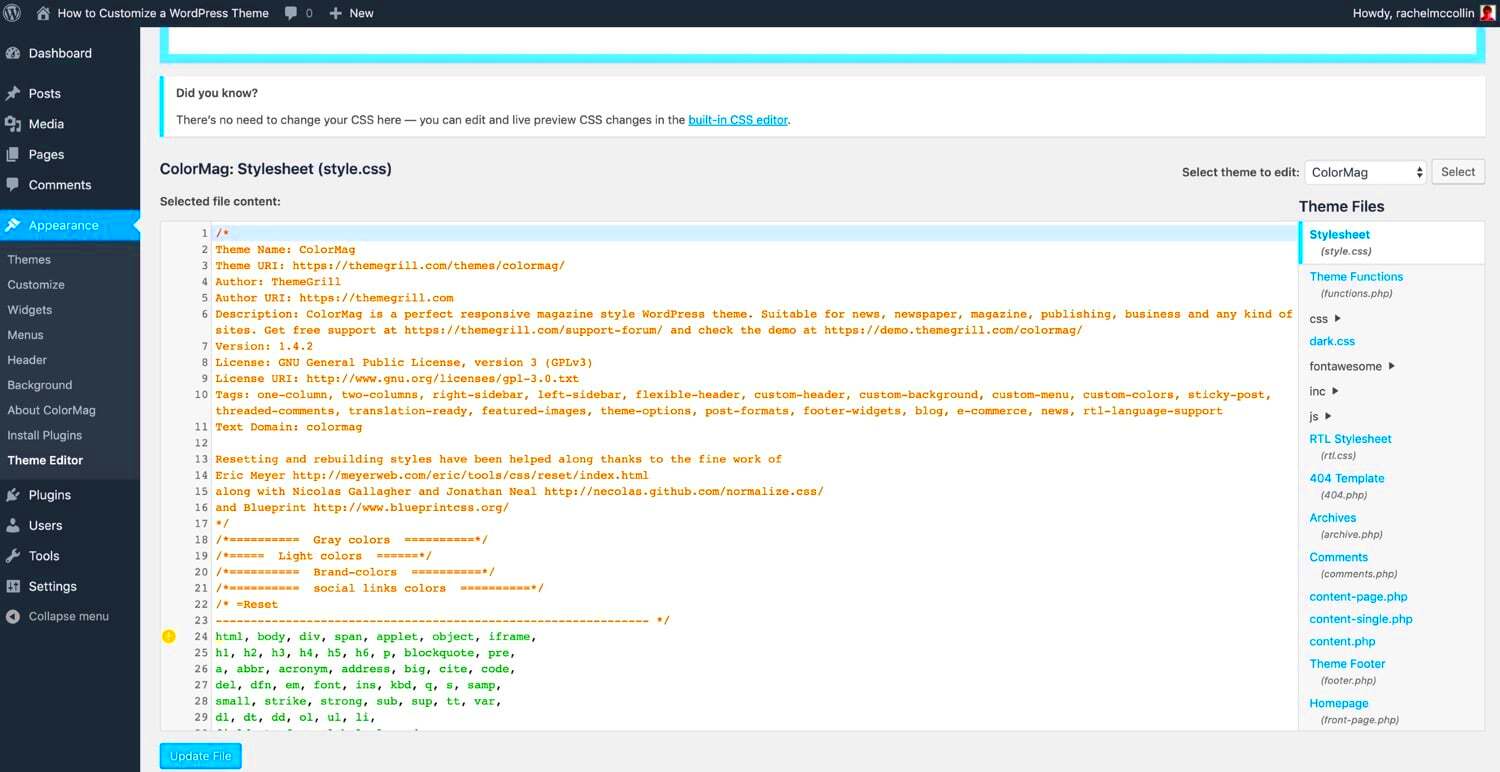
- Stylesheets: These files, often found in the theme’s folder, govern how elements like text and images appear on your site.
Each component of your theme can be styled individually using CSS. To truly make your WordPress site stand out, familiarize yourself with the particular theme you are using. Different themes may use different classes and IDs, so it’s crucial to inspect your page (using the Developer Tools in your browser) to see what styles you can apply. Once you understand your theme structure, you’re better equipped to implement custom styles that reflect your brand’s identity.
Utilizing Custom CSS in the Classic Editor
Custom CSS is your best friend when it comes to personalizing your WordPress theme, especially when using the Classic Editor. By adding a dash of CSS magic, you can tweak everything from font sizes to button colors. Here’s how you can effectively use custom CSS in the Classic Editor.
- Accessing the Customizer: Navigate to Appearance > Customize in your WordPress dashboard. This opens the theme customizer where you can see live changes.
- Finding the Additional CSS Section: In the Customizer sidebar, look for the Additional CSS option. This is where you can add your custom styles.
Here are some tips for writing effective CSS:
- Target Specific Elements: Use class or ID selectors to narrow down which elements you wish to style. For example, to change the font color of your site title, you might use:
- Test Incrementally: Make one change at a time and observe its effect on your site. This approach helps diagnose any issues quickly.
- Fallback Styles: Consider adding fallback styles in case custom styles don’t render as expected. This ensures a more consistent experience across browsers.
h1.site-title { color: #ff0000; } |
By understanding how to utilize custom CSS effectively within the Classic Editor, you can enhance your website’s design and create a unique style that resonates with your audience. Happy styling!
5. Adding HTML and Shortcodes for Enhanced Styling
When it comes to styling your WordPress theme using the Classic Editor, adding HTML and shortcodes can take your content from basic to fabulous! If you’re familiar with HTML, you’ve got a powerful tool at your disposal. But don’t worry if you’re not; even a little knowledge can go a long way.
First off, let’s talk about HTML. It’s the backbone of any web content. With the Classic Editor, you can switch from the Visual tab to the Text tab. Here’s how you can spice things up:
- Headings: Use
<h2>,<h3>, etc., for titles to create a hierarchy. - Lists: Create bullet points with
<ul>(unordered list) or<ol>(ordered list). - Links: Add hyperlinks using
<a href="URL">Link Text</a>. - Images: Insert images with
<img src="URL" alt="description">.
Next up, let’s explore shortcodes. Shortcodes make it super easy to insert dynamic elements into your posts. Many plugins will offer shortcodes, and your theme might, too. For example, you might see something like this:
That simple code can create a beautiful image gallery! Shortcodes can be for buttons, sliders, columns, and more. Just consult your theme’s documentation or the plugin’s user guide to discover available options.
6. Working with Theme Customization Options
Now that you’ve got a grasp on HTML and shortcodes, let’s dive into another important aspect: working with theme customization options. The Theme Customizer is a built-in feature in WordPress that allows you to tweak various elements of your site without touching code. If you’re using the Classic Editor, you might still be using a classic theme with its own unique set of customization features.
To access the Customizer, go to Appearance > Customize from your dashboard. Here, you’ll find options that might include:
- Site Identity: Change your site title, tagline, and logo.
- Colors: Adjust the color scheme to match your brand’s aesthetic.
- Header Image: Upload an eye-catching header image to make your site stand out.
- Menus: Create and manage your navigation menus.
- Widgets: Add and organize widgets in your sidebar or footer.
Remember, the live preview feature allows you to see your changes in real-time, so you can experiment without worry. Play around with different settings until you find the look and feel that truly represents your brand.
Additionally, don’t forget to check out any theme-specific options that might appear in your customizer. These can include layouts for blog posts, custom background settings, and more!
By combining the power of HTML, shortcodes, and theme customization options, you can create a website that’s not only visually appealing but also uniquely yours!
Best Practices for Styling with the Classic Editor
Styling your WordPress theme can be a fun and rewarding task. When using the Classic Editor, there are some best practices to keep in mind to ensure that your site looks polished and professional. Here are some tips for getting it just right:
- Use Inline CSS Sparingly: If you’re editing directly during post creation, try to limit your inline CSS and instead rely on your theme’s existing styles. This keeps your code cleaner and more manageable.
- Preview Regularly: Don’t forget to use the ‘Preview’ option often. This allows you to see how your changes will look on different screen sizes and ensures that everything presents well before it goes live.
- Use Headings Effectively: Properly utilize headings (H1, H2, H3…) to organize your content. This not only enhances readability but also plays a significant role in SEO.
- Leverage Custom CSS: If your theme supports custom CSS, take advantage of it to tweak styles without altering your core theme files. You can add this via “Appearance > Customize > Additional CSS.”
- Consistent Font Choices: Stick to a limited number of font types across your site. Consistency improves aesthetics and user experience.
- Check Responsiveness: Always check how your styles appear on mobile devices. A responsive design is crucial for a good user experience.
By applying these best practices, you can create a visually stunning site while using the Classic Editor. It keeps your workflow efficient and supports a coherent brand image.
Common Issues and Troubleshooting
Even seasoned WordPress users may run into some hiccups while using the Classic Editor for styling. Here’s a rundown of common issues you might face, along with troubleshooting tips:
| Issue | Possible Solution |
|---|---|
| Styles Not Applying: Sometimes, your custom styles may not show up as expected. | Check your code for errors, make sure the styles are linked correctly, and clear your cache. |
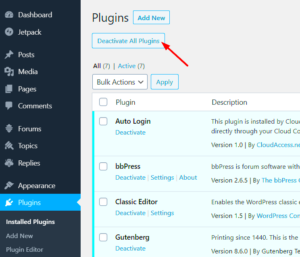
| Changes Not Saving: You hit ‘Update’, but nothing happens. | Ensure you have the latest version of WordPress. If issues persist, consider deactivating plugins that might conflict. |
| Visual vs. Text Editor Confusion: Styles may appear different in the Visual and Text tabs. | Always check the Text editor for proper HTML tags and styles. Sometimes, the visual formatting can mislead you. |
| Images Not Displaying Correctly: Images may not show up as intended. | Double-check image URLs and ensure they’re uploaded correctly in the Media Library. |
When in doubt, seek help from WordPress forums or theme support. Often, a fresh pair of eyes can spot issues you might have missed. Happy styling!
Conclusion and Further Resources
Styling your WordPress theme using the Classic Editor can be a fulfilling endeavor, allowing you to customize your website to better reflect your brand’s identity. While modern page builders offer a wide range of features, the Classic Editor provides a simplified approach that can be easier for certain users. By following these steps, you can effectively enhance the aesthetic appeal of your site:
- Utilize Custom CSS: Adding custom styles can make your theme unique.
- Leverage Theme Options: Access built-in options in your theme settings for quick changes.
- Use HTML for Layout Control: Integrate HTML tags for better formatting.
- Incorporate Plugins: Enhance functionality with plugins that offer additional styling features.
- Maintain a Consistent Color Scheme: Choose a color palette that resonates with your audience.
- Optimize Typography: Select fonts that align with your site’s purpose and improve readability.
For more advanced styling techniques, consider the following resources:
| Resource | Description |
|---|---|
| WordPress Developer Resources | A comprehensive guide on WP development practices, including styling. |
| CSS-Tricks | CSS tutorials and techniques to enhance your web design skills. |
| W3Schools CSS Tutorial | A beginner-friendly resource for learning CSS basics and advanced techniques. |
By employing these methods and resources, you can effectively style your WordPress site through the Classic Editor, ensuring a personalized user experience that keeps your audience engaged.


