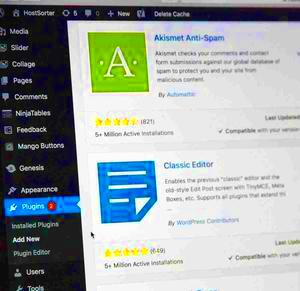
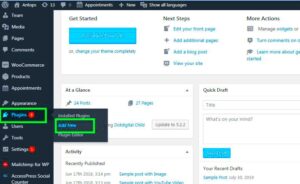
So, you’ve heard about WordPress plugins, and you’re eager to dive into the world of plugin development. That’s fantastic! In this section, we’ll explore what makes plugins a vital part of the WordPress ecosystem. Plugins allow you to customize your site, enhance functionality, and improve user experience—all without needing to modify the core code of WordPress itself. Exciting, right? Let’s unravel the magic of these little extensions and how they can transform your website.
Understanding the Basics: What is a WordPress Plugin?
Alright, let’s break it down. A WordPress plugin is essentially a piece of software that you can upload to your WordPress website to add new features or enhance existing functionality. Think of plugins as apps for your WordPress site. They come in all shapes and sizes, from simple tweaks to complex systems. Here’s a quick overview:
- Add Functionality: Want to add a contact form, optimize SEO, or integrate social media? There’s a plugin for that!
- Enhance Performance: Plugins can help improve site speed, security, and overall user experience.
- Easy to Install: Most plugins are user-friendly and can be installed with just a few clicks from the WordPress admin dashboard.
Let’s take a look at some key components that make a plugin:
| Component | Description |
|---|---|
| Plugin Directory: | Your plugin needs to have a specific structure to function correctly. |
| Main PHP File: | This file contains the core code of your plugin and includes metadata. |
| Hooks: | Actions and filters that allow you to integrate your code with WordPress. |
In essence, plugins make WordPress highly adaptable, allowing you to create a unique experience tailored to your audience. They’re a powerful tool in every WordPress developer’s toolkit! Are you ready to build your first one? Let’s get started!
Setting Up Your Development Environment
Alright, let’s get your development environment ready so you can jump straight into building your first WordPress plugin! Setting this up is crucial because it ensures that you have a safe space to code, test, and debug without potentially messing up a live website. Here’s how you can do it:
- 1. Install Local Server Software: Think of this as your personal playground for WordPress. Tools like XAMPP, WampServer, or Local by Flywheel are perfect for this. They allow you to run a web server on your computer, giving you a local instance of WordPress to play with.
- 2. Download WordPress: Head over to the official WordPress website and grab the latest version. Once you’ve got it, unzip the files and move them into the directory where your local server software serves files (like htdocs for XAMPP).
- 3. Set Up the Database: Most local server tools come with phpMyAdmin, a handy interface for managing your databases. Create a new database there, give it a name (like my_local_wp), and keep it ready for your WordPress installation.
- 4. Configure wp-config.php: While setting up WordPress, it will ask for database details. You’ll need to enter the database name you just created, along with ‘root’ as the username and leave the password blank (if you’re using XAMPP).
- 5. Install WordPress: Visit your local server URL (usually http://localhost/your-folder-name) and follow the steps to complete the WordPress installation. Voila! You now have a playground to develop your plugin.
With your environment set up, you’re all set to dive into plugin development. Remember, testing in a local environment is key to avoiding mistakes on your live site!
Creating a New Plugin Directory
Now that you’ve prepared the groundwork, it’s time to get hands-on and create your very first plugin directory! This step is pretty straightforward, but it’s important to know the right structure to follow. Let’s break it down:
- 1. Navigate to the Plugin Directory: Open the WordPress installation folder on your local server and go to wp-content/plugins/. This is where all the magic happens!
- 2. Create a New Folder: Think of a catchy name for your plugin—it should reflect its function. For example, if you’re creating a simple “Hello World” plugin, you might name it hello-world-plugin. Create a new folder with that name.
- 3. Create the Main Plugin File: Inside your new folder, create a PHP file with the same name as your directory. For our example, it would be hello-world-plugin.php.
- 4. Add Plugin Header Comments: Open your main PHP file and insert the following header comments at the top:
This snippet informs WordPress about your plugin, and it will show up in the admin area under “Plugins.”
- 5. Activate Your Plugin: Head over to the WordPress admin dashboard, navigate to the Plugins menu, and you’ll see your new plugin listed there. Just click “Activate,” and guess what? You’re officially a WordPress plugin developer now!
And that’s it! You’ve set up your plugin directory. From here, you can start coding, and the possibilities are endless! Just remember to keep your code neat and organized, and don’t be afraid to experiment. Happy coding!
Developing Your First Plugin File
Now that you’ve set the stage for your WordPress plugin, it’s time to roll up your sleeves and start developing the actual plugin file. This is where the magic happens! In simple terms, a WordPress plugin is essentially a PHP file or a collection of files that extend the functionality of your website.
To begin, you’ll want to create a new file within your plugin directory. For example, if you’ve named your plugin “My First Plugin,” you might create a file named my-first-plugin.php. Don’t forget to open this file in your favorite text editor or IDE, as you’ll be tapping into the world of PHP code!
Your first order of business is to add some basic functionality to your plugin. For starters, let’s create a simple function to display a message on your site. Here’s a quick rundown of how you can set that up:
Once you’ve added this function, you’ll need to hook it into WordPress, which is done using action hooks. A simple way to do this could involve the init hook. Here’s how you might do that:
add_action('wp_footer', 'my_first_plugin_message');?>This addition ensures that your message is displayed in the footer of your website. You can check this by visiting your site once the plugin is activated. Congratulations, you’ve just developed the first file of your plugin!
Adding Plugin Header Information
Every WordPress plugin needs a little bit of header information that allows WordPress to recognize it properly. This is kind of like your plugin’s identity card. Without this information, WordPress won’t know what your plugin is all about and won’t be able to display it in the plugins list.
To add this information, you’ll place a PHP comment block at the top of your plugin file. Here’s the basic format:
/*Plugin Name: My First PluginPlugin URI: http://example.com/my-first-pluginDescription: A simple WordPress plugin that displays a custom message.Version: 1.0Author: Your NameAuthor URI: http://example.comLicense: GPL2*/Let’s break this down:
- Plugin Name: The name that users will see in the plugin menu.
- Plugin URI: A link to a webpage that explains your plugin in detail.
- Description: A brief description of what your plugin does.
- Version: The current version of your plugin.
- Author: Your name or the name of the company that developed the plugin.
- Author URI: A link to your website or portfolio.
- License: The license under which your plugin is released (GPL2 is commonly used for WordPress plugins).
This header-based information helps WordPress manage your plugin effectively, and it also gives potential users a sense of what your plugin is about. Once you’ve added this, save your file and check the WordPress admin panel—your plugin should appear on the list, ready to be activated!
Implementing Basic Functionality
Now that you have set the stage with your plugin’s files and basic structure, it’s time to bring your WordPress plugin to life by implementing its core functionality. This is where the magic happens! Depending on what you want to achieve with your plugin, this could involve anything from adding shortcodes to creating custom post types.
First, let’s determine the purpose of your plugin. Do you want it to display a widget, add a new feature to your site, or perhaps modify how certain content is shown? Here are some basic functionalities you might consider:
- Shortcodes: Shortcodes allow users to insert predefined functions into posts or pages easily. You can create a shortcode to display custom content with just a simple tag.
- Custom Post Types: If your plugin is about displaying specific content (like a portfolio), creating a custom post type will allow users to manage and display their content more effectively.
- Widgets: Adding custom widgets to your plugin means users can add and manipulate content from the WordPress widgets area.
Here’s a simple example of implementing a shortcode:
// Shortcode functionfunction my_custom_shortcode() { return "Hello, this is my first WordPress plugin!
";}add_shortcode('my_shortcode', 'my_custom_shortcode');By inserting [my_shortcode] into any post or page, users will see “Hello, this is my first WordPress plugin!” displayed. Play around with your functionality and test how users will interact with it.
Activation and Deactivation Hooks
You’ve done a great job so far! Now let’s talk about something critical but often overlooked: activation and deactivation hooks. These hooks are essential for managing your plugin’s behavior when it’s activated or deactivated. They can help set up necessary configurations and clean up afterward, ensuring your plugin runs smoothly.
Using these hooks can impact your WordPress database and site behavior significantly. Here’s a quick overview of what you can do:
- Activation Hook: This is triggered when the plugin is activated. You can use this hook to create tables in the database, add default settings, or initialize default options. Imagine you’re setting some foundation before constructing a house!
- Deactivation Hook: This is called when the plugin is deactivated. You can use it to clean up options or settings if they are no longer needed, ensuring your users aren’t left with leftover data.
Here’s a simple code snippet for both hooks:
// Activation Hookfunction my_plugin_activate() { // Code to run on activation add_option('my_plugin_option', 'default_value');}register_activation_hook(__FILE__, 'my_plugin_activate');// Deactivation Hookfunction my_plugin_deactivate() { // Code to run on deactivation delete_option('my_plugin_option');}register_deactivation_hook(__FILE__, 'my_plugin_deactivate');With these hooks in place, you can ensure that your plugin behaves nicely, setting everything up before your users start using it and cleaning up afterward. Happy coding!
9. Testing Your Plugin
Building a WordPress plugin is an exciting venture, but before you unleash it on the world, thorough testing is crucial. Think of this stage as the final quality check before presenting your work. Here’s how to go about it:
First, you’ll want to set up a local development environment or a staging site, where you can test your plugin without affecting a live website. Tools like Local by Flywheel or XAMPP can help you create an environment mirroring your live server.
Here’s a checklist of tests to run:
- Functionality Testing: Ensure every function works as intended. Test input fields, buttons, and settings to see if they respond accurately.
- Compatibility Testing: Check if your plugin plays nicely with popular themes and other essential plugins. This helps prevent conflicts down the line.
- Performance Testing: Use tools like Query Monitor to see if your plugin affects site speed or performance. A sluggish plugin can frustrate users.
- User Acceptance Testing: If possible, let a few trusted users try it out. Gather feedback on usability and functionality.
Additionally, check for edge cases where users might use the plugin in unexpected ways. It’s often in these scenarios that the most critical issues arise. Lastly, consider writing automated tests using a framework like PHPUnit to ensure your plugin remains functional with future updates.
10. Debugging Common Issues
Even after testing, you might run into some hiccups when your plugin is in use. Debugging is an inevitable part of development, but fear not—it’s manageable! Below are common issues and the strategies to resolve them:
| Issue | Possible Causes | Solutions |
|---|---|---|
| Plugin not activating | Conflicts with other plugins or theme, missing files. | Check for PHP errors in your code, disable other plugins, and ensure all files are in place. |
| Functionality not working as expected | Incorrect hooks or filters, JavaScript conflicts. | Review your code for proper usage of hooks and use the browser console to troubleshoot JavaScript issues. |
| Site crashes or error messages | Major bugs, memory limits exceeded. | Enable WP_DEBUG in your wp-config.php file to pinpoint errors, and consider increasing PHP memory limits. |
When debugging, take a systematic approach. Start by isolating the problem, looking closely at the area of code involved, and tweaking it until you identify the root cause. And remember, the WordPress community is vast and welcoming; don’t hesitate to seek help in forums if you’re stuck. Happy coding!
11. Distributing Your Plugin
Once you’ve built your first WordPress plugin, it’s time to get it out into the world! Distributing your plugin is a crucial step, and there are several options available to make it accessible to WordPress users everywhere. Let’s break it down!
First, consider submitting your plugin to the WordPress Plugin Directory. This is the most popular way to distribute plugins and gives you access to a vast audience. To do this, you’ll need to:
- Ensure your plugin meets the WordPress guidelines.
- Write a compelling description, highlighting the features and benefits of your plugin.
- Prepare proper documentation for users.
- Submit your plugin for review through the official site.
Next, you might want to explore other platforms like GitHub. Hosting your plugin on GitHub allows for easy collaboration, version control, and issue tracking. You can also foster a community around your plugin, encouraging users to contribute.
Additionally, think about promoting your plugin through various channels. Social media platforms, blogging, and forums can help spread the word. Don’t forget to provide clear instructions on installing and using your plugin, and consider creating a video tutorial to enhance user engagement.
Lastly, consider charging for premium features or offering donation options through platforms like PayPal if your plugin adds significant value. This could create additional revenue streams while still providing a free version for users.
12. Conclusion and Next Steps
You’ve made it! Building your first WordPress plugin is no small feat and is a commendable achievement. Now that you’ve developed and distributed your plugin, it’s essential to reflect on your journey and plan your next steps.
First off, gather feedback. Engage with your users to understand their experiences—what they love and what could be improved. This could be through surveys, social media, or direct communication in support forums. Understanding user feedback is invaluable for future enhancements.
Next, start thinking about updates. The WordPress ecosystem is always evolving, and keeping your plugin up-to-date with the latest version of WordPress is critical to maintaining compatibility and security. Regular updates will also keep your users happy and engaged.
Consider expanding your knowledge as well! Dive deeper into more advanced topics like WordPress Security, Performance Optimization, and even SEO best practices. These skills will help you enhance your plugin and make it stand out in the competitive WordPress marketplace.
Finally, set goals for the future. Do you want to enhance your current plugin, build additional plugins, or maybe even start contributing to the WordPress core? Whatever your ambition, take it step by step, and you’ll find yourself making significant progress in no time.
So, congratulations once again on this exciting journey! Now get out there and make your mark in the WordPress community!

