Starting a new website can feel overwhelming, especially if you’re new to web development. That’s where building a WordPress site on localhost comes in handy. Essentially, localhost is your personal computer acting as a mini web server, allowing you to create, test, and tweak your site without needing a live internet connection or worrying about messing up a real website. It’s a safe, private space where you can experiment freely, learn the ropes, and prepare your site before launching it online. Whether you’re a blogger, small business owner, or just curious about web design, setting up WordPress locally is a fantastic first step.
Understanding the Benefits of Using Localhost for WordPress Development
Using localhost for your WordPress development journey offers numerous advantages that make the process smoother and more enjoyable. First off, it’s completely free—no hosting fees or domain purchases needed during the initial stages. You get to learn and test features without any risk of breaking a live site, which means you can experiment with themes, plugins, or custom code without fear of downtime or security issues.
Another big plus is speed. Since everything runs directly on your computer, loading and testing changes happen instantly, making your workflow much more efficient. Plus, working locally gives you complete control over your environment. Want to try out a new plugin? No problem. Need to tweak the PHP code? Easy peasy. It’s like having a sandbox where you can play, learn, and grow your skills.
Additionally, setting up on localhost is ideal for troubleshooting. If something isn’t working right, you can isolate problems without external factors complicating things. And when you’re ready to go live, migrating your website from localhost to a web host is straightforward, ensuring a seamless transition. Overall, developing on localhost is an empowering way to build your WordPress site from scratch in a safe, fast, and cost-effective environment.
3. Necessary Tools and Software for Setting Up Localhost
Alright, before we dive into the actual setup, let’s talk about the tools you’ll need. Think of these as your toolkit — without them, building your local WordPress site would be pretty tough. But don’t worry, most of these are free and straightforward to install.
First up, you’ll need a local server environment. This is what makes your computer behave like a web server, so you can run WordPress locally. The two most popular options are:
- XAMPP: Available for Windows, Mac, and Linux. It’s super user-friendly and comes with Apache (the server), MySQL (database), PHP, and Perl — all the essentials for WordPress.
- MAMP: Especially popular on Mac, but also available for Windows. Similar to XAMPP, it provides a simple way to set up a local server with Apache and MySQL.
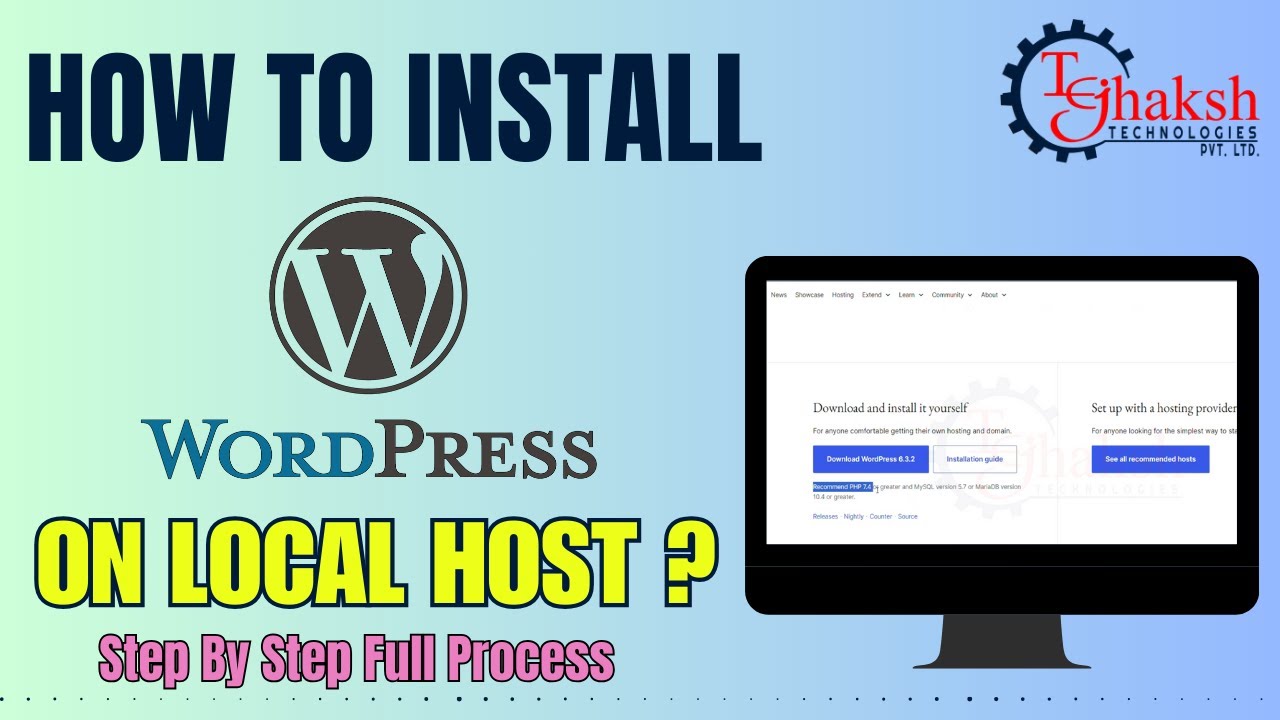
Next, you’ll need to download and install WordPress itself. It’s free, open-source, and the core of your website. You can grab the latest version from the official website.
Finally, a text editor or IDE (Integrated Development Environment) helps you edit your code easily. Some popular options include:
- Visual Studio Code: Free, powerful, and highly customizable.
- Sublime Text: Fast and lightweight, perfect for quick edits.
- Notepad++: Simple and free, great on Windows.
Optional but helpful tools include:
- phpMyAdmin: Usually bundled with XAMPP and MAMP, it’s the interface you’ll use to manage your databases.
- Browser Developer Tools: Built into Chrome, Firefox, or Edge, these are invaluable for debugging and testing.
So, in a nutshell, your setup will look like this:
| Tool | Purpose | Notes |
|---|---|---|
| XAMPP / MAMP | Local server environment | Apache, MySQL included |
| WordPress | Website core | Download from official site |
| Code Editor | Editing files and code | VS Code, Sublime, Notepad++ |
| phpMyAdmin | Database management | Usually bundled with XAMPP/MAMP |
With these tools in place, you’re all set for the next step: installing your local server environment!
4. Step-by-Step Guide to Installing a Local Server Environment
Now that you know what tools you’ll need, let’s walk through the installation process step by step. Don’t worry — I’ll keep it simple and easy to follow.
Step 1: Download Your Chosen Local Server Software
- Go to the official website of XAMPP (https://www.apachefriends.org/index.html) or MAMP (https://www.mamp.info/en/downloads/).
- Select the version compatible with your operating system (Windows, Mac, Linux).
- Download the installer file.
Step 2: Install the Software
- Run the installer file you downloaded.
- Follow the on-screen instructions. Usually, you can keep most defaults, but pay attention to where the software is installing.
- Once installed, launch the application.
Step 3: Start Your Local Server
- Open XAMPP or MAMP control panel.
- Start the Apache server and MySQL database by clicking the “Start” button next to each service.
- If everything is running smoothly, you’ll see green lights indicating active services.
Step 4: Verify the Setup
Open your web browser and type http://localhost in the address bar. If you see the XAMPP or MAMP welcome page, congratulations — your local server is working!
Step 5: Set Up the Database for WordPress
- Access phpMyAdmin by navigating to
http://localhost/phpmyadmin. - Create a new database for your WordPress site. Name it something like my_wp_site.
- Leave the default settings or adjust as needed, then click “Create.”
Step 6: Download WordPress
- Visit the official WordPress download page.
- Download the latest ZIP file.
- Extract the ZIP file into your local server’s document root folder:
- For XAMPP on Windows:
C:xampphtdocsyourproject - For MAMP on Mac:
/Applications/MAMP/htdocs/yourproject
Step 7: Run the WordPress Installation
- In your browser, go to
http://localhost/yourproject(replace yourproject with your folder name). - You’ll see the WordPress installation wizard. Follow the prompts:
- Select your language.
- Enter your database details:
- Database Name: the one you created earlier, e.g., my_wp_site
- Username: usually root (default in XAMPP/MAMP)
- Password: leave blank (default in XAMPP/MAMP)
- Database Host: localhost
- Table Prefix: wp_ (or change if you want multiple sites in one database)
- Click “Submit” and then “Run the installation.”
- Fill in your site title, username, password, and email address to set up your admin account.
- Click “Install WordPress.”
And just like that, you’re ready to start customizing your WordPress site locally! Remember, working on localhost is a fantastic way to learn and experiment without affecting a live website. Once you’re happy with your site, you can even migrate it to a live host when you’re ready to go public.
5. Downloading and Installing WordPress on Your Localhost
Alright, so you’re ready to get your hands dirty and set up WordPress on your own computer. The first step is downloading WordPress itself — don’t worry, it’s super straightforward! Think of it as getting a new app on your phone. You’ll just need to head over to the official WordPress website (wordpress.org/download/) and click that big blue button to download the latest version.
Once the download is complete, you’ll have a ZIP file. Extract it to a folder on your computer where you plan to keep your site files — maybe something like “MyFirstWP” so you remember where it is. Now, to run WordPress locally, you’ll need a local server environment. Don’t worry; there are a few popular options:
- XAMPP – Works on Windows, Mac, and Linux. It’s easy to install and use.
- MAMP – Great for Mac users, but also available for Windows.
- Local by Flywheel – A super user-friendly option designed specifically for WordPress beginners.
For most beginners, XAMPP is a solid choice. You can download it from apachefriends.org. After downloading, follow the installation prompts — it’s pretty much next, next, finish. Once installed, launch the control panel and start the Apache and MySQL modules. These are your virtual servers that will run your WordPress site.
Next, create a database for your WordPress site. Open your browser and go to http://localhost/phpmyadmin. Click on “Databases,” then enter a name for your database — let’s say “wp_localhost” — and hit create. Remember this name, you’ll need it during installation.
Now, navigate to your extracted WordPress folder (the one you downloaded earlier). Rename the folder to your site name, like “myfirstsite” — this will be the URL you visit. Copy this folder into your XAMPP’s “htdocs” directory (usually located at C:xampphtdocs on Windows).
Finally, open your browser and type http://localhost/myfirstsite. You’ll be greeted with the WordPress installation page. Select your language, then fill out the database details:
- Database Name: wp_localhost (or whatever you named it)
- Username: root (default for XAMPP)
- Password: leave blank (default for XAMPP)
- Database Host: localhost
- Table Prefix: wp_ (or change if you want multiple sites in one database)
Click “Submit,” then “Run the installation.” Fill out your site title, username, password, and email address, then hit “Install WordPress.” Voila! You now have a local WordPress site ready for you to customize and learn from.
6. Configuring Your Local WordPress Site
Great job installing WordPress! Now, let’s talk about how to configure your site so it’s tailored to your needs. When you first log into your WordPress dashboard (http://localhost/myfirstsite/wp-admin), you’ll see a familiar admin area that’s kind of like the control panel for your site.
First things first, you’ll want to set up your site’s basics. Navigate to Settings > General. Here, you can update your site title, tagline, timezone, and more. Think of this as the foundation — it’s what visitors will see when they land on your site, so make it personal and clear.
Next, you might want to choose a theme. Head over to Appearance > Themes. WordPress comes with some default themes, but there are thousands of free and premium options available. For starters, try installing a simple, clean theme like “Twenty Twenty-Three” or explore some beginner-friendly themes like Astra or OceanWP. Just click “Add New,” search, install, and activate!
Customizing your theme is just as easy. Under Appearance > Customize, you can tweak colors, fonts, header images, and more. This is where you make your site look uniquely yours without touching any code.
Don’t forget about plugins! These are like apps for your WordPress site that add extra features. To install plugins, go to Plugins > Add New. For example, you might want a plugin for SEO (like Yoast SEO), security (Wordfence), or contact forms (Contact Form 7). Just search, click “Install Now,” then “Activate.”
Another key setup is your permalinks — the URLs for your posts and pages. Go to Settings > Permalinks and choose a structure that’s good for SEO, like “Post name.” This makes your URLs clean and easy to read.
Finally, explore your dashboard. Add some pages (like About, Contact), create your first blog post, and upload media like images or videos. The more you customize and play around, the more comfortable you’ll become with WordPress.
Remember, since this is your local site, none of these changes are live on the internet yet. It’s a safe space to experiment, learn, and build your dream website before going live. Have fun exploring all the options — your perfect site is just a few clicks away!
7. Customizing Your WordPress Site and Adding Content
Now that you’ve got your WordPress site installed and running locally, it’s time to make it uniquely yours! Customizing your site not only makes it visually appealing but also helps you create a brand that resonates with your visitors. Plus, adding content is what transforms your site from a blank canvas into a useful resource or portfolio.
Personalize Your Site’s Appearance
First things first, let’s choose a theme. Think of themes as the wardrobe for your website—they set the style and layout. To pick one:
- Navigate to Appearance > Themes in your WordPress dashboard.
- Click on Add New to browse free themes in the WordPress repository.
- Use the search bar or filters to find a style that fits your needs.
- Preview any theme before installing to see how it looks.
- Click Install and then Activate.
Once your theme is active, you can tweak its settings under Appearance > Customize. Here, you can change colors, fonts, header images, and more—making your site reflect your personality or brand.
Customize with Plugins
Plugins are like apps for your WordPress site—they add extra functionality. Want a contact form? There’s a plugin for that. Need SEO tools? Yep, there’s one for that, too. To add plugins:
- Go to Plugins > Add New.
- Search for the plugin you need (e.g., “Contact Form 7”).
- Click Install Now, then Activate.
Popular plugins include:
- Yoast SEO – improves your search engine ranking
- Jetpack – offers security, performance, and more
- Contact Form 7 – creates contact forms easily
Adding Content: Posts and Pages
Content is the heart of your website. You’ll mainly work with two types:
- Pages – for static content like About, Contact, Services.
- Posts – for blog entries or news updates.
Creating a New Page
To add a page:
- Navigate to Pages > Add New.
- Enter a title (like “About Us”).
- Add your content in the editor. You can format text, add images, videos, and more.
- Click Publish when you’re ready to make it live on your local site.
Creating a Blog Post
For posts:
- Go to Posts > Add New.
- Write your article title and content.
- Assign categories or tags to organize your posts.
- Click Publish to see it appear on your blog.
Enhancing Your Content
Use images, videos, and headings to make your content engaging. You can also install page builders like Elementor or Beaver Builder, which allow drag-and-drop design—perfect if you’re not comfortable with code.
8. Testing and Making Changes Locally Before Going Live
Before you take the leap and publish your site to the world, it’s crucial to test everything thoroughly on your localhost. Think of your local environment as a sandbox where you can experiment freely without worrying about breaking things or upsetting visitors.
Why Test Locally?
Testing locally gives you a safe space to:
- Check if all links, buttons, and forms work properly.
- Ensure your site looks good on different devices or screen sizes.
- Spot and fix design or functionality issues early.
- Experiment with new features or design tweaks without risking a live site.
How to Test Your Site Effectively
Here are some tips to make your testing thorough:
- View on Different Browsers: Test on Chrome, Firefox, Edge, etc., to ensure compatibility.
- Use Developer Tools: Most browsers have tools to simulate mobile devices, check page speed, and troubleshoot issues.
- Check Responsiveness: Resize your browser window or use device emulation to see how your site adapts.
- Test Forms and Interactive Elements: Fill out contact forms or comment sections to verify they work.
- Review Content: Read through all pages to catch typos, broken images, or layout problems.
Making Changes and Re-Testing
If you discover issues or want to tweak something, simply make the changes in your local environment. Then, refresh your site to see the updates. Repeat the testing process until everything functions smoothly and looks great.
Preparing to Launch
When you’re satisfied with your local version, it’s time to migrate your site to a live server. But don’t skip thorough testing—once live, fixing issues can be more complicated. So, use your localhost as a testing ground and launch confidently!
Remember, building and customizing your WordPress site is an iterative process. The more you test and tweak, the more polished and professional your final website will be. Happy building!
9. Tips for Moving Your Local WordPress Site to a Live Server
Congratulations! You’ve built a fantastic WordPress site on your local machine, and now you’re ready to share it with the world. Moving from your localhost to a live server might seem daunting at first, but with a few simple steps, you’ll have your site up and running online in no time. Here are some helpful tips to make the process smooth and stress-free:
1. Choose a Reliable Hosting Provider
Start by selecting a hosting provider that suits your needs. Whether you’re looking for shared hosting, VPS, or managed WordPress hosting, ensure they offer good performance, uptime, and support. Popular options include Bluehost, SiteGround, and WP Engine. Having a reliable host will make your migration smoother and your site more stable once live.
2. Backup Everything
Before you do anything, back up your entire local site — files and database. You can use plugins like Duplicator or All-in-One WP Migration for an easy migration process. These tools package your site into a downloadable file that you can import into your live server.
3. Export Your Database
If you prefer a manual approach, export your WordPress database using phpMyAdmin. Log into your local phpMyAdmin, select your database, and click on “Export.” Save the SQL file somewhere safe. When importing to the live server, you’ll import this database to replicate your local environment.
4. Upload Files to Your Live Server
Use FTP clients like FileZilla or the file manager provided by your hosting provider to upload your WordPress files. Ensure you upload everything from your local WordPress directory, including the wp-content folder, themes, plugins, and uploads.
5. Update Configuration Files
Once uploaded, edit the wp-config.php file on your live server to update the database credentials (DB_NAME, DB_USER, DB_PASSWORD, and DB_HOST). Also, if your site URL has changed, you’ll need to update it in the database.
6. Update Site URL and Permalinks
After importing everything, access your site’s admin dashboard on the live server. Navigate to Settings > General and update the WordPress Address (URL) and Site Address (URL). Then, go to Settings > Permalinks and click “Save Changes” to refresh your URL structure.
7. Test Your Site
Finally, thoroughly test your live website. Check all pages, links, images, and functionalities to ensure everything migrated correctly. Fix any issues like broken links or missing images by updating URLs or re-uploading files as needed.
8. Additional Tips
- Use a staging environment if your host offers one, to test before going live.
- Set up SSL to secure your website with HTTPS.
- Monitor your site after launch for any unexpected issues.
Moving your WordPress site from localhost to a live server may take a bit of effort, but with patience and these tips, you’ll have your website online and accessible in no time. Remember, backups are your best friend—always keep copies of your site before making major changes!
10. Conclusion and Next Steps for Your WordPress Development Journey
You’ve made it through the essential steps of building your WordPress site on localhost, and hopefully, you’re feeling confident about moving forward. Whether you’re planning to launch your site, expand your skills, or start customizing more advanced features, this is just the beginning of your WordPress journey.
Reflect on What You’ve Learned
Building a website locally gave you a safe space to experiment, learn, and troubleshoot without any pressure. You’ve set up a local environment, installed WordPress, chosen themes and plugins, and even explored customizing your site’s appearance and functionality. These foundational skills are invaluable as you progress.
Next Steps to Grow Your WordPress Skills
- Learn how to customize themes: Dive into theme development or child themes to make your site uniquely yours.
- Master plugin development: Explore creating your own plugins for specific features you want to add.
- Understand SEO basics: Optimize your site to rank better in search engines with tools like Yoast SEO.
- Improve site performance: Use caching, image optimization, and other techniques to make your site faster.
- Enhance security: Implement best practices to keep your site safe from threats.
Stay Updated and Keep Learning
The WordPress ecosystem is always evolving. Follow blogs, join forums, and participate in communities like the WordPress Support forums or local meetups. Continuous learning will keep your skills sharp and help you stay ahead in web development.
Build a Portfolio and Share Your Work
As you grow more confident, consider showcasing your projects online. Create a portfolio site, contribute to open-source WordPress projects, or offer your services as a freelance developer. Sharing your work not only helps others but also opens doors for new opportunities.
Remember: Practice Makes Perfect
The more you experiment, troubleshoot, and build, the better you’ll become. Don’t be afraid to try new things, make mistakes, and learn from them. Every project is a step toward becoming a proficient WordPress developer.
So, keep exploring, keep building, and most importantly, enjoy the journey of creating beautiful, functional websites with WordPress. Your adventure has just begun!

