If you’ve spent any time managing a WordPress site, you know how busy that admin dashboard can get. The default icons are functional, but sometimes they just don’t match your branding or make navigation as intuitive as you’d like. Customizing your admin menu icons is a great way to personalize your dashboard, making it more visually appealing and easier to use. Whether you’re a developer looking to add a unique touch or a site owner wanting a more professional look, changing those icons is easier than you might think. Let’s explore how you can give your WordPress admin menu a fresh, customized look with personalized icons.
Understanding the Importance of Custom Admin Icons
At first glance, icons might seem like small details, but they play a big role in how we interact with the WordPress dashboard. Custom admin icons do more than just look good—they enhance usability, improve workflow, and reinforce your branding. When icons are tailored to your site’s theme or business, it becomes easier for you and your team to identify sections quickly, saving time and reducing confusion. Plus, well-chosen icons can make your admin area feel more professional and cohesive, giving your site a polished appearance. For developers and freelancers, customizing icons also provides an opportunity to showcase their skills and add a personal touch to client sites. So, think of custom admin icons as a simple yet powerful way to make your WordPress admin area more functional, attractive, and aligned with your brand identity.
3. Prerequisites for Changing the Admin Menu Parent Icon
Before diving into how to change the admin menu parent icon in WordPress, it’s important to make sure you’ve got a few things in place. First off, you should have access to your website’s files and a basic understanding of adding custom code or plugins. Don’t worry, you don’t need to be a developer — just a little familiarity helps!
Here are the key prerequisites:
- Administrator Access: Ensure you’re logged in as an admin. Only users with full permissions can make these changes.
- Backup Your Site: Always, always back up your website before making any modifications. This way, if something goes wrong, you can restore it easily.
- Child Theme or Custom Plugin: It’s best to add custom code via a child theme or a custom plugin. This prevents your changes from being overwritten during updates.
- Custom Icon Files: Prepare your custom icon images in the formats supported by WordPress (like SVG or PNG). Keep them optimized for web use.
- Optional – Plugins: If you prefer a plugin-based approach, install a plugin that allows admin menu customization, like “Admin Menu Editor” or similar.
Once you have these essentials in place, you’re ready to move on to the methods for changing your admin menu parent icon. Remember, a little preparation saves a lot of headache later!
4. Methods to Change the Admin Menu Parent Icon in WordPress
There are a few ways to change the admin menu parent icon in WordPress, depending on your comfort level with code and what tools you prefer. Let’s go through the main methods:
Method 1: Using a Plugin
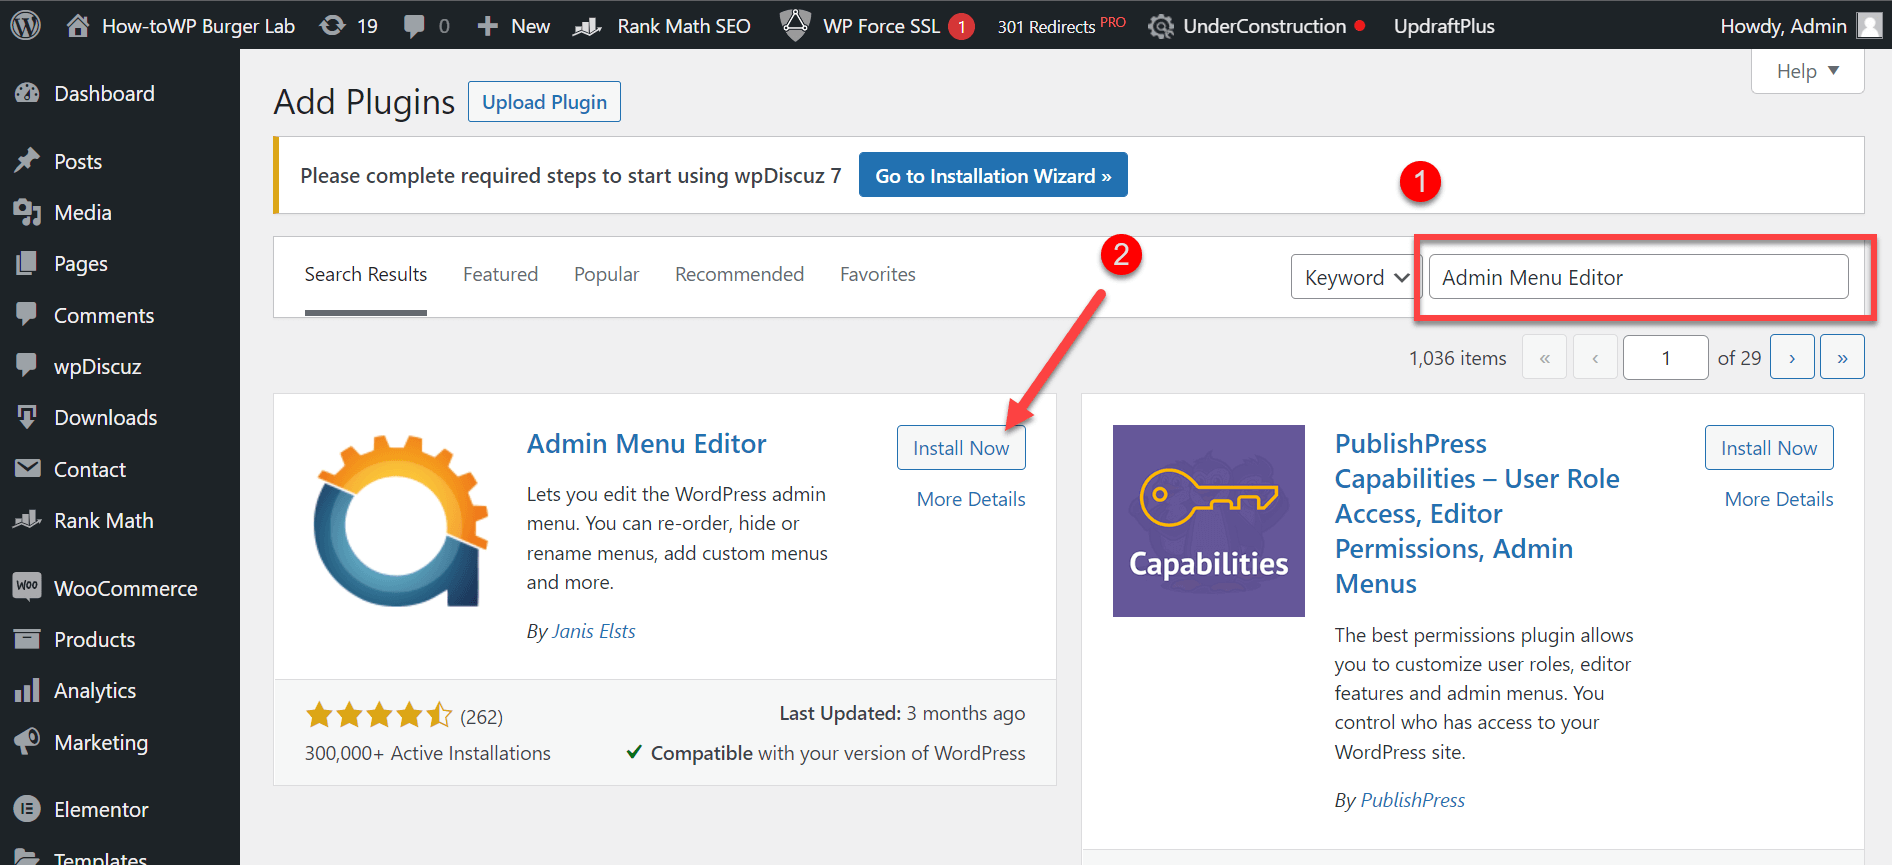
If you’re not into coding, this is the easiest route. Plugins like Admin Menu Editor make it simple to customize menu icons visually.
- Install and activate the plugin: Go to Plugins > Add New, search for “Admin Menu Editor,” then install and activate it.
- Access the plugin settings: Head to Settings > Menu Editor.
- Locate your menu item: Find the parent menu you want to customize.
- Change the icon: Usually, the plugin provides an option to select or upload a new icon. Choose your custom icon file or select from available options.
- Save your changes: Don’t forget to click Save! Refresh your admin dashboard, and you should see the new icon.
This method is straightforward and perfect for users who prefer a visual interface without touching code.
Method 2: Adding Custom Code to Your Theme
If you’re comfortable with adding code, this method offers more control. You can directly modify your theme’s functions.php file or create a custom plugin. Here’s a simple example to get you started:
function change_admin_menu_icon() { global $menu; // Replace 'your-menu-slug' with your menu's slug // and specify the icon URL or Dashicons class $menu_slug = 'your-menu-slug'; $new_icon_url = get_stylesheet_directory_uri() . '/images/custom-icon.png'; foreach ( $menu as &$item ) { if ( $item[2] === $menu_slug ) { // Change the icon URL $item[6] = $new_icon_url; } }}add_action( 'admin_menu', 'change_admin_menu_icon' );Note: The above code is a basic example. You’ll need to adjust the menu slug and icon path accordingly. Also, for SVG icons, you might need to enqueue them differently or use Dashicons classes.
Alternatively, for more complex icon changes, you can use the add_menu_page function’s icon_url parameter when creating menu items, or use JavaScript/jQuery for dynamic changes.
Method 3: Using Custom CSS
Another simple approach, especially for small tweaks, is to add custom CSS to replace the icon with your own. Here’s how:
- Identify the menu item: Use your browser’s developer tools to find the CSS classes or IDs associated with the parent menu.
- Add custom CSS: Go to Appearance > Customize > Additional CSS and add code like:
adminmenu .menu-icon-your-menu-slug { background-image: url('your-custom-icon.png') !important; background-size: contain; background-repeat: no-repeat;}Replace your-menu-slug with the specific class for your menu and point the URL to your custom icon. Save and refresh your admin dashboard.
While this method is quick, it’s less flexible and might require adjustments if the menu structure changes.
Final Tips
Whichever method you choose, remember to test your changes thoroughly. Clear your cache, refresh the admin dashboard, and verify that the icon appears as expected. Also, keep in mind that updates to WordPress or plugins might affect customizations, so document your changes for future reference.
Changing the admin menu parent icon can make your dashboard more personalized and easier to navigate, especially if you manage multiple sites or clients. Have fun customizing your WordPress admin area!
5. Step-by-Step Guide to Change the Admin Menu Parent Icon
Changing the admin menu parent icon in WordPress might sound a bit technical at first, but don’t worry—it’s actually quite straightforward once you get the hang of it. I’ll walk you through each step so you can customize your admin dashboard to better match your branding or just make it look more personalized.
Step 1: Choose Your Icon
First things first, decide on the icon you want to use. You can pick from a variety of icon libraries like Dashicons (which come bundled with WordPress), Font Awesome, or even custom SVG icons. For simplicity, let’s stick with Dashicons, since they’re easy to implement and supported out-of-the-box.
Step 2: Locate Your Theme’s functions.php File
Next, you’ll need to add some custom code to your theme’s functions.php file. It’s always a good idea to use a child theme or a site-specific plugin to keep your changes safe from theme updates.
- Go to Appearance > Theme Editor
- Select your active theme (preferably a child theme)
- Find and open functions.php
Step 3: Add Custom Code to Change the Icon
Here’s an example of how to change the parent menu icon using Dashicons. Replace your-menu-slug with your menu’s slug, and choose the icon you want by looking up its class on the Dashicons library.
function change_admin_menu_icon() { global $menu; // Find your menu's position; for example, the first item foreach ( $menu as $index => $item ) { // Replace 'your-menu-slug' with your actual menu slug if ( isset( $item[2] ) && $item[2] === 'your-menu-slug' ) { // Set the Dashicon class here $menu[$index][6] = 'dashicons-media-image'; // Example icon break; } }}add_action( 'admin_menu', 'change_admin_menu_icon', 999 );In this code:
- We loop through the admin menu items
- Find the correct menu item by its slug
- Change the icon class in the sixth element of the menu array
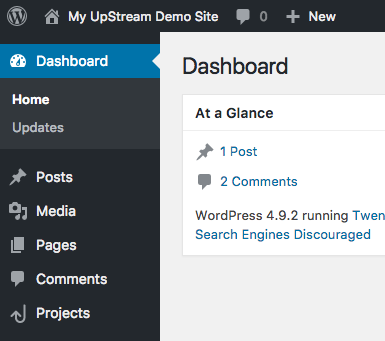
Step 4: Save and Refresh
Save your changes, then refresh your WordPress admin dashboard. You should see the new icon appear next to your menu item. If it doesn’t show up immediately, try clearing your cache or refreshing the page a few times.
And there you go! That’s the basic process to swap out the parent icon in your admin menu. For more advanced customization, you might consider using plugins or deeper hooks, but this method works well for most needs.
6. Best Practices for Customizing WordPress Admin Menu Icons
Customizing your admin menu icons can make your WordPress dashboard more intuitive and personalized, but it’s best to do it thoughtfully. Here are some tips and best practices to keep in mind:
1. Keep Icons Relevant and Clear
The purpose of an icon is to quickly convey the function of a menu item. Choose icons that are intuitive and match what the menu item does. For instance, use a camera icon for media-related sections or a wrench icon for settings.
2. Maintain Consistency
Stick to a consistent icon style across your admin menu. If you’re using Dashicons, stay within that library. Mixing different icon styles can look messy and confuse users.
3. Use Minimal Customization
While it’s tempting to go overboard, less is often more. Avoid cluttering your admin menu with too many custom icons. Focus on the most important items to improve usability without overwhelming the user.
4. Test for Responsiveness and Compatibility
Make sure your custom icons display well on different screen sizes and browsers. Also, test after WordPress core updates or theme changes to ensure your customizations still work properly.
5. Backup Before Making Changes
Always back up your site before making custom modifications to your functions.php or installing custom plugins. This way, you can easily revert if something doesn’t work as expected.
6. Consider Using Plugins for Ease
If coding isn’t your thing, there are plugins like Admin Menu Editor that allow you to customize icons and menu order through a user-friendly interface. These tools can save you time and reduce the risk of errors.
7. Document Your Customizations
Keep a record of the icons and customizations you’ve made, especially if you manage multiple sites. This documentation makes it easier to replicate or troubleshoot in the future.
By following these best practices, you’ll create a more visually appealing, user-friendly, and professional-looking WordPress admin dashboard. Remember, small touches like customized icons can make a big difference in your workflow and user experience!
7. Troubleshooting Common Issues When Changing Admin Icons
Changing the admin menu parent icon in WordPress can sometimes come with its fair share of hiccups. Don’t worry—most issues are easy to resolve once you know what to look for. Here are some common problems and how to troubleshoot them:
1. Icon Not Updating Immediately
If you’ve made your changes but the icon still looks the same, it might be due to browser caching. Try these steps:
- Clear your browser cache or do a hard refresh (usually Ctrl + Shift + R or Cmd + Shift + R).
- Clear any caching plugins you use on your WordPress site.
- Disable caching temporarily to see if the icon updates.
2. Incorrect Icon Display
If the icon appears broken or shows a default icon, double-check:
- That you’ve used the correct icon URL or icon class.
- If using a custom icon font, ensure the font files are properly loaded.
- That your code syntax is correct—small typos can prevent icons from rendering.
3. Permissions or Plugin Conflicts
Sometimes, other plugins or theme functions may override your customizations. To troubleshoot:
- Temporarily disable other plugins to see if the icon appears correctly.
- Switch to a default theme like Twenty Twenty-One to rule out theme conflicts.
- Check your site’s error logs for any related issues.
4. Using Incorrect Hooks or Methods
Ensure you’re hooking into the right WordPress actions and filters. Refer to the latest WordPress documentation or tutorials to confirm your code is up-to-date. Remember, WordPress updates can sometimes change how admin menus are handled, so staying current is key.
5. Compatibility with WordPress Version
Older or very new versions of WordPress might have different methods or restrictions. Check the WordPress Codex or developer resources for version-specific guidance. If needed, update your code to match the latest standards.
By systematically troubleshooting these issues, you’ll usually find the culprit and get your custom admin icon displaying just how you want. Remember, patience and a methodical approach are your best friends here!
8. Conclusion and Additional Resources for Customizing WordPress Admin Menu
Customizing the WordPress admin menu, especially changing the parent icon, is a fantastic way to personalize your dashboard and make it more intuitive for your workflow. Whether you’re building a client site, creating a custom admin experience, or just want a fun touch of branding, tweaking admin icons can really make a difference.
While the process might seem a bit technical at first, with the right approach—using plugins, custom code snippets, or icon libraries—you can achieve professional and polished results. Remember to back up your site before making significant changes and test your customizations across different browsers and devices.
Looking for more ways to customize your WordPress admin area? Here are some additional resources that can help:
- Official WordPress Developer Resources: Admin Menu
- Custom Admin Menu Plugins
- Font Awesome Icons Library
- WordPress Hooks Reference: admin_menu
With a bit of experimentation and the right tools, you can turn your WordPress admin dashboard into a more personalized and efficient workspace. Happy customizing!