If you’re looking to spice up your WordPress website with some eye-catching icons, Font Awesome is a fantastic choice. It offers a huge library of scalable vector icons that can easily be customized to match your site’s style. Whether you’re adding icons for social media, navigation menus, or decorative elements, integrating Font Awesome can make your site look more professional and engaging. The best part? You don’t need to be a coding expert to get started. In this guide, we’ll walk through the simple steps to enqueue Font Awesome icons correctly, ensuring they load smoothly and work perfectly on your site.
Understanding the Importance of Enqueuing Scripts Properly

Now, you might wonder, why all this fuss about enqueuing scripts? Well, in WordPress, properly adding external scripts like Font Awesome is crucial for several reasons. First, it helps prevent conflicts with other plugins or themes that might also be loading scripts. When you enqueue scripts correctly, WordPress manages their loading order, avoiding issues like duplicate code or broken icons. Second, it improves your site’s performance. Proper enqueuing ensures scripts are loaded only when needed and in the right way, which can speed up your website. Lastly, following the recommended method keeps your site maintainable and compatible with future
3. How to Enqueue Font Awesome Icons in Your WordPress Theme
So, you’ve decided to add some flair to your WordPress site with Font Awesome icons. One way to do this is by manually enqueueing the Font Awesome library directly into your theme. Don’t worry; it’s simpler than it sounds, and it gives you more control over how the icons are loaded.
First things first, you’ll want to access your theme’s functions.php file. You can do this via the WordPress admin dashboard under Appearance > Theme Editor, or better yet, through your hosting file manager or an FTP client to avoid accidental overwrites.
Step-by-Step to Enqueue Font Awesome
- Backup your site — always a good idea before making code changes.
- Navigate to your functions.php file.
- Add the following code snippet at the end of the file:
<?phpfunction enqueue_font_awesome() { // Check if Font Awesome is already loaded to prevent duplicates wp_enqueue_style( 'font-awesome', 'https://cdnjs.cloudflare.com/ajax/libs/font-awesome/6.4.0/css/all.min.css', array(), '6.4.0' );}add_action( 'wp_enqueue_scripts', 'enqueue_font_awesome' );This code does a few things:
- Defines a function called enqueue_font_awesome.
- Uses the wp_enqueue_style function to load Font Awesome from a CDN (you can also host it locally if you prefer).
- Hooks into wp_enqueue_scripts action, which runs during the process of loading your site’s scripts and styles.
Why Enqueue Instead of Hardcoding?
Enqueueing ensures that your styles load properly, don’t conflict with other plugins or themes, and follow WordPress best practices. Plus, it makes future updates easier and safer.
Pro Tip
If you want to load a specific version of Font Awesome or host it locally, you can replace the CDN URL with your own hosted file path. Just remember, hosting locally may require additional setup, like uploading the CSS and font files to your server.
4. Adding Font Awesome via Plugins Versus Manual Enqueueing
Now, you might be wondering — should I manually enqueue Font Awesome, or is there a plugin that can do it for me? Both approaches have their pros and cons, so let’s break it down.
Using a Plugin
There are several plugins available that make adding Font Awesome super straightforward. Some popular options include:
- Font Awesome — Official plugin by Font Awesome that offers easy integration and updates.
- Better Font Awesome — Provides options for loading different icon sets and customizing icon styles.
- WP Font Awesome — Simple plugin to add Font Awesome icons to your site.
Advantages of Plugins
- Ease of Use: No coding required. Just install, activate, and configure.
- Automatic Updates: Keep your font library up-to-date without manual intervention.
- Additional Features: Some plugins offer icon management dashboards, icon search, and customization options.
Disadvantages of Plugins
- Extra Load: Plugins can add to your site’s overall load time if not optimized.
- Dependency: Relying on plugins means you depend on their updates and compatibility.
- Less Control: Limited customization options compared to manual enqueueing.
Manual Enqueueing
Enqueueing Font Awesome manually, as we discussed earlier, gives you:
- Full control over how and when the icons load.
- Less reliance on third-party plugins, which can sometimes conflict or bloat your site.
- Potential performance benefits if you host the library locally or optimize the CDN delivery.
So, Which Is Better?
It depends on your comfort level and needs:
| Criteria | Using a Plugin | Manual Enqueueing |
|---|---|---|
| Ease of setup | Very simple, no coding required | Requires editing theme files |
| Control | Limited, depends on plugin options | Full control over version, loading, and placement |
| Performance | Depends on plugin efficiency | Potentially faster if hosted locally or optimized CDN |
| Flexibility | Less flexible, relies on plugin features | Highly customizable |
Final Thoughts
If you’re new to WordPress and want a quick setup, a plugin might be the way to go. But if you’re comfortable editing code and want maximum control — especially for performance optimization — manually enqueueing Font Awesome is a solid choice. Whichever route you pick, both methods will help you spice up your site with those stylish icons in no time!
5. Customizing Font Awesome Icons and Ensuring Compatibility
Once you’ve successfully added Font Awesome to your WordPress site, the fun begins — customizing those icons to match your website’s style and making sure everything plays nicely with your other plugins and themes. Customization is key to making your icons feel integrated rather than pasted on, so let’s explore some ways to tweak and fine-tune.
Changing icon size, color, and style is straightforward with CSS. For example, to adjust the size, you can add classes like fa-lg, fa-2x, fa-3x, etc., directly to your icon markup. Want to change the color? Just target the icon with CSS and set the color property:
.fa-custom { color: ff5733; / Your desired color / font-size: 24px; / Or use Bootstrap classes like fa-2x /}For more personalized styling, consider creating a custom CSS file or adding styles to your theme’s stylesheet. Remember, the key is to ensure your styles are specific enough to override default icon styles but not so broad that they affect other icons unintentionally.
Another handy tip is to use icon prefixes to switch icon styles. Font Awesome offers different styles like solid (fas), regular (far), light, and brands (fab). For example:
<i class="fas fa-camera"></i> <i class="far fa-clock"></i> <i class="fab fa-apple"></i> Ensuring compatibility is equally important. Sometimes, conflicts happen when other plugins or themes enqueue scripts or styles that clash with Font Awesome. To prevent this, follow these best practices:
- Use a unique handle when registering Font Awesome in your functions.php, reducing the chance of conflicts.
- Load Font Awesome in the footer if possible, to avoid blocking other scripts.
- Check plugin compatibility by disabling plugins one by one to identify conflicts.
- Test with different themes to see if the icons display correctly across environments.
If you’re using a page builder or theme that already includes Font Awesome, be cautious about loading it twice. In such cases, it’s best to disable redundant enqueuing to avoid duplicate code or style conflicts. Sometimes, you might need to dequeue styles added by other plugins, which can be done via wp_dequeue_script() or wp_dequeue_style() functions in your theme’s functions.php.
6. Troubleshooting Common Issues When Enqueuing Font Awesome
Even with careful setup, you might run into hiccups. Here are some common issues and how to troubleshoot them:
Icons Not Showing Up
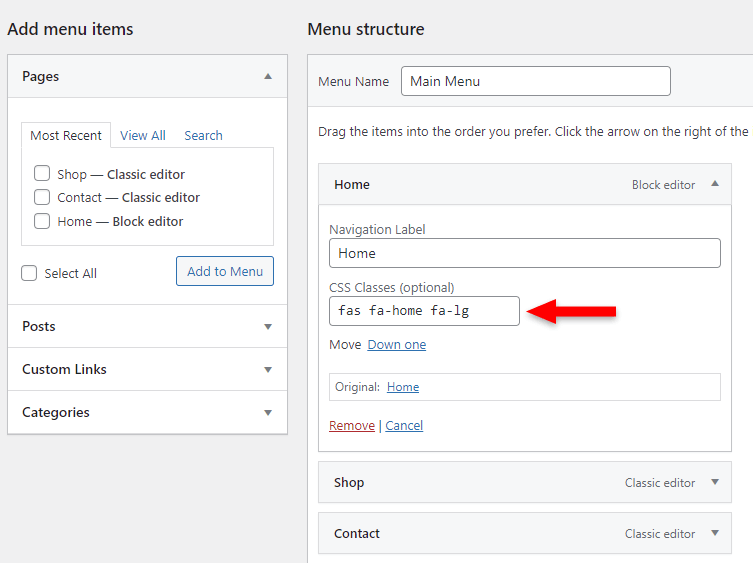
This can be caused by incorrect enqueueing, wrong class names, or conflicts. First, double-check that your enqueue code is correct and that the URL points to the right version of Font Awesome. Also, ensure your icon markup uses the correct classes, like <i class="fas fa-home"></i>.
Check Console for Errors
Open your browser’s developer tools (F12 or right-click > Inspect) and look at the Console tab. Any 404 errors indicate failed script or style loads. If you see errors related to Font Awesome, verify your CDN URL or local file paths.
Icon Styles Not Applying
If your icons appear but don’t match your styling, inspect the element and see if your CSS rules are overriding default styles. Use the browser’s inspector to see which styles are affecting your icon. Adjust your CSS specificity accordingly.
Conflicts with Other Plugins or Themes
If you suspect conflicts, try disabling other plugins one at a time and switch to a default theme like Twenty Twenty-Three. If icons start working, re-enable plugins one by one to identify the culprit. Sometimes, plugin developers enqueue their own versions of Font Awesome, causing duplication or conflicts. In such cases, consider dequeuing the conflicting scripts or styles.
Using the Correct Font Awesome Version
Ensure you are using the version of Font Awesome that matches your icon classes. For example, fa- prefixes are used in Font Awesome 4, while newer versions like 5 and 6 use fas, fab, etc. Mismatched classes and versions can cause icons to disappear.
In summary, customizing and troubleshooting Font Awesome is mostly about paying attention to your code, checking for conflicts, and ensuring your setup aligns with the version you’re using. With a bit of patience, you’ll have beautifully styled icons that seamlessly integrate into your WordPress site!
Conclusion and Best Practices for Using Font Awesome in WordPress
Integrating Font Awesome icons into your WordPress site can significantly enhance its visual appeal and user experience. To maximize benefits and maintain a professional look, it’s important to follow some best practices. First, always use the latest version of Font Awesome to access new features and security updates. Optimize your icon usage by only including the icons you need, which helps reduce page load times. You can do this efficiently through the kit configuration or by customizing your icon set.
When implementing icons, consider accessibility. Use appropriate aria-hidden="true" attributes for decorative icons and provide descriptive labels where necessary to ensure screen readers can interpret your site effectively. Additionally, leverage the CSS classes provided by Font Awesome to style icons consistently across your website, such as adjusting size, color, or hover effects.
| Best Practice | Benefit |
|---|---|
| Use the CDN or Kit | Ensures quick updates and easy management |
| Include only necessary icons | Reduces page weight and improves load times |
| Implement accessibility features | Enhances usability for all users |
| Consistent styling with CSS | Maintains a cohesive visual design |
In summary, by following these best practices, you can seamlessly incorporate Font Awesome icons into your WordPress website, creating a more engaging and accessible user experience while keeping your site optimized and professional.