Ever noticed those little notification bubbles on your WordPress dashboard? They’re like tiny alerts that tell you about new comments, updates, or other important activities. When you’re working with custom post types, these bubbles can be especially handy—they keep you informed without cluttering your screen. But sometimes, they just don’t show up or stop working altogether. If that’s happening to you, don’t worry! Understanding what notification bubbles are and how they function in the context of custom post types is the first step toward fixing the issue. Let’s dive into what they are and why they matter.
Common Causes of Notification Bubble Issues in WordPress
Notification bubble problems can be frustrating, but they usually come down to a few common culprits. Here’s a quick rundown of what might be causing the issue:
- Plugin Conflicts: Sometimes, plugins don’t play nicely together. A plugin that manages notifications or custom post types might conflict with others, causing the bubbles to not display correctly.
- Incorrect or Missing Hooks: WordPress uses hooks to trigger notifications. If a hook isn’t properly added or is missing in your custom post type code, notifications won’t appear.
- JavaScript Errors: Notification bubbles often rely on JavaScript. If there’s a JavaScript error on your admin page, it can halt the script that displays these bubbles.
- Outdated or Incompatible Themes and Plugins: Using outdated themes or plugins can lead to compatibility issues, which might disable or break notification features.
- Custom Code Mistakes: If you or a developer added custom code to modify notifications, mistakes or typos can prevent bubbles from showing up.
- Server or Caching Issues: Sometimes server configurations, aggressive caching, or CDN settings can interfere with real-time notifications, causing delays or missing bubbles.
Identifying the root cause is key. Once you know what’s behind the problem, you can take targeted steps to fix it and get those helpful notification bubbles working again on your custom post types.
3. Step-by-Step Guide to Troubleshoot Notification Bubble Problems
Dealing with notification bubbles that refuse to show up can be pretty frustrating, especially when you’re eager to keep your site’s users informed. Luckily, most issues are fixable with a bit of troubleshooting. Let’s walk through a straightforward, step-by-step process to identify and resolve common problems that might be causing your notification bubbles to malfunction.
Step 1: Confirm Notification Bubble Settings
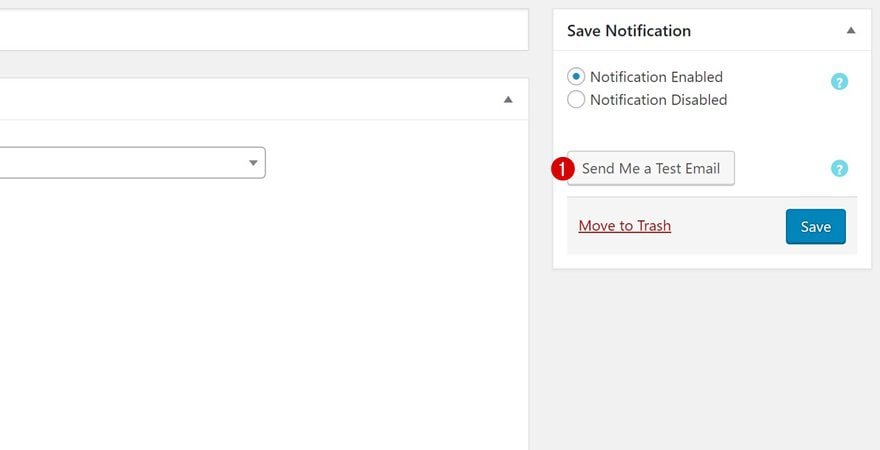
First things first, check your plugin or theme settings. Sometimes, notification bubbles are controlled via options in your plugin dashboard or theme customizer. Make sure that notifications are enabled for your custom post types. Look for options like “Enable Notification Bubbles” or similar, and toggle them on if they’re off.
Step 2: Verify User Permissions
Notification bubbles often rely on specific user roles or capabilities. Ensure that the logged-in user has the necessary permissions to see notifications. For example, administrators or editors typically have full access, but if you’re testing as a subscriber or non-privileged user, you might not see notifications.
Step 3: Check the Notification Logic
Review the code or plugin logic that generates notifications. If you’re using custom code, make sure your conditions for displaying bubbles are correct. For instance, if your code says if (post_type == 'your_custom_post_type') then show notification, verify that the post type name matches exactly.
Step 4: Debug JavaScript Errors
Open your browser’s developer console (usually F12 or right-click > Inspect > Console tab) and look for any JavaScript errors. Errors here can prevent notification bubbles from rendering properly. Fix any errors you find, which might involve updating scripts, fixing conflicts, or ensuring dependencies are loaded correctly.
Step 5: Clear Caches and Test
If you’re using caching plugins or server-side caching, clear all caches. Sometimes, outdated cached scripts or pages prevent new notifications from appearing. After clearing, refresh your page several times and test again.
Step 6: Disable Conflicting Plugins
Deactivate other plugins temporarily to see if there’s a conflict causing the issue. Sometimes, plugins that modify the admin interface or add custom scripts can interfere with notification bubbles. Reactivate plugins one by one to identify the culprit.
Step 7: Check for Plugin or Theme Updates
Make sure your notification plugin, theme, and WordPress core are all up to date. Developers often release fixes that resolve compatibility issues, including notification problems.
Step 8: Examine Server and PHP Error Logs
If all else fails, look into your server’s error logs for clues. PHP errors can sometimes prevent scripts from executing correctly. Contact your hosting provider if you’re unsure how to access these logs.
4. How to Properly Register Custom Post Types with Notification Bubbles
Now, let’s talk about the right way to register your custom post types so that notification bubbles work smoothly. Proper registration isn’t just about creating the post type; it’s also about ensuring it integrates seamlessly with your notification system.
Use the Correct Arguments When Registering
When registering a custom post type with register_post_type(), make sure to include the right arguments:
| Argument | Purpose |
|---|---|
| ‘public’ | Set to true to make the post type publicly accessible and visible in admin menus, which helps notification systems recognize it. |
| ‘show_in_menu’ | Ensures the post type appears in the admin menu, making it easier for notifications to target it. |
| ‘show_in_rest’ | Enables Gutenberg editor support and REST API access, important for modern notification tools. |
| ‘supports’ | Include features like ‘title’, ‘editor’, ‘comments’ depending on what your post type needs. Proper support ensures notifications can reference relevant content. |
| ‘has_archive’ | Allows archiving, which can be useful if notifications are triggered on archive pages. |
Hook Into the Registration Process
Ensure you’re hooking into register_post_type() properly, typically within an action like init. For example:
add_action( 'init', 'register_my_custom_post_type' );function register_my_custom_post_type() { register_post_type( 'my_custom_type', array( 'labels' => array( 'name' => __( 'My Custom Types' ), 'singular_name' => __( 'My Custom Type' ), ), 'public' => true, 'show_in_menu' => true, 'show_in_rest' => true, 'supports' => array( 'title', 'editor', 'excerpt' ), 'has_archive' => true, // Add other args as needed ) );}Ensure Compatibility with Notification Plugins
Some notification systems listen for specific post statuses or metadata. Make sure your custom post type supports relevant features like ‘status’ changes or custom fields. If your notification plugin uses hooks like save_post, verify your post type triggers those hooks correctly.
Test Your Setup
After registration, create a new post of your custom type and see if the notification bubble appears as expected. If not, revisit the previous troubleshooting steps, focusing on registration details and plugin compatibility.
By following these best practices for registration and troubleshooting, you’ll ensure your custom post types are integrated smoothly with your notification bubbles, making your site more interactive and user-friendly.
5. Using Plugins and Code Snippets to Fix Notification Bubble Issues
If you’ve tried the usual troubleshooting steps and your notification bubbles still aren’t cooperating, don’t worry—there are some handy plugins and code snippets that can help you get things back on track. These tools can make the process much easier, especially if you’re not super comfortable diving into complex code on your own.
Plugins can be a lifesaver. For example, plugins like Admin Notices or WP Notification Bubbles are designed to help you customize and troubleshoot admin notifications. They often come with user-friendly interfaces where you can manage notifications, set conditions, and troubleshoot issues without touching a single line of code.
Here’s a quick rundown of how you might use a plugin:
- Install and activate the plugin via your WordPress dashboard.
- Navigate to the plugin settings, where you’ll often find options to enable, disable, or customize notification bubbles.
- If the plugin supports custom post types, ensure you’ve configured it to recognize your specific types.
- Test to see if the notification bubbles now appear correctly for your custom post types.
Sometimes, plugins alone aren’t enough, especially if your issue stems from custom code or theme conflicts. That’s where adding custom code snippets can help. For example, you might add a snippet to ensure that notifications are being properly registered for your custom post types:
// Example snippet to add admin notices for custom post typesfunction show_custom_post_type_notice() { global $pagenow; if ( $pagenow == 'edit.php' && isset( $_GET['post_type'] ) && $_GET['post_type'] == 'your_custom_post_type' ) { echo '<div class="notice notice-info">'; echo '<p>Remember to review your custom post type entries!</p>'; echo '</div>'; }}add_action( 'admin_notices', 'show_custom_post_type_notice' );Just a quick tip: always back up your site before adding new snippets, and test them in a staging environment if possible. This way, you avoid accidentally breaking your site or creating conflicts.
In summary, leveraging the right plugins and carefully crafted code snippets can give you more control and clarity on why your notification bubbles aren’t showing up. It’s all about finding the right tools that fit your comfort level and site setup.
6. Best Practices for Managing Notification Bubbles on Custom Post Types
Once you’ve got your notification bubbles working smoothly, it’s important to manage them effectively. Proper management ensures your admin area remains clutter-free and that notifications serve their purpose—helping you stay informed without overwhelming you.
Here are some best practices to consider:
1. Be Specific with Notifications
Only show notification bubbles for critical or time-sensitive information. For example, notify about pending reviews, plugin updates relevant to custom post types, or important system messages. Avoid overloading the admin with unnecessary alerts, which can cause important messages to be ignored.
2. Use Clear and Concise Messages
Notifications should be easy to understand at a glance. Use simple language and highlight key actions or information. For example:
- Pending posts: You have 3 unpublished custom posts.
- Update needed: Plugin XYZ has a new version available.
3. Categorize Notifications
If your site manages multiple custom post types, consider categorizing notifications by type or importance. This helps you prioritize what needs immediate attention versus things that can wait.
4. Automate or Schedule Regular Checks
Set aside time regularly to review your notifications. You might even automate certain reminders using plugins or scheduled code snippets, so you don’t forget important tasks related to your custom post types.
5. Keep Your Site and Plugins Updated
Many notification issues stem from outdated plugins or themes. Regular updates ensure compatibility and smooth operation of notification features.
6. Test Changes in a Staging Environment First
Before implementing significant fixes or updates, test in a staging site. This way, you can verify that your notification setup works as intended without risking your live site.
By following these best practices, you keep your admin interface clean, relevant, and efficient. Clear and well-managed notifications help you stay on top of your custom post types without unnecessary distractions, leading to a more productive workflow and happier site management experience.
7. Additional Tips for Ensuring Notification Bubbles Work Correctly
Having your notification bubbles pop up just the way you want can sometimes feel like a bit of a puzzle. Here are some extra tips to help you troubleshoot and ensure everything runs smoothly:
Clear Caches Regularly
If you’re using caching plugins or your host has server-level caching, old versions of your pages might interfere with the notification system. Make it a habit to clear your caches after making changes or updates. This way, your visitors see the latest notifications without glitches.
Check for Plugin Conflicts
Sometimes, other plugins can clash with your notification system. To identify conflicts:
- Deactivate all plugins except those necessary for notifications.
- Test if the notification bubbles work.
- Re-activate plugins one by one, testing after each activation.
This process helps pinpoint any plugins causing issues. If you find a conflict, look for alternative plugins or contact the plugin developer for support.
Verify User Roles and Permissions
Notification bubbles often depend on user roles. Ensure that your user roles have the correct permissions to see notifications. Sometimes, custom roles or restrictions can block notifications from appearing. Adjust permissions accordingly or test with different user accounts.
Update Your Plugins and WordPress
Keeping everything updated is key. Outdated plugins or WordPress versions can cause compatibility issues. Regularly check for updates and install them promptly to maintain smooth functionality.
Enable Debugging Mode
If problems persist, turn on debugging in WordPress to get detailed error messages:
define('WP_DEBUG', true);
Place this line in your wp-config.php file. Debug logs can help you or a developer identify what’s causing notification bubbles not to display properly.
Consult Plugin Documentation and Support
Finally, don’t forget to check the official documentation of your notification plugin. Many issues are common and well-documented, and the support forums can be a goldmine for solutions. If needed, reach out to plugin developers—they often provide quick help for specific issues.
8. Conclusion and Resources for Further Help
Fixing notification bubbles on custom post types in WordPress can feel tricky at first, but with a systematic approach, it’s entirely manageable. Remember to:
- Ensure your plugin settings are correct
- Check for conflicts and permissions
- Keep everything updated
- Use debugging tools when needed
By following these tips and troubleshooting step-by-step, you can restore the seamless notification experience on your site, keeping your users informed and engaged.
If you’re still facing challenges, don’t hesitate to seek additional help. Here are some valuable resources:
- WordPress Support Forums
- Plugin Developer Support Page (replace with your plugin’s actual support link)
- WordPress Developer Resources
- Consider hiring a professional developer if complex issues persist.
Remember, troubleshooting is part of the process, and each step you take brings you closer to a fully functional notification system. Happy editing!