If you’re looking to customize and enhance your WordPress.com website, plugins are your best friends. They allow you to add new features, improve performance, and tailor your site to fit your needs—all without needing to code. While WordPress.com offers a more streamlined experience compared to its self-hosted counterpart, it still provides options for integrating plugins, especially if you’re on certain plans. This guide will walk you through the basics of installing plugins on
Understanding the Limitations and Differences Between WordPress.com and WordPress.org
Many newcomers get a bit confused when they hear about WordPress.com and WordPress.org because they sound similar, but they’re actually quite different in terms of flexibility and control. Knowing these differences is key to understanding what you can do with plugins and how to optimize your website.
WordPress.com is a hosted platform, which means WordPress manages the hosting for you. It’s super user-friendly, especially for beginners, but it comes with some restrictions. For example, on the free plan, you can’t install third-party plugins or custom themes. Upgrading to a Business or eCommerce plan unlocks the ability to install plugins, but even then, there are some limitations on what types of plugins you can use.
On the other hand, WordPress.org offers a self-hosted solution. You download the WordPress software and install it on your own web hosting server. This setup gives you full control over your website. You can install any plugin from the WordPress plugin repository or upload custom plugins. This flexibility is perfect if you want complete freedom to customize every aspect of your site, but it does require a bit more technical know-how and responsibility for maintaining security, backups, and updates.
In summary, if you want a simple, managed platform with some plugin options, WordPress.com might be enough—just choose the right plan. But if you’re looking for maximum control, customization, and the ability to install a wide range of plugins without restrictions, then WordPress.org is the way to go. Understanding these differences helps set realistic expectations and ensures you choose the platform that best fits your goals and technical comfort level.
3. Prerequisites for Installing Plugins on WordPress.com
Before you dive into installing plugins on your WordPress.com site, it’s important to understand what you need to get started. Unlike self-hosted WordPress.org sites, WordPress.com has some restrictions, especially if you’re on the free plan. Here’s what you should check or prepare:
- Plan Type: To install plugins, you’ll need to be on a paid plan—either the Premium, Business, or eCommerce plan. The free and lower-tier plans don’t support plugin installation.
- Access to the Dashboard: Make sure you have admin access to your WordPress.com dashboard. Only users with admin rights can add or manage plugins.
- Plugin Compatibility: Not all plugins are available or compatible with WordPress.com. The platform offers a curated list of plugins that you can install, mainly through their plugin marketplace.
- Understanding Limitations: Remember, WordPress.com manages the hosting environment, so some advanced plugins or customizations might not be allowed. It’s a good idea to review the plugin options available within your plan.
Once you’ve confirmed your plan type and have admin access, you’re all set to explore the plugins available and enhance your site’s functionality. Just keep in mind that choosing the right plan unlocks the ability to truly customize your website with the plugins you need!
4. Step-by-Step Guide to Installing Plugins on WordPress.com

Now that you’re ready, let’s walk through the process of installing plugins on your WordPress.com site. It’s straightforward, and I’ll break it down into simple steps:
- Log into Your WordPress.com Account: Head over to wordpress.com/log-in and enter your credentials.
- Access Your Site Dashboard: From the dashboard, select the website where you want to install the plugin. Click on “Manage” or “Site” to go to your site’s overview.
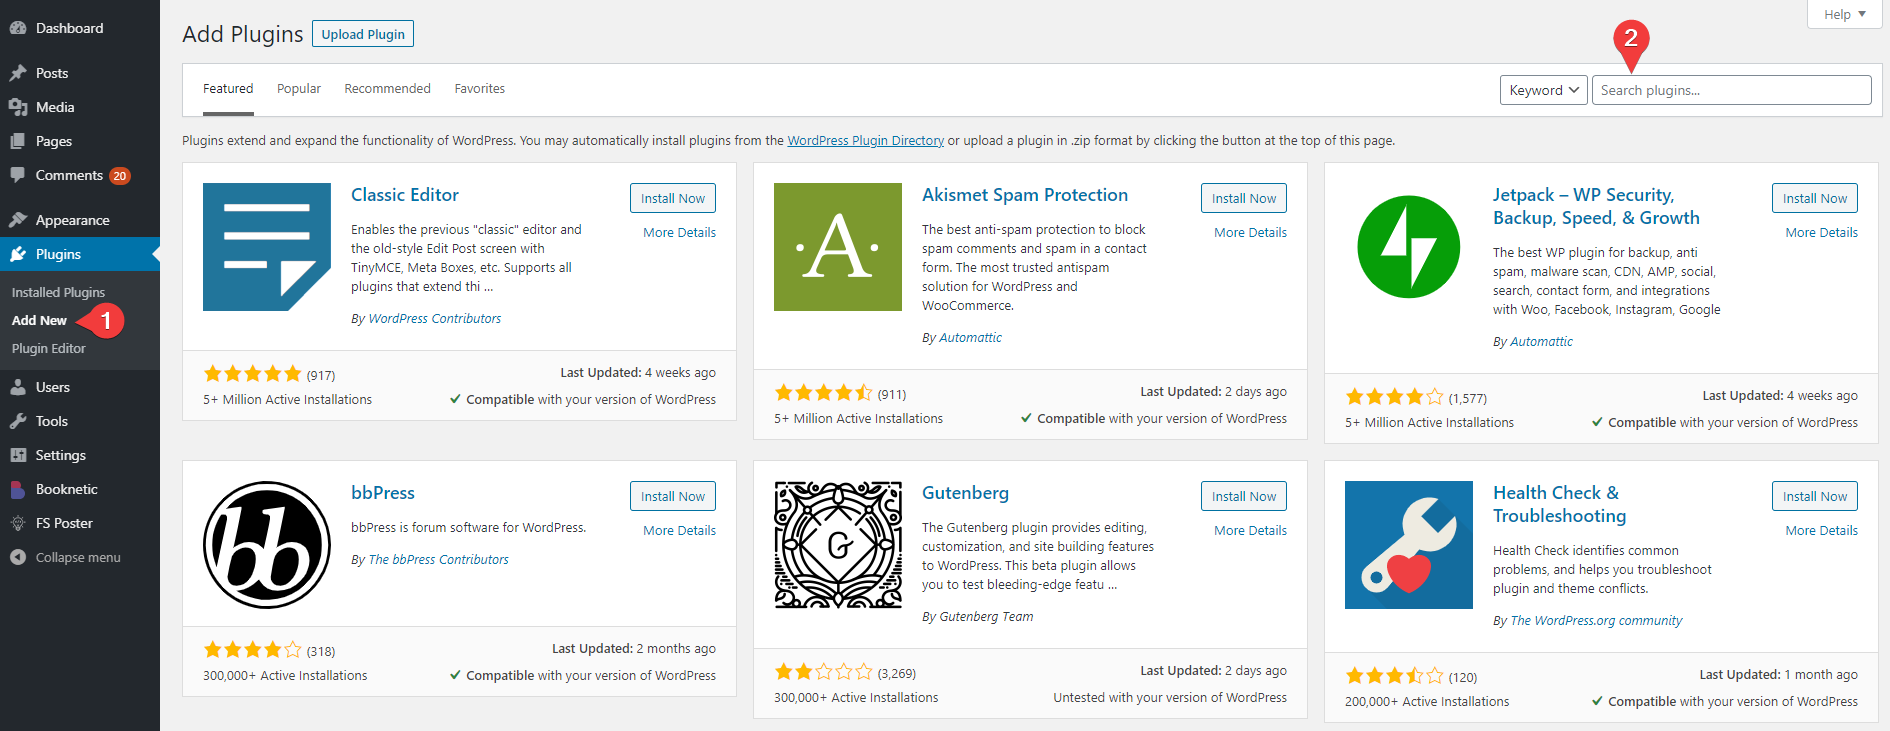
- Navigate to Plugins: In the left-hand menu, click on “Plugins”. If you’re on the correct plan, you’ll see an option to browse or upload plugins here.
- Browse or Search for Plugins: Use the search bar to find specific plugins or browse the curated list of plugins available through WordPress.com. You’ll see options like SEO tools, contact forms, or social media integrations.
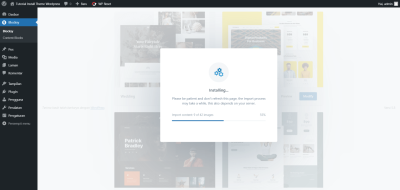
- Install the Plugin: Once you find the plugin you want, click the “Install” button next to it. WordPress.com will handle the installation process automatically.
- Activate the Plugin: After installation, click the “Activate” button. This step is crucial—without activation, the plugin won’t work.
- Configure Plugin Settings: Many plugins have settings you can customize. Usually, you’ll find a new menu item in your dashboard or under the plugin’s submenu. Take a moment to configure it to suit your needs.
And that’s it! You’ve successfully installed and activated a plugin on your WordPress.com site. Remember, if the plugin requires additional setup, the plugin’s documentation or support forums are great resources. With your new plugin in place, you’re well on your way to making your website more functional, engaging, and tailored to your goals!
5. Best Plugins to Enhance Your WordPress.com Website
Now that you’re familiar with how to install plugins on your WordPress.com site, it’s time to explore some of the best tools out there that can truly boost your website’s functionality. Whether you’re looking to improve your site’s design, optimize for search engines, or add new features, these plugins can make a big difference.
Note: Keep in mind that on WordPress.com, especially if you’re on the free plan, plugin options are limited compared to self-hosted WordPress.org sites. However, if you’re on a Business or eCommerce plan, you gain access to a wide range of powerful plugins.
Top Plugins to Consider
- Jetpack – An all-in-one plugin that offers security, performance, and site management tools. It helps with site stats, backups, spam protection, and more.
- Yoast SEO – Essential for improving your site’s SEO. It guides you through optimizing content, meta descriptions, and keywords to help your pages rank better in search engines.
- Contact Form 7 – Easily add contact forms to your website so visitors can reach out. It’s flexible and widely used.
- WP Mail SMTP – Ensures your emails (like contact form notifications) are reliably delivered. Perfect for avoiding email delivery issues.
- Smush – Optimizes and compresses your images to speed up your website without losing quality, enhancing user experience and SEO.
- Google Site Kit – Connects your site with Google Analytics, Search Console, and other tools, giving you valuable insights about your visitors and performance.
These plugins are popular because they offer real value without complicating your site. Before installing any plugin, always check its reviews, compatibility, and update history. Remember, too many plugins can slow down your site, so choose the ones that truly align with your goals.
Pro Tip:
Always activate plugins one at a time and test your site after each activation. This way, you can easily identify if any plugin causes conflicts or slows down your website.
6. Managing and Updating Plugins Effectively
Once you’ve installed some great plugins, the next step is managing and updating them properly. This keeps your website secure, fast, and functioning smoothly.
Here’s what you should keep in mind:
- Regular Updates: Always update your plugins as soon as updates are available. Developers release updates to fix bugs, patch security vulnerabilities, and improve performance.
- Backup Before Updates: Before updating plugins (or making major changes), it’s a good idea to back up your website. Many hosting providers offer one-click backups, or you can use a plugin like UpdraftPlus.
- Monitor Site Speed and Functionality: After updating, check your website to ensure everything runs smoothly. Look out for broken features or slow loading times.
- Deactivate and Delete Unused Plugins: If you have plugins installed that you no longer use, deactivate and delete them. Extra plugins can introduce security risks and slow down your site.
- Keep a Plugin List: Maintain a list of your active plugins, their versions, and update dates. This helps you stay organized and troubleshoot issues more efficiently.
Managing Conflicts and Troubleshooting
If you notice errors or your site behaving oddly after an update, try these steps:
- Deactivate plugins one by one to identify the culprit.
- Check plugin compatibility with your current WordPress version.
- Consult support forums or the plugin developer’s documentation for guidance.
Automate Where Possible
Some hosting providers or WordPress.com plans allow automatic plugin updates. Enabling this feature can save you time and ensure your plugins stay current. However, always monitor your site after updates to catch any issues early.
In summary, managing your plugins isn’t a one-and-done task. Regular updates, backups, and monitoring will keep your website secure, fast, and reliable—giving your visitors a smooth experience and helping your site succeed.
7. Troubleshooting Common Plugin Installation Issues
Installing plugins on your WordPress.com site can sometimes come with a few bumps along the way. Don’t worry—most issues are straightforward to resolve once you know what to look for. Here are some common problems and how to troubleshoot them:
Plugin Not Installing or Uploading
If you’re trying to upload a plugin and it isn’t working, check the following:
- File Size Limits: Some hosting plans have size restrictions. Make sure your plugin file isn’t exceeding the maximum upload size.
- Compatibility: Verify that the plugin is compatible with your current version of WordPress.com. Outdated plugins or incompatible versions can cause issues.
- File Format: Ensure you’re uploading a ZIP file if uploading manually. Extracted folders won’t work.
If problems persist, try uploading via FTP or contact support for assistance.
Plugin Conflicts or Errors
Sometimes, after installing a plugin, you might notice errors or conflicts with other plugins or themes. Here’s what to do:
- Deactivate and Reactivate: Turn off the plugin to see if the issue resolves. Then, try reactivating it.
- Check for Compatibility: Review plugin documentation or support forums for known conflicts.
- Update Plugins: Keep all plugins updated to their latest versions to minimize compatibility issues.
- Disable Recent Plugins: If problems began after installing a new plugin, disable that one first.
In case of persistent conflicts, consider reaching out to the plugin developer or seeking help from the WordPress community.
Performance Issues or Slow Loading
Some plugins may cause your site to load slowly. To troubleshoot:
- Deactivate Plugins One-by-One: Identify if a specific plugin is the culprit by turning off plugins sequentially.
- Optimize Plugin Usage: Use only necessary plugins to reduce bloat.
- Caching and Optimization: Combine plugins with caching tools to improve load times.
Remember, less is often more—only keep plugins that truly add value to your website.
General Tips for Troubleshooting
Other helpful tips include:
- Always back up your site before making major changes.
- Read plugin reviews and support forums for known issues.
- Ensure your WordPress.com plan supports plugin installation if you’re using Business or eCommerce plans.
By staying patient and methodical, troubleshooting plugin issues becomes much more manageable. If you’re ever stuck, the WordPress community and support teams are just a click away!
8. Tips for Maximizing Website Functionality with Plugins
Plugins are like the Swiss Army knives of your WordPress.com site—they can do almost anything! To get the most out of them, keep these tips in mind:
Choose Plugins Wisely
- Prioritize Quality: Select plugins with good reviews, active support, and recent updates.
- Limit the Number: Too many plugins can slow down your site and increase security risks. Only install what you truly need.
- Check Compatibility: Make sure plugins are compatible with your version of WordPress.com and other installed plugins.
Optimize Plugin Usage
- Configure Settings Properly: Spend some time setting up your plugins to suit your website’s goals.
- Regular Updates: Keep plugins updated to access new features and security patches.
- Schedule Regular Checks: Periodically review your plugins to ensure they’re still useful and functioning correctly.
Enhance User Experience
Use plugins to improve how visitors interact with your site:
- Contact Forms: Make it easy for visitors to reach you.
- Social Sharing: Add buttons for sharing content on social media platforms.
- SEO Optimization: Use SEO plugins to help your content rank better in search engines.
- Performance Enhancements: Implement caching and image optimization plugins to speed up your site.
Leverage Analytics and Security Plugins
- Analytics: Use tools like Google Analytics integrations to monitor visitor behavior and improve content strategy.
- Security: Install security plugins to protect your site from threats, malware, and spam.
Stay Up-to-Date and Educated
Finally, keep learning about new plugins and best practices. Follow WordPress blogs, forums, and tutorials to stay ahead of the curve. The more you understand what each plugin does, the better you can tailor your website’s functionality to meet your needs.
By thoughtfully selecting, configuring, and maintaining your plugins, you’ll significantly enhance your website’s performance, security, and user experience. Remember: a well-optimized site with the right tools can make all the difference in achieving your online goals!
Conclusion and Additional Resources for WordPress.com Users
Enhancing your WordPress.com website through plugins can significantly improve its functionality, user experience, and overall performance. While WordPress.com offers a more streamlined and managed environment compared to self-hosted WordPress, it still provides options to extend your site’s capabilities effectively. Remember to select plugins carefully—prioritize those from reputable sources, ensure compatibility with your current WordPress version, and avoid overloading your site with unnecessary features to maintain optimal speed and security.
To maximize your website’s potential, consider exploring the following additional resources:
- Official WordPress.com Support: Comprehensive guides and tutorials on plugin management and site optimization.
- WordPress.com Forums: Community-driven assistance where you can ask questions and share tips with other users.
- Plugin Recommendations: Curated lists of popular and highly-rated plugins suitable for various website needs.
- Webinars and Tutorials: Video content that walks you through installation, customization, and troubleshooting.
By leveraging these resources, you can confidently enhance your site’s functionality while maintaining security and performance. Remember, a well-optimized website not only attracts visitors but also provides a seamless experience that encourages return visits and engagement.