If you’re managing a website or a project, you probably juggle multiple tools to keep everything organized. Trello, with its visual boards and cards, is fantastic for task management, while WordPress is your go-to platform for creating and maintaining your website. But what if you could connect these two powerhouses? Integrating Trello with WordPress using a plugin makes it easier to streamline your workflow, keep your content and tasks aligned, and boost your productivity. Whether you’re a blogger, marketer, or small business owner, this integration can be a game-changer. Let’s explore what this looks like and how to get started.
Benefits of Connecting Trello with Your WordPress Site
Bringing Trello and WordPress together offers a ton of advantages that can help you stay organized and efficient. Here are some of the main benefits:
- Streamlined Content Planning: Manage your editorial calendar directly from Trello. Create cards for each blog post idea, assign deadlines, and track progress—all from your Trello boards. It keeps your content pipeline clear and organized without constantly switching platforms.
- Automated Workflow: With the right plugin, you can automate tasks like publishing new posts when a Trello card moves to a specific list or updating Trello when a post is published. This reduces manual work and minimizes errors.
- Better Collaboration: If you’re working with a team, integrating Trello allows everyone to see the latest updates, comments, and task statuses in real-time. Your content team, designers, and developers can stay aligned without endless email chains.
- Centralized Task Management: Instead of juggling multiple tools, you can keep your project management and website updates in sync. This integration helps you prioritize tasks and see the bigger picture at a glance.
- Enhanced Productivity: Automations and direct links between your tasks and website content help you save time. You can focus more on creating quality content instead of managing multiple tools manually.
Overall, integrating Trello with WordPress creates a more cohesive workflow. It turns scattered tasks into a connected process, making your website management smoother and more efficient. Whether you’re running a blog, an online store, or a corporate site, this setup can save you time and reduce headaches. Ready to learn how to set it up? Let’s dive into the steps to make this integration happen seamlessly.
3. Choosing the Right Plugin for Trello and WordPress Integration
When it comes to connecting Trello with your WordPress site, the options can seem overwhelming at first. There are several plugins out there, each with its own features, strengths, and quirks. So, how do you pick the right one? Well, it’s all about understanding your needs and matching them with what each plugin offers.
First, consider what you want to achieve. Are you looking to display Trello boards inside your WordPress site? Or do you want to automate tasks, like creating Trello cards based on form submissions or blog comments? Some plugins focus on visual integration, allowing you to embed boards or lists directly into pages. Others excel at automation, syncing data between Trello and WordPress seamlessly.
Here are some key factors to keep in mind:
- Compatibility: Make sure the plugin works with your current version of WordPress and Trello.
- Ease of Use: Look for user-friendly interfaces and clear documentation. You don’t want something overly complicated, especially if you’re not a developer.
- Features: Check if the plugin supports the specific features you need — like creating cards, updating boards, or embedding Trello content.
- Support & Updates: Choose a plugin that’s actively maintained and has good support channels. This saves you headaches down the line.
- Reviews & Ratings: Read user feedback to gauge reliability and performance.
Some popular plugins you might consider include:
- WP Trello: Offers easy embedding of boards and lists into WordPress pages or posts.
- Trello for WordPress: Focuses on automation and syncing tasks between Trello and WordPress.
- Embedly or Similar Embed Plugins: While not Trello-specific, these can embed Trello boards via embed codes.
Remember, sometimes a simple plugin that does exactly what you need is better than a feature-heavy one that complicates things. Take your time to review options, maybe even test a few in staging environments before committing.
4. Step-by-Step Guide to Installing the Plugin
Now that you’ve picked the perfect plugin for your Trello and WordPress integration, it’s time to get it installed and set up. Don’t worry — it’s generally a straightforward process. Here’s a step-by-step guide to help you through it:
Step 1: Log into Your WordPress Dashboard
Start by logging into your WordPress admin area. This is usually accessible at yourdomain.com/wp-admin. You’ll need administrator privileges to install plugins.
Step 2: Navigate to the Plugins Section
On the left-hand menu, click on Plugins and then select Add New. This will take you to the plugin repository where you can search for your chosen plugin.
Step 3: Search for the Plugin
Use the search bar in the top right and type in the name of your Trello integration plugin, e.g., “WP Trello” or “Trello for WordPress.” Once you find it, click on Install Now.
Step 4: Install and Activate
After clicking Install Now, wait a few moments for the plugin to install. Once done, click on Activate. The plugin is now active on your site.
Step 5: Configure the Plugin Settings
Most plugins will add a new menu item in your dashboard sidebar or an options page under Settings. Navigate to this area, and you’ll typically be asked to connect your Trello account:
- Follow the prompts to generate an API key or authorize the plugin to access your Trello account.
- Enter any required credentials or tokens. Usually, the plugin provides links to Trello’s developer API page where you can generate these.
Ensure you save your settings before moving on. Some plugins may also allow you to select specific boards, lists, or cards to display or sync.
Step 6: Embed Trello Content or Set Up Automation
Depending on what your plugin offers, you might now embed Trello boards into pages using shortcodes, widgets, or blocks. Follow the plugin’s documentation for exact instructions on how to do this. If automation is involved, configure triggers and actions as needed.
And that’s it! With your plugin installed and configured, you’re well on your way to seamlessly integrating Trello with your WordPress site. Remember to test everything thoroughly to ensure it works smoothly. Happy managing your projects!
5. Configuring the Plugin Settings for Seamless Integration
Once you’ve installed and activated the Trello plugin on your WordPress site, it’s time to dive into the settings to make sure everything runs smoothly. Think of this step as customizing your workspace so that Trello and WordPress work together seamlessly, without any hiccups.
First, navigate to the plugin’s settings panel—usually found under the WordPress dashboard menu labeled “Trello” or something similar. Here, you’ll see a variety of options to tailor the integration to your needs.
Key settings to pay attention to include:
- API Key and Token: This is the gateway for your WordPress site to communicate with Trello. You’ll need to generate these credentials from Trello’s developer API page if you haven’t already. Once obtained, input them into the plugin’s fields. This step is crucial because without proper authentication, the integration won’t work.
- Default Board and List: Choose which Trello board and list you want to connect to your WordPress posts or pages. This way, new content can automatically be linked or even created in the designated Trello board.
- Synchronization Frequency: Decide how often you want WordPress to sync with Trello. Do you want real-time updates, or is a daily sync sufficient? Setting this correctly helps avoid unnecessary API calls and keeps your workflow efficient.
- Post Types and Taxonomies: Specify whether you want to sync only certain post types (like posts, pages, or custom post types) and categories or tags. This allows you to control what content interacts with Trello, keeping things organized.
- Notification Settings: Enable or disable notifications for specific actions, such as when a new post is published or a Trello card is updated. This helps you stay informed without overwhelming your inbox.
Take some time to explore each setting and tailor them to your workflow. Many plugins also offer tooltips or documentation links directly within the settings panel—use these resources if you’re unsure about particular options. Once configured correctly, your Trello and WordPress integration will feel natural, helping streamline your content management process and project tracking.
6. Connecting Your Trello Boards to WordPress
Now that your plugin is configured, the next step is linking your specific Trello boards to your WordPress site. This connection is what enables your content and project management to work hand in hand. Let’s walk through the process together.
Step-by-step guide:
- Choose Your Trello Board: Log in to your Trello account and identify the board you want to connect. It could be a content calendar, a project board, or any other relevant workspace.
- Get the Board ID: To connect it with WordPress, you’ll need the unique Board ID. You can find this in the URL when you open the board—it’s the string of characters after “b/” in the URL. For example, in https://trello.com/b/abcdef123456/my-project-board, the ID is abcdef123456.
- Authorize the Connection: Return to your WordPress dashboard and the Trello plugin settings. Here, you’ll typically find an option to select or add a new board. Enter the Board ID or select the board from a dropdown list if available.
- Test the Connection: Most plugins provide a “Test” button—use this to verify that WordPress can successfully communicate with your Trello board. If everything is set up correctly, you’ll see a confirmation message.
- Configure Board-Specific Settings: Depending on your plugin, you might be able to specify which lists within the board to sync, assign specific labels, or set permissions for what can be created or updated from WordPress.
Once connected, you can start automating tasks like creating Trello cards from new WordPress posts, updating cards when posts are edited, or even displaying Trello board information directly on your website.
Remember, maintaining a clear structure—such as naming conventions and consistent board organization—will make managing your Trello-WP integration much easier in the long run. With your boards linked up, you’re well on your way to a more integrated, productive workflow that keeps your content and projects aligned effortlessly.
7. Managing Your Tasks and Projects Directly from WordPress
Once you’ve successfully integrated Trello with your WordPress site, you’ll find that managing your tasks and projects becomes much more streamlined. Instead of juggling between multiple tabs or switching back and forth between platforms, you can handle your project updates right from your WordPress dashboard. This not only saves you time but also helps keep your focus sharp.
Imagine this: You’re working on a blog post, and you realize you need to assign a task to your team. With the Trello plugin integrated, you can create a new Trello card directly from your WordPress admin area. No more logging into Trello separately! This seamless connection means you can quickly add, update, or move cards without interrupting your content management flow.
Here are some of the key ways you can manage your Trello boards from WordPress:
- Create new cards or checklists: Instantly add new tasks or sub-tasks as cards on your Trello boards.
- Edit existing cards: Update descriptions, move cards between lists, or change due dates—all from your WordPress admin panel.
- Track progress: Use visual indicators like labels or checklists to see at a glance how your project is progressing.
- Assign team members: Assign cards to team members directly if you have multiple collaborators, ensuring everyone knows what they need to do.
Additionally, many plugins offer dashboards or widgets that display your Trello boards right within WordPress. This means you can get an overview of your ongoing projects without leaving your site. It’s like having a mini project management hub right where you create and publish content.
Managing your projects from WordPress also encourages better collaboration. If you’re working with a team, you can set up notifications or updates that appear in your WordPress environment, keeping everyone on the same page. Plus, it simplifies your workflow—less switching between apps means less chance of missing important updates or deadlines.
In essence, integrating Trello with WordPress turns your website into a central command center for your content and project management. Whether you’re a solo blogger or part of a larger team, this setup helps keep your projects organized, accessible, and easy to manage—all from the comfort of your WordPress dashboard.
8. Tips for Optimizing Your Trello and WordPress Workflow
Now that your Trello and WordPress are working together smoothly, you’ll want to make sure your workflow is as efficient as possible. Here are some practical tips to help you get the most out of this integration and keep your projects running seamlessly:
1. Create Clear and Consistent Labels
Labels are a game-changer for visual project management. Use color-coded labels in Trello to categorize tasks—such as “Content,” “Design,” “SEO,” or “Urgent.” When these labels sync with your workflow, you can quickly identify the status or type of task at a glance, saving you time and reducing confusion.
2. Automate Routine Tasks
Leverage automation tools like Trello’s Butler or Zapier to set up automatic actions. For example, you can automatically move a card to a “Completed” list once you mark a checklist as done, or create a new WordPress draft when a Trello card reaches a certain stage. Automations reduce manual work and keep your workflow flowing smoothly.
3. Use Templates for Repetitive Projects
If you frequently work on similar content types or projects, save time by creating Trello card templates. You can duplicate these templates for each new project, ensuring consistency and completeness. When integrated with WordPress, this means you can quickly set up new content workflows without starting from scratch each time.
4. Schedule Regular Syncs and Reviews
Set aside time weekly or bi-weekly to review your Trello boards and WordPress content. This helps catch any overlooked tasks, update deadlines, and ensure all content aligns with your project goals. Keeping everything synchronized prevents bottlenecks and last-minute scrambles.
5. Use Clear Naming Conventions
Be consistent with how you name your Trello cards and WordPress posts. Clear, descriptive titles make it easier to find what you need quickly. For example, prefix tasks with project initials or labels—like “BlogPost: How to Integrate Trello with WordPress”—to keep things organized.
6. Leverage Notifications Wisely
Set up notifications in Trello and WordPress to alert you of important updates, but don’t go overboard. Too many alerts can be distracting. Focus on critical updates like approaching deadlines or completed tasks to stay informed without feeling overwhelmed.
7. Keep Your Boards and Content Organized
Maintain a clean and logical structure in Trello with clearly defined lists (e.g., Ideas, To Do, In Progress, Review, Done). Similarly, organize your WordPress content into categories and tags that mirror your Trello workflow. Consistency here makes managing both platforms much easier.
8. Regularly Backup Data
Ensure your Trello boards and WordPress content are backed up regularly. This safeguards against accidental data loss and gives you peace of mind as your projects grow. Use plugins or third-party tools to automate backups where possible.
By applying these tips, you’ll not only streamline your workflow but also enhance productivity and collaboration. Remember, the goal is to make your project management as intuitive and effortless as possible—so you can focus more on creating great content and less on juggling tools.
9. Troubleshooting Common Integration Issues
Integrating Trello with WordPress can be a game-changer for managing content and projects, but sometimes things don’t go as smoothly as you’d like. Don’t worry—many of the common issues have simple fixes. Here’s a quick guide to troubleshooting those pesky problems so you can get back to focusing on your workflow.
1. Authentication Errors: If your plugin isn’t connecting properly to Trello, double-check your API key and token. Make sure you’ve entered them correctly and that the token has the necessary permissions. Sometimes, regenerating your API token from Trello’s developer API page can resolve authorization issues.
2. API Rate Limits: Trello has rate limits to prevent abuse. If you see error messages related to exceeding these limits, wait a little while before trying again. To avoid hitting these limits, try to minimize the number of API calls your plugin makes, especially during bulk operations.
3. Plugin Compatibility Problems: Ensure your plugin is compatible with your current version of WordPress. Check for updates regularly, and read the plugin’s support forum or documentation for known issues. Sometimes, conflicts with other plugins or themes can cause problems—try disabling other plugins temporarily to identify conflicts.
4. Data Sync Issues: If your Trello cards aren’t showing up in WordPress or vice versa, verify that the correct board and list IDs are configured in the plugin settings. Also, check your internet connection and ensure the Trello service isn’t experiencing outages.
5. Unexpected Errors or Crashes: Clear your website’s cache and cookies. Sometimes, browser or server cache can interfere with the plugin’s functionality. Enable debugging mode in WordPress to see detailed error logs, which can help pinpoint the root cause.
6. Customization and Styling Problems: If the integration isn’t matching your site’s style, review the plugin’s styling options or add custom CSS to tweak the appearance. Remember to back up your site before making significant modifications.
By keeping these common issues in mind and following these tips, you can troubleshoot most problems effectively. If problems persist, don’t hesitate to reach out to the plugin’s support team or community forums—there’s often a simple fix waiting to be discovered!
10. Additional Resources for Enhancing Your Workflow
Integrating Trello with WordPress is just the beginning. To truly streamline your workflow and boost productivity, consider exploring these additional resources and tools. They can help you customize your setup, automate tasks, and learn best practices.
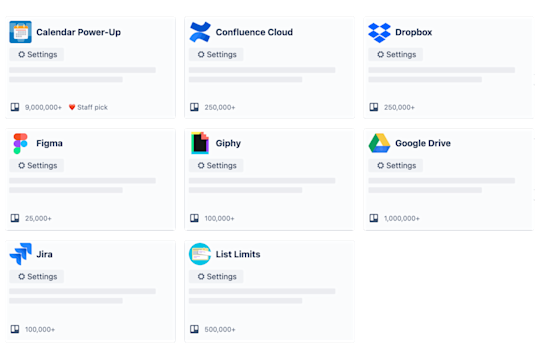
1. Trello Power-Ups and Integrations: Trello offers a variety of Power-Ups—addons that extend functionality. For example, you can connect Trello with Slack for real-time notifications, Google Drive for file sharing, or Calendar for scheduling. These integrations can complement your WordPress setup nicely.
2. Automation Tools: Automate repetitive tasks with tools like IFTTT or Zapier. For example, you can set up a workflow where a new WordPress post automatically creates a Trello card, keeping your team updated effortlessly.
3. WordPress Plugins for Workflow Enhancement: Besides the Trello plugin, explore other WordPress plugins like:
- WP Scheduled Posts – for managing editorial calendars
- Advanced Custom Fields – for customizing content types
- Yoast SEO – to optimize your content for search engines
4. Trello Templates and Resources: Save time by using Trello templates for project management, editorial calendars, or content planning. Check out Trello’s template gallery for ideas and starting points.
5. Online Courses and Tutorials: Educate yourself with courses from platforms like Udemy, Coursera, or LinkedIn Learning on Trello, WordPress, and automation. Video tutorials can provide step-by-step guidance and inspire new ways to work smarter.
6. Community Forums and Support: Join communities like the WordPress Support Forums, Trello Community, or Reddit’s r/WordPress and r/Trello. These platforms are goldmines for tips, troubleshooting help, and sharing your own insights.
By leveraging these resources, you can create a more efficient, automated, and organized workflow that makes managing your website and projects a breeze. Remember, the key to success is continuous learning and experimenting with new tools—so keep exploring and adapting your setup to fit your evolving needs!