If you’ve ever visited a website that took forever to load or saw images that looked blurry or stretched out, you know how frustrating slow-loading or poorly optimized images can be. On WordPress sites, images are a big part of the user experience—they make your content engaging and visually appealing. But if your images are too large, too small, or not optimized for the web, they can slow down your site, hurt your SEO, and turn visitors away. That’s why understanding the right image sizes for WordPress is essential. It’s all about finding that sweet spot—images that look great and load quickly, keeping your site snappy and your visitors happy.
Understanding Common WordPress Image Dimensions
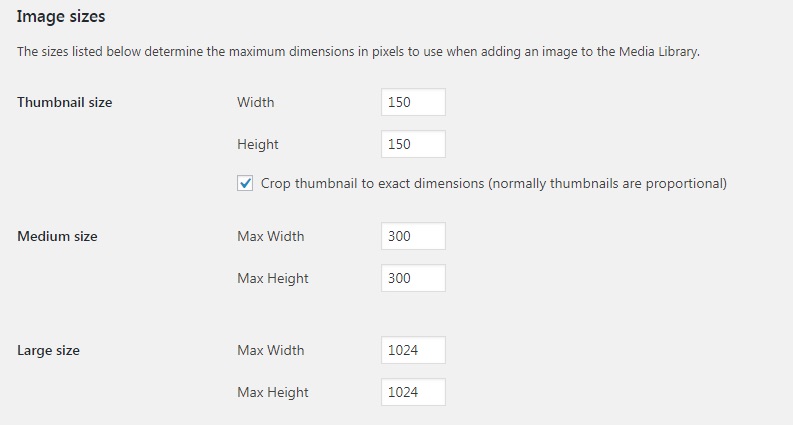
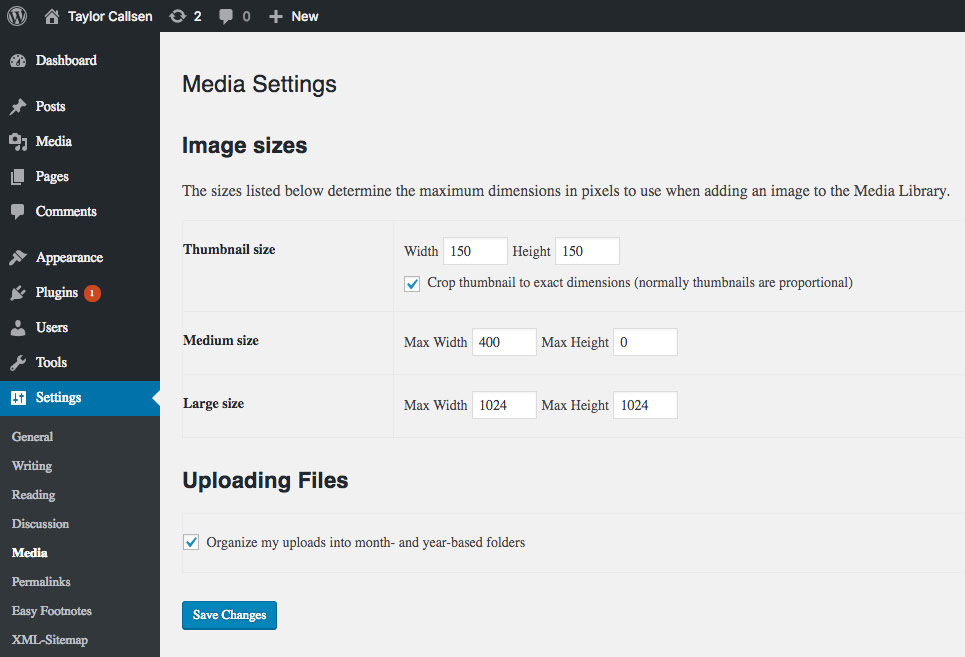
WordPress uses a variety of image sizes for different parts of your site, and knowing these can help you optimize your images effectively. Here’s a quick rundown of the most common dimensions you’ll encounter:
- Thumbnail: Usually 150×150 pixels. Used for small previews, widgets, or galleries.
- Medium: Default size is 300×300 pixels, but it can vary. Ideal for content within posts or pages where a larger image is needed but not full-width.
- Large: Typically 1024×1024 pixels. Suitable for larger images within your content that need more detail.
- Full Size: The original uploaded image. Can be very large, so it’s important to resize or crop as needed.
Beyond these default sizes, your theme might define additional custom sizes tailored to specific layouts or functionalities. For example, a full-width header might require an image of 1920 pixels wide, while a grid layout might need smaller, consistent image sizes. Understanding these common dimensions helps you prepare your images in advance, ensuring they fit perfectly without the need for excessive resizing or cropping later on.
Remember, size isn’t just about pixels—it’s also about file size. An image that’s 1920 pixels wide but saved in a highly compressed format can look great and load quickly. Conversely, an unoptimized large image can slow down your site. So, always aim for the right dimensions and optimal file sizes for the best results.
3. How to Choose the Right Image Size for Different Website Sections
When it comes to designing a website, not all images are created equal. The size you choose for your images can make a huge difference in how your site loads and how it looks. Different sections of your website have different needs, so understanding how to select the right image size for each part is key to maintaining a fast and visually appealing site.
Let’s break down some common website sections and what image sizes tend to work best:
- Header or Hero Image: This is often the first thing visitors see, so it needs to be clear and striking. Typically, a width of 1920 pixels is great for full-screen hero images on desktop. Keep the file size under 500 KB if possible to keep load times quick.
- Featured Images for Blog Posts: These usually display at smaller sizes, so an image around 1200 x 628 pixels (ideal for social sharing) works well. You can go a bit smaller for thumbnails, like 600 x 400 pixels.
- Content Images: For images embedded within your content, aim for widths that match the content area of your site. For most themes, 800-1000 pixels wide is sufficient. Always check your theme’s content width to avoid unnecessary large images.
- Sidebar or Small Widgets: These images are generally smaller, around 300-400 pixels wide. Keep their file size minimal so they don’t slow down the sidebar load times.
- Background Images: These can vary depending on design, but a common size is 1920 x 1080 pixels. Just ensure they are optimized to prevent slow loading.
Remember, a good rule of thumb is to always match your image dimensions to the display size on your website. Avoid uploading enormous images and then resizing them in CSS or HTML. Instead, resize the image beforehand to the correct dimensions. This way, you’re not wasting bandwidth on pixels that won’t be seen.
4. Tips for Compressing Images Without Losing Quality
Compressing images is an essential step in optimizing your website for speed, but it can be tricky to do without sacrificing too much quality. Luckily, there are several strategies and tools that help you strike the perfect balance.
Here are some practical tips for compressing your images effectively:
- Use Compression Tools: There are many free and paid tools designed specifically for image compression. Some popular options include:
- TinyPNG / TinyJPG
- ImageOptim (Mac)
- JPEGmini
- Compressor.io
- Choose the Right Format: Use JPEG for photographs and images with lots of colors. PNG works best for images with transparency or sharp lines. WebP is a newer format that offers excellent compression and quality, supported by most modern browsers.
- Adjust Compression Settings: When saving images, tweak the compression level. For JPEGs, a quality setting between 70-80% often provides a good balance. Avoid going below 60%, as it can introduce visible artifacts.
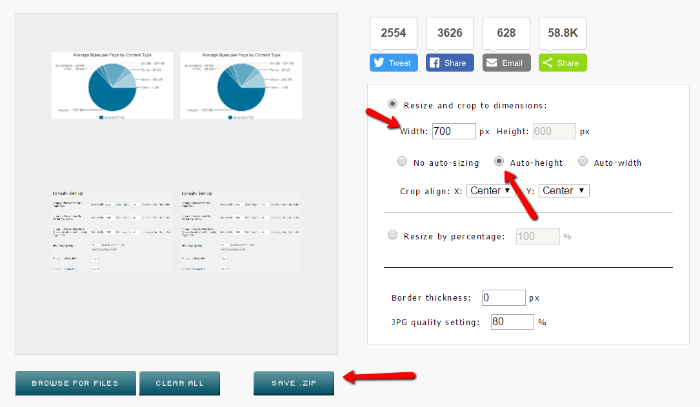
- Resize Before Compressing: Always resize your images to the maximum display size needed. Compressing a large image down to a smaller size is better than compressing a large image that will be scaled down in your website.
- Use Automated Plugins: If you’re on WordPress, plugins like WP Smush, ShortPixel, or Imagify can automatically compress images when you upload them. These tools often have bulk optimization features, saving you time.
- Test and Preview: After compression, always preview your images on your website to ensure they still look good. If you notice quality loss, adjust your compression settings accordingly.
By applying these tips, you’ll be able to significantly reduce your image file sizes without sacrificing visual appeal. Faster-loading pages lead to better user experience, improved SEO rankings, and ultimately, more visitors sticking around to explore your content.
5. Tools and Plugins to Optimize Images for Faster Loading
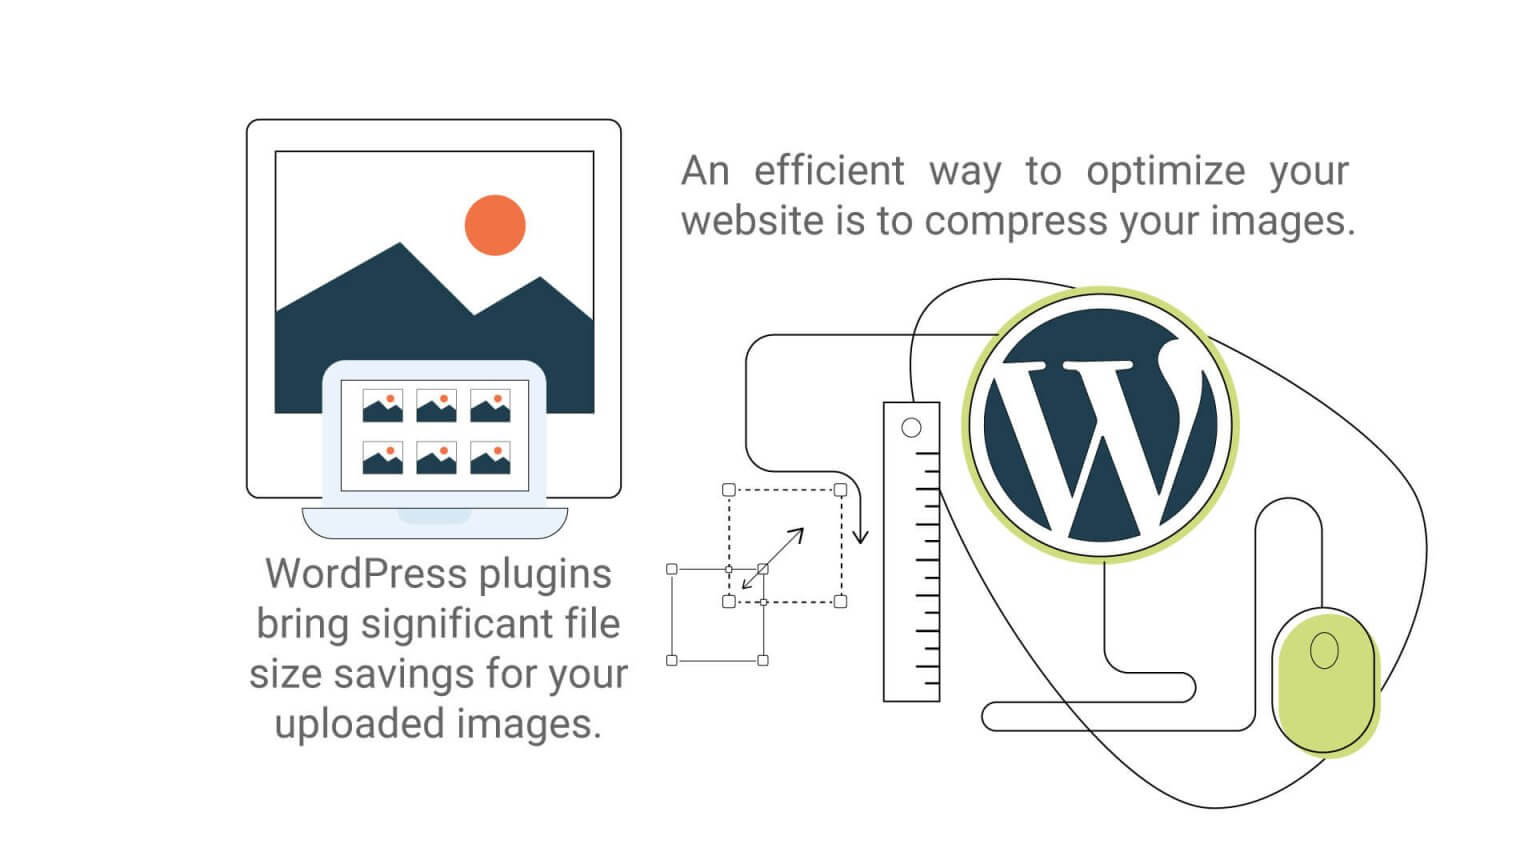
When it comes to making your WordPress site lightning-fast, optimizing your images is a game-changer. Luckily, there are plenty of tools and plugins designed specifically to help you do just that—without needing to be a tech whiz. Let’s explore some of the top options that can make your images smaller, smarter, and more efficient.
Popular Image Optimization Plugins
- Smush – This user-friendly plugin automatically compresses images on upload and can bulk optimize your existing images. It’s great for beginners and offers options for lazy loading, which delays loading images until they’re needed on the screen.
- EWWW Image Optimizer – Supports lossless and lossy compression, and works well with various image formats. It also offers a CDN (Content Delivery Network) integration for even faster delivery.
- ShortPixel – Known for high-quality compression with minimal quality loss. It supports WebP images, which are excellent for reducing size without sacrificing visual appeal.
- Imagify – Offers different compression levels, so you can choose the balance between quality and size. It’s especially handy if you’re dealing with a large number of images.
How These Tools Help
These plugins do more than just compress images; they often offer features like lazy loading, WebP conversion, and even bulk optimization—saving you time and effort. Plus, many of them have free tiers, so you can test them out without a financial commitment. Remember, the goal is to reduce file sizes as much as possible while keeping your images looking sharp and appealing.
Using External Tools
If you prefer working outside of WordPress, there are excellent standalone tools like TinyPNG, ImageOptim, or JPEGmini. You can optimize your images before uploading them, which keeps your site running smoothly. Just upload your images to these tools, download the optimized versions, and then upload to your WordPress media library.
Pro Tip:
Always backup your images before bulk optimizing, especially if you’re working with a large library. It’s better to be safe and have original copies just in case you want to revert to the high-quality versions later.
6. Best Practices for Uploading and Managing Images on WordPress
Optimizing images is just one part of the puzzle. How you upload, organize, and manage your images on WordPress also plays a vital role in ensuring your website loads quickly and stays easy to handle. Here are some best practices to keep in mind:
1. Upload Images at the Correct Size
Resizing images to the dimensions you actually need before uploading prevents unnecessary bloat. For example, if your blog post displays images at 800px wide, upload images around that size rather than large files that will be scaled down in the browser.
2. Use Descriptive Filenames and Alt Text
Give your images clear, descriptive filenames (like sunset-beach-hawaii.jpg) and include relevant alt text. This not only helps with SEO but also ensures your images are accessible to all visitors.
3. Organize Your Media Library
Keep your media library tidy by creating folders or categories for different types of images—like “Blog Headers,” “Product Photos,” or “Icons.” This makes it easier to find what you need and reduces the risk of uploading duplicates.
4. Use Lazy Loading
Lazy loading delays loading images until they’re visible on the user’s screen. Many optimization plugins include this feature, but you can also enable it manually or via your theme. This significantly improves initial load times, especially on pages with lots of images.
5. Regularly Audit and Remove Unused Images
Over time, your media library can get cluttered with images you no longer need. Regularly review and delete unused images to keep your library lean. Not only does this save storage space, but it also helps your website load faster.
6. Consider Using a Content Delivery Network (CDN)
A CDN distributes your images across multiple servers worldwide, reducing latency and speeding up load times regardless of where your visitors are located. Many plugins support CDN integration, making setup straightforward.
By combining these best practices with the right tools and plugins, you’ll ensure your images are optimized for speed and manageability. The result? A faster, more efficient website that keeps visitors happy and engaged.
Conclusion and Final Tips for Maintaining Fast-Loading WordPress Sites
Ensuring your WordPress website loads quickly is essential for providing a great user experience and improving your search engine rankings. To achieve optimal performance, focus on using appropriately sized images, optimizing your code, and leveraging caching techniques. Regularly reviewing your site’s performance and making necessary adjustments can help maintain fast loading times over time.
Here are some final tips to keep your WordPress site running smoothly:
- Consistently optimize images: Use tools like TinyPNG or ImageOptim to compress images without losing quality before uploading.
- Choose a lightweight theme: Opt for themes that are optimized for speed and avoid heavy features you don’t need.
- Utilize caching plugins: Plugins like W3 Total Cache or WP Super Cache can significantly reduce load times.
- Implement a Content Delivery Network (CDN): Distribute your content across multiple servers worldwide to improve load times for international visitors.
- Regularly update plugins and themes: Keep your site secure and optimized by maintaining the latest versions.
- Monitor site performance: Use tools like Google PageSpeed Insights or GTmetrix to identify and fix speed bottlenecks.
By adhering to these best practices and remaining vigilant about your site’s performance, you’ll ensure a faster, more user-friendly WordPress website that can handle growth and deliver content efficiently. Consistent maintenance and optimization are key to sustaining optimal loading speeds over time.
- Use Compression Tools: There are many free and paid tools designed specifically for image compression. Some popular options include: