If you’ve been running a WordPress site and noticed that your pages sometimes take too long to load or even timeout, you’re not alone. One common culprit behind such issues is the PHP max execution time — a setting that controls how long your server allows a script to run before stopping it. Luckily, adjusting this setting can often resolve performance hiccups and make your website run smoother. In this guide, we’ll walk through what PHP max execution time is, why it matters, and how you can easily tweak it to boost your WordPress site’s performance.
What Is PHP Max Execution Time and Why Is It Important?
Think of PHP max execution time as the time limit your server sets for how long a PHP script (like loading a page or running a plugin) can run before it gets cut off. By default, many servers set this limit to around 30 seconds, but depending on what you’re doing—like importing large data, running complex plugins, or updating themes—this might not be enough.
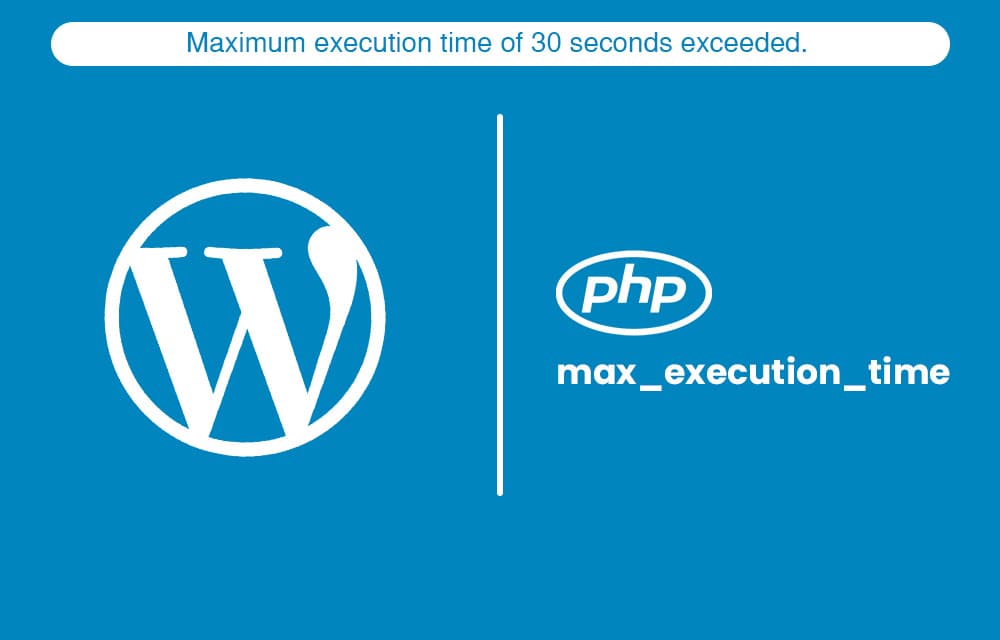
Why does this matter? Well, if your scripts hit that limit, they get terminated prematurely, leading to errors such as “504 Gateway Timeout” or incomplete processes. This can frustrate visitors and prevent certain functions from working properly. For example, if you’re trying to import a huge WooCommerce product list or back up your site, a too-low execution time can cause the process to stop midway, leaving you with incomplete data and wasted effort.
Adjusting the PHP max execution time gives your scripts a little extra breathing room, reducing the chances of timeouts and errors. It’s especially helpful when performing resource-heavy tasks or troubleshooting issues related to timeouts. However, it’s important to set it thoughtfully—setting it too high might hide underlying server issues, while setting it too low can hinder your site’s more demanding operations.
In short, understanding and managing this setting helps ensure your WordPress website runs smoothly, even during intensive tasks. It’s a simple tweak that can make a big difference in your site’s performance and reliability.
3. Signs That Your WordPress Site Needs a Higher PHP Max Execution Time
Have you ever tried to upload a large file, install a big plugin, or run a complex operation on your WordPress site, only to see it fail or hang? These are common signs that your PHP Max Execution Time might be too low. Essentially, this setting controls how long your server will allow a script to run before it terminates it to prevent server overload.
Here are some typical signs indicating that your site might need a higher PHP Max Execution Time:
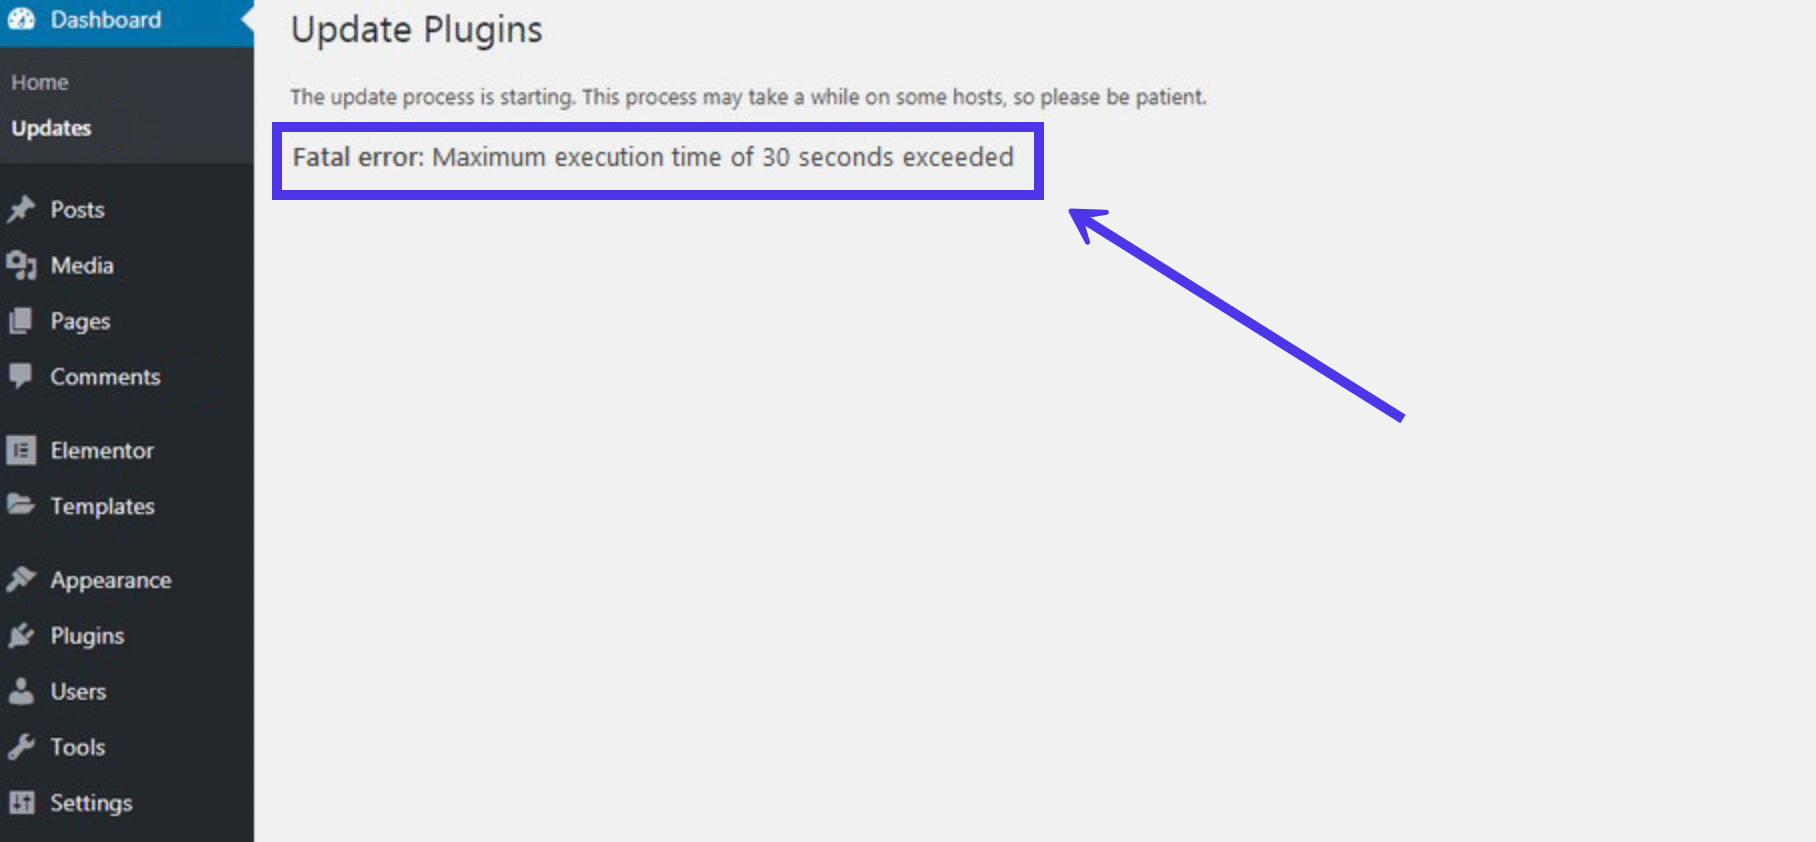
- Timeout errors during uploads or installations: When uploading large images, videos, or plugin files, you might see error messages like “Maximum execution time exceeded.”
- Slow or incomplete plugin or theme updates: If updates take forever or don’t complete, it could be because scripts are timing out.
- Server timeout notices: Your hosting provider or server logs may show timeout errors, indicating scripts are exceeding the allowed execution limit.
- Site performance issues with large data processing: When running tasks like importing/exporting data, or running complex plugins, a low execution time can cause failures or incomplete operations.
It’s important to remember that a low execution time isn’t always the root cause; sometimes, poorly optimized code or server issues contribute. But if you’re frequently facing these issues during legitimate, resource-heavy tasks, increasing the PHP Max Execution Time can often help smooth out your workflow.
Keep in mind that setting it too high might have security or server stability implications, so make adjustments carefully and monitor your site after changes.
4. How to Locate the PHP Max Execution Time Setting in WordPress
Finding where this setting lives can feel a bit tricky, especially because it’s a server-level configuration, not always directly adjustable from WordPress itself. But don’t worry — there are several methods to locate and view the PHP Max Execution Time, depending on your hosting environment.
Here are some common ways to locate this setting:
1. Using a PHP Info File
This is one of the simplest ways to see all your PHP configurations, including Max Execution Time:
- Create a new file named
phpinfo.phpin your WordPress root directory. - Edit the file and add the following code:
<?phpphpinfo();?>This method gives you a comprehensive look at your PHP configuration, including other limits like upload size and memory limits.
2. Checking via cPanel or Hosting Dashboard
If you’re using a hosting provider with cPanel or a similar dashboard, you can often locate PHP settings there:
- Login to your hosting account.
- Navigate to the PHP Configuration or PHP Selector section.
- Look for a setting named max_execution_time or similar.
- Note the current value, which is usually set in seconds.
Some hosts allow you to modify this directly from the interface, making adjustments straightforward.
3. Using a WordPress Plugin
There are plugins designed to display and sometimes modify PHP settings directly from your WordPress dashboard:
- PHP Info & Status
- Health Check & Troubleshooting
- WP Server Info
After installing one, navigate to its info page to find the Max Execution Time and other server parameters.
4. Editing the php.ini or .htaccess Files
If you have access to your server’s root files:
- php.ini: Look for or add the line
max_execution_time = 300(value in seconds). - .htaccess: Add or modify this line:
php_value max_execution_time 300.
Note: Changes here depend on server configuration and may require restart or may not be permitted on shared hosting.
In summary, locating the PHP Max Execution Time depends on your hosting environment and access level. Starting with a PHP info file is usually the most straightforward method for most users. Once you know the current value, you can decide if an adjustment is necessary to improve your site’s performance during heavy tasks.
5. How to Increase the PHP Max Execution Time in WordPress
If you’ve ever encountered a message saying your website timed out or a script took too long to run, it’s likely due to the PHP max execution time setting being too low. Luckily, increasing this limit can help your site run smoother, especially if you’re dealing with resource-intensive plugins, large imports, or complex themes.
There are several ways you can bump up the PHP max execution time in WordPress, and the best method often depends on your hosting setup. Let’s walk through the most common options:
1. Using php.ini File
This is the most direct way if you have access to your server’s configuration files.
- Locate your php.ini file. It’s usually in your server’s root directory or a folder named after your PHP version.
- Open the file and find the line that says
max_execution_time = 30(or a different number). - Change the value to your preferred limit, like
300for 5 minutes. - Save the file and restart your web server to apply changes.
Note: Not all hosting environments allow direct editing of php.ini, especially on shared hosting.
2. Modifying .htaccess File
If you don’t have access to php.ini, your next best option is to add a line to your .htaccess file, located in your WordPress root directory.
php_value max_execution_time 300Just add this line at the end of your .htaccess file. Be cautious—mistakes here can cause server errors. Always back up your file before editing.
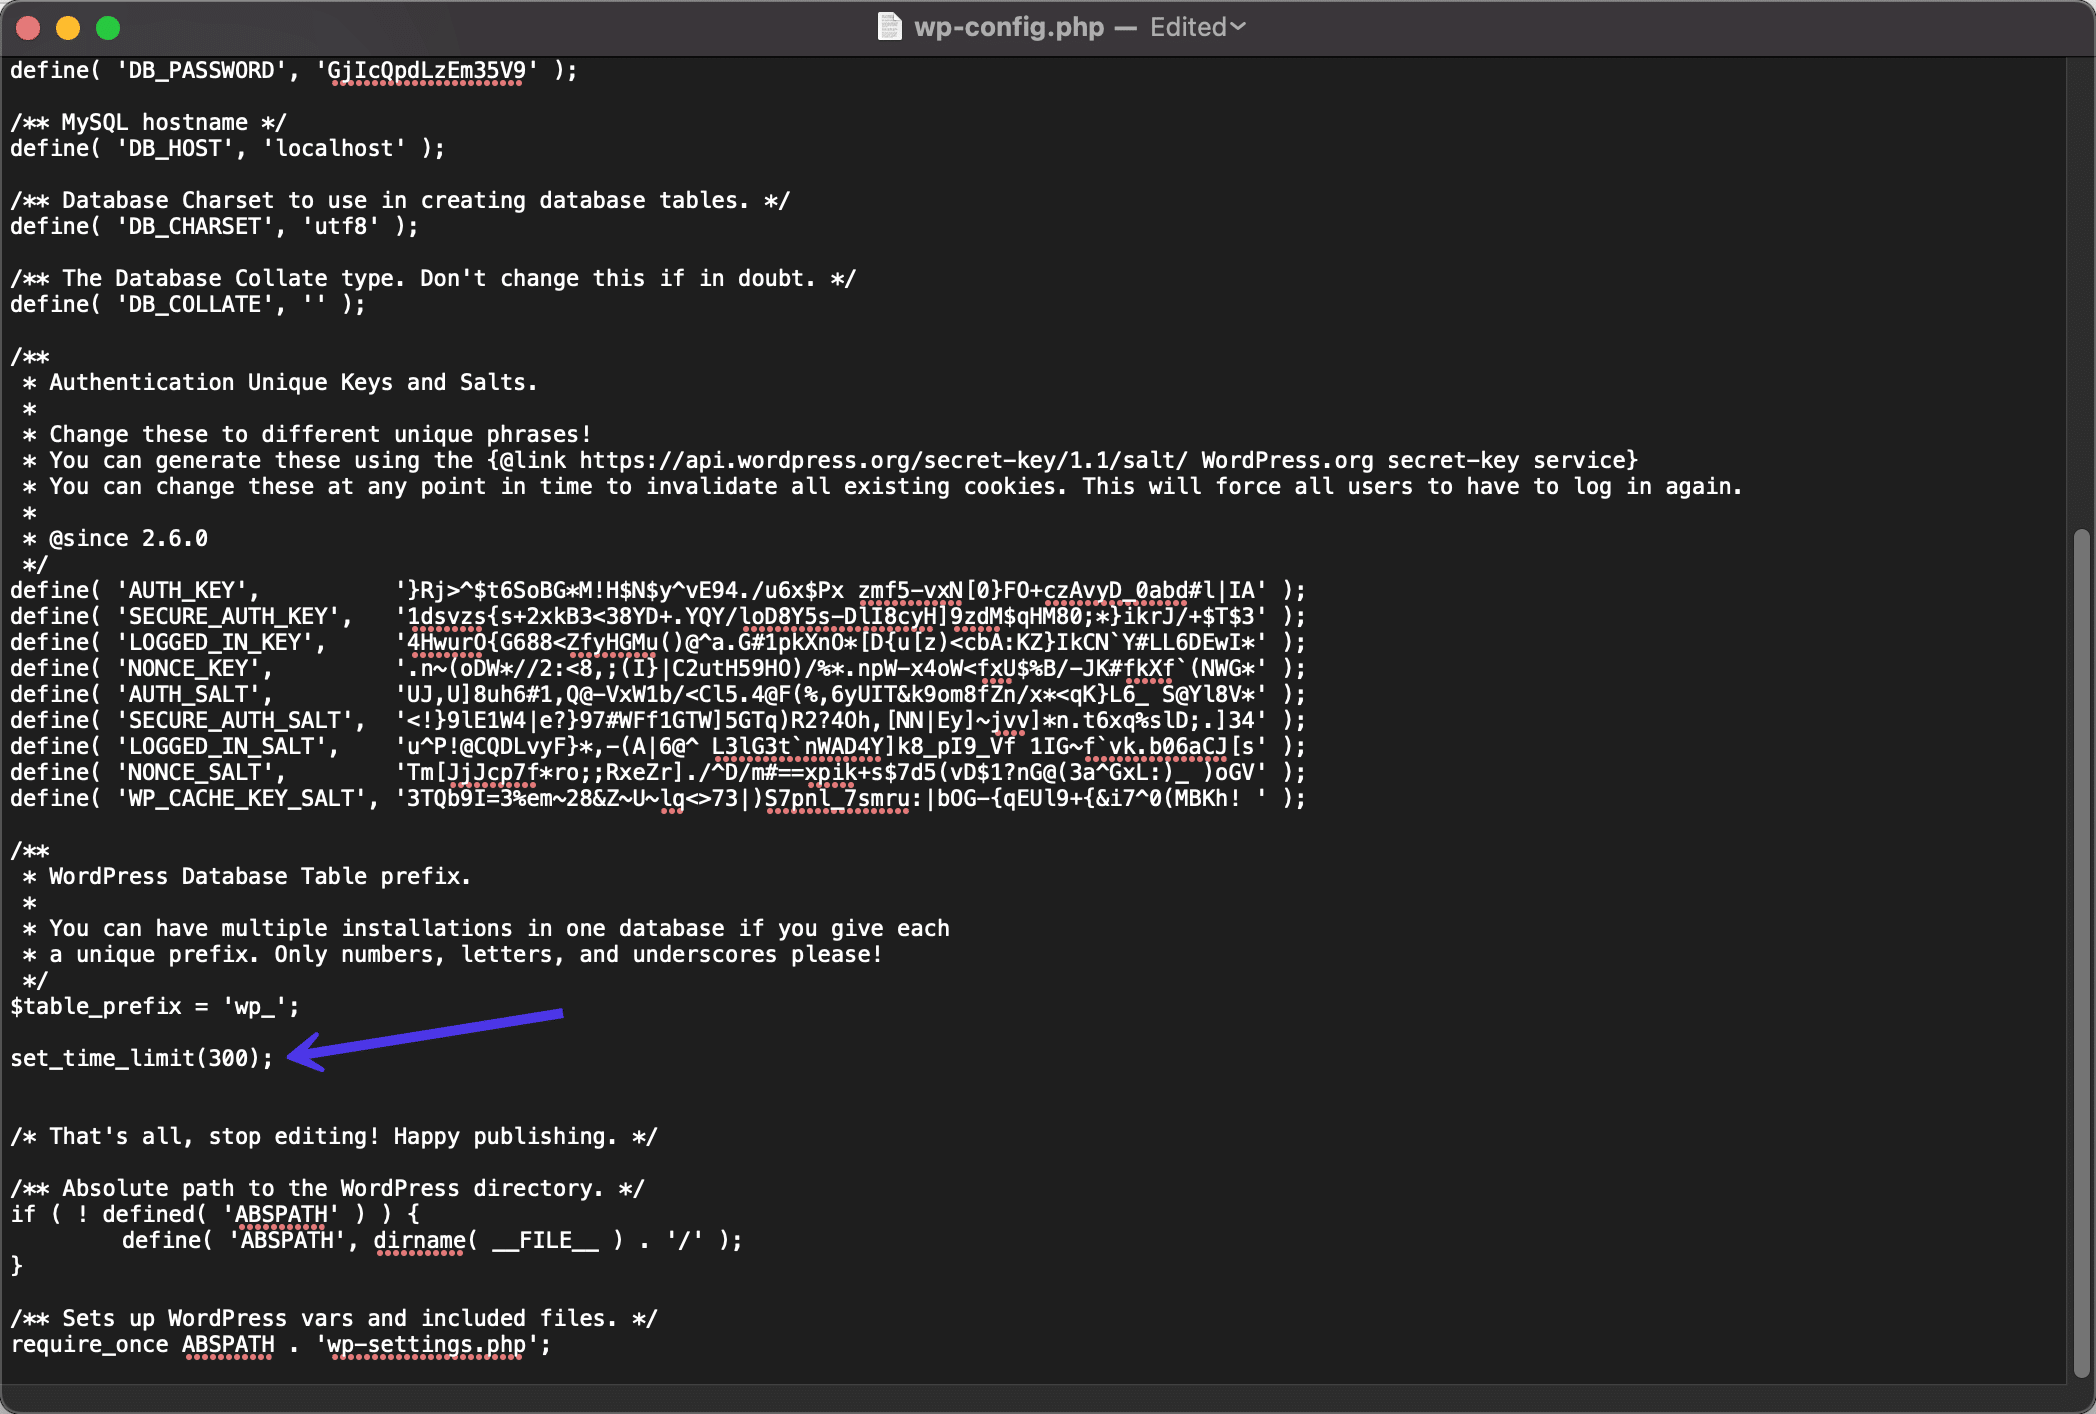
3. Using wp-config.php
Sometimes, you can define the maximum execution time directly in your wp-config.php file.
set_time_limit(300);Add this line somewhere before the line that says / That's all, stop editing! Happy blogging. /. Keep in mind, this method may not work on all hosting setups, especially if PHP’s configuration disables changing the execution time at runtime.
4. Contacting Your Hosting Provider
If you’re unsure or uncomfortable editing files, or if your changes don’t take effect, reach out to your hosting support. They can often increase the limit for you or guide you through their specific process.
Important Reminder:
While increasing the PHP max execution time can help avoid timeouts, it’s essential not to set it too high. A very long limit might hide underlying performance issues or cause other server problems. The goal is to find a balance that allows your site to run necessary tasks without masking inefficiencies.
6. Best Practices for Setting PHP Max Execution Time
Adjusting the PHP max execution time isn’t just about making your site work — it’s about doing it smartly. Here are some best practices to keep in mind:
1. Start Small and Gradually Increase
- Begin with a modest increase, such as 60 or 120 seconds.
- Test your site after each change to see if issues resolve.
- Only increase further if necessary, avoiding setting the limit unnecessarily high.
2. Consider the Nature of Your Website
For small blogs or sites with minimal plugins, a standard 30-second limit might suffice. But if you’re running large e-commerce stores, complex data imports, or custom scripts, higher limits (like 300 seconds or more) might be justified.
3. Optimize Your Scripts and Plugins
Sometimes, long execution times are a sign of inefficient code or poorly optimized plugins. Before increasing the limit, consider:
- Deactivating unnecessary plugins
- Optimizing database queries
- Breaking large tasks into smaller chunks
Improving code efficiency can often reduce the need to increase execution time, leading to better overall performance.
4. Monitor Your Server and Site Performance
Keep an eye on your server logs and website analytics. Unexpected timeouts or performance drops might indicate that increasing the execution time isn’t enough, and deeper optimization or upgrading your hosting plan may be needed.
5. Avoid Setting It Too High
While it might be tempting to set a very high limit to prevent errors, excessively high values can mask underlying problems and cause server resource exhaustion. Aim for a reasonable value that supports your site’s needs without encouraging poor performance practices.
6. Document Your Changes
Keep track of any modifications you make to PHP settings. This helps when troubleshooting issues or updating your hosting environment later on.
In summary, setting the right PHP max execution time is about balance. Increase it enough to let your site handle necessary tasks smoothly, but not so high that it masks performance issues or strains server resources. With a cautious approach and ongoing monitoring, you’ll ensure your WordPress site stays fast, reliable, and efficient.
Conclusion
Optimizing the PHP maximum execution time is a crucial step in enhancing your WordPress website’s performance and reliability. By understanding how to find and adjust this setting, you can prevent timeouts during resource-intensive processes such as plugin updates, backups, or large file uploads. Remember that the default value may not always suit your site’s specific needs, especially if you run complex or high-traffic websites. To effectively manage this, consider the following best practices:
- Monitor your site’s performance regularly to identify tasks that require longer execution times.
- Adjust the max execution time cautiously to avoid server overloads or potential security issues.
- Use a combination of methods such as editing php.ini, wp-config.php, or .htaccess files, depending on your hosting environment.
- Consult your hosting provider if you’re unsure about making changes or if restrictions are in place.
By carefully setting the PHP max execution time, you ensure smoother operations and reduce the likelihood of errors that can hinder your site’s performance. Always back up your configurations before making adjustments and test changes in a staging environment if possible. With these practices, you’ll keep your WordPress site running efficiently and provide a better experience for your visitors.