If you’ve ever navigated your WordPress admin dashboard and noticed a blank or stuck screen, you know how frustrating it can be. Loading indicators are visual cues that tell you the page is working on loading your content, so you’re not left wondering if something’s wrong. They come in various forms—spinners, progress bars, or simple messages—and can significantly improve the user experience. Whether you’re a developer or a site owner, understanding how to add a loading indicator ensures your admin pages feel smooth and professional. Let’s dive into what these indicators are and how they can help your WordPress site run more seamlessly.
Why You Should Use a Loading Indicator in WordPress Admin
Using a loading indicator in your WordPress admin isn’t just about aesthetics—it’s about enhancing usability and trust. When you perform actions like updating plugins, saving settings, or loading complex pages, sometimes there’s a delay. Without a visual cue, users might think the site has frozen or that their action didn’t go through. That’s where a loading indicator shines. It reassures users that their request is being processed, reducing confusion and frustration. Moreover, if you manage multiple clients or a busy admin dashboard, these indicators can improve workflow efficiency by clearly showing when a process is underway. Another key reason is that loading indicators can help prevent repeated clicks or submissions—people might click multiple times if they don’t see immediate feedback, which can cause errors or duplicate actions. By adding a simple, clear indicator, you guide users smoothly through their tasks, making your WordPress admin experience more polished and user-friendly. Ultimately, a small addition like a loading spinner or progress bar can make your admin interface feel more responsive and professional, encouraging better engagement and satisfaction from users or clients.
3. Methods to Add a Loading Indicator to Your WordPress Admin Page
Adding a loading indicator to your WordPress admin area can really improve the user experience, especially if you have pages or actions that take a bit longer to load. There are a few common methods to do this, and each has its own pros and cons. Let’s walk through the most popular approaches.
Method 1: Custom JavaScript and CSS
This method involves adding some custom code to your theme or a site-specific plugin. You’ll enqueue a JavaScript file that listens for page loads or AJAX requests and then displays a loading spinner or overlay until everything’s ready.
- Step 1: Create a JavaScript file that shows a loading indicator when an admin page starts loading and hides it once the page is fully loaded.
- Step 2: Enqueue this script in your admin area using the
admin_enqueue_scriptshook. - Step 3: Add some CSS to style the loading indicator, such as a spinner or overlay.
This method is flexible and allows you to customize the indicator’s appearance and behavior exactly as you want. However, it requires some coding knowledge and careful implementation to avoid conflicts.
Method 2: Hook into WordPress Admin Actions
WordPress provides hooks like admin_notices, admin_footer, and admin_init that you can leverage to display a loading indicator at specific points. For example, you can add an overlay at the top of every admin page and hide it once the page’s scripts have finished loading.
This approach is more straightforward if you’re comfortable with PHP and can add code snippets directly into your theme’s functions.php or a custom plugin. It’s a good choice if you want a simple, universal loading indicator without much customization.
Method 3: Using AJAX Events
Sometimes, your admin pages load data asynchronously via AJAX, and in those cases, you can tie your loading indicator to AJAX events. WordPress has JavaScript hooks and events that you can listen for, such as ajaxStart and ajaxStop.
This method is particularly handy if your admin interface relies heavily on AJAX, like custom dashboards or plugins. It ensures the indicator shows only when actual data is loading, making the UI feel responsive and polished.
4. Using Plugins to Implement a Loading Indicator
If coding isn’t your thing or you want a quick, hassle-free way to add a loading indicator, there are plenty of WordPress plugins that can do the job for you. Here are some popular options:
| Plugin Name | Description | Ease of Use | Notes |
|---|---|---|---|
| Admin Loading Screen | Provides a customizable loading screen for your admin area, including spinners, progress bars, and background images. | Easy | Good for branding and visual effects. Limited customization for behavior. |
| WP Admin Loader | Adds a loading overlay with animated icons when admin pages are loading. | Very Easy | Minimal setup, just install and activate. |
| Loading Indicator for WordPress Admin | This plugin injects a loading spinner on admin page loads and AJAX requests. | Easy | Focuses on AJAX-heavy pages, great for custom dashboards. |
Using plugins is often the fastest way to add a loading indicator without touching any code. Just search for the plugin in your WordPress admin, install, activate, and configure the settings if needed. Many plugins also let you customize the appearance, so you can match it to your site’s branding.
When choosing a plugin, consider:
- Compatibility with your WordPress version
- Whether it offers the customization options you want
- Reviews and ratings from other users
In summary, whether you prefer a custom-coded solution or a plugin, adding a loading indicator can make your admin experience feel smoother, especially if your site has complex or slow-loading pages. Pick the method that fits your skill level and needs, and you’ll be well on your way to a more polished admin interface!
5. Customizing the Loading Indicator with CSS and JavaScript
Once you’ve added a basic loading indicator to your WordPress admin page, you might want to make it stand out or match your site’s branding. Customizing the look and feel of the spinner or overlay is pretty straightforward, thanks to CSS and a bit of JavaScript.
First, let’s talk about CSS. You can style the loading overlay and spinner to match your design. For example, change colors, sizes, or add animations. Here’s a simple example of customizing a spinner:
/ Style the overlay background /custom-loading-overlay { position: fixed; top: 0; left: 0; width: 100%; height: 100%; background-color: rgba(34, 34, 34, 0.7); / semi-transparent dark background / display: flex; align-items: center; justify-content: center; z-index: 9999;}/ Style the spinner itself /custom-loading-spinner { border: 8px solid f3f3f3; / Light grey / border-top: 8px solid 3498db; / Blue / border-radius: 50%; width: 60px; height: 60px; animation: spin 1s linear infinite;}/ Spin animation /@keyframes spin { 0% { transform: rotate(0deg); } 100% { transform: rotate(360deg); }}This CSS creates a circular spinner with a nice spinning animation. To add this to your admin page, you can enqueue a custom stylesheet or add inline styles within your plugin or theme.
Next, you’ll need to control when this loading indicator appears and disappears using JavaScript. Here’s a simple script to toggle the overlay:
// Show the loading indicatorfunction showLoading() { document.getElementById('custom-loading-overlay').style.display = 'flex';}// Hide the loading indicatorfunction hideLoading() { document.getElementById('custom-loading-overlay').style.display = 'none';}// Example: Show loading when an AJAX request startsjQuery(document).on('ajaxStart', function() { showLoading();}).on('ajaxStop', function() { hideLoading();});Alternatively, if you’re not using jQuery, you can manage the overlay with vanilla JavaScript events. Just ensure you call showLoading() before a process begins and hideLoading() once it’s finished.
By combining these CSS styles and JavaScript controls, you can create a fully customized, branded loading indicator that enhances your admin interface’s professionalism and user experience.
6. Best Practices for Effective Loading Indicators
Adding a loading indicator is a fantastic way to improve user interaction, but it’s important to do it right. Here are some best practices to ensure your loading indicators are helpful rather than distracting:
1. Keep It Simple and Clear
Your loading indicator should communicate that something is happening without overwhelming the user. Use simple spinners, progress bars, or subtle overlays. Avoid overly flashy or complex animations that can be distracting or confusing.
2. Make It Visible but Non-Intrusive
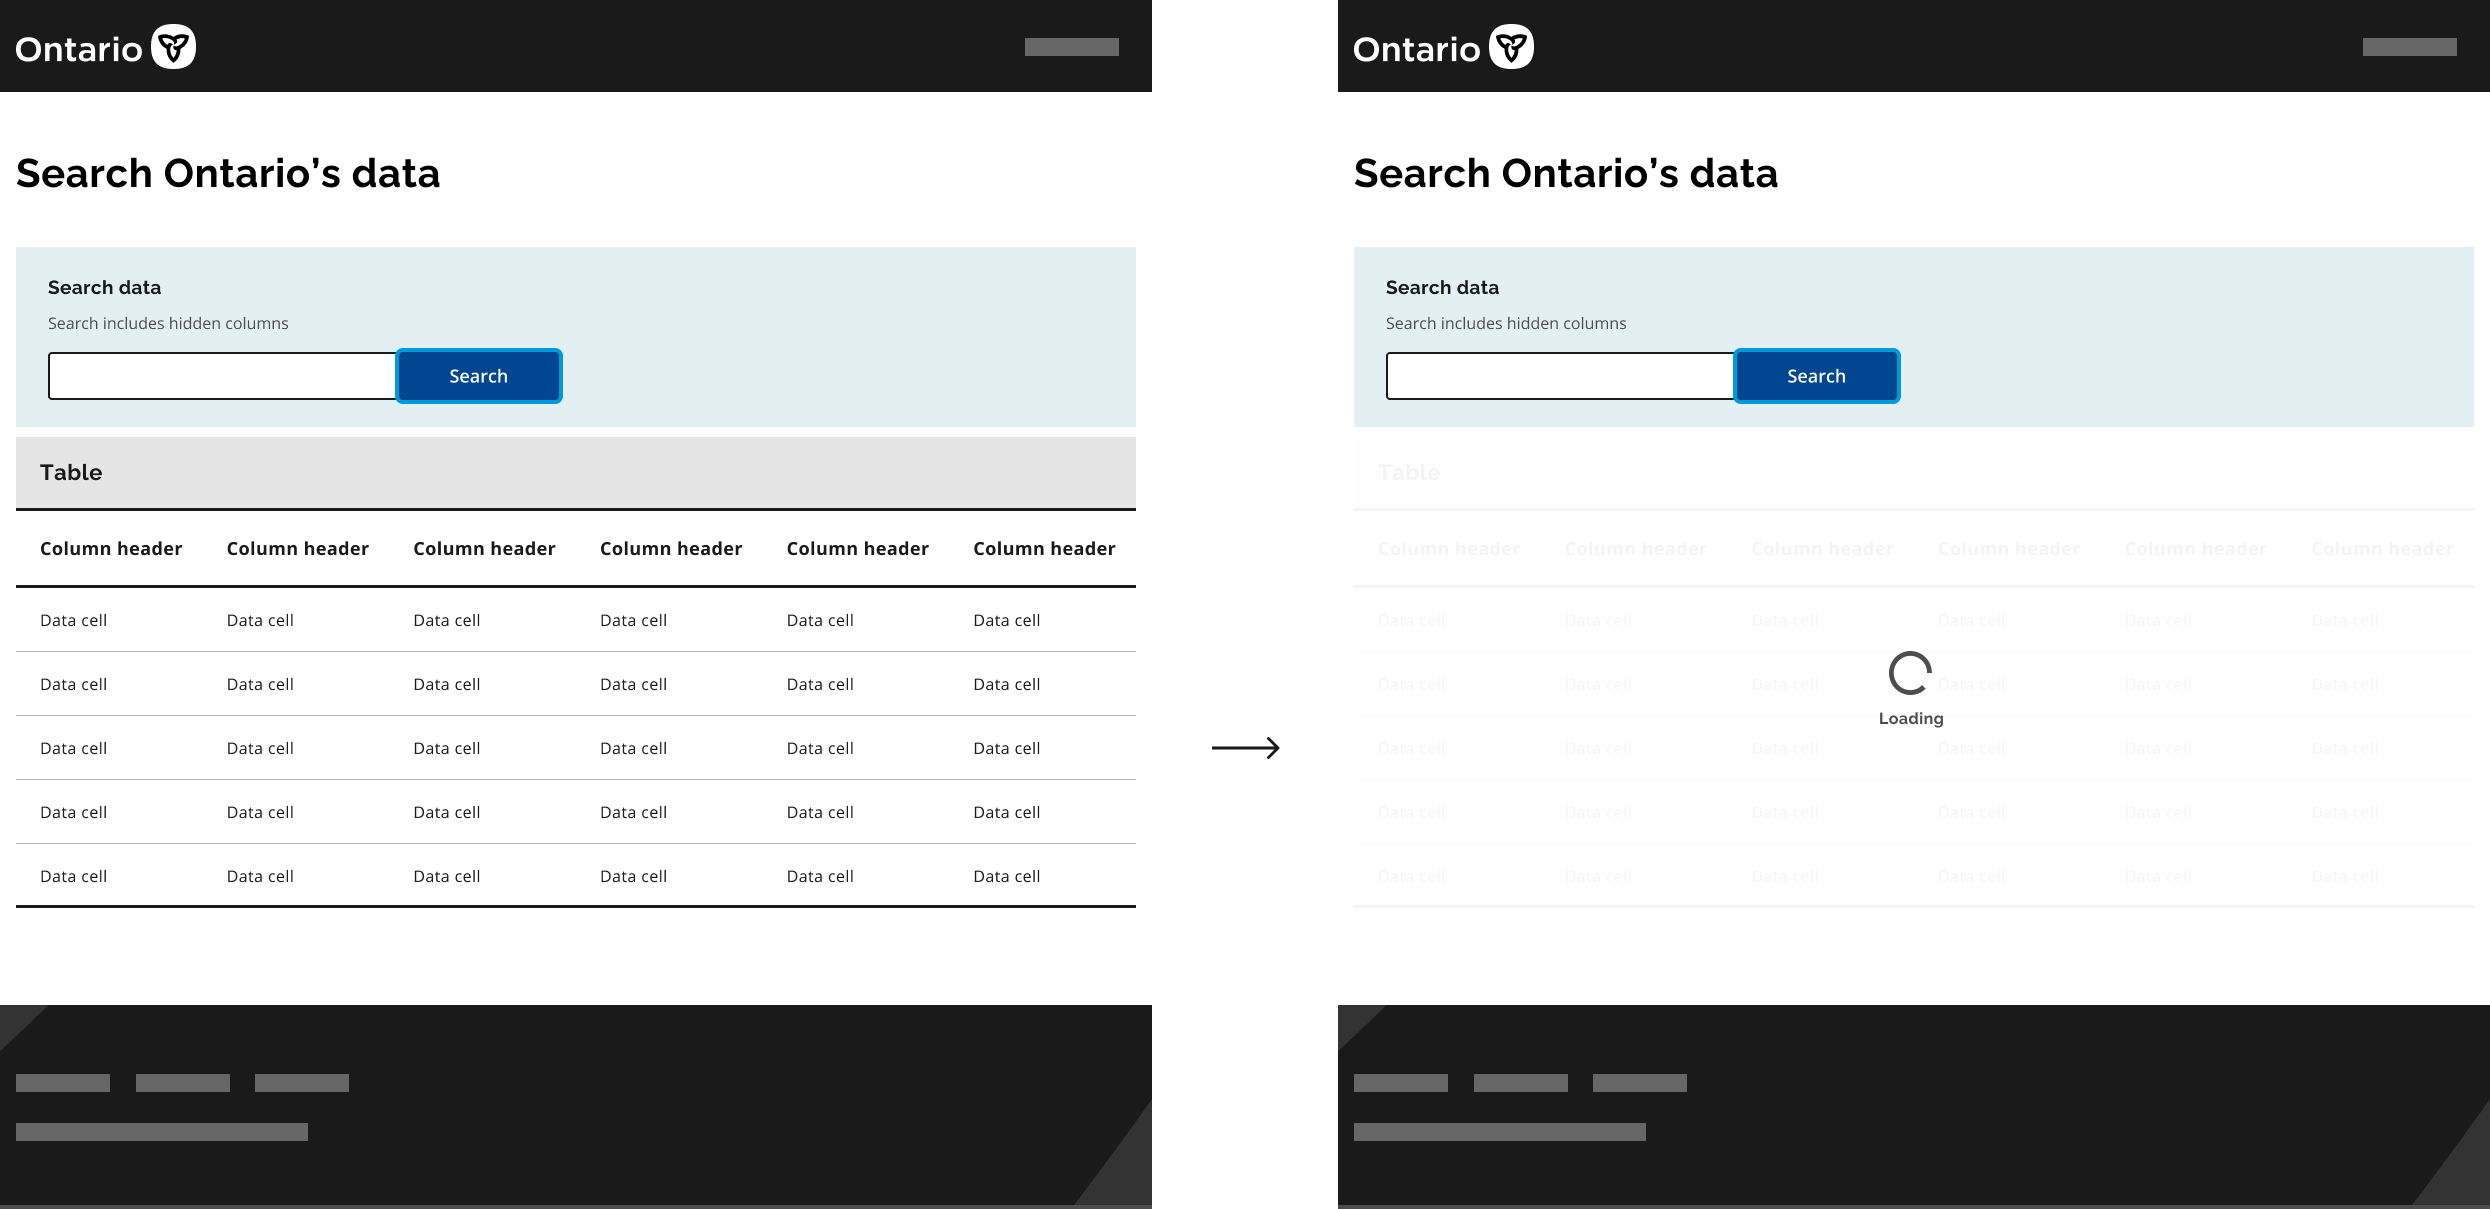
The indicator should be noticeable enough that users understand their action is being processed. However, it shouldn’t block the interface entirely or linger too long. Use transparency and positioning wisely—usually centered overlays work well.
3. Provide Feedback on Progress When Possible
If you can estimate how long a process will take, a progress bar can be more reassuring than a spinner. Users appreciate knowing how much longer they need to wait. For example:
| Type | When to Use | Example |
|---|---|---|
| Spinner | Indeterminate processes with unpredictable duration | Loading data from an external API |
| Progress Bar | Processes with known duration or steps | Uploading files or exporting data |
4. Minimize Waiting Time
The best loading indicators are paired with fast, optimized processes. If a task takes too long, consider breaking it into smaller chunks or providing alternative options to keep users engaged.
5. Hide the Indicator Promptly
Don’t leave the loading indicator on longer than necessary. Once the process completes, remove it immediately to avoid confusion or frustration.
6. Test Across Devices and Browsers
Ensure your loading indicators look good and function smoothly on different screen sizes and browsers. Consistency in appearance and performance helps maintain a professional look.
7. Accessibility Matters
Make sure your indicators are accessible. For example, include ARIA labels or roles so screen readers can inform users about ongoing processes. A simple example:
<div id="custom-loading-overlay" role="status" aria-busy="true" aria-label="Loading...">This way, users relying on assistive technologies are also kept informed.
In summary, effective loading indicators are a mix of good design, clear communication, and smooth performance. When implemented thoughtfully, they can significantly enhance the user experience in your WordPress admin area, making interactions feel more polished and professional.
Conclusion and Additional Tips for Optimizing WordPress Admin Performance
Adding a loading indicator to your WordPress admin page enhances user experience by providing clear feedback during processing times. It helps prevent confusion and ensures users understand when actions are being executed in the background. To maximize the effectiveness of your loading indicator, consider the following additional tips:
- Optimize Plugins and Themes: Regularly review and deactivate unnecessary plugins. Use lightweight themes to reduce load times.
- Implement Caching: Utilize caching plugins like W3 Total Cache or WP Super Cache to decrease server response times.
- Upgrade Hosting: Choose a hosting provider that offers better server resources and optimized environments for WordPress.
- Minify Scripts and Styles: Compress JavaScript and CSS files to reduce their size and improve page load speeds.
- Monitor Performance: Use tools like Google PageSpeed Insights or GTmetrix to identify bottlenecks and areas for improvement.
By combining these strategies with a well-implemented loading indicator, you can significantly enhance your WordPress admin’s responsiveness and overall user satisfaction. Regular maintenance and performance optimization are key to ensuring a smooth and efficient admin experience for you and your team.