If you’re looking to boost your website’s credibility and engage visitors, adding a review slider is a fantastic idea. It’s a dynamic way to showcase your customer feedback, ratings, and testimonials right on your homepage or product pages. Creating one in WordPress might sound complicated, but with the right tools and a little guidance, you can have a sleek, functional review slider up and running in no time. Whether you’re a beginner or a seasoned website owner, this post will walk you through the basics and share some tips to make your review slider stand out.
Why a Review Slider Is Important for Your Website
Let’s face it — trust is everything online. People want to see proof that your product or service delivers what you promise before they hit that “Buy Now” button or contact you. That’s where a review slider comes into play. Here’s why it’s a must-have:
- Builds Trust and Credibility: Displaying real customer reviews shows visitors that others have had positive experiences with your brand. It’s like word-of-mouth, but on your website.
- Enhances User Engagement: A well-designed slider captures attention and encourages visitors to spend more time exploring what others think about your products or services.
- Showcases Social Proof: Social proof is a powerful psychological effect that influences purchasing decisions. When potential customers see that others are satisfied, they’re more likely to convert.
- Highlights Key Testimonials: Instead of listing reviews in a boring list, a slider allows you to feature multiple testimonials in a compact, attractive format that keeps your page lively.
- Improves SEO and Conversion Rates: Fresh and relevant reviews can improve your search engine rankings and persuade visitors to take action, whether it’s making a purchase, subscribing, or contacting you.
In short, a review slider isn’t just a fancy feature — it’s a strategic tool that can significantly impact your website’s performance and reputation. By showing real, positive feedback in an eye-catching way, you’re building trust and encouraging visitors to become loyal customers.
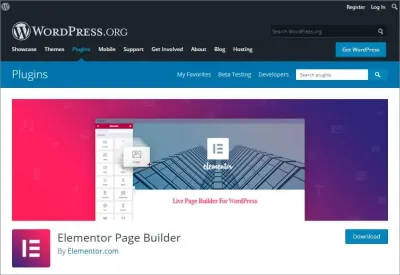
3. Choosing the Right WordPress Plugin for Review Sliders
Alright, so you’re convinced a review slider is just what your website needs to showcase customer feedback and boost credibility. But with so many plugins out there, how do you pick the right one? Don’t worry — I’ve got your back! The key is to find a plugin that fits your needs, is easy to use, and plays nicely with your existing website.
First, think about what features are essential for you. Do you want a slider that’s simple and straightforward, or something more customizable? Here are some things to consider:
- Ease of Use: Is the plugin user-friendly, especially if you’re not super tech-savvy?
- Design Flexibility: Can you customize the look to match your website’s style?
- Review Types Supported: Does it support different review formats — text, star ratings, images?
- Compatibility: Does it work well with your theme and other plugins?
- Performance: Will it slow down your site? Speed matters!
- Support & Updates: Is the plugin regularly updated? Is there good support if you run into issues?
Some popular options include:
| Plugin Name | Key Features | Best For |
|---|---|---|
| WP Customer Reviews | Simple review collection + slider option, shortcode support | Basic review display |
| Smart Slider 3 | Highly customizable sliders, drag & drop, supports reviews & images | Design flexibility & visual appeal |
| Site Reviews | Robust review management, shortcode support, customizable display | Managing multiple reviews easily |
| MetaSlider | Easy to create sliders, supports images, videos, and text | Simple review sliders with multimedia |
Read reviews, check plugin ratings, and maybe even test a couple on a staging site before making your final choice. Remember, the goal is to find a plugin that’s easy to set up and maintain, so you can focus on showing off your awesome reviews!
4. Step-by-Step Guide to Installing and Activating the Review Slider Plugin
Great! You’ve chosen your perfect review slider plugin. Now, let’s get it installed and activated so you can start showcasing those glowing reviews. Don’t worry — it’s a simple process that anyone can do, even if you’re new to WordPress.
Step 1: Log into Your WordPress Dashboard
Start by logging into your WordPress admin area. You can usually do this by visiting yourwebsite.com/wp-admin and entering your username and password.
Step 2: Navigate to Plugins
Once logged in, look at the menu on the left side and click on Plugins. Then select Add New — this is where you’ll find all the plugins available for installation.
Step 3: Search for Your Chosen Plugin
In the search bar on the top right, type the name of the plugin you want to install (e.g., “Site Reviews” or “Smart Slider 3”).
Browse through the results, and once you find the right plugin, look for the one authored by reputable developers with good reviews and recent updates.
Step 4: Install the Plugin
Click the Install Now button next to the plugin. WordPress will handle the download and installation automatically. This usually takes just a few seconds.
Step 5: Activate the Plugin
After installation, the button will change to Activate. Click it to activate your plugin. Once activated, you’ll see a confirmation message, and the plugin will be ready to configure.
Step 6: Configure the Plugin Settings
Depending on the plugin, you might see a new menu item in your dashboard or a settings link. Follow the plugin’s setup instructions to add your reviews, customize the slider appearance, and place it on your site.
And that’s it! With just a few clicks, you’ve installed and activated your review slider plugin. Now, you’re all set to start adding reviews and creating engaging sliders that will impress your visitors and build trust in your products or services.
5. How to Add and Customize Reviews in Your Slider
Now that you’ve set up your review slider plugin, it’s time to start adding reviews. This is where the magic happens, turning your slider into a powerful showcase of your happy customers’ feedback. Whether you’re collecting reviews manually or importing them, the process is pretty straightforward.
Adding Reviews Manually
Most review slider plugins have a dedicated section in your WordPress dashboard where you can add reviews. Here’s a quick step-by-step:
- Navigate to the plugin’s review management area, usually found under the plugin menu or under a “Reviews” tab.
- Click on “Add New Review” or similar button.
- Fill in the review details:
- Reviewer Name: Who left the review?
- Review Text: The actual feedback or testimonial.
- Rating: Usually a star rating, like 1–5 stars.
- Date: Optional, but adds authenticity.
- Save your review.
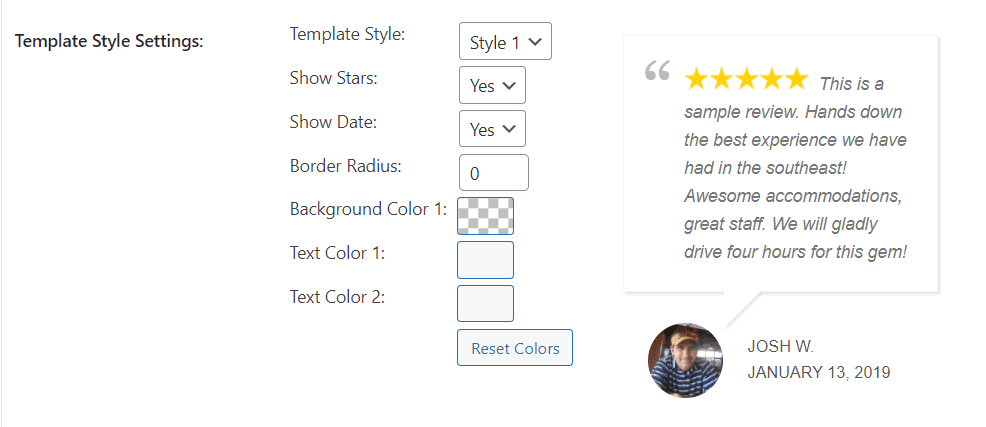
Customizing Review Display
Most plugins let you tweak how reviews look within the slider. You can often customize:
- Number of reviews shown at once.
- Display style — whether you want a grid, carousel, or list layout.
- Show or hide elements like reviewer name, date, or rating stars.
- Design options such as fonts, colors, and spacing to match your site’s style.
For example, if your theme has a modern look, you might want a sleek carousel with star ratings. On the other hand, a simple list with reviewer names can work well for a more straightforward presentation.
Importing Reviews
If you have reviews collected elsewhere, some plugins support importing reviews via CSV files or integrations with review platforms. This can save you time if you already have a collection of testimonials and want to showcase them without re-entering everything manually.
Remember, the key to an effective review slider is authenticity. Showcase genuine feedback, and don’t be afraid to update reviews periodically. Fresh reviews keep your slider engaging and trustworthy.
6. Embedding the Review Slider into Your WordPress Site
Great! You’ve added reviews and customized your slider. Now, let’s get it onto your website where visitors can see it easily. Embedding your review slider is usually a breeze, especially with most plugins offering multiple options.
Using Shortcodes
The most common method is via shortcodes. When you create a new slider, your plugin will generate a unique shortcode, like [review_slider id="123"]. Here’s how to add it:
- Copy the shortcode provided by your plugin.
- Go to the page, post, or widget where you want the slider to appear.
- Paste the shortcode directly into the content editor — whether it’s the Classic Editor or Gutenberg block editor.
- Update or publish your page/post.
Visit the page on your site, and your review slider should display beautifully. If you want to place it in a specific location, simply insert the shortcode where you want it to appear.
Embedding via Widgets
Many review slider plugins also add a widget you can drag into your sidebar or footer:
- Navigate to Appearance > Widgets.
- Find the widget associated with your review slider plugin.
- Drag it into your chosen widget area.
- Configure any options, such as which slider to display or the title.
- Save your changes and view your site to see the slider in action.
Embedding with Page Builders
If you’re using a page builder like Elementor, Beaver Builder, or Divi, most plugins are compatible. Typically, you can add a shortcode widget or module, then paste your review slider shortcode into it. This allows for even more design flexibility, letting you position your reviews precisely where you want them.
Once embedded, don’t forget to preview your page and make any styling tweaks if needed. The goal is to make your reviews stand out and encourage visitors to trust your brand.
And that’s it! Embedding your review slider into your WordPress site is simple, and with a little customization, it can become a key part of your social proof strategy. Happy showcasing!
7. Tips for Optimizing Your Review Slider for Better Engagement
Now that you’ve set up your review slider, you might be wondering how to make it as engaging as possible. After all, a slider is only effective if visitors actually interact with it and find it helpful. Here are some friendly tips to optimize your review slider and boost user engagement:
Showcase Authentic and Diverse Reviews
People love seeing honest feedback from real customers. Make sure your slider features a mix of reviews that highlight different aspects of your product or service. This not only builds trust but also appeals to a broader audience. Including reviews from various demographics or use cases can make your slider more relatable.
Keep It Visual and Readable
Use clear, high-quality images of your reviewers (if they’ve provided photos) alongside their reviews. Also, ensure that the text is easy to read—avoid cluttered fonts or tiny sizes. A clean, visually appealing slider will naturally grab users’ attention.
Incorporate Calls-to-Action (CTAs)
Encourage visitors to leave their own reviews by adding friendly CTAs near your slider. Phrases like “Share Your Experience” or “Leave a Review” can motivate engagement. Consider linking these to your review submission page for easy access.
Use Engagement-Friendly Features
- Auto-play with pause options: Let your slider auto-advance, but give users the ability to pause or navigate manually.
- Navigation controls: Add clear arrows or dots so visitors can browse reviews at their own pace.
- Animations: Subtle transitions can make the slider feel modern and lively.
Optimize for Mobile Devices
Since a lot of users browse on smartphones, ensure your slider looks good and functions smoothly on all screen sizes. Use responsive design techniques, and test your slider on different devices to avoid frustrating your visitors.
Highlight Key Reviews
If you have standout reviews or testimonials that really showcase your strengths, feature them prominently. You might even pin a particularly glowing review at the top or use a different style to make it stand out.
Monitor and Adjust
Keep an eye on how users interact with your review slider. Use tools like Google Analytics or heatmaps to see if people are engaging. Based on this data, tweak the design, content, or placement to improve performance.
8. Conclusion and Final Tips for Using Review Sliders Effectively
Wrapping up, review sliders are a fantastic way to build credibility, showcase customer satisfaction, and add a dynamic element to your website. But like any tool, their effectiveness depends on how thoughtfully you implement and optimize them. Here are some final tips to ensure your review slider works for you:
Keep It Fresh
Regularly update your slider with new reviews. Fresh content not only reflects ongoing customer satisfaction but also encourages repeat visitors to check back often.
Be Authentic
Never fake or overly curate reviews. Authenticity is key to building trust with your audience. Display genuine feedback, even if some reviews are critical—they can add credibility.
Balance Design and Content
While eye-catching design is important, prioritize clear and meaningful content. Your reviews should be easy to read and highlight the real value your product or service provides.
Test Different Approaches
Don’t be afraid to experiment. Try different layouts, review formats, or placements on your website. See what resonates most with your visitors and refine accordingly.
Integrate with Overall Marketing Strategy
Make sure your review slider complements your brand messaging and marketing goals. Use it as part of a broader strategy to showcase social proof, improve SEO, and increase conversions.
Remember, the goal is to foster trust and encourage interaction. When set up thoughtfully, your review slider can become a powerful tool that turns visitors into loyal customers. Happy slider building!