If you’ve ever felt that your WordPress admin panel could use a little polish or a modern touch, you’re not alone. Adding sleek transitions can dramatically improve the user experience, making navigation feel more fluid and intuitive. Whether you’re a developer customizing your site or a site owner wanting a more professional look, understanding how to implement smooth transitions can set your admin interface apart. In this guide, we’ll walk through simple steps to add these stylish effects, making your admin panel not just functional but also visually appealing and enjoyable to use.
Understanding the Benefits of Transitions in the Admin Interface
Transitions are subtle animations or effects that occur when you perform actions like opening menus, switching tabs, or hovering over elements. Incorporating these into your WordPress admin panel offers several advantages:
- Enhanced User Experience: Smooth transitions make the interface feel more responsive and polished, reducing cognitive load and making navigation feel natural.
- Professional Appearance: A well-designed admin panel with subtle animations gives your site a modern, high-quality look, impressing clients or team members.
- Improved Usability: Transitions can help users understand changes in the interface, such as menu expansions or content loading, making the experience more intuitive.
- Reduced Abruptness: Instead of sudden shifts that can be jarring, transitions create a seamless flow, improving overall satisfaction.
Implementing transitions doesn’t have to be complicated. With just a bit of CSS and some strategic placement, you can elevate your admin panel to a new level of sophistication. Plus, these enhancements can contribute to a more engaging workflow, motivating you or your team to work more efficiently. So, let’s explore how exactly you can add these sleek effects step-by-step!
3. Prerequisites and Tools Needed for Adding Transitions
Before diving into adding those smooth transitions to your WordPress admin panel, it’s essential to gather a few tools and understand what you’ll need. Think of this as preparing your toolkit before starting a DIY project — the more organized you are, the smoother everything will go.
First off, you’ll want to have access to your WordPress site’s files. This usually means having:
- FTP Client or File Manager: Tools like FileZilla or your hosting provider’s file manager allow you to connect to your site’s server and make changes to your theme files.
- Code Editor: A good code editor like Visual Studio Code, Sublime Text, or Notepad++ makes editing CSS and JavaScript easier and more error-free.
- Basic Knowledge of CSS and JavaScript: While you don’t need to be a coding wizard, understanding how CSS transitions and JavaScript work will help you troubleshoot and customize your effects.
- Access to WordPress Admin Dashboard: Sometimes, you can add custom CSS or scripts directly through plugins or theme options, which is less risky if you’re not comfortable editing files directly.
Additionally, it’s a good idea to back up your site before making any changes. This way, if something doesn’t work quite right, you can restore your site to its previous state without any fuss.
And finally, consider installing a child theme if you plan to modify theme files directly. This prevents your customizations from being overwritten during theme updates, saving you from redoing work down the line.
In summary, the key tools are:
- FTP client or file manager access
- Code editing software
- Basic understanding of CSS/JavaScript
- Backup and child theme setup (optional but recommended)
Once you’ve got these in place, you’re all set to start customizing your admin panel with sleek, eye-catching transitions that will impress visitors and make your workflow feel a lot more modern.
4. Step 1: Accessing Your WordPress Theme Files or Admin Customization Settings
The first step in adding transitions is to access your WordPress theme files or the admin customization options. This might sound straightforward, but it’s crucial to do it correctly to avoid any mishaps.
If you’re comfortable working directly with your theme files, here’s what to do:
- Log into your hosting account or use your FTP client: Connect to your site’s server using your FTP credentials or through your hosting provider’s file manager.
- Navigate to your theme folder: Usually, this is located at
wp-content/themes/your-theme-name/. - Identify the right file to edit: Typically, styles are added to
style.css, but for more advanced transitions, you might want to create or edit a custom JavaScript file or add code inline.
If editing theme files feels intimidating — and it’s perfectly okay if it is — you can also add custom CSS or JavaScript directly through the WordPress admin dashboard using plugins like Simple Custom CSS & JS or through your theme’s built-in customizer options.
To access customization settings via the dashboard:
- Log into your WordPress admin panel.
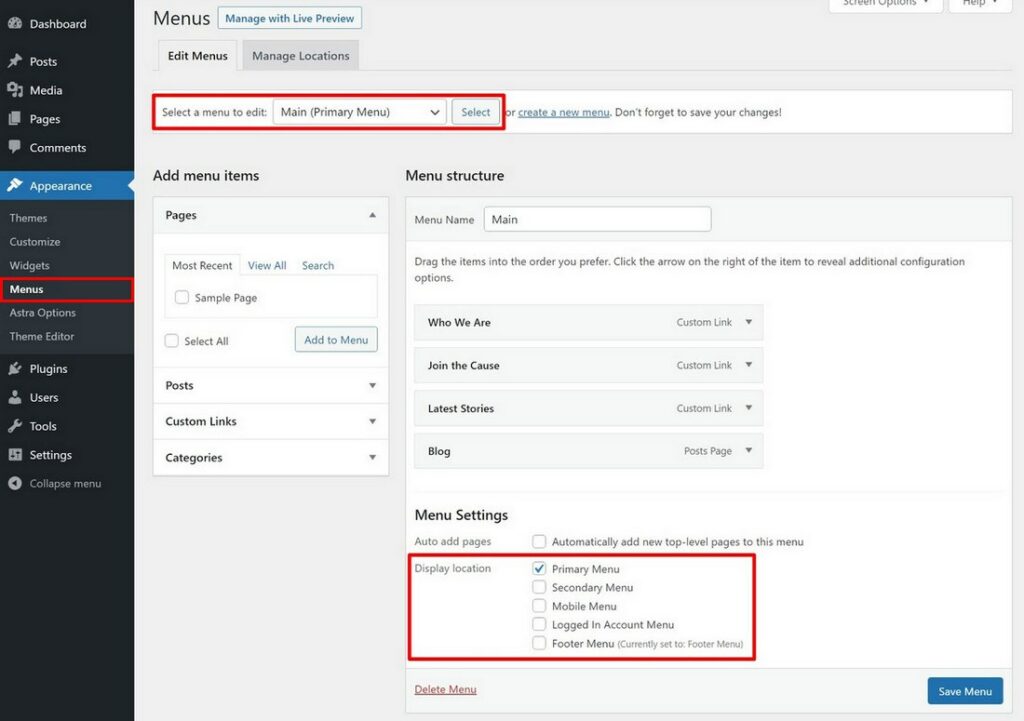
- Navigate to Appearance > Customize: This opens the theme customizer where many themes allow you to add custom CSS or scripts.
- Look for Additional CSS or Custom Code sections: Here, you can paste your CSS code for transitions.
Whichever method you choose, the goal is to reach the point where you can safely add or modify CSS and JavaScript that will control your admin panel’s appearance and behavior.
Remember: Always back up your current files or note existing code before making changes. That way, if something doesn’t look right, you can revert quickly and avoid any downtime or visual glitches.
Once you’ve gained access to your theme files or customizer settings, you’re ready to move on to actually adding the transition code. But don’t worry — we’ll walk through each step carefully to ensure your admin panel transforms into a sleek, modern workspace.
5. Step 2: Adding Custom CSS for Transition Effects
Now that you’ve got your transition ideas in mind, it’s time to bring them to life with some custom CSS. Think of CSS as the artist’s palette—it’s what allows you to add style, smoothness, and personality to your admin panel. Don’t worry if you’re new to CSS; we’ll keep it straightforward and practical.
First, you’ll want to identify the specific elements you want to animate. For example, maybe you want your admin menu to fade in smoothly or your dashboard widgets to slide into place. To do this, you can target those elements using their classes or IDs. Here’s a quick way to get started:
/ Example: Adding fade-in effect to the admin menu /adminmenu { opacity: 0; / Start invisible / transition: opacity 0.5s ease-in-out; / Smooth transition /}/ When ready to show the menu, add a class or change the style /adminmenu.show { opacity: 1; / Fully visible /}Next, you’ll want to add this CSS to your WordPress site. The easiest methods include:
- Using the Customizer: Go to Appearance > Customize > Additional CSS and paste your styles there.
- Using a child theme’s stylesheet if you’re comfortable editing theme files.
- Through a site-specific plugin or a custom CSS plugin for more flexibility.
Remember, CSS transitions work best when you set an initial state (like opacity: 0) and then change that state with a class toggle or JavaScript. This way, the transition effect will animate smoothly between the two states.
Here’s a quick tip: Use the transition property to specify the property you want to animate (like opacity, transform, or background-color), the duration, and the easing function. For example:
transition: all 0.3s ease-in-out;This makes your transitions feel natural and polished. Feel free to experiment with different properties and timing to match your aesthetic.
6. Step 3: Implementing Transition Effects Using JavaScript or jQuery
While CSS handles a lot of the magic, sometimes you’ll need a little JavaScript or jQuery to trigger your transitions at just the right moment. This is especially true if you want effects to happen on page load, button clicks, or other user interactions.
Let’s walk through a simple example: suppose you want the admin notices to fade in when the page loads. You can do this by adding a script that adds a class to your element after the page has loaded.
// Using jQueryjQuery(document).ready(function($) { $('admin-notices').addClass('show');});And your CSS might look like this:
/ Initial state: hidden /admin-notices { opacity: 0; transition: opacity 0.5s ease-in-out;}/ When the 'show' class is added, fade in /admin-notices.show { opacity: 1;}To add this script to your WordPress admin, you can enqueue a custom script file or use the wp_add_inline_script function in your plugin or theme’s functions.php. Here’s a simple way to enqueue your script:
function add_custom_admin_scripts() { wp_enqueue_script('custom-admin-transitions', get_template_directory_uri() . '/js/admin-transitions.js', array('jquery'), null, true);}add_action('admin_enqueue_scripts', 'add_custom_admin_scripts');In your admin-transitions.js file, include the jQuery code shown earlier. This setup ensures your transitions are smooth, dynamic, and trigger exactly when you want them to.
Another powerful technique is to animate elements based on user interactions—like clicking a button to reveal hidden panels or loading new content with animated effects. For these, you can listen for events and toggle classes accordingly, combining JavaScript/jQuery with your CSS transitions seamlessly.
In summary, combining custom CSS with JavaScript or jQuery gives you full control over how your admin panel transitions look and feel. Play around with different effects, timing, and triggers to craft an experience that’s both functional and visually appealing for your users.
7. Testing and Previewing Your Transition Effects in the Admin Panel
Alright, you’ve added those sleek transition effects to your WordPress admin panel—nice work! Now, before you sit back and bask in the glory, it’s crucial to test and preview everything to make sure it looks just right. After all, a transition that looks perfect on your local setup might not behave the same way on different browsers or devices. So, let’s walk through how to do that smoothly.
First off, preview your admin panel directly on your site’s dashboard. Most transition effects are visible right away once you refresh the page. But don’t just check once—test multiple times to catch any hiccups or glitches. Clear your browser cache or do a hard refresh (usually Ctrl + Shift + R or Command + Shift + R) to ensure you’re seeing the latest version of your admin panel.
Next, it’s a good idea to test across different browsers and devices. Chrome, Firefox, Safari, Edge—each browser may render CSS transitions slightly differently. If you have access to mobile devices, check how your admin panel looks there too. Sometimes, transitions can look silky smooth on desktop but behave oddly on mobile or vice versa.
Here are some practical steps for thorough testing:
- Refresh the admin page multiple times to see the transition in action.
- Navigate to different sections of the admin panel to ensure transitions work consistently everywhere.
- Try performing actions that trigger transitions—like opening menus, switching tabs, or modal popups—and observe their behavior.
- Use browser developer tools (like Chrome DevTools) to inspect the elements involved in your transitions. You can tweak CSS on-the-fly to troubleshoot issues.
- Take note of any lag, flickering, or unexpected jumps during transitions. These can be signs of performance issues or conflicts with other scripts.
Additionally, consider getting feedback from others—if you work with a team, ask colleagues or friends to test it out and share their impressions. Sometimes, fresh eyes can spot issues you might miss.
Finally, if you notice any problems, don’t hesitate to refine your CSS. Minor tweaks, like adjusting transition durations or easing functions, can make a big difference in achieving a polished look. Remember, testing is an iterative process—keep refining until your transitions are smooth, professional, and enhance the user experience.
8. Tips for Creating Seamless and Professional Transition Effects
Great, your tests are looking good! Now, let’s talk about how to elevate your transition effects from decent to downright professional. It’s all about subtlety, consistency, and making sure your transitions enhance usability rather than distract from it. Here are some tips to help you craft seamless, polished effects:
1. Keep Transitions Subtle and Appropriate
Big, flashy transitions might catch the eye, but they can also be distracting or feel unprofessional. Instead, opt for subtle effects—like slight fades, gentle slides, or smooth scaling—that complement your interface without overwhelming users.
- Duration matters: Aim for 300ms to 500ms for most transitions. Too fast, and they’re hardly noticeable; too slow, and they become annoying.
- Use easing functions: Easing (like ease-in-out) makes transitions feel more natural. Experiment with different timing functions to find what feels right.
2. Be Consistent Across the Admin Panel
Consistency is key. Use the same transition styles throughout your admin interface so users know what to expect. For example, if menus slide in from the left with a fade, keep that pattern for all similar elements. It creates a cohesive look and improves user experience.
3. Focus on Performance
Transitions shouldn’t slow down your admin panel. Avoid heavy CSS animations or excessive effects that might cause lag, especially on lower-end devices. Use hardware-accelerated properties like transform and opacity whenever possible, as they tend to be smoother and less taxing on the browser.
4. Test Accessibility
Transitions should enhance, not hinder, accessibility. For users relying on keyboard navigation or screen readers, abrupt or overly complex effects can be confusing. Keep transitions minimal and ensure they don’t interfere with usability. Consider providing options to disable animations for users who prefer reduced motion.
5. Use a Cohesive Design Language
Match your transition effects with your overall admin panel style. For example, if your design uses soft shadows and rounded corners, choose transition effects that align with that aesthetic. Consistent design language makes your interface look professional and well-thought-out.
6. Experiment and Iterate
Don’t be afraid to try different effects and tweak their parameters. Sometimes, small changes—like adjusting the transition timing, delay, or easing—can make a big difference in the final look. Keep testing and refining until your transitions feel natural and enhance usability.
In the end, creating seamless and professional transition effects is about balancing visual appeal with user experience. With patience and attention to detail, you can make your WordPress admin panel not only functional but also a pleasure to use.
9. Additional Plugins and Resources for Enhancing Admin Panel UI
Hey there! If you’re really excited about customizing your WordPress admin panel and want to take it to the next level, you’re in luck. There are a bunch of plugins and resources out there that can help you add even more style, functionality, and flair to your backend. Let’s explore some of the most popular options and tools that can make your admin area truly stand out.
First up, Admin Menu Editor is a fantastic plugin that allows you to customize and reorder your admin menu with ease. Want to hide certain menu items or create custom menus? No problem. It’s user-friendly and perfect for tailoring your admin experience.
Next, consider WP Admin UI Customize. This plugin offers a simple interface to tweak colors, logos, and login screens. You can upload your branding assets and craft a cohesive look that matches your website’s style.
If you’re looking for a more comprehensive solution, Adminimize is a powerful plugin that lets you hide unnecessary menu items, widgets, and sections from specific user roles. It’s great for streamlining the admin area and reducing clutter for clients or team members.
Additional Resources:
- Official WordPress Developer Resources: The WordPress Codex and Developer Handbook are gold mines for understanding how to develop custom admin pages and styles.
- CSS Frameworks: Incorporate frameworks like Bootstrap or Tailwind CSS to give your admin panel a modern, responsive design.
- Custom CSS and JS: Use custom scripts to add animations, transitions, or interactive elements that aren’t covered by plugins.
Remember, while plugins are a quick way to enhance your admin UI, always keep security and performance in mind. Stick to well-maintained plugins, and test changes in a staging environment before deploying live. Combining these tools with your own custom styles will give you a uniquely professional and sleek admin panel.
10. Conclusion and Final Tips for Customizing Your WordPress Admin Panel
Congratulations! You’ve now got a solid understanding of how to add sleek transitions and customize your WordPress admin panel. Customizing your backend not only makes your workflow more enjoyable but also impresses clients and team members with a professional, cohesive look. As you wrap up your customization journey, here are some final tips to keep in mind:
- Plan Your Design: Before diving into code or plugins, sketch out the look and feel you want. Pick a color scheme, fonts, and styles that align with your brand or personal preference.
- Start Small: Make incremental changes rather than overhauling everything at once. This makes troubleshooting easier and helps you see what works best.
- Test Responsively: Ensure that your customizations look great on different screen sizes and devices. Use browser developer tools to preview how your admin panel adapts.
- Backup Regularly: Always back up your site before making significant changes. This way, you can revert if anything doesn’t go as planned.
- Use Child Themes or Custom Plugins: To keep your customizations safe during theme updates, implement them via child themes or custom plugins. This practice preserves your work and prevents accidental overwrites.
- Leverage Resources: Don’t hesitate to explore tutorials, forums, and the official documentation. The WordPress community is a treasure trove of helpful advice and inspiration.
In the end, customizing your WordPress admin panel is all about making your workspace more efficient, enjoyable, and reflective of your brand. Keep experimenting, stay updated with new tools, and have fun crafting an admin experience that works perfectly for you. Happy customizing!