Hey there! So, you’re excited to create your dream website but feeling a bit overwhelmed about where to start? Don’t worry — you’re in the right place. WordPress is a fantastic platform that makes building a website accessible to everyone, whether you’re a complete beginner or have some tech experience. It’s flexible, customizable, and powers over 40% of all websites on the internet. In this guide, we’ll walk through each step, starting from the basics. By the end, you’ll have a clear plan to launch your own beautiful, functional website that truly represents you or your business. Ready? Let’s dive in!
Choosing the Right Domain Name and Hosting Service
The first step in building your dream website is selecting the perfect domain name and a reliable hosting service. Think of your domain name as your website’s address — it’s what visitors will type into their browser to find you. Picking the right one is crucial because it impacts your branding, SEO, and how memorable you are to visitors.
Tips for choosing a great domain name:
- Keep it simple and easy to spell: Avoid complex words or tricky spellings. Short and straightforward names are easier to remember.
- Make it relevant: Your domain should reflect your niche, business, or personal brand.
- Use keywords wisely: Including relevant keywords can help with SEO, but don’t force it. Natural is better.
- Choose the right extension: .com is the most popular and trusted, but alternatives like .net, .org, or niche-specific ones (.photography, .blog) can work too.
- Avoid hyphens and numbers: They can be confusing or hard to remember.
Once you have a few ideas, check if they’re available using domain registration sites like Namecheap, GoDaddy, or Google Domains. When it comes to hosting, think of it as renting space on the internet for your website. You want a provider that’s reliable, secure, and offers good customer support.
What to look for in a hosting service:
- Uptime guarantee: Look for providers with 99.9% uptime to keep your site accessible.
- Speed and performance: Faster hosting means happier visitors, so choose one optimized for WordPress.
- Customer support: 24/7 support is a big plus if you run into issues.
- Security features: Features like SSL certificates protect your site and build trust.
- Price: Balance affordability with quality — many hosts offer beginner plans that are budget-friendly.
Popular hosting options for WordPress beginners include Bluehost, SiteGround, and DreamHost. Many of these come with one-click WordPress installation, making setup even easier. Remember, your domain name and hosting are the foundation of your website — choose wisely, and you’ll set yourself up for success from the start!
3. Installing WordPress and Setting Up Your Website
Alright, so you’ve got your domain name and hosting sorted—great job! Now it’s time to get WordPress installed and your website set up so you can start creating content and customizing your site. Don’t worry; it’s easier than it sounds, and I’ll walk you through each step.
First off, many hosting providers offer one-click WordPress installation. This is the fastest way to get everything up and running. Here’s a quick rundown:
- Log into your hosting account’s control panel (like cPanel or a custom dashboard).
- Look for an icon or section called “WordPress Installer,” “One-Click Install,” or something similar.
- Click on it, select your domain, and follow the prompts—enter your site name, admin username, password, and email address.
- Hit install, and voilà—your WordPress website is created!
If your host doesn’t have a one-click installer, you can always install WordPress manually. It involves downloading WordPress from wordpress.org, uploading the files via FTP, creating a database, and running the installation script. It sounds more complicated, but don’t worry—there are plenty of tutorials out there to guide you step-by-step.
Initial Setup After Installation
Once WordPress is installed, you’ll want to do some basic setup:
- Log into your WordPress dashboard at yourdomain.com/wp-admin.
- Update your permalinks for better SEO—go to Settings > Permalinks and select “Post name.”
- Adjust your site title and tagline under Settings > General.
- Install essential plugins like Yoast SEO, Jetpack, or Akismet to enhance functionality and security.
- Create your main pages — such as Home, About, Contact, and Blog—by navigating to Pages > Add New.
That’s it! Your site is now set up and ready for customization. Remember, the goal is to keep things simple at first—get the essentials right, then make it more personalized as you go along.
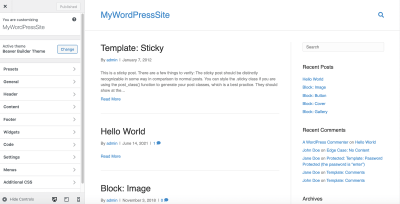
4. Selecting and Customizing WordPress Themes
Now that your website is installed and ready, it’s time to choose a theme. Think of a theme as the skin or design template for your site—it determines how everything looks, from fonts and colors to layout and style. Picking the right theme is crucial because it sets the tone for your visitors and makes your website feel professional and inviting.
How to Choose the Perfect Theme
Here are some tips to help you pick a theme that fits your needs:
- Purpose: Are you creating a blog, an online store, portfolio, or business site? Different themes cater to different needs.
- Responsiveness: Make sure the theme looks good on mobile devices and tablets.
- Customization Options: Check if the theme offers easy options to change colors, fonts, and layouts without coding.
- Ratings and Reviews: Look at feedback from other users—high ratings and positive reviews are a good sign.
- Support and Updates: Choose themes that are regularly updated and come with support from developers.
Where to Find Themes
There are plenty of free themes available directly through the WordPress Theme Repository. To browse:
- Go to your dashboard, then navigate to Appearance > Themes.
- Click on Add New to browse or search for themes.
- Use filters or keywords to narrow down options.
- Preview themes to see how they look—just click Preview.
- If you find one you like, click Install and then Activate.
For premium themes, sites like ThemeForest, Elegant Themes, or StudioPress offer a vast selection with advanced features and dedicated support. You can purchase and upload these themes via the dashboard by clicking on Upload Theme.
Customizing Your Theme
Once your theme is active, it’s time to make it your own. Here’s how:
- Navigate to Appearance > Customize: This opens the WordPress Customizer, where you can tweak colors, fonts, header images, backgrounds, and more.
- Use Theme Options: Some themes come with their own options panel—check under Appearance or a dedicated menu for additional settings.
- Add a Logo and Favicon: Upload images to personalize your branding.
- Set Up Menus: Go to Appearance > Menus to organize your navigation structure.
- Widgets: Customize your sidebar or footer by adding widgets like recent posts, social icons, or search bars.
Remember, the goal is to keep things simple at first. Focus on a clean, professional look that matches your brand or personal style. As you grow more comfortable, you can explore advanced customization options or even hire a developer for more complex tweaks.
And that’s the beauty of WordPress—once you’ve picked and customized a theme, you’re well on your way to building a website that feels uniquely yours. Happy designing!
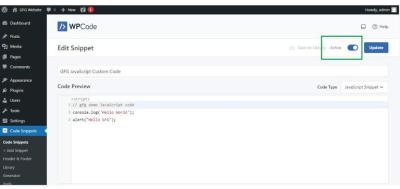
5. Installing Essential Plugins to Enhance Website Functionality
Once your WordPress site is up and running, it’s time to make it work for you. Plugins are like apps for your website—they add features, improve performance, and help you customize your site to fit your needs. But with thousands of plugins out there, how do you know which ones are essential? Don’t worry—I’ve got you covered!
First things first, head over to your WordPress dashboard and click on Plugins > Add New. Here, you’ll find a huge library of plugins. To keep things simple and effective, start with these core plugins:
- Yoast SEO: This plugin helps optimize your website for search engines. It guides you on improving your content’s SEO, making it easier for people to find you online.
- Akismet Anti-Spam: Protect your comments and contact forms from spam. It’s like having a digital bouncer for your site.
- WP Super Cache: Speed is crucial. This plugin speeds up your website by creating static copies of your pages, reducing load times for visitors.
- Jetpack: A versatile plugin that offers security features, site stats, backups, and more—all in one package.
- Contact Form 7: Want visitors to reach out? This plugin makes creating contact forms super easy.
To install a plugin, simply click Install Now, then activate it. Once activated, most plugins will add their settings to your dashboard, so take a few minutes to explore and configure them according to your needs.
Remember, less is more. Only install plugins that you truly need. Too many plugins can slow down your site or cause conflicts. Regularly review your plugins and remove any that aren’t serving you anymore. This keeps your website lean, fast, and secure.
6. Creating and Organizing Content for Your Website
Now that your site’s design and functionality are in place, it’s time to focus on content—the heart of your website. Well-organized, engaging content will keep visitors interested and encourage them to explore more. Let’s break down how to create and organize your content effectively.
First, think about the main pages your website needs. Typical pages include:
- Home: Your welcome mat, showcasing what you offer and guiding visitors to other parts of your site.
- About: Share your story, mission, or background. This helps build trust and connect with your audience.
- Services/Products: Clearly describe what you offer. Use images, bullet points, and clear headings to make it easy to scan.
- Blog: A space for sharing updates, tips, or industry insights—great for boosting SEO and establishing authority.
- Contact: Make it simple for visitors to reach you, with a contact form, email, phone number, and location map if applicable.
Next, organize your content with a logical hierarchy. Use categories and tags to group related posts or pages. For example, if you run a food blog, categories might be Recipes, Restaurant Reviews, and Cooking Tips. Tags can be more specific, like Vegan or Gluten-Free.
When creating posts, write in a friendly, conversational tone. Break up text with headings, images, and bullet points to make content easy to read. Always aim for clarity and value—answer questions your visitors might have and provide solutions.
Don’t forget to optimize your content for SEO. Use your focus keywords naturally, include relevant images with descriptive alt text, and link to related pages or articles within your site. This helps search engines understand your content better and improves your rankings.
Finally, keep your content fresh and updated. Regularly adding new blog posts, updating existing pages, and removing outdated information will keep your website vibrant and relevant, encouraging visitors to keep coming back.
7. Optimizing Your Website for Search Engines
Alright, so you’ve built your beautiful website—congratulations! But wait, if no one can find it, what’s the point? That’s where search engine optimization (SEO) comes into play. Think of SEO as making your website super friendly for Google, Bing, and other search engines so they can easily understand and recommend your site to people searching for what you offer.
First things first, focus on keyword research. These are the words and phrases your target audience is typing into search engines. Use tools like Google Keyword Planner or Ubersuggest to discover relevant keywords with good search volume and manageable competition. Incorporate these naturally into your content, titles, headings, and meta descriptions.
Next up, optimize your on-page elements:
- Title Tags: Make each page’s title descriptive and include your main keyword. Keep it under 60 characters so it displays well in search results.
- Meta Descriptions: Write compelling summaries of each page, including keywords, to encourage clicks.
- Headings: Use H1, H2, and H3 tags logically to structure your content. Your main title should be H1, with subheadings as H2 or H3.
- URL Structure: Keep URLs short, descriptive, and include keywords. For example: www.yoursite.com/digital-marketing-tips
Images are also crucial. Use descriptive file names and alt text with relevant keywords to help search engines understand your visuals. This also boosts your chances of appearing in image search results.
Beyond on-page SEO, consider technical aspects:
- Site Speed: Use caching plugins, optimize images, and choose a reliable hosting provider to keep your site fast.
- Mobile Responsiveness: Ensure your website looks and works great on smartphones and tablets.
- Security: Use SSL certificates (your site should have HTTPS) to protect your visitors and improve rankings.
- Sitemap and Robots.txt: Submit a sitemap to search engines and configure robots.txt to guide crawlers.
Finally, build backlinks by creating valuable content others want to reference and share. Engage on social media, guest blog, or collaborate with influencers in your niche. Remember, SEO is an ongoing process—regularly update your content, monitor your analytics, and tweak your strategies for continuous improvement.
8. Launching Your Website and Promoting It Effectively
You’ve done all the hard work—your website is polished, optimized, and ready to roll. Now it’s time for the exciting part: launching and spreading the word!
Before going live, do a final checklist: test every link, ensure forms work, verify your site loads correctly on different devices, and double-check your SEO basics. Once everything looks good, it’s time to hit that publish button!
Here are some effective ways to promote your website and attract visitors:
1. Announce Your Launch
Send out an announcement via email to your contacts and subscribers. Share your story behind the website, what visitors can expect, and how they can benefit. Use your social media channels—Facebook, Instagram, Twitter, LinkedIn—to spread the word. Consider creating a launch event or contest to generate buzz.
2. Leverage Social Media
Consistency is key. Regularly post engaging content, share blog posts, behind-the-scenes looks, and customer testimonials. Use relevant hashtags and join niche groups to connect with your target audience. Social proof and active engagement help build trust and drive traffic.
3. Content Marketing
Start a blog if you haven’t already. Publish helpful, informative, or entertaining articles related to your niche. This not only attracts visitors but also boosts your SEO. Share your content across social media platforms and encourage sharing to expand your reach.
4. Collaborate and Network
Partner with influencers, other websites, or local businesses to cross-promote. Guest posting on reputable sites or inviting guest writers to yours can expose your brand to new audiences.
5. Utilize Paid Advertising
If budget allows, consider Google Ads or social media ads to target specific demographics quickly. Well-targeted campaigns can give you a boost in traffic and conversions.
6. Track and Adjust
Use tools like Google Analytics to monitor your website traffic, user behavior, and conversions. Pay attention to what works and what doesn’t. Adjust your marketing strategies accordingly to maximize results.
Launching your website is just the beginning. Consistent promotion and engagement will help you build a loyal audience and turn your online presence into a thriving platform. Remember, patience is key—building momentum takes time, but with persistence, your dream website will become a go-to resource in your niche!
Maintaining and Updating Your Website for Long-Term Success
Once your website is live, the journey doesn’t end—it’s essential to keep it current and functioning optimally. Regular maintenance ensures your site remains secure, fast, and engaging for visitors. Start by updating WordPress core, themes, and plugins regularly to patch vulnerabilities and add new features. Outdated software can pose security risks and cause compatibility issues.
Backups are your safety net. Implement a routine backup schedule—preferably weekly or after major updates—and store copies securely. Many plugins offer automated backups, simplifying this process. Additionally, monitor your website’s performance using tools like Google Analytics and PageSpeed Insights. These insights help identify areas for improvement, such as slow-loading pages or high bounce rates.
Content updates are equally important. Fresh, relevant content keeps visitors engaged and improves SEO rankings. Consider adding new blog posts, updating existing pages, or refreshing multimedia elements like images and videos. Regularly review your site for broken links, outdated information, or design inconsistencies, and fix issues promptly.
Security is paramount. Use security plugins, enable two-factor authentication, and implement SSL certificates to protect user data. Regularly scan your site for malware or vulnerabilities to prevent potential threats.
Maintenance Task Frequency Tools/Notes Update WordPress, Themes, Plugins Monthly or as needed Built-in updater or plugins like UpdraftPlus Backups Weekly or after major updates UpdraftPlus, BackupBuddy Performance Monitoring Monthly Google Analytics, PageSpeed Insights Security Checks Monthly Wordfence, Sucuri Security By committing to consistent maintenance and updates, you’ll ensure your website remains a powerful tool for achieving your goals. Remember, a well-maintained site builds trust with visitors and keeps your online presence thriving for the long haul.