If you’ve ever wanted to add interactive maps, videos, or other dynamic content to your WordPress blog, iframes are a fantastic tool to do just that. They allow you to embed external content seamlessly into your pages or posts, making your website more engaging and informative. Whether you’re a beginner or a seasoned blogger, understanding how to embed an iframe can open up a world of possibilities for enhancing your content. In this guide, we’ll walk through the essentials of embedding iframes in WordPress and show you how to do it smoothly without any hassle.
Understanding the Benefits of Using Iframes for Dynamic Content

Using iframes in your WordPress site offers several advantages that can really boost your website’s functionality and user experience. Here’s why you might want to consider embedding iframes:
- Easy Integration of External Content: Want to showcase a Google Map, a YouTube video, or a third-party tool? Simply embed it using an iframe, and it appears right on your page without needing complex coding.
- Enhances User Engagement: Dynamic content like interactive charts, live feeds, or social media posts can make your site more lively and engaging for visitors.
- Maintains Content Separation: Iframes keep external content separate from your main website code, reducing the risk of conflicts or layout issues.
- Flexibility and Customization: With iframes, you can control the size, borders, and other styling aspects to match your site’s look and feel.
- Supports Responsive Design: When used properly, iframes can be made responsive, ensuring your embedded content looks great on desktops, tablets, and smartphones.
However, it’s good to keep in mind that while iframes are powerful, they should be used thoughtfully. Overusing them or embedding content from unreliable sources can slow down your website or pose security risks. But when used correctly, iframes are a simple and effective way to add dynamic, external content that keeps your website fresh and interactive.
3. Step-by-Step Guide to Embedding an Iframe in WordPress
Embedding an iframe into your WordPress blog might sound a bit intimidating at first, but once you get the hang of it, it’s pretty straightforward. Whether you want to add a YouTube video, a Google Map, or other dynamic content, this step-by-step guide will walk you through the process.
Step 1: Get the Embed Code
First things first, you need the iframe code. Many services, like YouTube, Google Maps, or any platform that provides embeddable content, will give you a snippet of code you can copy. For example, on YouTube, click the Share button, then select Embed, and copy the iframe code provided.
Step 2: Log in to Your WordPress Dashboard
Navigate to your WordPress admin area. Log in with your credentials and go to the post or page where you want to add the iframe.
Step 3: Open the Post or Page Editor
Depending on your setup, you might be using the Classic Editor or the Block Editor (Gutenberg). For the Classic Editor, switch to the Text tab. For the Block Editor, you’ll just add a Custom HTML block (more on that later).
Step 4: Insert the Iframe Code
Paste the iframe code directly into the editor where you want the content to appear. If you’re using the Classic Editor, make sure you’re in the Text view, not the Visual view, so the code isn’t escaped or altered.
Step 5: Preview and Publish
Always preview your post or page to ensure the iframe displays correctly. If everything looks good, go ahead and hit Publish or Update.
Bonus Tip: If you’re embedding content from sources that don’t provide iframe code, you might need to generate a custom iframe manually or use a plugin that facilitates embedding dynamic content easily.
4. Using the WordPress Block Editor to Insert Iframes
The WordPress Block Editor, also known as Gutenberg, makes inserting iframes a breeze thanks to the flexible block system. Here’s how you can do it in just a few simple steps:
- Open Your Post or Page in the Block Editor
Navigate to your WordPress dashboard, select your post or page, and click Edit. - Add a Custom HTML Block
Click the + button to add a new block. In the block search, type Custom HTML. Select it from the options that appear. - Paste Your Iframe Code
In the Custom HTML block, paste your iframe code exactly as you received it from the source. This method ensures the code is treated as HTML and displayed correctly. - Preview the Embedded Content
Click the Preview button within the block or use the preview icon in the top right corner to see how your embedded content looks. Make adjustments if necessary. - Publish or Update Your Post
Once satisfied with how it looks, save your changes by clicking Publish or Update.
Additional Tips:
- Sometimes, your iframe might not display properly if your theme or security settings block certain iframes. In that case, check your theme’s settings or consider using a plugin designed for safe embeds.
- For more control, you can add CSS styles directly within the Custom HTML block to adjust the size and look of your iframe.
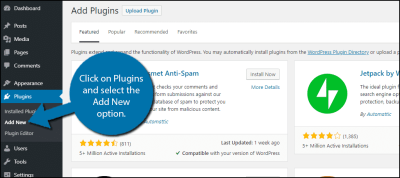
- If you plan to embed multiple iframes regularly, consider installing a dedicated plugin like Advanced Custom Fields or EmbedPress to streamline the process.
Embedding iframes with the WordPress Block Editor is really just about inserting your code into a dedicated block. It’s simple, intuitive, and doesn’t require any coding knowledge beyond copying the embed code. Just follow these steps, preview your content, and enjoy the dynamic content on your blog!
5. Adding Custom HTML Code for Iframe Embedding
So, you’ve decided to embed an iframe into your WordPress blog—great choice! Now, the next step is adding that code seamlessly into your posts or pages. While WordPress offers the Gutenberg block editor, sometimes it’s easiest to just insert custom HTML directly. Here’s how you can do it:
Using the Block Editor
In the Gutenberg editor, adding an iframe is straightforward:
- Open your post or page where you want to embed the iframe.
- Click the “+” icon to add a new block.
- Select the “Custom HTML” block from the options.
- Paste your iframe HTML code into this block.
- Preview your post to see how it looks. If everything’s good, publish or update your content.
Sample Iframe HTML Code
Here’s a quick example of what your iframe code might look like:
<iframe src="https://example.com" width="600" height="400" frameborder="0" allowfullscreen></iframe>
Tips for Custom HTML Embedding
- Use HTTPS: Ensure your iframe source uses HTTPS to avoid security warnings.
- Set Width and Height: Customize these attributes to fit your layout nicely.
- Frameborder and Allowfullscreen: Use these attributes to control appearance and functionality.
- Test before publishing: Always preview your post to double-check that the iframe displays correctly.
Handling Shortcodes and Plugins
If you’re using a plugin that provides shortcodes for embedding content, sometimes you can wrap those shortcodes inside a custom HTML block, or use dedicated blocks provided by the plugin itself. But for most custom iframes, inserting the HTML directly works perfectly.
6. Best Practices for Responsive and Secure Iframes
Embedding iframes is awesome, but making sure they look good on all devices and keep your site secure is just as important. Let’s talk about some best practices to ensure your embedded content is both responsive and safe.
Making Iframes Responsive
Responsive design means your iframe adjusts smoothly to different screen sizes—whether someone’s viewing on a desktop, tablet, or phone. Here’s how you can do it:
- Use CSS techniques: Wrap your iframe in a container div with a CSS class that maintains aspect ratio.
- Example:
<div class="responsive-iframe"> <iframe src="https://example.com" frameborder="0" allowfullscreen></iframe></div><style>.responsive-iframe { position: relative; padding-bottom: 56.25%; / 16:9 aspect ratio / height: 0; overflow: hidden;}.responsive-iframe iframe { position: absolute; top: 0; left: 0; width: 100%; height: 100%;}</style>
This approach ensures your iframe scales correctly on any device, providing a better user experience.
Securing Your Embedded Iframes
Security is crucial, especially if your iframe loads external content. Here are some tips to keep your site safe:
- Use sandbox attributes: Adding
sandboxto your iframe restricts what the embedded content can do. For example:<iframe src="https://example.com" sandbox="allow-scripts allow-same-origin"></iframe>
- Validate sources: Only embed content from trusted URLs to prevent malicious code injection.
- HTTPS everywhere: Always link to secure URLs to avoid security warnings or vulnerabilities.
- Keep WordPress and plugins updated: Regular updates patch security holes that could be exploited via embedded content.
Additional Tips
- Test responsiveness and security: Use browser tools to test your embedded iframe on different devices and check for vulnerabilities.
- Limit iframe content: Avoid embedding overly complex or untrusted third-party content that could slow down your site or introduce security risks.
- Monitor performance: Keep an eye on page load times; if an iframe causes slowdowns, consider optimizing or lazy-loading the content.
By following these best practices, your embedded iframes will not only look great but also keep your WordPress site secure and user-friendly. Happy embedding!
7. Troubleshooting Common Iframe Embedding Issues
Embedding iframes in your WordPress blog can sometimes come with a few hiccups. Don’t worry—most issues are straightforward to troubleshoot once you know what to look for. Here are some common problems and how to fix them:
Blocked Content or Security Errors
Sometimes, your iframe might not display properly, showing a blank space or a security warning. This often happens because the website you’re embedding has set restrictions to prevent embedding on other sites. To fix this:
- Check the source website’s embedding policy or headers (like X-Frame-Options).
- If you control the source, ensure it allows embedding by setting the proper headers or permissions.
- For external sources, consider finding an alternative embed or requesting permission.
Incorrect URL or Embedding Code
Double-check the URL you’re using inside the iframe. Even a small typo can prevent the iframe from loading properly. Make sure your code looks something like this:
<iframe src="https://example.com" width="600" height="400"></iframe>
Ensure the URL is correct, accessible, and starts with “http://” or “https://”.
Responsive Iframes Not Displaying Properly
Sometimes, your iframe doesn’t look good on mobile or different screen sizes. To fix this, you can add some CSS to make your iframe responsive:
<style>.responsive-iframe { position: relative; padding-bottom: 56.25%; / 16:9 aspect ratio / height: 0; overflow: hidden;}.responsive-iframe iframe { position: absolute; top: 0; left: 0; width: 100%; height: 100%;}</style>
Then wrap your iframe in a div with the class “responsive-iframe”:
<div class="responsive-iframe"> <iframe src="https://example.com" frameborder="0"></iframe></div>
Plugin or Theme Conflicts
If your iframe isn’t showing up, it could be due to conflicts with plugins or your theme. To troubleshoot:
- Disable plugins one by one to see if something is blocking the iframe.
- Switch to a default theme temporarily to check for theme conflicts.
- Review your browser’s console for error messages that can give clues.
8. Enhancing Your Blog with Interactive and Dynamic Content
Once you’ve mastered embedding basic iframes, why not take it a step further? Adding interactive and dynamic content can make your blog more engaging and provide real value to your readers. Here are some ideas and tips to elevate your WordPress posts:
Embedding Interactive Maps
Use iframes to embed maps from services like Google Maps. This is perfect for local businesses, event locations, or travel blogs. For example:
<iframe src="https://www.google.com/maps/embed?pb=YOUR_MAP_EMBED_CODE" width="600" height="450" style="border:0;" allowfullscreen="" loading="lazy"></iframe>
This allows visitors to explore locations without leaving your page.
Adding Live Data or Charts
Integrate live data visualizations or dashboards through iframes. Many data tools like Tableau, Datawrapper, or Google Data Studio offer embed options. This is a fantastic way to showcase:
- Sales figures
- Survey results
- Real-time analytics
Ensure your embedded content is updated automatically and looks good on all devices.
Embedding Video and Multimedia Content
While WordPress has native video embedding, sometimes an iframe from a third-party source offers more control or features. For example, you can embed live webinars, interactive tutorials, or multimedia presentations hosted on platforms like Vimeo or specialized tools.
Using Interactive Forms and Surveys
Embedding forms via iframe from tools like Google Forms or Typeform allows you to gather feedback, conduct surveys, or collect sign-ups seamlessly. These forms are dynamic and can be styled to match your blog’s aesthetic.
Best Practices for Dynamic Content
- Optimize for Mobile: Always test your embedded content on various devices.
- Ensure Accessibility: Use ARIA labels and descriptive titles where possible.
- Check Loading Speed: Too many iframes can slow down your site. Use lazy loading attributes or load content asynchronously.
- Maintain Security: Embed content from trusted sources only to avoid security risks.
With these strategies, you can make your WordPress blog not just more informative, but also more interactive and engaging, keeping your visitors hooked and encouraging them to explore more of what you have to offer.
Conclusion and Tips for Effective Iframe Integration
Embedding iframes in your WordPress blog can significantly enhance your content by showcasing dynamic elements such as videos, maps, or interactive forms. To ensure a smooth integration, keep in mind that proper sizing is crucial—use the width and height attributes to fit the iframe seamlessly within your layout. Additionally, always verify the source URL to ensure it is secure (preferably HTTPS) and trustworthy, as this impacts website security and user experience.
Here are some useful tips for effective iframe embedding:
- Use sandbox attributes if you need to restrict iframe permissions for security reasons.
- Optimize content load times by lazy-loading iframes where possible, especially for heavy media.
- Test responsiveness by viewing your blog on different devices to ensure the iframe scales correctly.
- Keep accessibility in mind by adding descriptive titles or aria-labels to improve navigation for users with disabilities.
- Consider using plugins or shortcodes if you frequently embed iframes, simplifying the process and maintaining consistency.
By following these guidelines, you can maximize the benefits of iframe integration without compromising your website’s performance or security. Remember, thoughtful implementation leads to a more engaging and professional-looking blog that effectively leverages dynamic content for your readers.