Hey there! If you’re building a website with WordPress, you’ve probably wondered how to make your images more engaging by adding text right on top of them. Whether it’s for highlighting a special offer, creating a stunning hero section, or just making your content pop, overlaying text on images is a fantastic trick. The key is doing it without dulling or obscuring the image, so your visuals stay vibrant and appealing. Luckily, WordPress offers multiple ways to achieve this, from simple plugins to custom CSS. Let’s dive into how you can add text over images seamlessly and beautifully!
Reasons to Overlay Text on Images in WordPress
Overlaying text on images isn’t just a design fad — it’s a smart move for your website’s effectiveness. Here are some compelling reasons why you might want to do it:
- Grab Attention Instantly: An eye-catching image combined with compelling text can immediately draw visitors into your content or offer.
- Enhance Visual Storytelling: Images with overlays can communicate your message more powerfully, making complex ideas easier to grasp at a glance.
- Create Clear Calls to Action: Overlaid text is perfect for highlighting buttons, special deals, or prompts that encourage user interaction.
- Improve Branding: Consistent use of overlays with your brand colors and fonts can boost brand recognition and professionalism.
- Save Space and Keep Design Clean: Instead of cluttering your page with separate text blocks, overlaying text on images keeps your layout sleek and visually appealing.
Plus, when done right, overlaying text can make your website look modern and polished. The trick is to ensure your text is readable and that it enhances, rather than dulls, your beautiful images. That’s what we’ll explore next!
3. Methods to Add Text Over Images in WordPress
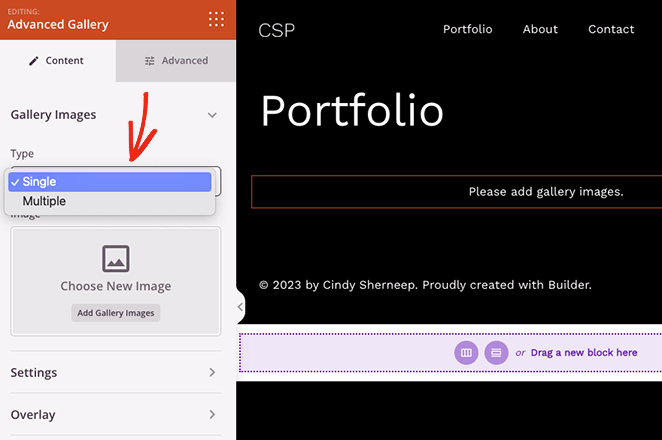
Adding text over an image might seem tricky at first, but there are actually several ways to do it in WordPress that don’t dull the image or make it look cluttered. Whether you’re creating a hero banner, a call-to-action section, or just want some stylish overlay text, the key is to choose the method that best fits your needs and comfort level with WordPress tools.
Let’s explore some of the most popular methods:
1. Using a Plugin
If you’re not comfortable with code or want a quick, hassle-free solution, plugins are your friends. Popular plugins like Advanced Custom Fields, Elementor, or Beaver Builder allow you to add overlay text easily. They often come with drag-and-drop interfaces, so you can position your text precisely without touching a single line of code.
2. Custom CSS Overlay
For those comfortable with a bit of CSS, you can create a custom overlay by wrapping your image and text in a container and positioning the text over the image with CSS. This method gives you more control and flexibility, especially when designing unique overlays that match your site’s style.
3. Using the Built-In Block Editor (Gutenberg)
WordPress’s default block editor (Gutenberg) has evolved into a powerful tool that can handle overlay text without dulling or obscuring your images. We’ll dive into this method in detail next, as it’s often the easiest for beginners and doesn’t require additional plugins or coding.
4. Creating a Background Image with Text Using Cover Blocks
Another simple approach involves using the Cover block, which allows you to set an image as a background and overlay text directly on it. This method is perfect for creating banners, headers, or featured sections that need stylish, readable text on top of images.
In summary, your choice depends on your comfort level, the design you’re aiming for, and how much customization you want. Using built-in tools is often the fastest way to get professional-looking results without adding extra plugins or coding. Next, let’s see how you can do this easily with Gutenberg’s Cover block.
4. Using Built-In Block Editor (Gutenberg) to Overlay Text

If you’re using the latest version of WordPress, the Gutenberg block editor is a fantastic feature that makes overlaying text on images straightforward and visually intuitive. No need for extra plugins or complex CSS — just a few clicks, and you’re done!
Step-by-Step Guide:
- Add a Cover Block: In your page or post, click the + button to add a new block, then select Cover. This block allows you to set an image as the background with overlay text.
- Choose Your Image: Upload a new image or select one from your media library. You can also enter a URL if your image is hosted elsewhere.
- Adjust Overlay Opacity: Once your image appears, you’ll see options to change the overlay color and opacity. To keep your image vibrant and avoid dulling it, choose a semi-transparent overlay color (like black with 20-30% opacity) or even set it to transparent if you prefer no overlay color.
- Add Your Text: Inside the Cover block, click on Click to add text. Type your message, headline, or call-to-action. You can also add multiple paragraphs or buttons as needed.
- Customize Text Style: Use the right sidebar or toolbar to adjust font size, color, alignment, and other style options to make your text stand out without overshadowing the image.
- Fine-Tune the Layout: Drag the block handles to adjust the height of the Cover block, ensuring your text fits perfectly and remains readable.
Tips for Better Results:
- Contrast is Key: Make sure your text color contrasts well with your background image. Light text over dark images or vice versa usually works best.
- Use Padding and Margins: Add spacing around your text for better readability and visual balance.
- Avoid Overcrowding: Keep your message concise. Too much text can become unreadable over images, especially on smaller screens.
This method is perfect for beginners and those who want to keep their workflow simple. Plus, since the Cover block is part of WordPress core, it’s always updated and compatible with your site, making it a reliable choice for adding overlay text without dulling your images.
In the next section, we’ll explore some advanced tips and tricks to make your overlay text even more stunning and effective. Stay tuned!
5. Utilizing WordPress Plugins for Advanced Overlay Options
If you’re looking to take your image overlays to the next level without diving into complex coding, WordPress plugins are your best friends. They make it super easy to add stylish, customizable text over images with just a few clicks. Plus, many come with features that allow you to fine-tune how your text interacts with the image, ensuring it looks professional and eye-catching.
Some popular plugins you might want to explore include:
- WP Overlay Text: A straightforward plugin that lets you add text overlays to images, with options for font style, size, and color. It also supports positioning and opacity controls.
- Image Hover Effects Ultimate: Not only does this plugin add hover effects to images, but it also includes overlay text options that appear when users hover over an image, creating interactive and dynamic visuals.
- Elementor: While primarily a page builder, Elementor offers powerful tools for overlaying text on images, with drag-and-drop controls and lots of styling options. It’s perfect if you want more control over your design.
Using these plugins is usually as simple as installing, activating, and then selecting your image. From there, you can customize your overlay text—choose your fonts, colors, transparency, and positioning—without messing with code. Many plugins also support responsive settings, so your overlays look great on all devices.
Remember: Always check the plugin reviews and compatibility with your WordPress version before installing. And don’t forget to keep your plugins updated to ensure security and performance. With the right plugin, adding beautiful, advanced text overlays becomes a breeze—saving you time and effort while elevating your site’s visual appeal.
6. Customizing Text and Image Appearance for Better Visuals
Once you’ve added your text over an image, the next step is to make sure it looks just right. Customizing the appearance of both your text and the underlying image can make a huge difference in how engaging and professional your visuals feel. It’s all about balancing readability with aesthetics.
Here are some tips to help you achieve that perfect look:
- Choose Contrasting Colors: To ensure your text stands out, use colors that contrast well with the image. For example, white text on a dark background or black text on a light image. Many design tools let you pick colors that complement your site’s palette.
- Adjust Transparency and Opacity: Sometimes, a semi-transparent overlay behind your text can improve readability without dulling the image. Many plugins and CSS options let you tweak transparency levels—try different settings to see what works best.
- Select Readable Fonts and Sizes: Use clean, legible fonts and appropriate sizes. Bold headlines or larger text can draw attention, while smaller text can provide details. Consider font pairing—using a stylish font for headings and a simple one for body text.
- Apply Text Shadows and Effects: Adding subtle shadows or glow effects to your text can help it pop out from busy backgrounds. Just be cautious not to go overboard—subtlety is key for a polished look.
On the image side, you can enhance appearance by:
- Applying Filters or Adjustments: Brightness, contrast, and saturation tweaks can help your image look vibrant and crisp behind your overlay text.
- Using Overlay Layers: A semi-transparent color layer over the image can help your text stand out more clearly. For example, a dark overlay on a bright image makes white text more readable.
- Ensuring Responsiveness: Make sure your images and overlays scale well on different devices. Many page builders and plugins support responsive design, so your visuals stay sharp everywhere.
Ultimately, the goal is to create visuals that are both eye-catching and easy to read. Play around with these settings—test different color combinations, font styles, and transparency levels. Preview your designs on various devices if possible. Small tweaks can make a big difference in how your visitors experience your content, making your site look more professional and inviting.
7. Tips to Prevent Dulling or Obscuring the Image
Adding text over an image can really make your content pop, but it’s easy to accidentally hide or dull the image if you’re not careful. So, how do you ensure your text enhances rather than distracts from your image? Here are some practical tips:
Choose the Right Image
Start with an image that has enough space or a relatively simple background. Busy or highly detailed images can make overlay text hard to read and might cause you to choose a font color or style that dulls the image. Look for images with areas of uniform color or contrast where your text can sit comfortably.
Use Contrast Effectively
Contrast is your best friend here. Make sure your text color sharply contrasts with the part of the image behind it. For example, white text works well on darker backgrounds, while black or dark gray text shines on lighter areas. You can also add semi-transparent overlays (more on that below) to create a consistent background for your text, ensuring it stands out without dulling the image.
Employ Overlay Layers Wisely
Adding a semi-transparent layer between the image and your text can help keep the image vibrant while ensuring your words are legible. For instance, a black or white overlay with 20-50% opacity can mute the image just enough to highlight the text without dulling the entire picture. Adjust the opacity until you find that sweet spot where both elements shine.
Adjust Brightness and Saturation
If you notice your image looks dull after adding text, consider editing it before uploading. Slightly increasing the brightness or saturation can make the image more vibrant, which in turn helps your overlay text pop without overpowering the image. Many WordPress plugins or image editors allow quick adjustments directly within your site.
Pick the Right Font and Size
Sometimes, the font style and size can make a big difference. Choose bold, clear fonts that are easy to read, and avoid overly ornate styles that can blend into the background. Larger font sizes can also help your message stand out, but be cautious not to overpower the image visually.
Test Different Combinations
Don’t be afraid to experiment! Try different overlay colors, transparency levels, and font styles to see what works best for your specific image. Preview your changes on different devices to ensure your text remains readable and your image remains vibrant across screens.
8. Conclusion and Best Practices for Overlaying Text on Images
Overlaying text on images is a fantastic way to create engaging visuals for your website, social media, or marketing materials. When done thoughtfully, it can enhance your message without dulling or obscuring the beauty of your images. Remember, the key is balance—making sure your text stands out without overpowering the background.
To wrap things up, here are some best practices to keep in mind:
- Start with high-quality images: Clear, vibrant images provide a better canvas for overlay text.
- Use overlays or semi-transparent backgrounds: They help your text pop while keeping the image lively.
- Prioritize contrast: Choose text colors that stand out against the background for maximum readability.
- Edit images if needed: Slight enhancements like increasing brightness or saturation can make a big difference.
- Test extensively: View your design on different devices and lighting conditions to ensure consistency.
- Keep it simple: Avoid cluttered fonts or overly busy images that make text hard to read.
Ultimately, the goal is to create visuals that are both eye-catching and easy to understand. With these tips, you’ll be well on your way to adding compelling text overlays that boost your content without dulling your stunning images!

