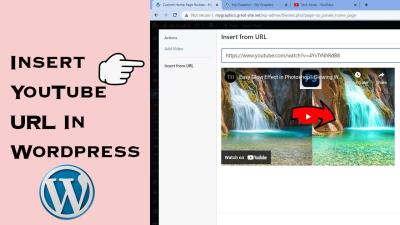
Thinking about creating a website in 2025? Whether you’re starting a blog, a business site, or an online store, WordPress remains one of the easiest and most flexible platforms out there. With its user-friendly interface and tons of customizable options, you don’t need to be a tech expert to get your site up and running. In this guide, we’ll walk you through the essential steps to build your WordPress website from scratch, making the process simple and enjoyable. So, let’s dive into the exciting world of website creation and turn your ideas into a digital reality!
Choosing the Right Domain Name and Hosting Service
Before you start building your website, the first big step is selecting a domain name and hosting service. Think of your domain as your website’s address — it’s what visitors will type into their browser to find you. The hosting service, on the other hand, is like renting a space on the internet where your website lives.
Choosing a Domain Name: Your domain should be memorable, easy to spell, and relevant to your content or brand. Here are some tips:
- Keep it short and simple.
- Use keywords related to your niche.
- Avoid numbers and hyphens, which can cause confusion.
- Choose the right extension (.com, .net, .org, or niche-specific like .blog or .shop).
Once you’ve brainstormed some options, check their availability using domain registration sites like GoDaddy, Namecheap, or Bluehost. It’s a good idea to pick a domain that aligns with your brand and is easy for people to remember.
Choosing a Hosting Service: Your hosting provider determines how well your website performs and how secure it is. For beginners in 2025, I recommend looking for a hosting provider that offers:
| Feature | Why It Matters |
|---|---|
| Ease of Use | Look for one-click WordPress installation and user-friendly dashboards. |
| Performance & Uptime | Reliable servers with high uptime ensure your site is always accessible. |
| Customer Support | 24/7 support can save you when you encounter issues. |
| Price | Affordable plans that fit your budget, with transparent pricing. |
| Security Features | Includes SSL certificates and regular backups to keep your site safe. |
Popular options like Bluehost, SiteGround, and DreamHost are known for their beginner-friendly features and solid performance. Many hosting providers also include free domain registration for the first year, which is a great bonus for newcomers.
In summary, choosing the right domain name and host sets a strong foundation for your website. Take your time to pick something that resonates with your brand, and select a hosting plan that offers reliable service and great support. Once you’ve got these in place, you’re ready to move on to installing WordPress and customizing your site!
3. Installing WordPress on Your Hosting Platform
Alright, now that you’ve got your domain and hosting sorted out, it’s time to get WordPress installed. Don’t worry—this part is pretty straightforward, even if you’re new to all of this. Most hosting providers make the process super simple with tools like one-click installers.
Here’s a quick step-by-step to guide you through:
- Log into your hosting account: Head over to your hosting provider’s website and sign into your control panel or dashboard.
- Locate the WordPress installer: Look for sections like “Website” or “Softaculous,” “Fantastico,” or “One-Click Installers.” These are usually prominently displayed.
- Start the installation: Click on the WordPress icon, then hit the “Install” button.
- Configure your settings: You’ll need to choose:
- Domain name: Select the domain where you want WordPress installed.
- Site Name & Admin Info: Enter your site’s name, admin username, password, and email. Make sure your password is strong!
- Complete the installation: Click “Install” or “Finish,” and your hosting platform will do the rest. In just a few moments, your WordPress site will be live!
Some hosting providers also offer manual installation methods, which involve downloading WordPress from the official site and uploading files via FTP. But honestly, for beginners, the one-click method is the way to go—it’s quick, safe, and hassle-free.
Once installed, you’ll be able to access your WordPress dashboard by going to yourdomain.com/wp-admin. Log in with the username and password you set during installation, and voilà—you’re officially a WordPress website owner!
4. Selecting a Theme for Your Website Design

Now that your WordPress site is set up, it’s time to give it a look that matches your style and goals. This is where themes come into play. Think of a theme as the outfit your website wears—color schemes, layouts, fonts—all of it can be customized to make your site unique.
Here’s how to pick the perfect theme:
- Determine your website’s purpose: Is it a blog, an online store, a portfolio, or a business site? Different themes cater to different needs.
- Browse the WordPress Theme Repository: Head over to wordpress.org/themes/—it’s full of free themes vetted by WordPress. Use filters like “features” or “subject” to narrow down your options.
- Look for responsive and mobile-friendly designs: Most modern themes are responsive, meaning they look great on phones and tablets. This is a must-have for a good user experience and SEO.
- Check reviews and ratings: Read what other users are saying. A high rating and recent updates are signs of a reliable theme.
- Preview themes: Use the “Live Demo” feature to see how the theme looks in action before installing it.
Once you find a theme you like, here’s how to install it:
- From your WordPress dashboard, go to Appearance > Themes.
- Click on Add New.
- Use the search bar or upload a theme ZIP file if you’ve downloaded one externally.
- Click Install and then Activate.
And that’s it! Your website now has a fresh look. Remember, you can always switch themes later, so don’t worry about getting it perfect on your first try. Play around with different styles, customize colors, fonts, and layouts to make your site feel like you.
5. Customizing Your WordPress Site with Plugins and Widgets
Once you’ve got your basic WordPress site up and running, it’s time to make it truly your own. This is where plugins and widgets come into play—they’re like the accessories and gadgets of your website, helping you add features, improve functionality, and make your site more engaging for visitors.
What Are Plugins and Widgets?
- Plugins: These are extra pieces of software you install to extend your site’s capabilities. Want a contact form? There’s a plugin for that. Need SEO tools? There’s a plugin for that too.
- Widgets: Think of widgets as small blocks you add to your site’s sidebar, footer, or other widget-ready areas. They display content like recent posts, social media feeds, or search bars.
Choosing the Right Plugins
With thousands of plugins available, it can be overwhelming. Here are some tips for selecting the best ones:
- Check reviews and ratings: Look for plugins with high ratings and plenty of active installs.
- Update frequency: Choose plugins that are regularly maintained and updated compatible with your WordPress version.
- Essential plugins for starters: Consider installing plugins like Yoast SEO for search engine optimization, WPForms for contact forms, and Wordfence Security for site security.
Adding and Managing Plugins
Adding plugins is straightforward:
- Go to your WordPress dashboard and click on Plugins > Add New.
- Use the search bar to find the plugin you want.
- Click Install Now and then Activate.
Once activated, most plugins will add their settings to your dashboard menu or under Settings.
Using Widgets Effectively
Managing widgets is just as simple:
- Navigate to Appearance > Widgets in your dashboard.
- Drag and drop available widgets into your widget areas, like the sidebar or footer.
- Configure each widget’s settings to suit your needs.
Remember, less is often more—don’t overload your site with too many plugins or widgets, as it can slow down your site and make management more complicated. Focus on adding features that genuinely enhance user experience and support your website goals.
6. Creating Essential Pages and Content for Your Website
With the customization tools in place, it’s time to build the core content of your website. Every good website needs a few essential pages to inform visitors, establish credibility, and guide actions. These pages form the backbone of your site and help visitors navigate easily.
Key Pages Every Website Needs
| Page | Purpose |
|---|---|
| Home | Welcome visitors and give a quick overview of what your site offers. Make it engaging and clear. |
| About | Share your story, mission, or background. Build trust and connect with your audience. |
| Contact | Provide ways for visitors to reach out—include a contact form, email, phone number, or social links. |
| Services/Products | Showcase what you offer, with details, pricing, and images if relevant. |
| Blog | Share updates, tips, and insights to keep your site fresh and improve SEO. |
Creating Your Pages
To create a new page:
- Go to Pages > Add New in your dashboard.
- Enter a clear, descriptive title (e.g., “About Us”).
- Use the WordPress editor to add your content—text, images, videos, or links.
- Preview your page to see how it looks.
- Click Publish when you’re ready for it to go live.
Tips for Effective Content
Here are some quick tips to make your pages engaging and user-friendly:
- Be clear and concise: Visitors want quick answers; avoid long-winded paragraphs.
- Use visuals: Images and videos can make your pages more appealing.
- Include Calls to Action (CTAs): Encourage visitors to take the next step—like contacting you or subscribing.
- Optimize for SEO: Use relevant keywords, descriptive titles, and meta descriptions to help your pages rank better in search engines.
Building these foundational pages sets your website up for success. They not only help visitors understand what you do but also establish your professionalism and credibility online. Take your time crafting compelling, helpful content—you’ll thank yourself later when your site starts attracting visitors!
7. Optimizing Your WordPress Site for Search Engines
Great, your website is looking good! Now, let’s make sure people can actually find it when they search online. Search Engine Optimization (SEO) might sound complicated, but it’s really about making your site friendly for search engines like Google. The better your SEO, the higher your site will rank in search results, bringing more visitors your way.
Here are some simple and effective ways to optimize your WordPress site for SEO:
- Use a Good SEO Plugin: Plugins like Yoast SEO or All in One SEO Pack make it easy to optimize your content. They guide you through adding keywords, creating meta descriptions, and more.
- Choose Descriptive, Keyword-Rich Titles: Your page titles should clearly describe what the page is about, including relevant keywords. For example, instead of “My Blog,” try “Healthy Recipes for Beginners.”
- Craft Unique Meta Descriptions: These short summaries appear under your page titles in search results. Make them enticing and include your main keywords to encourage clicks.
- Use Keywords Thoughtfully: Incorporate relevant keywords naturally into your content, headings, and image alt texts. Avoid keyword stuffing—it should feel natural!
- Optimize Your Images: Use descriptive file names and alt tags for all images. This helps Google understand what your images are about and improves your chances of appearing in image searches.
- Improve Website Speed: Search engines favor fast-loading websites. You can achieve this by optimizing images, using caching plugins like W3 Total Cache, and choosing a reliable hosting provider.
- Create Quality Content Regularly: Consistently publishing helpful and engaging content encourages visitors to stay longer and share your site, which boosts your SEO.
Remember, SEO isn’t a one-and-done task. It’s an ongoing process. Keep monitoring your site’s performance with tools like Google Analytics and Search Console. Over time, these insights will help you refine your strategies and climb higher in search rankings.
8. Ensuring Your Website is Mobile-Friendly and Fast
In 2025, most people browse the web on their smartphones or tablets. If your website isn’t mobile-friendly and fast, visitors will leave quickly, and search engines might rank you lower. So, let’s talk about how to make sure your site looks great and loads quickly on any device.
Why Mobile-Friendliness Matters: Google’s algorithm prioritizes mobile-friendly websites because they provide a better user experience. A mobile-friendly site adapts to different screen sizes, making navigation easy and content easy to read.
Here’s what you can do to ensure your website is mobile-friendly and fast:
- Choose a Responsive Theme: Most modern WordPress themes are responsive, meaning they automatically adjust to different screen sizes. Pick a theme that’s optimized for mobile devices.
- Use Large, Readable Fonts and Buttons: Make sure text is easy to read without zooming and buttons are big enough to tap comfortably.
- Optimize Images: Compress images to reduce file size without losing quality. Plugins like Smush or built-in tools can help with this.
- Enable Caching and Minify Files: Caching stores static versions of your site, speeding up load times. Minify CSS and JavaScript files to reduce their size. Plugins like WP Rocket or Autoptimize are great for this.
- Use a Content Delivery Network (CDN): CDNs distribute your content across multiple servers worldwide, reducing latency and speeding up access for visitors everywhere.
- Regularly Test Your Site Speed: Use tools like Google PageSpeed Insights, GTmetrix, or Pingdom to check how fast your site loads. They also give specific recommendations to improve speed.
- Avoid Overloading Your Site: Limit the number of plugins and scripts that run on your pages. Too many can slow things down and cause compatibility issues.
By making your website mobile-friendly and fast, you’re not only providing a better experience for your visitors but also improving your chances of ranking higher in search results. Remember, a smooth, speedy site keeps visitors happy and coming back for more!
9. Launching Your WordPress Website and Promoting It
Congratulations! You’ve built your website, customized it to your liking, and now it’s finally time to go live. Launching your WordPress site is a big milestone, but the journey doesn’t end there. Once your site is live, your next goal is to attract visitors and get your content noticed.
First things first—double-check everything. Make sure all pages load correctly, links work, and your site looks good on different devices. Test your site speed using tools like Google PageSpeed Insights or GTmetrix, and optimize images if needed to ensure your visitors have a smooth experience.
Now, it’s time to promote your website:
- SEO Optimization: Use relevant keywords in your content, meta descriptions, and titles. Install plugins like Yoast SEO or Rank Math to help optimize your pages and improve your visibility on search engines.
- Social Media: Share your new website across your social media channels—Facebook, Instagram, Twitter, LinkedIn—whatever platforms your audience uses. Engage with followers and encourage sharing.
- Content Marketing: Publish high-quality, valuable content regularly. Consider starting a blog, creating videos, or offering free resources like ebooks or templates to attract and retain visitors.
- Email Marketing: Build an email list from day one. Offer a freebie or newsletter signup form on your site, then send updates, tips, or exclusive offers to your subscribers.
- Online Communities and Forums: Participate in niche-specific groups on Reddit, Facebook, or industry forums. Share your expertise and subtly promote your website when relevant.
Remember, promoting your website is an ongoing process. Consistent effort over time helps build authority, increase traffic, and grow your online presence. Be patient and stay committed—you’ll start to see results!
10. Maintaining and Updating Your WordPress Site in 2025
Once your website is live and attracting visitors, the work doesn’t stop. Regular maintenance and updates are essential to keep your site secure, fast, and relevant. Think of your website as a living entity that needs care and attention to thrive.
Here are some key practices for maintaining your WordPress site in 2025:
| Task | Why It’s Important |
|---|---|
| Update WordPress Core, Themes, & Plugins | Security patches, new features, and performance improvements are rolled out regularly. Keeping everything updated reduces vulnerability to hackers and bugs. |
| Backup Your Website | In case something goes wrong—like a plugin conflict or hacking—you want a recent restore point. Use reliable backup plugins like UpdraftPlus or BackupBuddy. |
| Monitor Site Performance & Security | Use tools like Google Analytics for traffic insights and security plugins such as Wordfence or Sucuri to detect malware or suspicious activity. |
| Review & Refresh Content | Keep your content current and relevant. Update outdated information, add new blog posts, and optimize existing content for SEO. |
| Optimize Site Speed | As technology advances, user expectations for fast-loading sites increase. Regularly review and optimize images, leverage caching, and use a CDN if needed. |
| Engage with Your Audience | Respond to comments, gather feedback, and adapt your content based on what your visitors want. It builds community and loyalty. |
In 2025, maintaining your WordPress website also means staying updated with the latest web trends and security standards. Set a schedule—monthly or quarterly—to review your site and ensure everything runs smoothly. Remember, a well-maintained website not only performs better but also builds trust with your visitors, making them more likely to return and recommend your site to others.

