Ever thought about giving your WordPress site a unique look? You’re not alone! Custom templates can make your site stand out from the crowd, and they’re easier to create than you might think. Whether you’re a blogger, a business owner, or just a creative soul, customizing your templates allows you to convey your unique brand or message. In this section, we’ll unravel what custom templates are and why they’re important for your website’s design and functionality.
What is Divi Builder?

If you’re diving into the world of WordPress design, you’ve likely come across Divi Builder. But what exactly is it? Well, let me break it down for you!
Divi Builder is a powerful drag-and-drop page builder plugin created by Elegant Themes. It’s renowned for its flexibility and ease of use, allowing users of all skill levels to create stunning websites with little to no coding knowledge. Here’s why Divi Builder stands out:
- Drag and Drop Functionality: Easily move elements around your page with simple drag-and-drop actions, making the design process intuitive.
- Pre-made Layouts: With hundreds of pre-built templates, you can kickstart your design without starting from scratch.
- Mobile Responsiveness: Ensure your site looks great on all devices, whether it’s a smartphone, tablet, or desktop.
- Custom CSS: For the more advanced users, Divi allows you to insert custom CSS for even more design flexibility.
- Visual Editing: See your changes in real-time! The front-end editor lets you make adjustments and instantly view them.
In short, Divi Builder is an incredible tool that simplifies web design and empowers anyone to create beautiful, functional WordPress sites. Excited to explore more? Stick around as we delve into how to create custom templates using this versatile builder!
Benefits of Using Custom Templates

Creating custom templates in WordPress using the Divi Builder comes with a host of benefits that can significantly enhance your website’s appeal and functionality. Let’s dive into why custom templates are a great choice:
- Unique Design: Custom templates allow you to break away from generic layouts. You can design a site that truly reflects your brand’s identity. This means choosing colors, fonts, and layouts that resonate with your target audience.
- Improved User Experience: Tailoring your templates to meet specific user needs can lead to a more intuitive navigation system. When users find information easily, they are more likely to stay on your site.
- Easy Updates: Once you create a custom template, it’s incredibly easy to update. You can simply tweak a template rather than redesigning each page individually. This saves valuable time and effort.
- SEO Benefits: Custom templates can enhance your search engine optimization (SEO) strategies. By structuring your website content logically and using proper headings, you create a more crawlable site for search engines.
- Versatility: Whether you’re building a blog, an online store, or a portfolio, custom templates can cater to any type of website. Flexibility to change and adapt is a huge plus.
In summary, custom templates not only make your website visually appealing but also improve user engagement and facilitate easy updates. If you’re looking to make your WordPress site stand out, using Divi Builder for custom templates is the way to go!
Setting Up Divi Builder
Getting set up with Divi Builder is straightforward and doesn’t require any technical expertise. Whether you are a novice or an experienced developer, the process is user-friendly. Here’s how you can set things up:
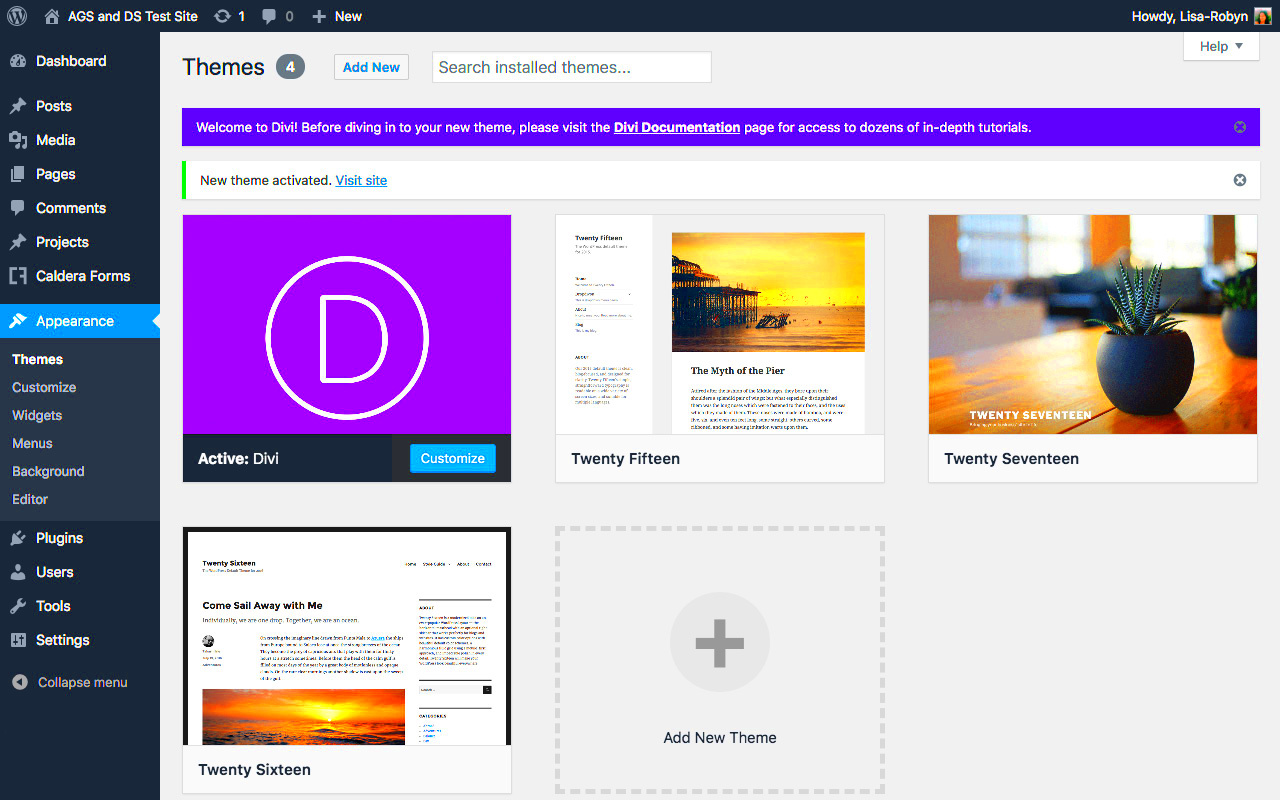
- Purchase and Install Divi: Start by purchasing the Divi theme or the Divi Builder plugin from the Elegant Themes website. Once you’ve downloaded it, install it on your WordPress site via the dashboard by navigating to Appearance > Themes > Add New.
- Activate Your License: After installing, you’ll need to activate your license. Go to Divi > Theme Options and enter your API key to ensure you receive updates and support.
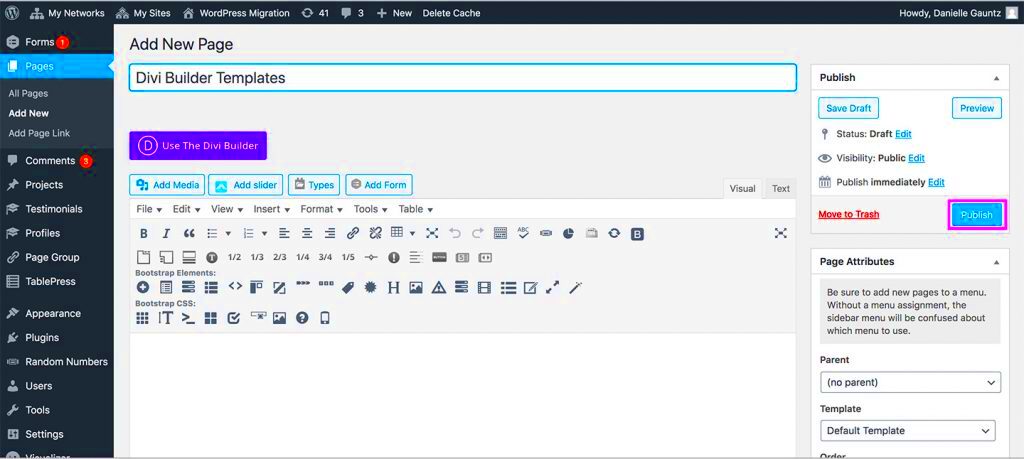
- Creating a New Page: To begin building custom templates, create a new page from your WordPress dashboard. Click on Add New under the Pages section.
- Launch Divi Builder: On your new page, click the Use Divi Builder button. This will redirect you to a user-friendly interface where the magic happens!
- Select a Layout: You can either start from scratch or select one of the premade layouts that Divi offers. This is a great way to kickstart your design process. Customize it as per your needs!
- Add Modules: Divi allows you to add various modules like text, images, sliders, and more. Simply drag and drop them into your layout to build your page visually.
And there you have it! Setting up Divi Builder is a breeze, and once it’s up and running, you’re well on your way to creating stunning custom templates for your WordPress website. Explore the options and have fun designing!
Creating a New Custom Template
Creating a custom template in WordPress using the Divi Builder is both fun and straightforward. Whether you’re looking to design a unique landing page, a blog post layout, or a full-fledged website, Divi’s template system has got you covered. Let’s go through the process step-by-step.
First off, to create a new template, navigate to your WordPress dashboard. From there, follow these steps:
- Go to Divi: Click on ‘Divi’ in the left sidebar of your dashboard and select ‘Theme Builder.’
- Create New Template: Click on the ‘+ Add New Template’ button at the top. This starts the template creation process.
- Choose Your Layout: Now, you can choose where you want to use this template, whether it’s for all posts, specific pages, or custom post types.
- Add Custom Layouts: Click on the ‘Add Custom Body’ option to start creating the layout for your new template.
- Save Your Template: Don’t forget to save your work occasionally. The save button is usually at the bottom of the builder interface.
Now, remember, with each new template, you have the freedom to use existing layouts or start from scratch. Depending on your design goals, you might want to use Divi’s pre-designed layouts or totally unleash your creativity. When you’re happy with your design, head back to the Theme Builder and ensure every setting is to your liking before publishing!
Using the Divi Builder Interface
The Divi Builder interface is user-friendly and visually intuitive, making it an excellent choice for beginners and experienced web designers alike. Upon entering the Builder, you will notice a clean layout designed to keep you focused on your design. Let’s break down the key components of the interface.
When you start using Divi Builder, you’ll encounter several primary sections:
- Header Area: Here, you’ll see your website’s name and options for saving or publishing your work.
- Build on the Frontend: You’ll often have the choice to edit directly on the front end of your site, allowing you to see changes live as you make them.
- Content & Design Settings: Each element you add can be customized individually. You can adjust content settings, styling options, and advanced features like spacing and positioning.
- Sections, Rows, and Modules: The structure of your layout is built using these components. Sections act as containers, rows hold modules, and modules are the actual content elements (like text, images, buttons, etc.).
| Component | Description |
|---|---|
| Sections | Large blocks that can hold multiple rows. |
| Rows | Dividers within sections that hold columns and modules. |
| Modules | Individual content units like text, images, sliders, etc. |
Playing around with each element is key to mastering the Divi Builder. Do not hesitate to explore different features, and remember—practice makes perfect! With time, you’ll become adept at transforming your ideas into stunning visual templates that resonate with your brand or personal style.
Designing Your Custom Template
Creating a custom template in WordPress using the Divi Builder opens up a world of possibilities for your website. It allows you to design a unique layout tailored specifically to your content and audience. Let’s break down the process to make it as easy as possible.
First things first, you’ll want to have a clear vision of what your custom template should look like. Consider the following:
- Purpose: What is the template for? Is it a blog post, a landing page, or a portfolio? Understanding the purpose will guide your design decisions.
- Layout: Think about how you want to organize your content. Would a grid layout work better, or perhaps a single-column format? Draw it out if necessary!
- Styling: Decide on colors, fonts, and other style elements that align with your brand. Use the Divi theme options to ensure consistency.
Once you have your vision, log into your WordPress dashboard and navigate to the page where you want to create the template. Click on the Divi Builder option, and you’ll be greeted with a robust set of tools.
Using the Divi Builder, you can drag and drop elements to construct your layout. Don’t hesitate to explore different content modules like text blocks, images, sliders, and more. Divi also offers a comprehensive library of pre-made layouts that can be customized to fit your needs.
Finally, once you’re happy with your design, make sure to preview it before publishing. This gives you a chance to tweak anything that doesn’t look quite right. Remember, designing a custom template should be an enjoyable process, so take your time and let your creativity shine!
Saving and Managing Templates
After you’ve poured your heart and soul into designing your custom template with the Divi Builder, you’ll want to save and manage it effectively. Fortunately, Divi makes this a breeze! Follow along to ensure your hard work doesn’t go to waste.
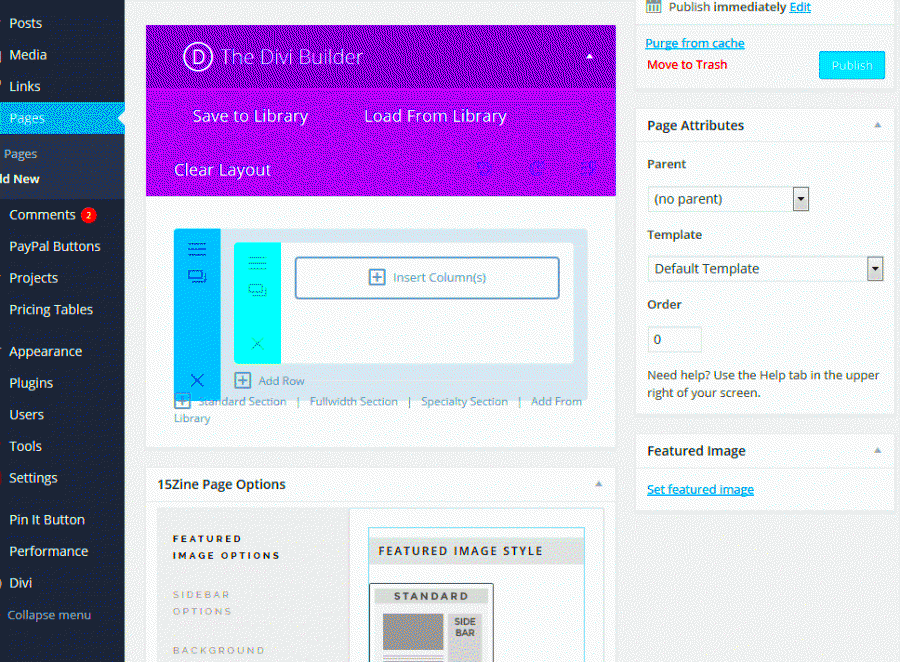
To save your custom template, simply click on the purple Divi icon in the builder interface, then select the Save to Library option. This allows you to save the entire layout as a template that you can reuse later.
When saving, you’ll have the option to name your template. Choose a descriptive name so you can easily identify it later. You can also add a category, which will help you organize your templates in the library.
To manage your templates, head over to the Divi Library in your WordPress dashboard. Here, you’ll see all the templates you’ve created. You can:
- Edit: Modify existing templates by selecting them and clicking on “Edit.”
- Duplicate: Create a copy of any template for experimentation without affecting the original.
- Delete: Remove any templates you no longer need to keep your library tidy.
Additionally, you can filter the templates using the categories you set earlier. This feature is great for quickly locating a specific template amidst many others.
Ultimately, saving and managing your templates properly leads to increased efficiency when building pages, helping you create stunning websites faster. Don’t forget to back up your templates regularly, just to be safe!
Applying Your Custom Template to Pages
Once you’ve created a stunning custom template with Divi Builder, the next step is to apply it to your desired pages. This is where the magic happens, and you start seeing your hard work come to life!
Here’s a straightforward guide to applying your custom template:
- Navigate to Your Pages: From your WordPress dashboard, go to Pages and choose the page that you want to apply your custom template to.
- Enable Divi Builder: Click on the ‘Enable Divi Builder’ button at the top of the page editor. If you’re editing a page that already uses Divi, just hop into the visual builder.
- Access the Template Library: Once in the Divi Builder, click on the ‘+’ icon to load your layout options. Here you’ll find the ‘Load From Library’ option.
- Select Your Custom Template: Browse your saved layouts and select the custom template that you previously created. Click Load to apply it.
- Adjust Settings: After loading your template, feel free to make any final tweaks and adjustments to elements like text, images, and spacing to fit the content of the specific page.
- Publish Changes: Don’t forget to click on the Publish or Update button once you’re satisfied with how everything looks!
Voila! Your custom template is now applied to your chosen page. Take a moment to preview it to ensure everything displays correctly.
Testing and Troubleshooting Your Template
After applying your custom template, testing and troubleshooting come into play to ensure everything functions seamlessly. This step is crucial in delivering a professional experience to your site visitors.
Here’s how you can effectively test and troubleshoot your template:
- Preview the Page: Use the preview function to see how your page looks in real-time. Observe spacing, alignment, and overall aesthetics.
- Check Responsiveness: Ensure that your page adapts well on different devices. Resize your browser or use tools like Chrome DevTools to simulate various screen sizes.
- Review Link Functionality: Click through all buttons and links within the template to ensure they lead to the correct destinations.
- Load Time Evaluation: Use tools like Google PageSpeed Insights to check your page load time. A slow page can deter visitors!
- Error Log Check: Keep an eye on your WordPress error logs for any hidden issues that could cause problems.
- Debugging Plugins: If you’re facing issues, consider disabling plugins one by one to identify any conflicts.
After you’ve tested and identified areas for improvement, make the necessary adjustments. Remember, the goal is to create a flawless experience for users, so don’t shy away from putting in a little extra effort during this phase!
Conclusion
Creating custom templates in WordPress using the Divi Builder is an excellent way to enhance your website’s design and functionality. By leveraging the intuitive drag-and-drop interface, you can create visually stunning layouts without needing extensive coding knowledge. Here’s a brief summary of the key steps you should follow:
- Enable Divi Builder: Activate the Divi Builder on the page or post where you want to create a custom template.
- Choose a Layout: Start with a pre-made layout or create a new one from scratch that suits your style.
- Add Modules: Use various Divi modules like text, images, sliders, and buttons to build your layout.
- Customize Styles: Utilize the design settings to customize colors, fonts, spacing, and more to match your branding.
- Save as Template: Once satisfied with your design, save it as a template for future use, which can save time on repetitive design tasks.
- Apply to Other Pages: Easily apply your saved template to other pages or posts, ensuring consistency across your site.
By following these steps, you can create a unique and professional-looking website tailored to your audience’s needs. Remember, the Divi Builder not only simplifies the design process but also allows for endless customization possibilities. Dive into your creativity with Divi Builder and watch your vision come to life!


