Caching is like having a shortcut to all the goodies on the internet, especially for WordPress sites. It stores copies of your pages, so they load faster for your visitors. In the fast-paced world we live in, waiting even a few seconds for a website to load can be frustrating. If your site is slow, potential readers may bounce away. That’s why understanding caching is crucial for any website owner.
Utilizing caching not only enhances your site’s speed but also improves user experience and boosts your search engine rankings. With better performance, you keep your visitors happy and engaged, leading to higher conversion rates. So, let’s dive into the different types of caching and how they can be a game-changer for your WordPress site.
Understanding Different Types of Caching
When it comes to caching, knowledge is power. There are several types of caching that you can implement to supercharge your WordPress site. Let’s break them down:
- Page Caching: This stores static copies of your webpages, so they don’t have to be generated each time someone visits. It drastically reduces load time.
- Browser Caching: This allows browsers to store certain elements of your site, such as images and stylesheets, on users’ devices, speeding up their subsequent visits.
- Object Caching: This type caches database queries, helping to reduce the load on your database server. It’s particularly useful for dynamic sites that frequently access the database.
- Opcode Caching: This caches the compiled PHP code so that it doesn’t need to be recompiled on every request, which can significantly improve performance.
- CDN Caching: A Content Delivery Network (CDN) caches your static assets across various servers worldwide, ensuring that users get faster content delivery, no matter where they are.
Each type of caching serves its unique purpose, and knowing how they work will help you choose the best combination for your WordPress site. By leveraging these caching strategies, you can enhance your website’s performance and provide a responsive experience to your users.
Choosing the Right Caching Plugin for Your Needs
When it comes to spicing up your WordPress site, selecting the right caching plugin is like choosing the perfect seasoning for your favorite dish. There are several options out there, each with its own unique flavor, benefits, and features. So, how do you know which one is right for you? Let’s break it down!
Here are some key factors to consider:
- Performance: Look for plugins that offer advanced caching methods such as page caching, browser caching, and object caching. Popular options like W3 Total Cache and WP Super Cache often rank high for performance.
- Ease of Use: Aim for a plugin that isn’t just powerful but easy to use. If you’re not a tech whiz, a user-friendly interface like that of WP Rocket might be your best bet.
- Compatibility: Ensure the plugin works seamlessly with your themes and other plugins. Some caching plugins have reported conflicts with specific WordPress themes, so do your homework!
- Support and Documentation: Check if the plugin you’re considering has an active support community and comprehensive documentation. This will come in handy if you encounter issues.
- Price: While there are great free options, premium plugins often offer more features and dedicated support. Balance your budget with your needs.
By weighing these factors, you can confidently select a caching plugin that will keep your site speedy and efficient.
Step-by-Step Guide to Installing a Caching Plugin
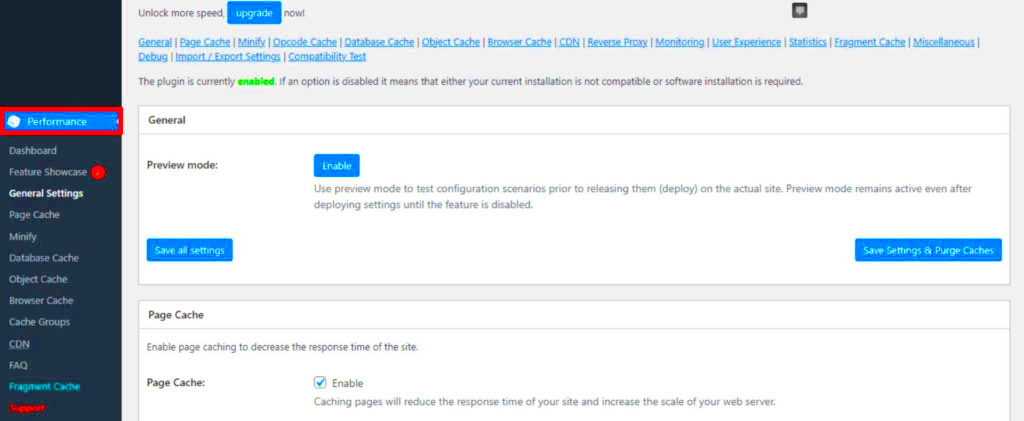
Now that you’ve chosen your ideal caching plugin, it’s time to get it installed. Don’t worry; it’s as easy as pie! Follow these simple steps to make sure your caching plugin is up and running in no time.
- Log into Your WordPress Dashboard: Typically, you can do this by going to yourdomain.com/wp-admin. Grab your admin credentials to get started!
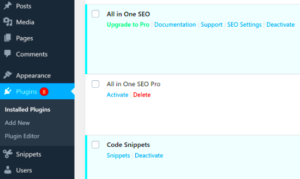
- Navigate to Plugins: On the left sidebar, find and click on “Plugins.” This is where all the magic happens.
- Add New Plugin: Click the “Add New” button, usually located at the top of the page.
- Search for Your Chosen Plugin: In the search bar, type the name of the caching plugin you’ve selected (like W3 Total Cache or WP Rocket).
- Install the Plugin: Once you find it, click on the “Install Now” button. The installation usually takes just a few seconds.
- Activate the Plugin: After installation, you’ll see an “Activate” button. Click it to turn your caching plugin on!
- Configure the Settings: Most plugins will have a settings page, where you can customize it to fit your needs. Take your time adjusting options like cache lifespan, minification, and CDN integration.
- Test Your Site: Finally, it’s essential to check your site’s performance. Use tools like Google PageSpeed Insights or GTmetrix to see how much faster your site is running.
And there you have it! With a few simple clicks, you’ve just turbocharged your WordPress site!
Configuring Your Caching Plugin for Optimal Performance
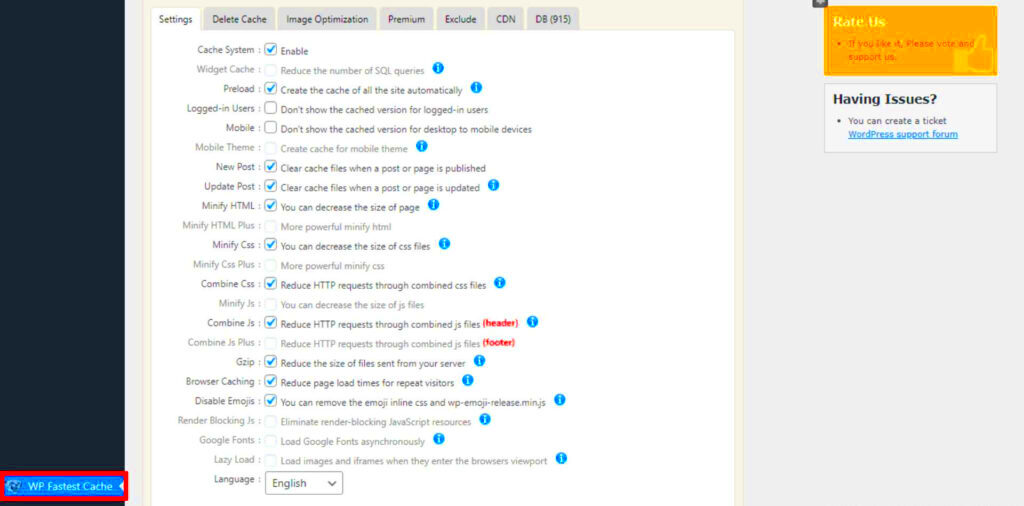
Once you’ve chosen a caching plugin for your WordPress site, the next step is to configure it for optimal performance. Don’t worry; it sounds more complicated than it is! With just a few tweaks, you can significantly boost your site speed.
Here are some key settings to focus on:
- Page Caching: This is the heart of your caching plugin. Enable it to store a static version of your site’s pages, allowing faster load times for visitors.
- Browser Caching: This setting allows browsers to remember certain elements of your site, so they don’t have to fetch them every time a user visits. Set the expiration time appropriately, typically anywhere from a few days to several weeks.
- Minification: This feature reduces the size of your CSS, JavaScript, and HTML files by removing unnecessary spaces and comments. It can significantly decrease load times.
- Gzip Compression: Enable Gzip compression to reduce the size of files sent from your server to your visitors’ browsers. This will help your site load faster without compromising quality.
- CDN Integration: If you are using a Content Delivery Network (CDN), ensure that your caching plugin integrates smoothly with it. This configuration allows your static files to be served from locations closer to your users.
Finally, always remember to clear your cache after making changes to configuration settings so that your site reflects the best performance.
Testing Your Site’s Speed Before and After Caching
Now that you’ve configured your caching plugin, it’s time to see how it’s performing! Testing your site’s speed both before and after setting up your caching plugin is essential. This step will give you tangible results and help you understand how much difference caching has made.
Here’s how you can effectively test your site’s speed:
- Use Speed Testing Tools: Popular tools like GTmetrix, Google PageSpeed Insights, and Pingdom can provide detailed reports on your site’s performance.
- Date and Time: Conduct your tests at similar times of the day to ensure consistency. Internet traffic can vary, affecting load times.
- Check Different Metrics: Look for changes in metrics such as load time, page size, and number of requests. It’s beneficial to focus on First Contentful Paint (FCP) and Time to Interactive (TTI).
After you have your baseline speed recorded before caching, go ahead and enable your caching plugin. Once you’ve configured it, retest your site using the same tools and methodology.
The results should show improved speeds! If you don’t see a notable difference, consider revisiting your caching settings or troubleshooting your server performance. Remember, the goal is to provide your visitors with a seamless and swift experience.
Troubleshooting Common Caching Issues
Caching plugins can do wonders for your WordPress site’s speed, but they can sometimes lead to issues that might leave you scratching your head. Let’s dive into some common caching problems you might encounter and how to troubleshoot them effectively.
1. Changes Not Reflecting: Have you updated your website but still see the old version? This is a common caching headache. Try clearing your cache through your caching plugin or in your web browser. In most caching plugins, there’s a clear cache button. Click it and check your site again.
2. Broken Layouts or Missing Elements: If your site looks broken after enabling a caching plugin, it might be due to CSS or JavaScript files being cached incorrectly. You can fix this by:
- Clearing your cache.
- Excluding specific CSS or JavaScript files from being cached.
- Using the ‘minify’ options with caution, as they can sometimes break your site layout.
3. Plugin Conflicts: Sometimes, certain plugins may conflict with your caching solution. If you suspect a conflict, you can:
- Deactivate other plugins one by one to identify the culprit.
- Ensure your caching plugin is updated to its latest version.
4. Server-Side Caching Issues: If you’re using server-side caching, like Varnish or Nginx, you might experience delays in seeing changes. Make sure to configure these settings properly and check with your hosting provider if necessary.
In case you’re still facing issues, consult the documentation for your caching plugin or reach out to their support. Remember, every site is different, so troubleshooting may require some experimentation to find what works best!
Best Practices for Maintaining Your Caching Strategy
Maintaining an effective caching strategy is like tuning a finely crafted machine—it needs regular check-ups to run smoothly! Here are some best practices to keep your cache functioning at its peak performance.
1. Regularly Clear Your Cache: You should get into the habit of clearing your cache whenever you make significant changes to your site. This includes updates to your posts, pages, or site design. Most plugins allow for manual cache clearing, but you may also set up automatic purging schedules.
2. Optimize Cache Settings: Dive into your caching plugin’s settings to fine-tune performance. Some things to consider:
| Setting | Best Practice |
|---|---|
| Cache Expiration Time | Set to a reasonable duration to ensure users are seeing recent changes. |
| Browser Caching | Enable it to improve load times for return visitors. |
| Gzip Compression | Enable Gzip to decrease file sizes and improve loading times. |
3. Regular Updates: Just as with WordPress itself, keeping your caching plugin up to date is crucial. Developers frequently release updates that improve performance and fix bugs. Always check for updates and apply them timely.
4. Monitor Performance: Use tools like Google PageSpeed Insights or GTmetrix to monitor your site’s performance regularly. These tools provide valuable insights into how caching affects your site and any areas that may need improvement.
By following these best practices, you ensure that your caching strategy is robust, thus keeping your WordPress site fast, responsive, and user-friendly. Remember, a well-implemented caching plan benefits both you and your visitors!
Conclusion: The Benefits of Caching for Your WordPress Site
Caching plugins are an essential tool for WordPress users looking to enhance their website’s performance and user experience. By temporarily storing copies of files and data, these plugins reduce the load time of pages, ultimately improving site speed. Here are some key benefits of implementing caching on your WordPress site:
- Improved Load Times: Caching reduces the time it takes to load web pages, minimizing bounce rates and keeping visitors engaged.
- Reduced Server Load: By serving cached data rather than querying the database for each page view, caching lowers the server load, making your site more efficient.
- Enhanced User Experience: Faster-loading pages contribute to a smoother browsing experience, encouraging users to stay longer on your site.
- SEO Benefits: Website speed is a vital ranking factor in search engine algorithms. Improved load times can lead to better search engine rankings.
- Caching Types: Familiarize yourself with types of caching such as Object Caching, Page Caching, and Browser Caching to optimize performance based on your site’s needs.
To effectively implement caching plugins, consider the following tips:
| Tip | Description |
|---|---|
| Choose the Right Plugin | Research and select a caching plugin that suits your WordPress configuration and needs. |
| Configure Settings Properly | Ensure optimal settings are configured for the best performance based on your site’s traffic and hosting environment. |
| Regularly Monitor Performance | Use tools like Google PageSpeed Insights to monitor performance and adjust caching settings as necessary. |
In conclusion, leveraging caching plugins is a smart strategy for WordPress site owners who wish to optimize their websites for speed, enhance user experience, and improve SEO potential. By understanding the benefits and implementing best practices, you can significantly boost your site’s performance.

