If you’re diving into the world of WordPress development, you’ve probably heard the term “hooks” thrown around quite a bit. But what exactly are they? In simple terms, WordPress hooks allow you to modify or enhance the functionality of plugins and themes without directly altering their core files. This is a game changer for developers and non-developers alike, as it enables customization while ensuring that updates to WordPress or your plugins don’t overwrite your unique additions.
By using hooks, you can bridge the gap between your custom features and existing functionalities, creating a seamless experience for users. Ready to learn more? Let’s dive deeper!
Understanding the Types of Hooks

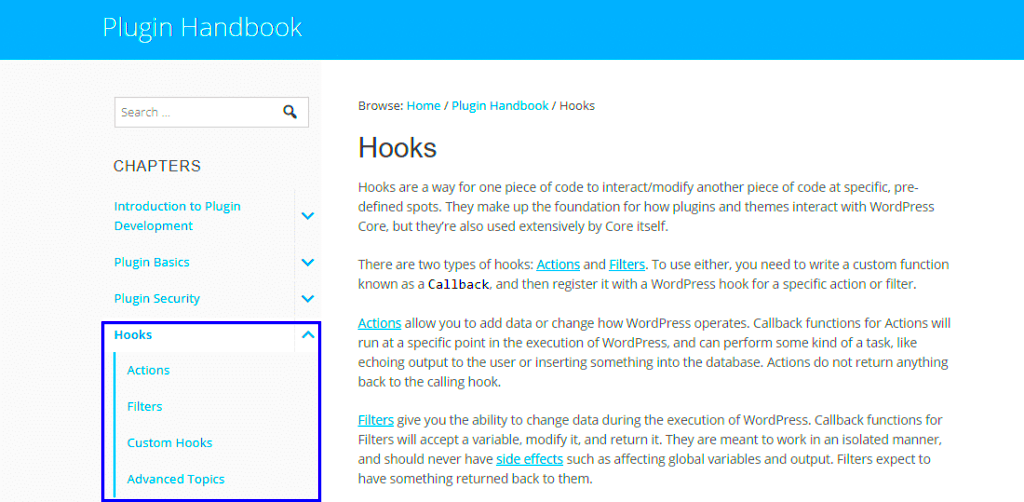
WordPress hooks are categorized primarily into two types: actions and filters. Understanding these types is crucial for anyone looking to customize plugins effectively. Here’s a closer look at each:
1. Actions
Actions hook into the WordPress execution process, allowing you to add custom functions at specific points. When WordPress reaches an action hook, it runs the functions tied to that hook. Here’s an example:
- Example: The `wp_footer` action allows you to add code right before the closing tag.
2. Filters
Filters, on the other hand, modify data before it’s sent to the database or displayed on the user’s screen. This is useful for altering content dynamically. For instance:
- Example: The `the_content` filter lets you modify post content before it’s rendered on the website.
Comparison Table
| Type | Purpose | Usage Example |
|---|---|---|
| Action | Adds functionality at a specific point | Adding a custom script to the footer |
| Filter | Modifies existing data | Changing post content before display |
By leveraging both actions and filters, you can create a powerful and customized experience on your WordPress site. So, whether you’re enhancing a plugin or tweaking the functionality of your theme, understanding these hooks is essential for effective customization!
How Hooks Work in WordPress

Hooks are a powerful feature in WordPress that allow developers to change or enhance the functionality of existing code without directly modifying it. Essentially, hooks are like doors you can open to let your own code into WordPress’ core, themes, or plugins. There are two main types of hooks: Action Hooks and Filter Hooks.
Action Hooks are points in the code where you can add your own functionality. For example, if you want to send an email whenever a post is published, you can use an action hook to trigger your email function at that specific point in the publishing process.
Filter Hooks, on the other hand, let you modify existing data before it’s displayed on the site. For instance, if you want to change the content of a post just before it is shown to visitors, a filter hook is exactly what you need.
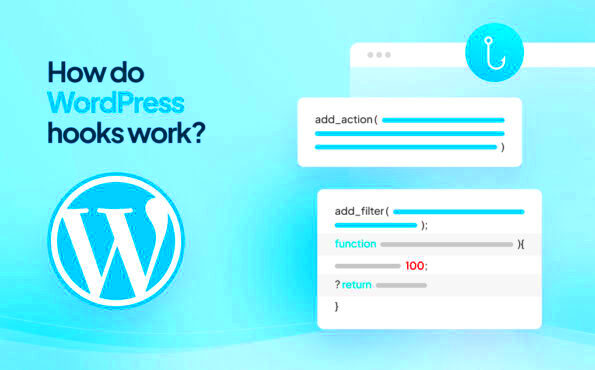
Using hooks is straightforward. You define a function that contains the code you want to execute and then tell WordPress where to execute this function using the hook. Here’s a quick breakdown:
- Step 1: Create your function that adds custom functionality.
- Step 2: Use `add_action()` or `add_filter()` to connect your function to a specific hook.
For example:
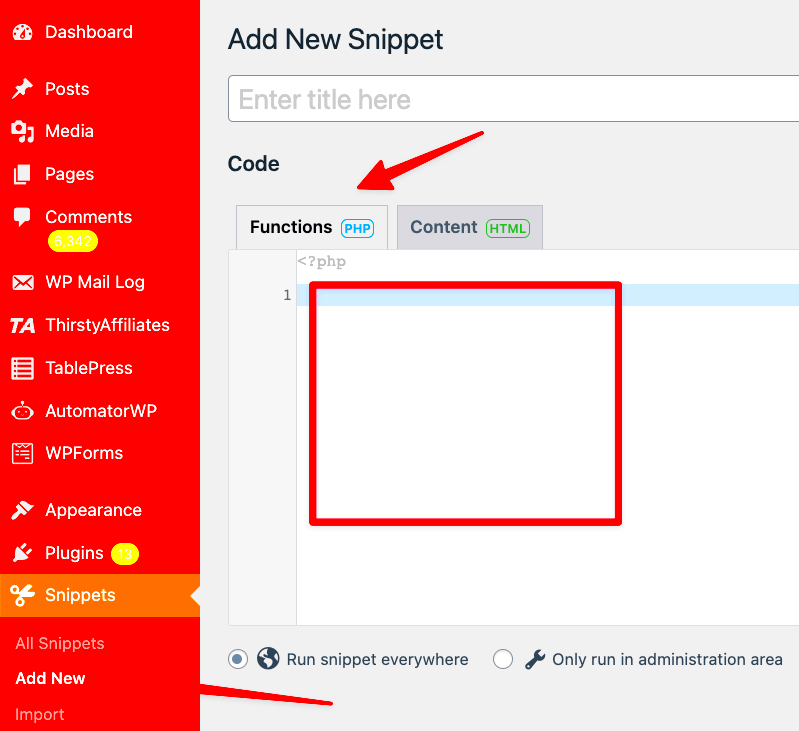
function my_custom_function() { // Your custom code here}add_action('init', 'my_custom_function');
By understanding how hooks work, you can do a lot more with WordPress than you might have thought possible, giving you the flexibility to create a site that perfectly serves your needs!
Identifying Hooks in Existing Plugins

If you want to add custom features to a WordPress plugin, the first step is knowing where to look for hooks within that plugin’s code. Identifying these hooks will allow you to extend and customize the plugin functionality without touching the core code.
Here are a few tips on how to spot hooks in existing plugins:
- Start with the Documentation: Many plugins come with detailed documentation where hooks are mentioned. Look for sections labeled “Hooks” or “Customizations.”
- Source Code Exploration: If documentation isn’t available, dive into the plugin’s PHP files. Look for functions named
add_actionoradd_filter. These indicate where hooks are available. - Search for Hook Comments: Often developers leave comments near hooks explaining their purpose. Search for the word “hook” in the code to find these points.
Once you’ve identified the hooks, it’s time to experiment. Create a simple function that utilizes the hook:
function my_custom_plugin_feature() { // Custom feature code}add_action('plugin_hook_name', 'my_custom_plugin_feature');
It’s that easy! When you understand how to identify hooks, you can effectively customize and enhance existing plugins, making your WordPress experience tailored specifically to your needs. Plus, it’s a great way to practice and advance your skills as a WordPress developer!
Creating a Child Theme or Custom Plugin
If you’re looking to add custom features to your WordPress site without modifying the core theme or plugins, creating a Child Theme or a Custom Plugin is a smart way to go. Let’s explore how each option works and why you might choose one over the other.
A Child Theme is essentially a theme that inherits functionality from another theme, known as the parent theme. This is ideal if you want to make changes to the appearance or some minor functionalities of your site without losing those changes when the parent theme gets updated. You can think of it as a protective shell around your theme customizations!
- Step 1: Create a new folder in the /wp-content/themes/ directory with the name of your child theme.
- Step 2: Inside that folder, create a style.css file. This file should include a header that specifies the template (the parent theme).
- Step 3: Create a functions.php file to enqueue the parent theme’s styles and add your custom CSS.
On the other hand, if you’re looking to add functionality that isn’t tied to a specific theme, or if you want to bundle various customizations, consider creating a Custom Plugin. This is a standalone solution that can be activated or deactivated without affecting your theme.
- Step 1: In the /wp-content/plugins/ directory, create a new folder for your plugin.
- Step 2: Create a main PHP file with a specific plugin header.
- Step 3: Add your custom functions and hook them into WordPress where needed.
Both methods have their unique advantages, and your choice will largely depend on the nature of your customizations!
Using Action Hooks to Add Functionality
Now that you have your Child Theme or Custom Plugin set up, it’s time to dig into Action Hooks. These little gems allow you to execute custom functions at specific points in the WordPress execution process, enabling you to safely add functionality without altering core files.
So, what exactly are action hooks? They are predefined points in WordPress where you can “hook” your custom code. When WordPress reaches the designated point, it will execute your functions. It’s like having a backstage pass to the performance that is your website!
Here’s a simple breakdown of how to use action hooks:
- Identify the Correct Hook: WordPress provides a variety of action hooks, like
wp_headorinit. You need to know which hook is appropriate for your custom functionality. - Create Your Custom Function: Write a PHP function that contains the code you’d like to execute. Keep it simple and focused!
- Hook Your Function to WordPress: Use the
add_action()function to hook your custom function to the desired action hook.
Here’s a quick example:
function my_custom_function() { echo '<p>Hello, this is my custom message!</p>';}add_action('wp_footer', 'my_custom_function');In this example, when the footer of your site is loaded, it will display “Hello, this is my custom message!” at the bottom. The possibilities are endless!
By using action hooks, you maintain the ability to update WordPress, your themes, and plugins while keeping your custom features intact. So, what are you waiting for? Start enhancing your WordPress site today!
Utilizing Filter Hooks for Modifying Data
When it comes to customizing the functionality of your WordPress site, filter hooks are your best friends! Think of filter hooks as tiny but powerful tools that allow you to modify data before it gets displayed or processed on your site. They essentially act as a bridge that captures data and lets you adjust it according to your needs.
For instance, let’s say you have a plugin that outputs certain content, but you want to tweak that output—maybe add some flair or make it more relevant to your audience. Filter hooks can help you do just that! Here’s what you need to know:
- How It Works: When a filter hook is triggered, it passes data through it, allowing you to manipulate that data before it reaches the end user. You can add, remove, or change the content simply by ‘hooking’ your function into it.
- Common Use Cases: Some typical scenarios where you’d use filter hooks include modifying post content, changing widget outputs, or altering settings and parameters in a plugin.
- Example: Let’s say you want to append a custom message to the end of every blog post. You can add a custom function to the `the_content` filter.
It’s crucial to remember that filter hooks are a powerful way to extend existing functionalities without altering the original plugin code. This approach maintains the integrity of the plugin and keeps it updatable. So, roll up your sleeves and start utilizing filter hooks to customize your WordPress experience!
Best Practices for Adding Custom Features
When you embark on the journey of adding custom features to WordPress plugins via hooks, following best practices can save you time and headaches. Let’s dive into some key points that will help ensure a smooth and effective customization process.
- Stay Organized: Keep your custom functions orderly. Consider creating a dedicated plugin for your modifications or use a child theme. This practice is crucial for maintaining code readability and future updates.
- Documentation is Key: Always document your code. This step helps you and others understand the reason behind certain modifications later on. Good documentation can save you from confusion months down the line!
- Test, Test, Test: Before rolling out any changes, test your custom features on a staging site. Buggy code can affect user experience, so ensure everything works flawlessly before going live.
- Performance Considerations: Adding custom capabilities can impact site performance. Avoid heavy operations within hooks and ensure your code is optimized for efficiency.
- Respect Plugin Updates: Remember that your custom features might rely on the original plugin’s functionality. When updates occur, check if your code still functions as intended.
By adhering to these best practices, you’ll not only simplify your customization process but also ensure that your WordPress site remains stable and efficient. Customizing plugins may seem daunting, but with these tips, you’ll be well-equipped to tackle any feature addition!
9. Testing Your Custom Features
Once you’ve added your custom features to a WordPress plugin using hooks, it’s time to put them to the test. Testing is a crucial step in ensuring that your features function as intended and don’t disrupt the existing functionality of the plugin. Here’s how to effectively test your custom features:
- Set Up a Staging Environment: Before testing on your live site, create a staging environment. This allows you to experiment without risking downtime for your users. Most hosting providers offer easy ways to set up a staging site.
- Check for Conflicts: Use the Plugin Organizer or similar tools to deactivate other plugins. This helps you identify if your custom features conflict with existing plugins. Once you’ve done this, activate them one by one to find any potential conflicts.
- Use Debugging Tools: Tools like Query Monitor or Debug Bar can help you spot errors, performance issues, and unexpected behavior. Always keep an eye on the PHP error logs for insights.
- Test Across Different Browsers: Make sure that your custom features render properly across different web browsers like Chrome, Firefox, and Safari. User experience can vary greatly based on the browser used.
- Gather Feedback: Don’t hesitate to solicit feedback from users or other developers. They can provide invaluable insights that you may have overlooked.
Overall, thorough testing not only ensures smooth functionality but also enhances user satisfaction. So, take your time and test rigorously!
10. Common Issues and Troubleshooting
Adding custom features using hooks can sometimes lead to a few hiccups along the way. While it might be tempting to panic, most issues can be resolved with some basic troubleshooting. Here are common problems you might encounter and how to tackle them:
| Issue | Solution |
|---|---|
| Feature Not Appearing: Sometimes your new feature might not show up where expected. | Double-check the hook you’re using and ensure it’s placed correctly. Use do_action or apply_filters properly. |
| Functionality Breaks the Site: If your site breaks after adding a feature, it might be due to syntax errors. | Check your code carefully for any typos or errors. Use tools like PHP Code Checker to validate your syntax. |
| Compatibility Issues: Your custom feature may not work well with other plugins. | Deactivate plugins one by one to find the culprit or use the WP_DEBUG feature to identify the source of the issue. |
| Performance Issues: Sometimes custom features can slow down your site. | Optimize your code, avoid using expensive database queries, and consider caching strategies to improve performance. |
By keeping these common issues in mind and being proactive with troubleshooting, you’ll find that adding custom features to WordPress plugins can be a smooth and enjoyable process. Remember, every problem has a solution, and every mistake is a step towards mastery!
Conclusion: Enhancing Your WordPress Site with Custom Hooks
WordPress is a versatile content management system that allows for extensive customization. One of the most powerful ways to tailor your WordPress experience is through the use of hooks. Hooks provide a way to modify plugin behavior without altering the core code, which is essential for maintaining upgradability and stability. Here’s how you can effectively add custom features to WordPress plugins using hooks:
Understanding Hooks in WordPress
Hooks are divided into two main categories:
- Action Hooks: These allow you to execute your custom code at specific points during the execution of WordPress.
- Filter Hooks: These are used to modify data before it is sent to the database or the browser.
How to Implement Hooks
To add custom features using hooks, follow these steps:
- Identify the Hook: Begin by identifying which hook corresponds to the feature you want to customize.
- Create a Custom Function: Write a function that contains the code for your custom feature.
- Add the Hook: Use the
add_action()oradd_filter()functions to associate your custom function with the chosen hook.
Example Code Snippet
Here is an example of how to use an action hook:
add_action('wp_footer', 'my_custom_footer_function');function my_custom_footer_function() { echo '<p>This is my custom footer message!</p>';}By leveraging hooks, you can greatly enhance the functionality of your WordPress plugins, making your site more tailored to your needs and improving the user experience.


