Adding videos and images to your WordPress posts can significantly enhance your content’s appeal. But why do they matter so much? Well, visuals can break up long blocks of text, making your posts more engaging and easier to digest. Plus, they can help convey messages more effectively than words alone. In this post, we’ll explore why integrating multimedia in your articles is essential and share some handy tips for doing it right.
Why Use Videos and Images in Your Posts?

If you’ve ever wondered what makes a post stand out, look no further than multimedia elements like videos and images. Here’s why they’re crucial:
- Grab Attention: Studies show that people are more likely to engage with a post that includes visuals. A compelling image can draw readers in almost instantly!
- Enhance Understanding: Sometimes, a picture is worth a thousand words. Complex concepts can often be simplified with a well-chosen image or video.
- Increase Shareability: Posts rich in multimedia tend to be shared more often on social media platforms. That means your content reaches further!
- Improve SEO: Search engines love fresh, engaging content. By strategically using images and videos, you can improve your search rankings.
- Boost User Experience: A mixed-media post is more user-friendly. Readers can choose how they absorb information, whether through text, visuals, or a combination of both.
In conclusion, incorporating videos and images into your WordPress posts not only enhances the readers’ experience but also plays a vital role in your content strategy. So, get creative!
Choosing the Right Format for Your Media

When it comes to adding videos and images to your WordPress posts, choosing the right format is crucial. The format not only affects the quality of your media but also impacts loading speed and overall user experience. Here are some key points to consider:
- Image Formats: Popular formats include JPEG, PNG, and GIF.
- JPEG: Great for photographs and images with many colors. It compresses well, keeping file sizes small while maintaining good quality.
- PNG: Ideal for images that need transparency or have text, graphics, or logos. It provides high quality but larger file sizes compared to JPEG.
- GIF: Best suited for simple animations and small graphics. It supports transparency but only allows for 256 colors, which limits its use for detailed images.
- Video Formats: The most common formats are MP4, WebM, and AVI.
- MP4: Highly recommended due to its compatibility across nearly all devices and browsers. It balances quality and size effectively.
- WebM: Offers good quality and smaller file sizes and is suited for web browsers but may not be supported on all devices.
- AVI: High-quality but large file sizes make it less ideal for web usage.
Choosing the right format can greatly enhance the visual appeal and loading times of your posts, making your blog more engaging!
How to Upload Images to WordPress

Uploading images to WordPress is a pretty straightforward process, but it pays to know the ins and outs to make sure you’re doing it right. Here’s a step-by-step guide:
- Log into Your WordPress Dashboard: Start by logging into your admin panel. This is where all the magic happens!
- Navigate to Media: On the left-hand sidebar, you’ll see a tab labeled ‘Media.’ Click on it! This section is where all your uploaded images and files are stored.
- Click ‘Add New’: Once in the Media library, look for the ‘Add New’ button. It’s usually located at the top of the screen. Click on that!
- Upload Your Images: You can either drag and drop your image files directly into the upload area or click the ‘Select Files’ button to browse your computer.
- Optimize Your Images: Once uploaded, you can edit the image details. Provide a descriptive filename, alt text (for accessibility and SEO), and caption if necessary.
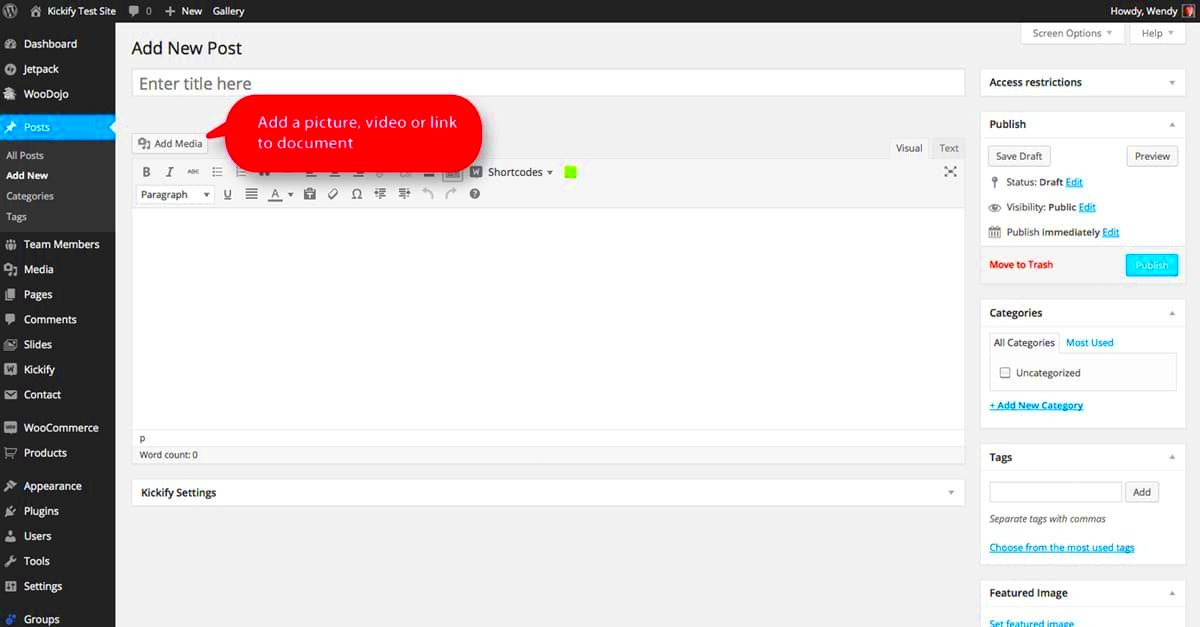
- Insert Image into Post: After your image is uploaded, you can easily insert it into any post. While in the post editor, click ‘Add Media’ and select your image from the Media Library.
And just like that, you’re on your way to creating stunning posts! Don’t forget to keep your images optimized for faster loading times!
How to Embed Videos in Your Posts
Embedding videos in your WordPress posts can enhance engagement, make your content more interactive, and help convey complex ideas more clearly. It’s easier than you might think! Let’s break it down into simple steps.
First, decide on the source of your video. Common platforms include:
- YouTube
- Vimeo
- Dailymotion
Each platform allows users to share their videos through embedding. When you’re on the video page, look for a Share button, and then select Embed. You’ll receive a code snippet that you can copy. Here’s how to add it to your post:
- Go to your WordPress dashboard.
- Navigate to Posts and either create a new post or edit an existing one.
- Switch to the Text (HTML) editor if you’re pasting the code directly.
- Paste the embed code where you want the video to appear.
- Click Update or Publish to save your changes.
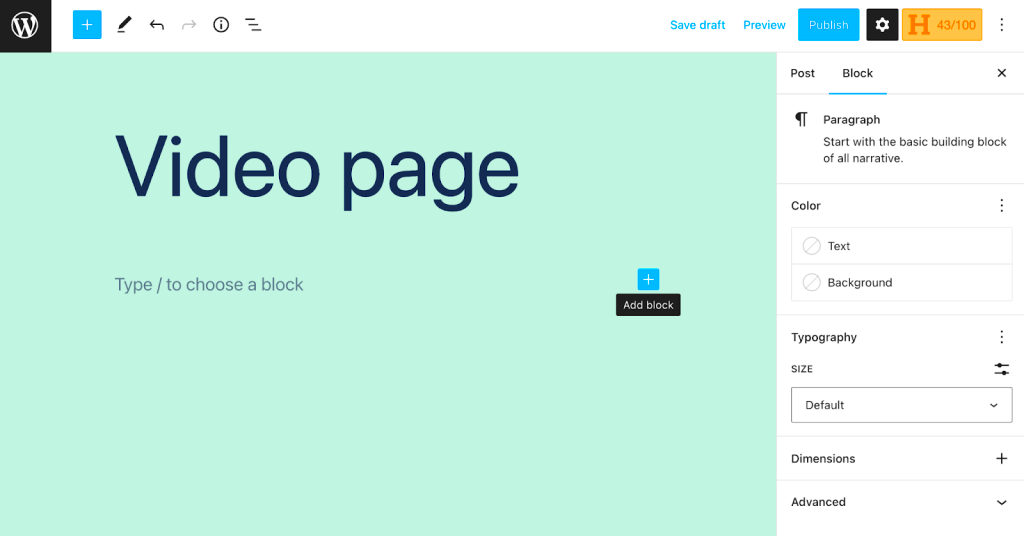
Additionally, if you’re using the block editor, simply add a “Custom HTML” block or a “YouTube” block, and paste the URL of the video directly. WordPress handles the rest!
Don’t forget to consider mobile viewers; ensure your videos are responsive. By having videos embedded in your posts, you can capture audience attention and encourage viewers to spend more time on your site.
Optimizing Images for Better Performance
Images can significantly impact your website’s loading speed and overall performance, so it’s crucial to optimize them before uploading! Here are a few tips to ensure you’re doing it right:
1. Choose the Right File Format: Utilize the appropriate file types based on your images:
- JPEG: Great for photographs with vibrant colors.
- PNG: Ideal for images with transparent backgrounds or simpler graphics.
- GIF: Best for short animations or graphics with limited colors.
2. Compress Your Images: Compressing images reduces their file sizes without sacrificing quality. You can use plugins like:
- Smush
- EWWW Image Optimizer
- Imagify
3. Use Descriptive Filenames: When saving your image files, use descriptive and relevant filenames. This helps with your SEO and assists search engines in understanding the content of your images.
4. Add Alt Text: Always include alt text that describes the image. This not only boosts accessibility for visually impaired users but also improves your SEO.
5. Lazy Loading: Consider enabling lazy loading, which loads images only when they come into the viewport. This can significantly enhance page load times.
By following these practices, you can ensure your images contribute positively to your blog’s performance, keeping both your audience and search engines pleased!
Best Practices for Video Content
When it comes to adding video content to your WordPress posts, there are several best practices you should consider to ensure your videos are effective, engaging, and optimized for performance. Here’s a rundown:
- Keep it Relevant: Your videos should always relate to the content of your post. If you’re discussing travel tips, for example, include videos that showcase beautiful destinations or travel hacks.
- Optimize for Performance: Large video files can slow down your website, affecting user experience and SEO. Consider using platforms like YouTube or Vimeo to host your videos and just embed them in your posts. This keeps your site speed intact!
- Use Captions and Subtitles: Not everyone has their sound on, and some may prefer reading along while watching. Adding captions and subtitles enhances accessibility and widens your audience.
- Include a Call to Action: What do you want your viewers to do after watching your video? Whether it’s subscribing to your channel, visiting your site, or engaging with your content, always make sure to include a clear call to action.
- Monitor Analytics: Using tools like Google Analytics can help you track how your videos are performing. Look at metrics like play rates and watch time to see what’s working and what isn’t.
Implementing these best practices can help elevate your video content, making it more engaging and effective in reaching your audience.
Using Plugins to Enhance Media Functionality
WordPress offers a plethora of plugins that can really amp up your media functionality, making it easier to manage your videos and images. Here are some of the top choices:
| Plugin | Features | Best for |
|---|---|---|
| Smush | Image optimization, lazy loading, bulk smushing | Improving site speed and image loading times |
| Envira Gallery | Drag-and-drop builder, video support, album creation | Creating beautiful galleries and showcasing videos |
| WP Video Lightbox | Lightbox effect for videos, responsive design | Presenting videos in a more interactive format |
| EmbedPress | Easy embedding of various media types, user-friendly interface | Streamlining the embedding process for videos and images |
When choosing plugins, consider what features you really need and how they align with your goals. Many plugins, such as the ones listed above, are either free or offer premium versions with additional features. By leveraging these tools, you can enhance the way you present media on your WordPress site and create a better experience for your visitors!
Ensuring Accessibility in Media
When you’re adding videos and images to your WordPress posts, it’s essential to ensure that all your content is accessible to everyone, including those with disabilities. Accessibility is not just a nice-to-have; it’s a necessity. Here are some tips to help you make your media more accessible:
- Alt Text for Images: Always add descriptive alt text to your images. This helps screen readers convey the content to visually impaired users. For instance, instead of “cat,” use “orange tabby cat sitting on a windowsill.” This gives context.
- Transcripts for Videos: If you’re uploading videos, consider providing a transcript. This is particularly helpful for hearing-impaired users and for those who prefer reading over watching.
- Captions and Subtitles: Adding captions is a must! Not only do they assist users who are deaf or hard of hearing, but they also help those who may be in a sound-sensitive environment, making your content more user-friendly.
- Color Contrast: Ensure your videos and images maintain good color contrast. Test your media against accessibility standards to avoid putting off users who might have difficulty distinguishing colors.
- Keyboard Navigation: Make sure that all interactive elements like video controls can be navigated using a keyboard. This is crucial for users who cannot use a mouse.
By taking these steps, you contribute to a more inclusive web, ensuring that your content can be enjoyed by everyone, regardless of their abilities. Accessibility is not just about complying with regulations; it’s about making your content useful and enjoyable for all viewers.
Conclusion
As we wrap up our discussion on adding videos and images to WordPress posts, it’s clear that visual content can significantly enhance user experience and engagement. However, it’s critical to approach this task thoughtfully. Here are some key takeaways:
- Don’t Overdo It: While images and videos can elevate your content, avoid cluttering your posts. Strive for a balance that keeps the focus on your message.
- Optimize Your Media: Always consider file sizes, formats, and compression techniques. Optimized media not only speeds up loading times but also enhances SEO.
- Stay Accessible: Accessibility should be a priority, not an afterthought. By ensuring all users can access your media, you widen your reach significantly.
- Stay Updated: The digital landscape is constantly evolving. Keep updated on new tools and best practices for media integration, as WordPress frequently rolls out new features.
Ultimately, when you thoughtfully incorporate videos and images into your WordPress posts, you create a richer, more enjoyable experience for your audience. So, take these tips to heart, get creative, and watch your content shine!


