Welcome to the exciting world of WordPress plugin development! If you’re a WordPress user, you’ve likely encountered plugins that enhance your site’s functionality. But have you ever wondered how those magical tools are created? This guide aims to demystify the process of plugin development for beginners. From understanding what plugins are to diving into the coding essentials, we’ll cover everything you need to kickstart your journey. So, whether you’re looking to solve a specific problem or simply want to expand your skills, you’re in the right place!
Understanding the Basics of Plugins

Before we dive into development, it’s important to understand what plugins are and how they work within the WordPress ecosystem. In simple terms, a plugin is a piece of software that adds specific features or functionalities to your WordPress site. They can help you do anything from optimizing your site’s SEO to securing it against threats.
Here are some key points to grasp:
- Modularity: Plugins offer modularity, meaning you can add or remove features without altering the core WordPress files.
- Hooks: They utilize hooks (actions and filters) which allow you to “hook” into WordPress and run your code at specific points.
- Customizability: Plugins can be incredibly customizable, enabling you to tailor your website based on your needs.
So, how do plugins work? Here’s a simplified table summarizing their functionality:
| Feature | Description |
|---|---|
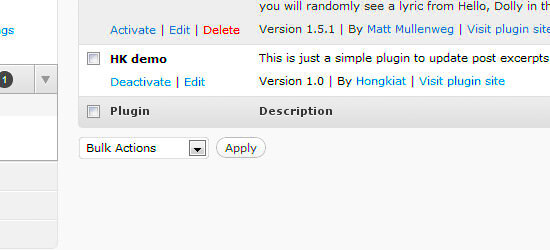
| Activation | Plugins are activated from the WordPress dashboard, which makes their features available on the site. |
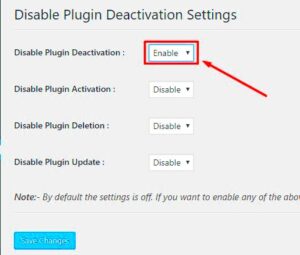
| Deactivation | When a plugin is deactivated, its features are automatically removed from the site. |
| Updates | Plugins can be updated regularly to fix bugs, introduce new features, and enhance security. |
In summary, plugins are powerful tools that can significantly enhance your WordPress site, making them a fundamental aspect of WordPress development. Understanding their basics is the first step to creating your own unique plugins!
Setting Up Your Development Environment
Before diving into the world of WordPress plugin development, it’s essential to set up your development environment properly. This ensures you have the right tools and resources at your disposal to create robust plugins with ease. Don’t worry; I’ll guide you step by step!
First off, you’ll need a local server environment to test your plugins. While there are several options available, the following are the most popular:
- XAMPP – It’s free, easy to install, and comes packed with Apache, MySQL, and PHP.
- MAMP – Perfect for Mac users, this application offers a straightforward installation.
- Local by Flywheel – This is an intuitive local development tool specifically tailored for WordPress, making it a great choice for beginners.
Once you’ve installed one of these local server environments, you’ll need to download and install WordPress:
- Go to the official WordPress website and download the latest version.
- Extract the files and move them to your local server’s directory.
- Create a new database for your WordPress installation using phpMyAdmin.
- Run the WordPress installation wizard by navigating to your local server URL.
Now that you have WordPress up and running, you can set up a code editor, which is where you’ll be writing your plugin code. Popular options include:
- Visual Studio Code – A powerful and popular choice due to its extensive features and extensions.
- Sublime Text – Lightweight and fast, perfect for quick edits.
- PHPStorm – A premium option with a plethora of built-in tools designed for PHP development.
And there you have it! Your development environment is set up and ready for some plugin magic!
Creating Your First WordPress Plugin
Now that your development environment is ready, it’s time to roll up your sleeves and create your very first WordPress plugin! Don’t worry if you feel a bit overwhelmed; I’ll guide you through the entire process.
To kick things off, let’s start by understanding the basic structure of a WordPress plugin. A WordPress plugin is essentially a folder containing at least one PHP file. Here’s how to create yours:
- Navigate to the wp-content/plugins directory inside your WordPress installation.
- Create a new folder for your plugin, let’s say my-first-plugin.
- Inside this folder, create a PHP file named my-first-plugin.php.
Next, let’s add some essential header information at the top of the my-first-plugin.php file. This is how WordPress recognizes the plugin:
<?php/*Plugin Name: My First PluginPlugin URI: http://example.comDescription: A simple plugin to get started.Version: 1.0Author: Your NameAuthor URI: http://example.comLicense: GPL2*/?>
Now, you might be wondering, what’s next? It’s time to add some functionality!
Let’s make the plugin display a simple message on the WordPress dashboard. Below the header section, add the following code:
function my_first_plugin_message() { echo <p>Welcome to My First Plugin!</p>}add_action('admin_notices', 'my_first_plugin_message');
Save your file, and head over to your WordPress admin panel. Click on Plugins, find your newly created plugin, and activate it. You should see your welcoming message on the dashboard!
Congratulations! You’ve just created your first WordPress plugin. From here, you can continue to expand its features, explore more hooks and functions, and truly make it your own!
5. Exploring WordPress Plugin Files and Structure
Welcome to the exciting world of WordPress plugin development! If you’re just getting started, it’s essential to familiarize yourself with the structure of a WordPress plugin. Understanding how a plugin is structured will help you create, customize, and maintain your plugins effectively.
A basic WordPress plugin consists of several critical files and folders, all working together to enable seamless functionality. Here’s a brief overview of the standard components you’ll find in a WordPress plugin:
- Main Plugin File: This is where the magic begins! Typically, it has the same name as your plugin and contains the plugin header comment, which provides WordPress with basic information about your plugin.
- Readme.txt: This file is a guide for users. It’s where you describe your plugin, list features, provide installation instructions, and include a changelog.
- Languages Folder: If you’re planning to make your plugin accessible to non-English speakers, this folder contains translation files (MO and PO) that enable your plugin to be translated into different languages.
- Assets Folder: Store your CSS, JavaScript, images, or any other files that will enhance the user interface of your plugin here.
- Includes Folder: This folder is often used for PHP files that facilitate the main plugin functionality. It keeps your code organized and modular.
By structuring your plugin with these files and folders, you not only keep things tidy, but you also make it easier for yourself and others to navigate your code. Remember, a well-organized plugin is the first step towards a successful project!
6. Working with Hooks: Actions and Filters
Now that you’re getting familiar with the files and structure of your plugin, it’s time to dive into one of the most powerful tools in WordPress development: hooks! Hooks allow you to add your features or modify the existing behavior of WordPress without altering the core files.
There are two primary types of hooks:
- Actions: These are hooks that allow you to add custom functionality to your plugin. When WordPress runs an action, it triggers your function at that specific point in the execution. Think of actions as events that happen at certain times in the WordPress lifecycle.
- Filters: Filters let you modify existing data before it’s displayed on the page. They allow you to change variables, like text or HTML markup, on the fly, giving you the ability to fine-tune output as necessary.
Here’s a simple example to illustrate:
// Adding an actionadd_action('wp_footer', 'my_custom_footer');function my_custom_footer() { echo 'Thank you for visiting my site!
';}In this code, the my_custom_footer function will be executed when the wp_footer action is triggered, adding a custom message in your site’s footer.
Now, here’s an example using a filter:
// Adding a filteradd_filter('the_content', 'modify_content');function modify_content($content) { return $content . 'This is an appended message!
';}In this example, we modify the content of posts by appending an additional message at the end.
By mastering hooks, you unlock incredible potential in your plugin development. It’s like having the universal remote for WordPress, allowing you to control and customize the experience seamlessly!
7. Adding Custom Functions and Shortcodes
When it comes to enhancing the functionality of your WordPress site, adding custom functions and shortcodes is a fantastic way to go. Custom functions allow you to tailor your plugin to meet specific needs, while shortcodes provide an easy mechanism for users to perform complex tasks with minimal effort.
To get started with custom functions, you’ll want to:
- Define Your Function: Write a function that accomplishes a specific task. For instance, if you want to create a function that calculates the number of posts, your code could look something like this:
function count_posts() { return wp_count_posts()->publish; }add_action('wp_footer', 'count_posts');Now, onto shortcodes. Shortcodes are snippets that allow users to insert custom functionality right into their posts or pages. To add a shortcode:
- Define the Shortcode: Create a function that outputs the content you want. For example:
- Register the Shortcode: Use the
add_shortcodefunction: - Use It! Now, users can just type
[greet]in their posts to display “Hello, World!”
function my_custom_shortcode() { return "Hello, World!"; }add_shortcode('greet', 'my_custom_shortcode');Adding custom functions and shortcodes is not just about code. It’s about empowering your users and enhancing their experience. Happy coding!
8. Creating an Admin Interface for Your Plugin
An engaging admin interface elevates your plugin, making it user-friendly and accessible to non-tech-savvy users. Creating a seamless admin interface helps users configure settings, view data, and manage functionalities without diving into the code. So, where do you start?
First, you’ll need to create a menu item in the WordPress admin dashboard. You can do this using the add_menu_page function:
add_menu_page('My Plugin', 'My Plugin', 'manage_options', 'my-plugin', 'my_plugin_page', 'dashicons-admin-generic');Here are the components to think about when constructing your admin interface:
- Build a Settings Page: This is where users can configure plugin options. If you want to add form fields, use
settings_fields()anddo_settings_sections()to ensure proper submission handling. - Use WordPress API: Leverage the WordPress Settings API for saving your settings. This makes it easier to handle forms, validation, and options storage. Each section can be linked through tabs to enhance user experience.
- Incorporate Styles and Scripts: If your interface would benefit from CSS or JavaScript, enqueue these using
wp_enqueue_styleandwp_enqueue_scriptfunctions, ensuring that they load only in the admin area.
Finally, always keep usability in mind. Add tooltips or help sections to guide users through complicated settings. Testing the interface with potential users can help you identify improvements, making your plugin even better.
With a well-woven admin interface, you not only improve your plugin’s usability but also encourage adoption by users who might feel intimidated by technology. Now, go create that amazing admin panel!
9. Testing and Debugging Your Plugin
Testing and debugging are crucial steps in the plugin development process. Whether you’re new to development or an experienced coder, ensuring that your plugin runs smoothly in various conditions will save you a lot of trouble down the road. Here are some key points to consider:
- Local Environment Setup: Start by setting up a local development environment. Tools like XAMPP, MAMP, or Local by Flywheel can help run your WordPress site locally. This way, you can test changes without affecting a live site.
- Utilize Debugging Tools: WordPress comes with built-in debugging features. You can enable debugging in your wp-config.php file with the line
define('WP_DEBUG', true);. This simple step will expose errors while you’re developing your plugin. - Unit Testing: Write automated tests to cover various functions and features of your plugin. Frameworks like PHPUnit can help you create and run unit tests that ensure everything is working as expected.
- Browser Testing: Make sure to test your plugin across different browsers and devices. Different environments may yield different results. A tool like BrowserStack can assist in this process.
After testing, remember to gather feedback. Involve users in beta testing your plugin, as they can provide insights you might have missed while developing.
10. Best Practices for WordPress Plugin Development
Developing a WordPress plugin can be an exciting journey, but it comes with responsibilities. Following best practices not only enhances the performance of your plugin but also ensures that it plays nicely with other WordPress components. Here are some best practices to follow:
- Keep Code Clean and Organized: Use clear and consistent naming conventions. Organize your files logically to make navigation easier for others who might work on your plugin in the future.
- Document Your Code: Clear documentation helps you and others understand your code better. Use inline comments and create a README file to explain the purpose and functionality of your plugin.
- Security First: Never underestimate the importance of security. Always sanitize, validate, and escape data thoroughly. Use WordPress’s built-in functions like
esc_html()andsanitize_text_field()to protect against vulnerabilities. - Optimize Performance: Ensure your plugin is efficient. Avoid heavy database queries and unnecessary resource loads to prevent slowdowns. You can use tools like Query Monitor to analyze and optimize performance.
- Stay Up-to-Date: Regularly update your plugin to ensure compatibility with the latest WordPress core versions, themes, and other plugins. This helps maintain functionality and security.
By adhering to these best practices, you not only improve your skills as a developer but also contribute to the vibrant WordPress community by providing high-quality, reliable plugins.
Securing Your Plugin
When it comes to WordPress development, security isn’t just an option—it’s a necessity. As a beginner, understanding how to secure your plugin is crucial for the safety of your users and their data. A security breach can lead to unauthorized access, data leaks, or even site defacement, which can reflect poorly on you as a developer.
First and foremost, always validate and sanitize user inputs. WordPress provides built-in functions, such as sanitize_text_field() and esc_html(), to help with this. You should also ensure your plugin follows the principle of least privilege—only request permissions that are absolutely necessary.
- Use Nonces: Nonces are security tokens that help protect against CSRF (Cross-Site Request Forgery). Always include nonces in your forms and verify them upon submission.
- Sanitize Data: Any data coming from user inputs should be cleaned before saving it to the database. This helps prevent SQL injections and other attacks.
- Escape Output: Use functions like
esc_url()andesc_html()to escape data before rendering it on the front-end. This is to prevent XSS (Cross-Site Scripting). - Secure File Access: If your plugin includes files, ensure they can’t be accessed directly. Use checks in PHP files to restrict access.
By following these best practices for security, you can safeguard your plugin against common threats, ensuring a safer experience for your users.
Documenting Your Plugin
Think of documentation as the soul of your plugin. Clear and comprehensive documentation isn’t just user-friendly; it’s essential for effective maintenance and improvements over time. Good documentation helps users understand how to use your plugin, troubleshoot issues, and recognize its potential.
Start by creating a Readme.txt file, which is essential for any WordPress plugin. This file should include:
- Plugin Name: Make sure it’s descriptive.
- Description: Explain what the plugin does and its benefits.
- Installation Instructions: Offer clear steps on how to install and activate the plugin.
- Frequently Asked Questions (FAQ): Address common queries that users might have.
- Changelog: Keep a list of changes and updates through versions.
Moreover, consider providing additional documentation in various formats:
| Format | Purpose |
|---|---|
| Online Documentation | Detailed guides and tutorials accessible on your website. |
| Video Tutorials | Visual learners will appreciate step-by-step walkthroughs. |
| Code Comments | In-line comments in your code can help you (and others) understand the logic behind your functions. |
The goal of documentation is to make your plugin as intuitive as possible. The easier it is for someone to understand and use your plugin, the more likely they are to adopt and recommend it. So, take the time to document your plugin thoroughly and clearly!
13. Distributing Your Plugin
Distributing your WordPress plugin is a crucial step after you’ve developed it. Not only does this allow you to share your work with the world, but it also opens the door to user feedback and potential improvements. Let’s break down various methods for distributing your plugin effectively:
- WordPress Plugin Directory: One of the most popular ways to distribute your plugin is through the official WordPress Plugin Directory. This platform gives developers massive visibility. To submit your plugin, you’ll need to create a readme file, ensure your plugin complies with WordPress guidelines, and set up SVN for version control.
- Your Own Website: Hosting your plugin on your website can be beneficial, especially if you want to build a brand around it. You can offer premium features, detailed documentation, and user support. Just remember to create a dedicated page for your plugin where users can easily find information and download it.
- Marketplaces: There are several online marketplaces like CodeCanyon, that allow you to sell your plugins. This can be a good option if you’re looking to monetize your development efforts. Ensure you create compelling descriptions and showcase screenshots to attract buyers.
- Social Media and Forums: Don’t underestimate the power of social media! Promote your plugin on platforms like Twitter, Facebook, and WordPress-specific forums. Engaging with potential users directly can create a loyal following.
- Email Marketing: If you have an existing user base or subscribers, consider sending out newsletters about your new plugin. Highlight the features, benefits, and include a download link.
In summary, distributing your WordPress plugin can take various forms. Choose the method that aligns best with your goals—be it sharing for free or generating revenue. Gather feedback and continue innovating!
14. Conclusion and Next Steps
Congratulations on reaching the end of this beginner’s guide to WordPress plugin development! You’ve covered a lot of ground—from understanding the fundamental concepts to diving into actual development and distribution. So, where do you go from here?
1. Keep Learning: The world of WordPress development is ever-evolving. Make it a habit to read blogs, listen to podcasts, or take courses related to WordPress and PHP. Consider visiting sites like W3Schools or WordPress Developer Resources.
2. Join Communities: Engaging with the WordPress community can provide invaluable insights. Platforms like WordPress Support Forums and various Slack channels or Facebook groups can help you connect with other developers.
3. Start a New Project: Don’t stop at one plugin! The more you work on different projects, the better you’ll become. Consider building a plugin that solves a problem you’ve encountered in your own WordPress usage.
4. Solicit Feedback: If you’ve distributed your plugin, reach out to users for feedback. Constructive criticism can guide improvements and inspire new features.
In conclusion, plugin development is a rewarding path that holds the potential to impact a wide audience. You have the skills—now it’s time to put them into action. Happy coding!


