If you’re thinking about building a website but feeling overwhelmed by all the options out there, you’re not alone. WordPress has become one of the most popular platforms for creating websites, thanks to its user-friendly interface, flexibility, and massive community support. Whether you’re a complete beginner or someone looking to enhance their skills, developing a WordPress site from scratch is an achievable and rewarding project. In this guide, we’ll walk through every step, from initial planning to launching your site, making the process straightforward and enjoyable.
Planning Your WordPress Website and Defining Goals
Before diving into the technical details, it’s crucial to start with a solid plan. Think about what you want your website to achieve. Are you creating a blog, an online store, a portfolio, or a business site? Clearly defining your goals will shape every decision you make moving forward.
Ask yourself these key questions:
- What is the main purpose of my website?
- Who is my target audience?
- What features do I need (e.g., contact forms, e-commerce functionality, galleries)?
- How often will I update my content?
- What is my budget for development and ongoing maintenance?
Once you’ve answered these questions, it’s helpful to create a simple outline or mind map of your site’s structure. Think about the main pages you’ll need, such as Home, About, Services, Blog, and Contact. Planning your site’s architecture early on will save you time and prevent headaches later.
Additionally, setting clear goals helps you choose the right tools and design elements. For example, if your primary goal is to sell products online, you’ll want to focus on WooCommerce integration and secure payment options. If your goal is to showcase a portfolio, visual design and easy navigation become priorities.
Remember, a well-thought-out plan acts as your roadmap. It keeps you focused, ensures all your needs are covered, and makes the development process much smoother. So, spend some quality time defining your goals and sketching out your site’s structure before you start building. It’s a small step that makes a big difference in the success of your WordPress website!
3. Choosing the Right Hosting and Domain Name
Alright, before diving into building your WordPress site, you need to set the foundation — and that’s choosing the right hosting provider and domain name. Think of your hosting as the digital real estate where your website lives, and the domain name as your website’s address. Getting these right from the start can make your journey smoother and set you up for success down the line.
Picking the right hosting provider depends on a few factors:
- Performance and Reliability: You want a host that offers minimal downtime and fast load times. No one likes a slow website!
- Customer Support: When things go wrong (and they will at some point), responsive support can save you a lot of headaches.
- Ease of Use: Especially if you’re a beginner, look for hosts that offer user-friendly dashboards and one-click WordPress installs.
- Pricing: Balance your budget with the features offered. Many hosts have tiered plans, so start small and scale as needed.
Popular hosting options for WordPress newbies include Bluehost, SiteGround, and DreamHost. These providers are officially recommended by WordPress.org and offer great beginner-friendly features.
Choosing your domain name is just as important. It’s your website’s unique address, so pick something memorable, simple, and relevant to your brand or niche. Here are some tips:
- Keep it short and easy to spell.
- Avoid hyphens and numbers — they can be confusing.
- Use keywords if possible, to hint at what your site is about.
- Check if the domain is available — tools like Namecheap or GoDaddy can help.
- Consider different extensions (.com, .net, .org, or niche-specific ones like .blog or .shop).
Once you’ve settled on a domain name, register it through your hosting provider or a domain registrar. Many hosting companies include free domain registration for the first year, which is a nice bonus.
4. Installing WordPress and Setting Up Your Website
With your hosting and domain ready, it’s time to install WordPress — the heart of your website. The good news? Most hosting providers make this process super straightforward with one-click installations.
Here’s a typical step-by-step:
- Log into your hosting account’s control panel (cPanel or similar).
- Look for the WordPress or Softaculous installer — it’s often labeled as “Install WordPress” or “Website Installer.”
- Click on it and follow the prompts:
- Choose your domain name from the dropdown menu.
- Fill in site details like your website name and admin credentials.
- Click “Install” and wait a few moments.
Once installed, you can access your WordPress admin dashboard at yourdomain.com/wp-admin. Log in using the credentials you set during installation.
Now, you’re officially a WordPress user! Before you start customizing, it’s a good idea to do some basic setup:
- Set your site title and tagline: Go to Settings > General.
- Adjust your permalinks: Under Settings > Permalinks, choose a URL structure that’s SEO-friendly, like “Post name.”
- Install essential plugins: Think security, backups, and SEO. Popular options include Yoast SEO, Akismet, and UpdraftPlus.
And that’s it! You’ve taken the crucial first steps to bring your website to life. From here, you can explore themes, customize your design, and start creating content — but the foundation is now solidly in place.
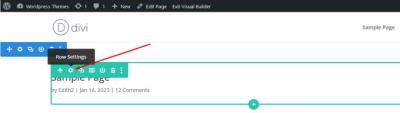
5. Customizing Your WordPress Theme for Your Brand
Now that you’ve installed your chosen theme and have your basic site setup, it’s time to make it uniquely yours. Customizing your WordPress theme is all about reflecting your brand’s personality, ensuring your website resonates with your audience, and creating a memorable user experience.
Think of your website as your digital storefront. Just like you’d decorate a physical space to match your brand’s vibe, customizing your theme helps tell your story visually. Here are some easy ways to do it:
Use the WordPress Customizer
Most themes come with a built-in customizer that allows you to tweak colors, fonts, header images, and layout options. To access it, go to Appearance > Customize in your WordPress dashboard. Spend some time exploring the options—these are your tools to align the look and feel with your brand’s identity.
Brand Colors and Logo
Your brand colors should be consistent across your website. Use the customizer to set your primary and secondary colors. Upload a high-quality logo that represents your brand—this will often go into the header area, making a strong first impression.
Typography Matters
Choose fonts that match your brand’s tone. For example, a creative portfolio might go for playful, artistic fonts, while a corporate site might prefer clean, professional typefaces. Many themes allow you to select fonts directly or integrate Google Fonts for more options.
Customize Homepage Layout
Depending on your theme, you can set up a homepage that highlights your best content—be it services, products, or latest blog posts. Use page builders or theme options to arrange sections like sliders, testimonials, or call-to-action buttons.
Use Child Themes for Advanced Customization
If you want to make more significant changes, consider creating a child theme. This way, your customizations won’t be overwritten when you update your main theme. It’s a bit more technical but worth the effort for a truly personalized site.
Preview and Test
Always preview your changes on different devices—desktop, tablet, mobile—to ensure your site looks great everywhere. Remember, a consistent and professional appearance builds trust and encourages visitors to stay longer.
By investing time in customizing your theme, you’re turning a generic template into a vibrant digital representation of your brand. It’s all about making your website feel authentic, inviting, and memorable for your visitors.
6. Installing Essential Plugins for Functionality and Security
Plugins are like apps for your WordPress site—they add new features, enhance existing ones, and help keep your website secure. But with thousands of plugins available, how do you choose the right ones? Let’s go over some essential plugins you should consider installing right from the start.
1. SEO Optimization
- Yoast SEO: This plugin helps you optimize your content for search engines, guiding you on keyword usage, readability, and meta descriptions. It’s a must-have for improving your site’s visibility.
2. Security
- Wordfence Security: Protect your site from malicious attacks, malware, and unauthorized logins. It offers firewall protection and live traffic monitoring.
3. Backup Solutions
- UpdraftPlus: Regular backups are crucial. This plugin allows you to schedule automatic backups and restore your site easily if anything goes wrong.
4. Performance Optimization
- WP Super Cache or W3 Total Cache: Speed is key. These plugins generate static pages of your site to improve load times, enhancing user experience and SEO.
5. Contact Forms
- Contact Form 7: Easy to set up forms so visitors can reach out. You can customize forms and embed them anywhere on your site.
6. Analytics
- MonsterInsights: Connect your site with Google Analytics to track visitor behavior, popular pages, and more. Data-driven decisions help you grow effectively.
7. Spam Protection
- Akismet: Automatically filters out spam comments, keeping your site clean and professional.
Installation Tips
To install plugins, go to Plugins > Add New in your dashboard, search for the plugin name, click Install Now, then activate. Once activated, most plugins have settings pages where you can customize their features.
Final Thoughts
Choosing and installing the right plugins can seem overwhelming, but focus on those that add real value—security, performance, and user engagement should be your top priorities. Regularly update your plugins to keep your site secure and running smoothly.
By thoughtfully selecting essential plugins, you’ll create a robust, secure, and high-performing WordPress site that provides a great experience for your visitors and supports your business goals.
7. Creating and Organizing Content for Your Website
Now that your basic website setup is complete, it’s time to focus on creating and organizing content that will engage your visitors and keep them coming back. Content is the heart of any website, and how you structure it can make a huge difference in user experience and overall effectiveness.
Start by defining the main pages your site needs. Typically, these include:
- Home: The first impression, showcasing what your website is all about.
- About: Sharing your story, mission, or business details.
- Services/Products: Showcasing what you offer.
- Blog: Sharing updates, insights, or industry news.
- Contact: Providing ways for visitors to reach you.
Once you’ve outlined these pages, focus on creating high-quality content that’s clear, concise, and valuable. Use a conversational tone that feels approachable—people want to connect with authentic voices. When writing, keep in mind:
- Headings and subheadings: Break your content into digestible sections. Use h2 and h3 tags to organize your content visually and for SEO benefits.
- Images and multimedia: Incorporate relevant images, videos, or infographics to make your content more engaging and easier to understand.
- Calls-to-action (CTAs): Encourage visitors to take the next step—subscribe to your newsletter, contact you, or buy a product.
- Internal linking: Link to other relevant pages or blog posts within your site. This helps visitors navigate and improves SEO.
Organizing your content effectively is equally important. Use a logical structure with clear navigation menus, categories, and tags. For example, if you run a food blog, categories might include “Recipes,” “Restaurant Reviews,” and “Cooking Tips.” Use tags to further specify topics, like “Vegan,” “Quick Meals,” or “Desserts.”
Remember, consistency is key. Keep your style and tone uniform across all pages, and update your content regularly to keep your site fresh and relevant. Whether you’re blogging regularly or updating your service offerings, a well-organized site makes it easy for visitors to find what they need and stay engaged.
8. Optimizing Your Website for Search Engines
Creating great content is just part of the equation—making sure people can find your website is equally important. Search Engine Optimization (SEO) helps your site rank higher in search engine results, bringing more organic traffic your way.
Here are some essential SEO tips tailored for WordPress sites:
1. Use SEO-Friendly URLs
Make your permalinks clean and descriptive. Instead of yourwebsite.com/page1, use yourwebsite.com/wordpress-development-tips. You can set this in your WordPress dashboard under Settings > Permalinks.
2. Install an SEO Plugin
Plugins like Yoast SEO or All in One SEO Pack simplify optimizing your content. They provide real-time feedback on your posts’ SEO and readability, helping you make improvements easily.
3. Focus on Keyword Research
Identify relevant keywords your target audience is searching for. Use tools like Google Keyword Planner or Ubersuggest to find popular keywords with manageable competition. Incorporate these naturally into your content, titles, and headings.
4. Optimize Your Content
- Use keywords strategically: Include them in titles, subtitles, and throughout your content.
- Write compelling meta descriptions: Summarize your page content in 150-160 characters to entice clicks from search results.
- Use header tags properly: Organize your content with h2 and h3 tags, including keywords where appropriate.
- Add alt text to images: Describe your images with relevant keywords to improve visibility in image searches.
5. Improve Site Speed
Fast-loading websites rank better and provide a better user experience. Use caching plugins like W3 Total Cache or WP Super Cache, optimize images with tools like TinyPNG, and consider a reliable hosting provider.
6. Build Quality Backlinks
Encourage other reputable sites to link to yours. This signals to search engines that your site is trustworthy. You can do this by guest blogging, sharing valuable content, and engaging in relevant online communities.
7. Ensure Mobile Responsiveness
Most users browse on mobile devices. Use a responsive theme and test your site on different screens to ensure it looks good and functions well everywhere.
Finally, regularly monitor your SEO performance with tools like Google Search Console and analytics platforms. Keep tweaking your strategies based on data, and over time, your site will climb higher in search rankings, attracting more visitors who are genuinely interested in what you offer.
9. Implementing Security Measures to Protect Your Site
So, you’ve built your WordPress site — congratulations! Now, one of the most crucial steps before going live is making sure your site is secure. After all, a secure website not only protects your visitors and your content but also helps you avoid headaches down the line, like hacking, data breaches, or SEO penalties. Don’t worry, setting up security isn’t as complicated as it sounds, and with a few best practices, you can keep your site safe and sound.
First things first, always keep your WordPress core, themes, and plugins up to date. Developers regularly release updates that fix security vulnerabilities, so enabling automatic updates or checking periodically ensures you’re protected against known threats.
Key Security Measures
- Use Strong Passwords: Ensure all user accounts, especially admin accounts, have strong, unique passwords. Consider using a password manager to generate and store complex passwords.
- Install Security Plugins: Plugins like Wordfence, Sucuri Security, or iThemes Security can add layers of protection, like firewall rules, malware scanning, and login attempt monitoring.
- Implement Two-Factor Authentication (2FA): Adding 2FA adds an extra layer of security during login, requiring a code from your phone or email.
- Secure Your Login Page: Change the default login URL, limit login attempts, and enable CAPTCHA to prevent brute-force attacks.
- Enable SSL/TLS Encryption: Use an SSL certificate to encrypt data transmitted between your site and visitors. Most hosts offer free SSL certificates via Let’s Encrypt.
- Backup Regularly: Schedule regular backups of your entire site, including database and files. Use plugins like UpdraftPlus or BackupBuddy, and store backups off-site.
- Limit User Permissions: Assign only necessary roles to users. Avoid giving admin access unless absolutely needed.
Additional Tips
Remember, security isn’t a one-and-done task — it’s an ongoing process. Regularly monitor your site for suspicious activities, review logs, and stay informed about the latest security threats. Also, consider setting up alerts for failed login attempts or unusual traffic patterns.
By investing a little time into security, you’re safeguarding your hard work and creating a trustworthy experience for your visitors. Think of it as locking your front door — it’s a simple step that makes a big difference!
10. Launching Your WordPress Website and Promoting It
You’re almost there! After all the planning, designing, and configuring, it’s time to launch your site and tell the world about it. Launching isn’t just about flipping a switch; it’s about making your website visible, accessible, and attractive to your target audience. Plus, a good promotion strategy will help you attract visitors and grow your online presence.
Preparing for Launch
- Final Checks: Double-check all pages, links, forms, and media. Make sure your contact info is correct and that your site loads properly on different devices and browsers.
- Optimize for Speed: Compress images, leverage caching plugins like W3 Total Cache or WP Super Cache, and consider a CDN (Content Delivery Network) to ensure fast load times globally.
- Set Up Analytics: Install Google Analytics or other tracking tools to monitor visitor behavior and measure your success.
- Configure SEO Settings: Use an SEO plugin like Yoast SEO or Rank Math to optimize your content, meta descriptions, and site structure for search engines.
- Test Everything: Perform user testing — ask friends or colleagues to browse your site and provide feedback. Check forms, checkout processes, or any interactive elements.
Launching Your Site
Once everything is set, it’s time for the big moment! If you’re using a hosting provider, most have a simple “launch” or “publish” button. If you’re moving from a staging environment, ensure you’ve migrated everything correctly. Announce your launch on social media, email newsletters, or any channels where your target audience hangs out.
Promotion Strategies
- Content Marketing: Regularly publish blog posts, videos, or tutorials that resonate with your audience. Valuable content encourages sharing and engagement.
- Social Media: Create profiles on platforms relevant to your niche. Share your content, engage with followers, and use hashtags to increase visibility.
- Email Marketing: Build an email list from day one. Offer freebies or newsletters to keep your subscribers engaged and informed about your latest updates.
- Collaborate and Network: Partner with influencers, bloggers, or other websites to gain backlinks and increase your reach.
- Paid Advertising: Consider running targeted ads on Google, Facebook, or Instagram to reach specific audiences quickly.
Post-Launch Maintenance
Launching isn’t the end — it’s just the beginning. Keep your site fresh with new content, monitor your analytics, and stay active on social media. Respond to comments and feedback, and continuously optimize your site for better performance and engagement.
Remember, building an audience takes time and consistency. Celebrate small wins along the way, stay patient, and enjoy the journey of growing your online presence. Your website is now live — go ahead and make your mark!
Maintaining and Updating Your WordPress Site for Long-Term Success
Ensuring your WordPress site remains secure, functional, and relevant requires ongoing maintenance and timely updates. Regularly updating your WordPress core, themes, and plugins is essential to patch security vulnerabilities, improve performance, and gain access to new features. Failing to keep your site updated can leave it vulnerable to malware, hacking attempts, and compatibility issues.
Here are key practices to maintain your site effectively:
- Perform Regular Backups: Schedule frequent backups of your website files and database. Use reliable backup plugins or hosting services to restore your site quickly if issues arise.
- Update Plugins, Themes, and WordPress Core: Always update to the latest versions to ensure security patches are applied. Test updates on a staging environment before deploying them live to prevent conflicts.
- Monitor Site Performance: Use tools like Google Analytics and PageSpeed Insights to track user engagement and loading speeds. Optimize images and leverage caching plugins for better performance.
- Secure Your Site: Implement security measures such as SSL certificates, strong passwords, two-factor authentication, and security plugins like Wordfence or Sucuri.
- Review and Remove Unused Content: Regularly audit your website for outdated or unused plugins, themes, and content. Removing unnecessary elements reduces potential security risks and improves site speed.
Additionally, keep an eye on user feedback and analytics to identify areas for improvement. Staying proactive with maintenance not only protects your site but also enhances user experience and SEO rankings, ensuring your WordPress site remains successful over the long term.
In conclusion, consistent maintenance and updates are vital to the longevity and effectiveness of your WordPress website. By establishing a routine, you can prevent problems before they occur and provide a seamless experience for your visitors.