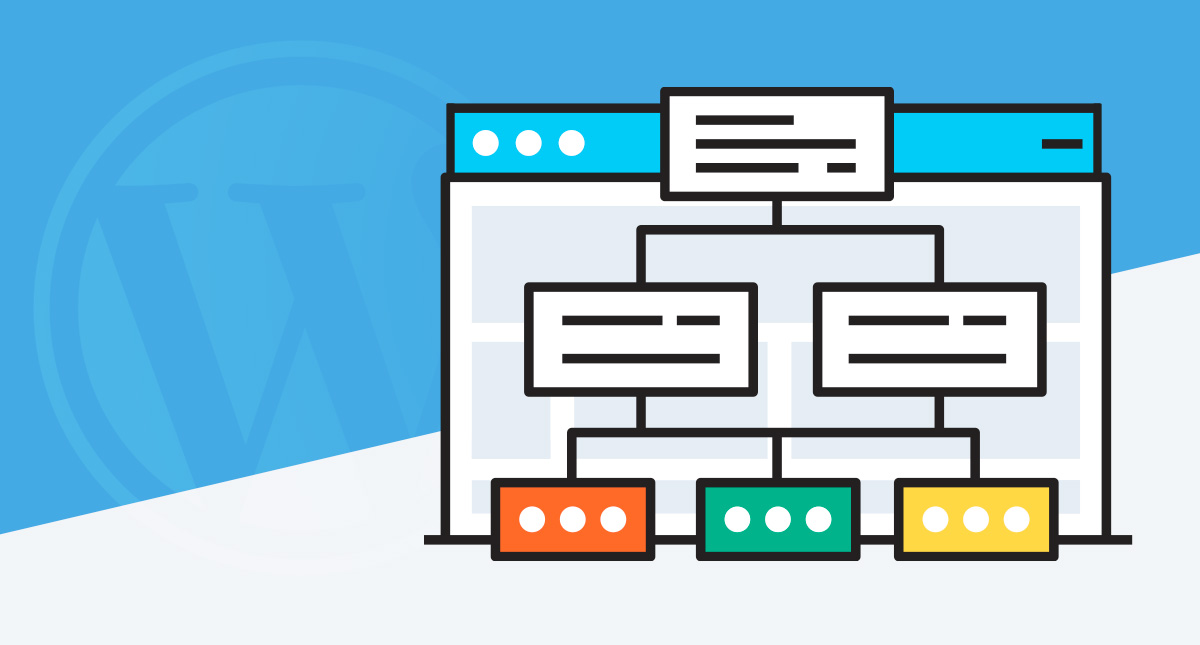
If you’ve ever wondered how search engines like Google find and understand your website’s content, sitemaps are the secret sauce. Think of a sitemap as a roadmap that highlights all the important pages, posts, and other content on your WordPress site. It helps search engines crawl and index your site more efficiently, ensuring your content gets found and ranked properly. For WordPress users, having a well-maintained sitemap isn’t just a good idea—it’s essential for SEO success. Whether you’re running a blog, an online store, or a corporate site, understanding the role of sitemaps can significantly boost your visibility online.
Benefits of Automating Sitemap Generation in WordPress
Now, you might be thinking, “That sounds useful, but isn’t creating a sitemap manually a hassle?” Luckily, automation comes to the rescue! Automating sitemap generation in WordPress offers several key benefits:
- Always Up-to-Date: Your sitemap automatically updates whenever you publish new content, delete pages, or make changes. No more manual edits!
- Saves Time and Effort: Once set up, you don’t have to worry about maintaining your sitemap. It runs seamlessly in the background.
- Ensures Better SEO: Search engines get the latest structure of your website, helping them crawl your site more effectively and improving your chances of ranking higher.
- Reduces Errors: Automated tools are less prone to human error, ensuring your sitemap remains accurate and comprehensive.
- Easy Integration with SEO Plugins: Many popular SEO plugins like Yoast SEO or Rank Math automatically generate and update sitemaps, making the process even smoother.
In short, automating sitemap creation not only keeps your site optimized but also frees you from the tedious task of manual updates, letting you focus on creating great content instead. It’s a smart move for any WordPress site owner aiming for better search engine performance without the extra hassle.
3. Step-by-Step Guide to Setting Up Automatic Sitemap Generation in WordPress
Ready to make your life easier and ensure search engines can find and index your website content effortlessly? Setting up an automatic sitemap in WordPress is a straightforward process that can significantly boost your SEO efforts. Let’s walk through the steps together!
Step 1: Install a Sitemap Plugin
The first thing you’ll want to do is pick a reliable plugin that can generate sitemaps automatically. Some popular options include Yoast SEO, All in One SEO Pack, and Google XML Sitemaps. For this example, we’ll use Yoast SEO because it’s user-friendly and packed with features.
Step 2: Install and Activate the Plugin
Go to your WordPress dashboard, click on Plugins > Add New. Search for Yoast SEO. Once you see it, click Install Now and then Activate.
Step 3: Enable Sitemap Functionality
After activation, navigate to SEO > General in your dashboard sidebar. Click on the Features tab. Here, you’ll find the XML Sitemaps toggle. Make sure it’s turned On. Once enabled, Yoast automatically generates your sitemap.
Step 4: Find and Submit Your Sitemap to Search Engines
To view your sitemap, click on the See the XML sitemap link that appears right below the toggle. It typically looks like https://yourdomain.com/sitemap_index.xml. Copy this URL.
Next, head over to your Google Search Console account (or Bing Webmaster Tools) and submit your sitemap URL. This step helps search engines crawl your site more efficiently, ensuring your content gets indexed faster.
Step 5: Confirm and Maintain
Once submitted, check back periodically to ensure your sitemap is updating as you publish new content. With Yoast, this process is fully automatic, so you don’t need to worry about manually updating your sitemap every time you add new pages or posts.
4. Choosing the Right Plugins for Automatic Sitemap Creation
Not all plugins are created equal, and choosing the right one can make a big difference in how smoothly your sitemap gets generated and maintained. Here’s what to consider when selecting a plugin:
Key Factors to Consider
- Ease of Use: Does the plugin have a simple setup process and clear options? Beginners will appreciate an intuitive interface.
- Compatibility: Ensure the plugin is compatible with your WordPress version and other plugins you use.
- Features: Look for plugins that offer automatic updates, customization options, and support for different content types (posts, pages, custom post types).
- Support and Updates: Regular updates and good support from the developers can save you headaches down the line.
Popular Plugins for Automatic Sitemap Creation
| Plugin Name | Key Features | Best For |
|---|---|---|
| Yoast SEO | Automatic sitemap generation, SEO analysis, readability checks | All-in-one SEO and sitemap needs |
| All in One SEO Pack | Automatic sitemaps, XML sitemap customization, social media integration | Users wanting comprehensive SEO tools |
| Google XML Sitemaps | Dedicated sitemap generator, supports large sites, customizable | Simple, focused sitemap creation |
| Sitemap by Google XML Sitemaps | Generates static sitemaps, supports multiple sitemap formats | Advanced users needing control over sitemap details |
Final Thoughts
Choosing the right plugin depends on your specific needs and comfort level. If you’re looking for an all-in-one SEO solution, Yoast SEO is a fantastic choice. For a lightweight, dedicated sitemap generator, Google XML Sitemaps might be better. Remember, the goal is to automate the process so you can focus on creating great content while search engines do the rest!
5. Configuring Your Sitemap Plugin for Optimal SEO Performance
Once you’ve installed and activated your sitemap plugin, the next step is to fine-tune its settings to get the best SEO results. Think of this as setting up your website’s roadmap so search engines can easily find and understand your content.
Most sitemap plugins offer a range of options to customize what gets included in your sitemap. Here’s a quick rundown of key settings you should look into:
- Include or Exclude Specific Content Types: Decide whether to include pages, posts, categories, tags, or custom post types. For example, if you have a portfolio or testimonials that you don’t want search engines to index, you can exclude them here.
- Prioritization and Frequency: Some plugins let you set how often pages or posts are updated and their priority level. While search engines don’t rely solely on these settings, they give them hints about your content’s importance and update schedule.
- Media and Images: Enable image sitemaps if your site relies heavily on visual content. This helps Google discover and index your images, which can boost your site’s visibility in image search results.
- Exclude Specific URLs: If there are certain pages or URLs you want to keep out of the sitemap, most plugins allow you to do this easily. This is handy for login pages, admin pages, or any content you don’t want publicly indexed.
Another tip is to ensure your sitemap is always up-to-date. Many plugins automatically update the sitemap when you publish new content, but it’s good to double-check in the plugin settings that this feature is enabled.
Finally, check if your plugin supports adding extra metadata or customizing the sitemap’s structure. This can be helpful if you have a complex site and want to ensure search engines understand your content hierarchy clearly.
By investing a few minutes in configuring your sitemap plugin properly, you’re setting your site up for better SEO performance. Remember, a well-structured sitemap makes it easier for search engines to crawl your site efficiently, which can help your pages rank higher in search results.
6. Testing and Submitting Your Sitemap to Search Engines
Great, your sitemap is set up and configured—now what? The next crucial step is to test it to make sure everything is working correctly and then submit it to search engines like Google and Bing.
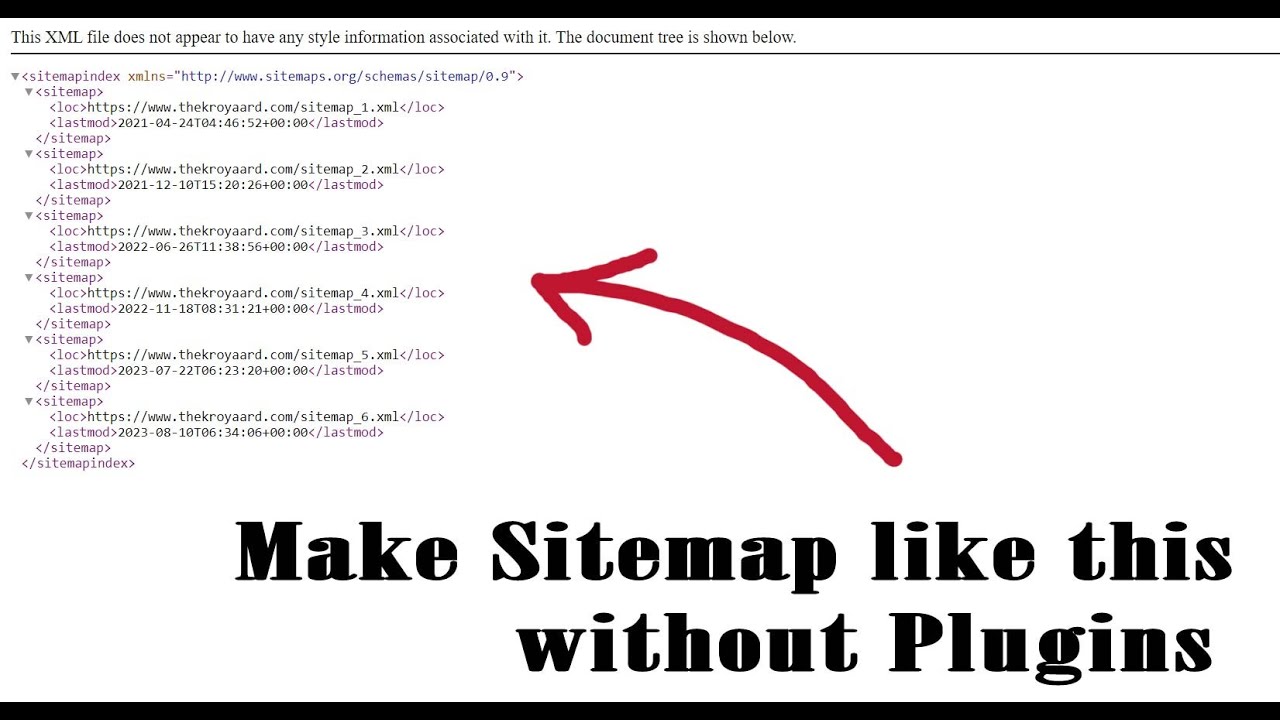
Testing Your Sitemap is easier than you might think. Most sitemap plugins generate a URL, such as https://yourwebsite.com/sitemap.xml. Start by opening this link in your browser. You should see an XML file with a list of your website’s URLs. If it loads correctly and contains the pages you expect, you’re on the right track.
If you encounter errors or the sitemap is empty, double-check your plugin settings, ensure your site is accessible publicly, and that your sitemap URL is correct. Some plugins also offer a built-in testing feature or a preview option—use these to confirm everything looks good before proceeding.
Submitting your sitemap to search engines is the final step to help them start crawling your site efficiently:
- Google Search Console:
- Log in to your Google Search Console account. If you don’t have one, you’ll need to create it and verify your website ownership.
- In the dashboard, select your website property.
- Navigate to the Sitemaps section in the menu.
- Enter your sitemap URL (e.g.,
https://yourwebsite.com/sitemap.xml) in the provided field. - Click Submit.
- Bing Webmaster Tools:
- Log in or sign up for Bing Webmaster Tools.
- Add your website and verify ownership.
- Go to the Sitemaps section.
- Enter your sitemap URL and submit.
Once submitted, search engines will start crawling your sitemap and indexing your pages. Keep in mind that it might take some time for your pages to appear in search results, so be patient.
After submission, it’s a good idea to periodically check your search engine consoles for any crawl errors or warnings. Fixing issues early helps ensure your site remains well-optimized and easily discoverable.
In summary, testing your sitemap guarantees that search engines can read it correctly, and submitting it ensures they know exactly where to find all your valuable content. This small but important step can significantly improve how your website is indexed and ranked.
7. Maintaining and Updating Your Sitemap for Continuous SEO Success
Once you’ve set up your automated sitemap in WordPress, the journey doesn’t end there. Think of your sitemap as a living document—it needs regular attention to keep up with your website’s evolving content. Why is this so important? Well, search engines like Google rely heavily on sitemaps to discover and understand your pages, especially as you add, modify, or remove content.
So, how do you ensure your sitemap stays current and continues to serve its purpose effectively? Here are some simple but essential tips:
- Regular Content Updates: Whenever you publish new posts, pages, or custom content types, your sitemap should automatically reflect these changes. Most plugins handle this seamlessly, but it’s good to verify periodically.
- Remove Outdated or Deleted Content: If you delete or archive content, ensure it no longer appears in your sitemap. Automated tools generally handle this, but double-checking can save you from indexing outdated pages.
- Monitor Your Sitemap: Use tools like Google Search Console to see how your sitemap is performing. Look for errors or warnings, such as pages not being crawled or indexing issues.
- Optimize for SEO Trends: As SEO best practices evolve, update your sitemap structure if needed. For example, prioritize important pages or add specific metadata to help search engines understand your content better.
Most importantly, keep your sitemap plugin or tool updated to the latest version. Developers often release updates that improve compatibility, security, and functionality, ensuring your sitemap remains efficient and reliable.
By dedicating a little time regularly to maintain your sitemap, you’re giving your website a better chance to rank well and stay visible in search results. Remember, a well-maintained sitemap is like a well-organized roadmap—making it easier for search engines to find and understand everything your site has to offer!
8. Troubleshooting Common Issues with Automated Sitemaps in WordPress
Even with the best tools and plugins, sometimes things don’t work perfectly. If your automated sitemap isn’t updating correctly, or you notice issues like pages not being indexed, don’t worry—you’re not alone. Let’s go through some common problems and how to troubleshoot them:
1. Your Sitemap Isn’t Updating After New Content
This can happen if the plugin isn’t configured correctly or if there’s a caching issue. To fix it:
- Check your plugin settings to ensure auto-update features are enabled.
- Clear your website cache and browser cache.
- Verify that the sitemap URL (e.g., /sitemap.xml) updates with your new content.
- Use Google Search Console to see if your latest pages are being crawled.
2. Sitemaps Are Not Submitting or Crawling Properly
If search engines aren’t indexing your sitemap, consider:
- Resubmitting your sitemap in Google Search Console or Bing Webmaster Tools.
- Checking robots.txt to ensure it doesn’t block your sitemap URL.
- Ensuring your server isn’t blocking bots or causing access issues.
3. Duplicate or Outdated URLs Showing Up
This can be confusing for search engines. To troubleshoot:
- Ensure your sitemap reflects only live, relevant content.
- Check for duplicate pages or URL variations and set canonical URLs appropriately.
- Update or remove stale content from your sitemap.
4. Errors in Google Search Console
If you see errors like “Submitted URL blocked” or “Crawled – currently not indexed,” try:
- Verifying your robots.txt file for accidental blocks.
- Ensuring your sitemap is correctly formatted and accessible.
- Using the URL Inspection tool to diagnose specific pages.
5. Plugin Conflicts or Compatibility Issues
If your sitemap plugin isn’t working as expected, consider:
- Deactivating other plugins to identify conflicts.
- Ensuring your WordPress and plugin versions are up-to-date.
- Consulting the plugin’s support forums or documentation for known issues.
Remember, troubleshooting is often a process of elimination. Take it step-by-step, and don’t hesitate to reach out to plugin support or SEO communities if you get stuck. Keeping your sitemap healthy and current is key to maintaining a strong SEO presence, so it’s worth investing a little time to troubleshoot and resolve issues as they arise.
Conclusion and Best Practices for Managing WordPress Sitemaps
Effectively managing your WordPress sitemap is crucial for enhancing your website’s SEO and ensuring that search engines can easily discover and index your content. A well-maintained sitemap not only improves visibility but also helps prioritize important pages, leading to better search rankings. To maximize these benefits, adhere to the following best practices:
- Regular Updates: Ensure your sitemap updates automatically with new or modified content. Use plugins like Yoast SEO or Rank Math that sync your sitemap with your site’s changes.
- Limit the Size: Keep your sitemap size manageable by splitting large sitemaps into smaller ones if necessary. Search engines recommend sitemaps not exceed 50,000 URLs or 50MB.
- Prioritize Important Content: Use the priority and change frequency tags in your sitemap to guide search engines on what to crawl first and how often.
- Validate Your Sitemap: Regularly check your sitemap for errors using tools like Google Search Console or XML Sitemap Validator to ensure it’s correctly formatted.
- Submit to Search Engines: After updating your sitemap, submit it directly through Google Search Console and Bing Webmaster Tools for faster indexing.
By following these best practices, you can ensure that your WordPress sitemap remains an effective tool for SEO, helping your website achieve better visibility and higher rankings in search engine results.