Imagine waking up one morning to find your website gone or hacked—scary, right? Regular backups are your safety net, allowing you to restore your site quickly without losing valuable content or data. Backing up your WordPress website might sound complicated, but with the right tools and a simple process, it becomes manageable—even free! Whether you’re a blogger, small business owner, or developer, knowing how to back up your site ensures peace of mind. In this guide, we’ll walk you through how to do it for free using Google Drive, so your website is always protected and ready to recover whenever needed.
Why Choose Google Drive for Website Backups
When it comes to backing up your WordPress site, you want a solution that’s reliable, accessible, and budget-friendly. Google Drive ticks all these boxes—and more! Here’s why it’s a fantastic choice for your website backups:
- Free Storage Space: Google Drive offers 15 GB of free storage, which is often enough for small to medium websites. You can always upgrade if needed, but for most personal or small business sites, this is more than enough.
- Easy Accessibility: Your backups are stored securely in the cloud, so you can access them anytime, anywhere—whether you’re at home, in the office, or on the go. All you need is an internet connection.
- Integration and Compatibility: Google Drive works seamlessly with various tools and can be integrated with backup plugins and scripts, simplifying the process. Plus, it supports a wide range of file formats.
- Automation: Using third-party tools or simple scripts, you can automate your backups to save time and reduce the risk of forgetting to back up manually.
- Security: Google employs robust security measures to keep your data safe, including encryption and regular security updates. Just remember to keep your account secure with strong passwords and two-factor authentication.
While there are many backup options out there, Google Drive’s combination of free storage, ease of use, and accessibility makes it a top choice—especially for those just starting out or looking to keep costs down. Plus, with a little bit of setup, you can enjoy automated backups and peace of mind knowing your website is protected without breaking the bank.
3. Prerequisites for Backing Up Your WordPress Site to Google Drive
Before you start the process of backing up your WordPress website to Google Drive, there are a few important prerequisites to keep in mind. Having everything in place will make the entire process smoother and help you avoid any hiccups along the way.
First off, you’ll need a Google Account. If you don’t already have one, it’s quick and easy to create — just head over to Google Sign Up. Your Google account will give you access to Google Drive, where your backups will be stored.
Next, ensure you have enough storage space on Google Drive. The free plan offers 15 GB, which is usually sufficient for small to medium-sized websites. But if your site has a lot of media files, consider upgrading or managing your storage accordingly.
Another essential prerequisite is a WordPress plugin that facilitates backups and integrates with Google Drive. Popular options include:
- UpdraftPlus — Very user-friendly, supports Google Drive, and offers both free and premium versions.
- Backup & Restore by BoldGrid — Simple to set up and works well with Google Drive.
- WPvivid Backup Plugin — Offers cloud storage options including Google Drive.
For this guide, we’ll assume you’re using UpdraftPlus, as it’s one of the most popular and reliable backup plugins out there. Make sure to install and activate your chosen plugin from the WordPress plugin repository.
Finally, you’ll need to set up Google Drive API credentials to securely connect your WordPress site with Google Drive. This involves creating a project in the Google Cloud Console, enabling the Drive API, and generating OAuth credentials. Don’t worry — this might sound technical, but with step-by-step instructions, it’s straightforward. We’ll cover this in the next section.
4. Step-by-Step Guide to Back Up Your WordPress Website to Google Drive
Great! Now that you’ve got all the prerequisites sorted, let’s walk through the process of backing up your WordPress website directly to Google Drive. We’ll focus on using the UpdraftPlus plugin, but other plugins follow a similar process.
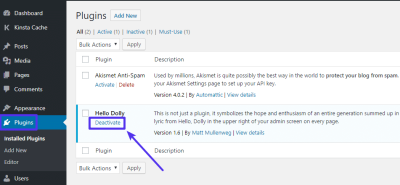
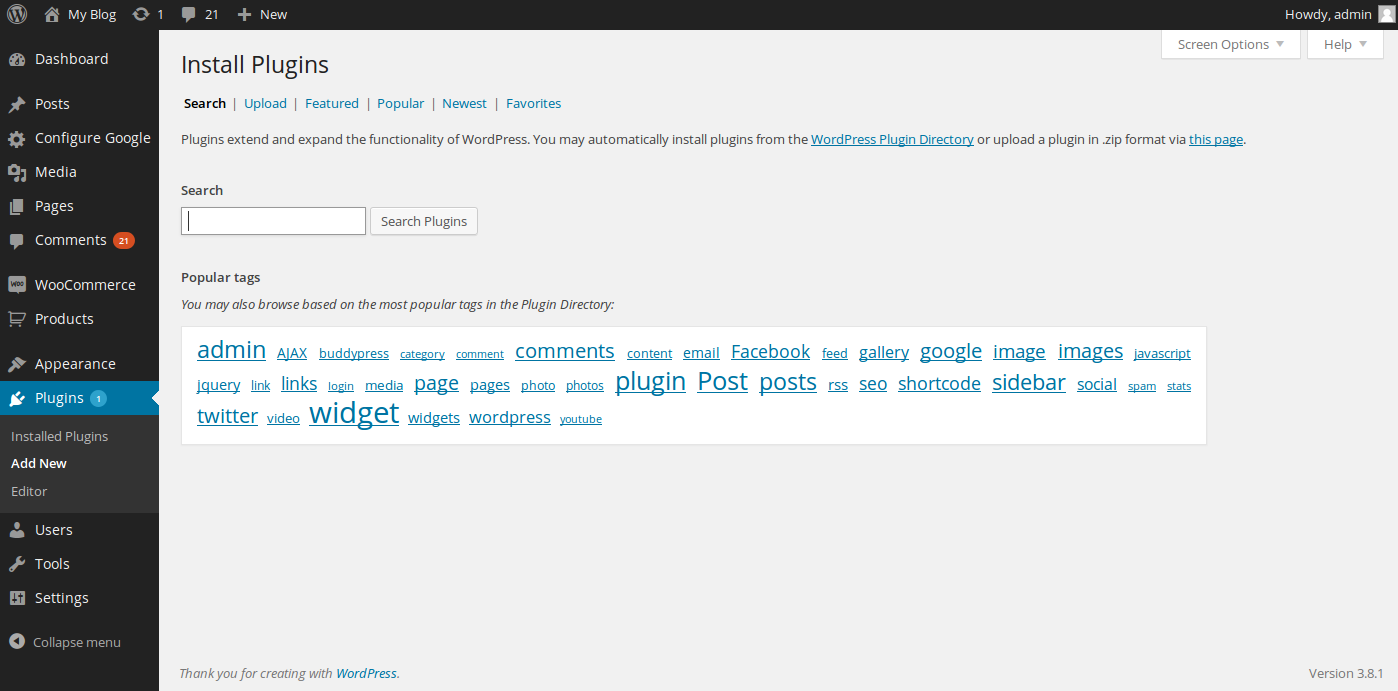
Step 1: Install and Activate UpdraftPlus
Head over to your WordPress dashboard, navigate to Plugins > Add New, search for UpdraftPlus, click Install Now, then Activate.
Step 2: Configure UpdraftPlus Settings
Once activated, go to Settings > UpdraftPlus Backups. Here, you’ll find options to customize your backup schedule and storage location.
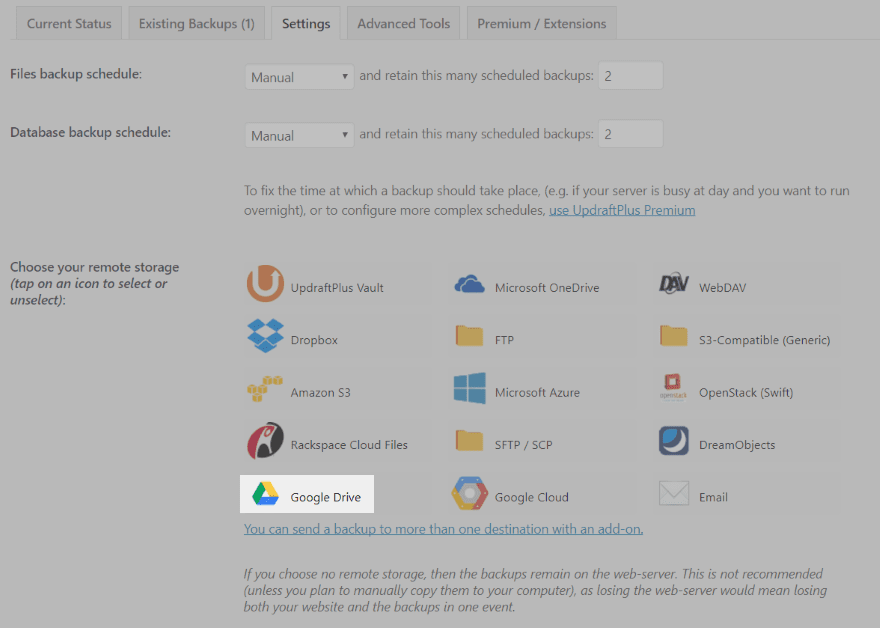
Step 3: Connect UpdraftPlus to Google Drive
- Scroll down to the Settings tab within UpdraftPlus.
- In the Choose your remote storage dropdown, select Google Drive.
- Click the Save Changes button at the bottom. You will see a button labeled Authenticate with Google.
- Click Authenticate with Google. A new window will open prompting you to log into your Google Account.
- Grant the necessary permissions for UpdraftPlus to access your Google Drive.
- After authorization, you’ll receive a confirmation message. Return to your WordPress dashboard.
Step 4: Set Up Google API Credentials (if required)
This is the technically involved part. Here’s a quick overview:
- Visit the Google Cloud Console.
- Create a new project or select an existing one.
- Enable the Google Drive API in your project.
- Navigate to Credentials, then click Create Credentials > OAuth client ID.
- Select Web application, fill in the details, and create.
- Download the JSON file or copy the client ID and secret.
- Enter these details into the UpdraftPlus plugin when prompted.
If you prefer a simpler method, UpdraftPlus provides a built-in way to handle this authorization process, so you might not need to manually create API credentials. Just follow the prompts during the connection process.
Step 5: Initiate Your First Backup
After successfully connecting your Google Drive account, go back to the Backup / Restore tab in UpdraftPlus. Click the Backup Now button. Choose whether to include files, database, or both, then confirm.
And voilà! Your website will start backing up to Google Drive. Depending on your site size, this might take a few moments. Once completed, you’ll see your backup files stored safely in your Google Drive account.
Remember to schedule regular backups! You can set your preferred frequency (daily, weekly, monthly) in the UpdraftPlus settings to keep your website safe without manual intervention.
That’s it — your WordPress site is now set up to back up automatically to Google Drive for free! Regular backups are your best defense against data loss, so make sure to check that everything is working correctly from time to time.
5. Recommended Plugins for Automating Google Drive Backups
When it comes to backing up your WordPress website to Google Drive, choosing the right plugin can make your life so much easier. Luckily, there are several user-friendly options out there that can automate your backups without requiring you to be a tech wizard. Let’s explore some of the most popular and reliable plugins you might want to consider.
UpdraftPlus
UpdraftPlus is one of the most popular backup plugins for WordPress, and for good reason. It offers seamless integration with Google Drive and provides options to schedule automatic backups with just a few clicks. The free version is quite robust, allowing you to restore backups easily and choose what to back up—files, database, or both.
- Easy setup: Connect your Google Drive account easily via OAuth.
- Automatic backups: Schedule daily, weekly, or monthly backups.
- Restore with ease: One-click restore feature.
Backup WordPress to Google Drive
This plugin is straightforward and designed specifically for Google Drive backups. It provides simple options to set up automatic backups, and its user interface is clean and intuitive. It also allows you to specify backup frequency and retention policies to keep your Drive uncluttered.
- Direct integration: Connects directly to Google Drive using OAuth.
- Customizable backups: Choose specific folders or files to include.
- Notifications: Get alerts when backups are completed or if issues arise.
WP Google Drive
While primarily a file management plugin, WP Google Drive can also be leveraged for backups when configured correctly. It allows you to sync your website files to Google Drive and can be scheduled to keep your backups up to date automatically.
- File synchronization: Sync your website files directly to Drive.
- Multiple account support: Manage backups across different Google accounts.
- Easy to use: Minimal setup required for basic backup needs.
All these plugins come with their own strengths, but the key is to pick one that fits your comfort level and backup needs. Most importantly, ensure that you connect securely to your Google Drive account and test your backups periodically to confirm everything’s working smoothly.
6. Scheduling Regular Backups for Peace of Mind
Once you’ve chosen the right plugin, the next step is to set up a regular backup schedule. Think of it like setting an alarm—you want it to go off at times that make sense for your website activity and update frequency. The goal? To always have recent copies of your website ready in case something unexpected happens.
Why Schedule Regular Backups?
Automatic scheduling ensures that you don’t forget to back up your site, especially during busy periods. It also minimizes the risk of losing recent content, updates, or settings if your site experiences issues like hacking, server crashes, or accidental deletions.
How Often Should You Back Up?
The frequency depends on how often you update your site:
- Daily: For sites with frequent updates, like news portals or e-commerce stores.
- Weekly: For blogs or informational sites that get regular but less frequent updates.
- Monthly: For static websites or portfolios with infrequent changes.
Setting Up Backup Schedules
Most backup plugins give you options to customize your schedule easily. Here’s a quick rundown of how to do it:
- Access plugin settings: Usually found in your WordPress dashboard under “Settings” or directly in the plugin menu.
- Choose backup frequency: Select daily, weekly, or monthly backups based on your needs.
- Set retention policies: Decide how many backups to keep. For example, keep the last 7 backups if doing daily backups.
- Specify backup time: Pick a time when your website has lower traffic to reduce server load.
Additional Tips for Peace of Mind
- Test your backups: Regularly restore a backup to verify it works properly.
- Store backups securely: Keep copies not only on Google Drive but consider downloading a copy to your local device or another cloud service for extra security.
- Monitor backups: Set up email alerts or notifications to stay informed about backup statuses.
Remember, consistency is key! By scheduling regular backups, you’re proactively safeguarding your website’s content, design, and data, giving you peace of mind to focus on creating and growing your site without worrying about potential data loss.
7. Restoring Your WordPress Site from Google Drive Backups
So, you’ve successfully backed up your WordPress website to Google Drive—great job! But what happens when you need to restore your site after an unexpected issue, like a hacking attempt, a plugin conflict, or a hosting problem? Restoring your site might sound intimidating, but with a solid plan, it’s actually pretty straightforward.
Here’s a step-by-step guide to help you get your site back up and running smoothly:
Step 1: Locate Your Backup Files
First, head over to your Google Drive where your backups are stored. Make sure you have the latest backup, including the database and all website files. Typically, your backup will include:
- Database file (usually a .sql or .zip file)
- Website files (themes, plugins, uploads, core files)
Step 2: Prepare Your Hosting Environment
Before restoring, ensure your hosting environment is ready. It’s a good idea to create a staging or temporary environment if possible, so you don’t overwrite your live site until you’re ready. Also, confirm that your current hosting supports restoring files and databases.
Step 3: Upload Files to Your Server
Using an FTP client like FileZilla or your hosting control panel’s file manager, upload your website files from the backup to your server. Overwrite the existing files if necessary.
Step 4: Import Your Database
Access your hosting control panel’s database management tool (usually phpMyAdmin). Select your WordPress database, then choose the option to import. Upload your database backup file, and ensure the import completes without errors.
Step 5: Update wp-config.php if Needed
If your database credentials or server environment have changed, update the wp-config.php file accordingly. Make sure database name, username, password, and host are correct.
Step 6: Test Your Site
Visit your website to see if everything looks good. Check different pages, plugins, and functionalities. Clear your browser cache if needed to see updates.
Pro Tip:
If you encounter issues, restore your backup to a staging environment first. This way, you can troubleshoot without affecting your live site.
Restoring from Google Drive backups might seem a bit technical at first, but with practice, it becomes second nature. Keep your backups organized and regularly test your restore process to ensure you’re prepared for any emergencies.
8. Tips for Ensuring Secure and Reliable Backups
Backing up your WordPress site is only half the battle—making sure those backups are secure and reliable is just as important. After all, what’s the point of a backup if it’s corrupted, outdated, or vulnerable to threats? Here are some practical tips to keep your backups safe, trustworthy, and ready when you need them.
1. Automate Your Backups
Manual backups are great, but they’re easy to forget or skip. Use backup plugins or scripts that automate the process. Schedule regular backups—daily, weekly, or after major updates—to ensure you always have recent copies.
2. Use Multiple Backup Locations
Relying solely on Google Drive is convenient, but it’s safer to have backups stored in more than one place. Consider cloud services like Dropbox, OneDrive, or even a dedicated backup storage service. Physical backups on external drives can also add an extra layer of security.
3. Verify Backup Integrity Regularly
Don’t just create backups—test restoring them periodically. This helps you catch corruption or incomplete backups before an emergency strikes. Schedule quarterly restore tests to stay confident in your backup’s reliability.
4. Keep Backups Up-to-Date
Your website changes frequently, so your backups should reflect those updates. Set a backup schedule that matches your site’s update frequency, especially after installing new plugins, themes, or making content changes.
5. Implement Strong Security Measures
Ensure your backups are stored securely:
- Use strong passwords for your Google account and backup services.
- Enable two-factor authentication on your Google account.
- Encrypt your backup files if possible, especially when storing sensitive data.
- Limit access to backup files to trusted users only.
6. Keep Backup Files Organized
Label your backups clearly with dates and version numbers. This makes restoring easier and helps you identify the most recent backup quickly.
7. Stay Updated with Plugin and WordPress Security
A secure website is less likely to encounter issues that require restoring. Keep WordPress, themes, and plugins updated, and use security plugins to guard against malware and hacking attempts.
By following these tips, you’ll ensure your backups aren’t just a safety net—they’ll be a reliable, secure, and quick way to get your site back on track whenever needed. Remember, proactive backup management saves you headaches later on!
Conclusion and Final Thoughts on Free WordPress Backup Solutions
Backing up your WordPress website is an essential step to ensure your data remains safe and recoverable in case of unexpected issues. Free backup solutions, such as Google Drive integrations, offer a cost-effective way to protect your site without additional expenses. These tools typically provide automated backups, easy restoration processes, and seamless integration with cloud storage platforms, making them suitable for most WordPress users. However, it’s important to choose a reputable plugin or method that regularly updates and has positive user feedback.
When selecting a free backup solution, consider these key factors:
- Ease of Use: User-friendly interfaces reduce the risk of errors during setup and restore.
- Backup Frequency: Ensure the solution supports scheduled backups to keep your data current.
- Storage Limits: Check Google Drive storage capacity and plan accordingly to avoid interruptions.
- Security: Opt for solutions that encrypt your backups and adhere to best security practices.
While free options are excellent for beginners and small websites, larger or more complex sites might require premium solutions offering advanced features and dedicated support. Always remember to periodically test your backups to confirm they can be successfully restored. Combining multiple backup strategies, such as local and cloud backups, adds an extra layer of security for your website.
In conclusion, leveraging free WordPress backup solutions to Google Drive is a smart, budget-friendly approach to safeguarding your website. With proper setup, regular maintenance, and careful selection of tools, you can ensure your website data remains protected and easily recoverable when needed.