Thinking about launching your own media portal but feeling overwhelmed about where to start? No worries! WordPress makes it surprisingly easy to build a professional-looking media site that showcases videos, images, news, and more. Whether you’re aiming to create a community hub, a news outlet, or a niche content aggregator, WordPress offers flexible themes and plugins to bring your vision to life. In this guide, we’ll walk through each step, from setting up your hosting to customizing your site, so you can confidently create a media portal that attracts visitors and keeps them coming back for more.
Choosing the Right Hosting and Domain for Your Media Portal
The foundation of any successful website starts with choosing the right hosting provider and domain name. Think of hosting as renting space on the internet where your site lives, while your domain is your site’s address—like example.com. Selecting a good hosting service ensures your media portal loads quickly, stays secure, and can handle traffic spikes as your audience grows. Here are some key factors to consider:
- Reliability and Uptime: Look for hosts with a reputation for high uptime (99.9% or better) so your site is always available.
- Speed and Performance: Choose hosts optimized for WordPress and media content—they often have caching and CDN options.
- Customer Support: Responsive support can save you headaches when technical issues arise.
- Scalability: As your media portal grows, you’ll want hosting that can accommodate increased traffic and storage needs.
Popular hosting options for media portals include Bluehost, SiteGround, and WP Engine, each offering plans tailored for WordPress sites. When it comes to your domain, pick a name that’s memorable, relevant to your niche, and easy to spell. You can register your domain through providers like Namecheap or directly via your hosting service. Remember, your domain is your brand’s identity on the web, so take your time choosing one that resonates with your content and audience.
3. Installing and Setting Up WordPress for Your Media Website

Alright, so you’re ready to bring your media portal to life! The first step is getting WordPress set up on your hosting. Don’t worry—it’s pretty straightforward, even if you’re new to this. Here’s a simple walkthrough to get you started:
Choosing a Reliable Hosting Provider
Before diving into installation, pick a hosting provider that’s optimized for WordPress. Look for features like one-click WordPress installs, good uptime, and solid customer support. Some popular options include Bluehost, SiteGround, and WP Engine. They often come with plans tailored for media sites, which can handle high traffic and large media files.
Installing WordPress
- One-Click Install: Most hosts offer a one-click WordPress installation. Usually, you’ll log into your hosting dashboard, find the “Install WordPress” button, and follow a few prompts. It’s super easy!
- Manual Installation: If needed, you can download WordPress from wordpress.org, upload it via FTP to your server, create a database, and run the installation script. But honestly, most hosts make this unnecessary.
Initial Setup and Configuration
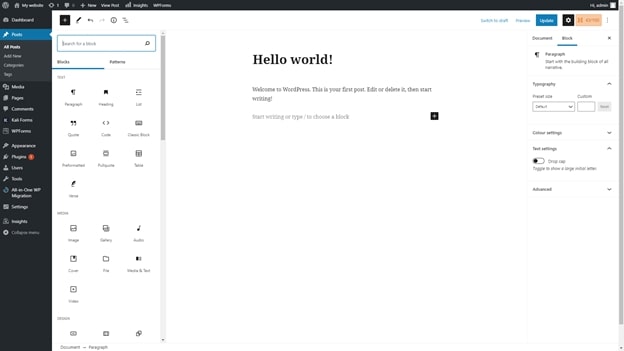
Once installed, you’ll land on your WordPress dashboard. Here’s what to do next:
- Set Your Site Title and Tagline: Go to Settings > General. Make sure your site name and description reflect your media focus.
- Configure Permalinks: Change URL structure to something clean and SEO-friendly. Head to Settings > Permalinks and select “Post name.”
- Install Essential Plugins: Some must-haves include:
- Yoast SEO for search optimization
- WP Super Cache or similar caching plugins for speed
- Media Library Organizer for managing your media files
Uploading Media and Creating Content
Now that your site is ready, start adding your media content. Use the built-in Media Library to upload images, videos, and audio files. Organize them with folders or categories to keep things tidy. When creating posts or pages, embed media easily using the block editor or classic editor. Remember, a well-organized backend makes your site easier to manage as it grows.
4. Selecting and Customizing a Suitable Media Portal Theme
The theme is the visual foundation of your media portal. It should not only look great but also be functional, fast, and easy to customize. Here’s how to pick the perfect theme and tailor it to your needs:
Finding the Right Theme
Start by browsing the WordPress Theme Repository or premium marketplaces like ThemeForest or Elegant Themes. Look for themes specifically designed for media, news, or magazine sites. Some features to consider:
- Responsive Design: Your site should look good on desktops, tablets, and smartphones.
- Media-Friendly Layouts: Support for large images, videos, and galleries.
- Built-in Features: Slider options, featured posts, multiple widget areas, and social media integration.
- Speed Optimization: Light themes that don’t bloat your server or slow down loading times.
Popular Themes for Media Portals
| Theme Name | Highlights | Price |
|---|---|---|
| Newspaper | Highly customizable, includes demo content, optimized for ads and videos | Premium |
| MH Magazine | Clean magazine layout, flexible widget areas, WooCommerce compatible | Premium |
| ColorMag | Free, responsive, easy to set up, perfect for news and media sites | Free/Premium options available |
Customizing Your Theme
Once you’ve chosen a theme, it’s time to make it your own:
- Use the WordPress Customizer: Accessible via Appearance > Customize, this tool lets you tweak colors, fonts, header layouts, and more, in real-time.
- Install Recommended Plugins: Many themes come with recommended plugins for additional features like sliders, social sharing, or page builders.
- Create Custom Menus: Organize your navigation so visitors can easily find categories, recent posts, or media collections.
- Add Widgets: Place media galleries, recent posts, or social feeds in sidebar or footer areas for enhanced engagement.
Tips for a Stunning Media Portal
Remember, simplicity is key. Keep your design clean and clutter-free, prioritize fast loading times, and focus on user experience. Use high-quality media, consistent branding, and clear calls to action to make your portal inviting and engaging.
Building your media portal is an exciting journey. With the right setup and a beautiful, functional theme, you’ll be well on your way to creating a space that attracts visitors and showcases your content perfectly. Happy building!
5. Installing Essential Plugins to Enhance Media Management
Once you’ve set up your WordPress site and have a good grasp of your media needs, it’s time to boost your media management capabilities with some handy plugins. Plugins can save you time, improve the user experience, and give your media portal a professional edge. Don’t worry — you don’t need to be a tech wizard to install and configure these tools! Let’s walk through some must-have plugins and how they can help.
First up, consider installing Media Library Assistant. This plugin supercharges your media library by allowing you to add custom taxonomies, filter media more effectively, and organize large collections seamlessly. It’s perfect if you’re planning to handle hundreds or thousands of media files.
Another popular choice is Enhanced Media Library. This plugin lets you organize media files into categories and tags directly within your library, making it easier to find what you need quickly. Plus, it supports custom taxonomies, which means you can tailor the organization system to fit your exact needs.
If you want to add more advanced image management features, WP Media Folder is a premium plugin that turns your media library into a folder-based system, similar to your desktop. It’s user-friendly and enables drag-and-drop organization, which is a huge time-saver.
For media optimization, consider Smush. It automatically compresses images upon upload, reducing load times without compromising quality. This is crucial for maintaining a fast, responsive media portal.
Here’s a quick checklist to get started:
- Install Media Library Assistant for enhanced management features
- Install Enhanced Media Library to organize files with categories and tags
- Consider WP Media Folder for folder-based organization (if needed)
- Use Smush or similar plugins for image optimization
To install any plugin, just head over to your WordPress dashboard, click on Plugins > Add New, search for the plugin name, click Install Now, and then activate it. Once activated, be sure to explore each plugin’s settings to customize it to your needs. With these tools in place, your media management will become more efficient and less stressful, letting you focus on creating great content instead of hunting for files.
6. Organizing Media Content with Categories and Tags
Now that you’ve installed the right plugins, it’s time to get organized! Properly categorizing and tagging your media files is key to maintaining a tidy, accessible media portal. Think of categories as broad topics or folders, and tags as specific keywords that describe individual files. Together, they make searching and filtering a breeze.
Start by planning your taxonomy. For example, if your media portal covers travel, you might have categories like Destinations, Travel Tips, and Photo Essays. Tags, on the other hand, could include specific locations, dates, or themes like Paris, Summer 2023, or Landscape.
To organize your media, follow these simple steps:
- Create categories that reflect your content structure. You can do this via your media plugin settings or directly in the media library if supported.
- Add tags to individual files for more granular filtering. For example, a photo of the Eiffel Tower can be tagged with “Paris,” “Landmark,” and “Summer 2023.”
- Assign categories and tags when uploading new media files. This ensures everything is organized from the start and saves time later.
Most media management plugins, like Enhanced Media Library, allow you to assign categories and tags directly within the media library interface. This makes bulk editing and assigning labels much easier, especially when dealing with large collections.
Why does this matter? Well, imagine you want to quickly find all photos taken in Paris during summer. If your files are properly tagged and categorized, you can simply filter by category “Destinations” and tags “Paris” and “Summer 2023,” and voilà — your list appears instantly. This saves hours of manual searching and keeps your portal looking professional and user-friendly.
In addition, consistent organization helps with SEO. Search engines can better understand your media content if it’s properly categorized and tagged, which can boost your visibility online.
Take some time regularly to review and update your categories and tags. As your media library grows, maintaining this structure ensures your portal remains easy to navigate and manage. Remember, a well-organized media library isn’t just about aesthetics; it’s about making your media content work for you, efficiently and effortlessly.
7. Adding Media Files and Embedding Content Effectively
Now that your media portal is taking shape, it’s time to fill it with media files and embed content that keeps your visitors engaged. The goal here is to make your media easily accessible and visually appealing, while also ensuring it loads quickly and functions smoothly.
First, let’s talk about uploading media files. WordPress makes this super simple—just head over to your Media Library. You can upload images, videos, audio files, and documents directly from your dashboard. To do this:
- Click on Media > Add New.
- Drag and drop your files or click to select them from your computer.
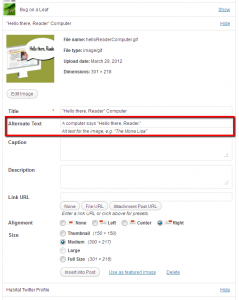
- Once uploaded, you can edit the media details like title, caption, alt text, and description. This not only helps organize your files but also boosts accessibility and SEO.
Embedding content is where your media portal really shines. Instead of just linking to files, embed videos, slideshows, or social media feeds directly into your pages or posts. Here are some tips for effective embedding:
- Use embed codes or URLs: Platforms like YouTube, Vimeo, and SoundCloud provide embed codes you can copy and paste into your posts. WordPress often auto-embeds these if you paste the URL directly into the editor.
- Leverage plugins: For advanced embedding, consider plugins like EmbedPress or WP YouTube Lyte. These can improve loading times, add custom styling, or support other media types.
- Optimize embedded media: For example, when embedding videos, choose the appropriate size and quality settings to ensure fast loading without sacrificing viewing experience.
Another handy tip is to organize your media into categories or folders using plugins like Media Library Organizer. This makes it easier to find and manage large collections of files, especially as your portal grows.
Finally, always preview embedded content on different devices—desktop, tablet, mobile—to ensure it looks good and functions properly everywhere. Remember, a smooth user experience keeps visitors coming back!
8. Optimizing Your Media Portal for Search Engines and Performance
Building a media portal isn’t just about adding content; it’s also about making sure your site loads quickly and ranks well in search engines. Let’s walk through some effective strategies to optimize both performance and SEO.
Speed is Key
A slow-loading site can frustrate visitors and hurt your search rankings. Here’s what you can do:
- Use a Content Delivery Network (CDN): Services like Cloudflare or StackPath distribute your media files across multiple servers worldwide, speeding up load times.
- Optimize images: Use tools like TinyPNG or ImageOptim to compress images without losing quality. Also, consider using modern formats like WebP for smaller file sizes.
- Caching plugins: Install plugins like W3 Total Cache or WP Super Cache to serve cached versions of your pages and media, reducing server load.
SEO Best Practices
To help your media portal rank higher in search results, focus on:
- Descriptive file names: Name your media files with relevant keywords, e.g., best-urban-photography-2023.jpg.
- Alt text for images: Write clear, keyword-rich descriptions that improve accessibility and SEO.
- Structured data: Use schema markup to help search engines understand your content better. Plugins like Schema Pro can assist with this.
- Creating rich content: Accompany your media with well-written articles, descriptions, and metadata to provide context and value.
Monitoring and Analytics
Keep an eye on how visitors interact with your media portal using tools like Google Analytics and Search Console. Track which media types are most popular, how users find your site, and where improvements are needed.
By combining fast loading times with strong SEO strategies, you’ll ensure your media portal attracts more visitors and keeps them engaged. Remember, a well-optimized site not only performs better but also provides a better experience for everyone!
9. Launching Your Media Portal and Promoting Your Content
Congratulations! You’ve built your media portal and are ready to share it with the world. Launching your site is an exciting milestone, but just as important is how you promote it to attract visitors and grow your audience. Let’s walk through some effective strategies to get your media portal noticed and ensure a successful launch.
Preparing for Launch
Before going live, double-check everything:
- Test your website on different devices and browsers to ensure it looks great everywhere.
- Make sure all links, videos, and images work correctly.
- Set up analytics (like Google Analytics) to track visitor behavior from day one.
- Have a backup of your site in case anything goes wrong.
Once you’re confident everything is polished, it’s time to officially launch!
Promoting Your Media Portal
Promotion is all about getting the word out and inviting visitors to explore your content. Here are some practical tips:
1. Leverage Social Media
Create accounts on platforms like Facebook, Twitter, Instagram, and LinkedIn. Share your latest articles, videos, or media updates regularly. Use engaging visuals and compelling captions to draw attention. Remember to interact with your followers—respond to comments and join conversations to build a community.
2. Email Newsletters
Build an email list from day one. Offer visitors something valuable, like a free guide or exclusive content, in exchange for their email addresses. Send periodic newsletters highlighting new content, upcoming features, or behind-the-scenes insights.
3. Collaborate with Influencers and Partners
Partner with content creators, bloggers, or industry influencers. They can help promote your portal to their audiences, giving you an immediate boost in visibility.
4. SEO Optimization
Optimize your content for search engines to increase organic traffic. Use relevant keywords, craft descriptive meta titles and descriptions, and ensure your site loads quickly. Tools like Yoast SEO can guide you through best practices.
5. Submit to Media Directories and Forums
Get listed on media directories or relevant forums where your target audience hangs out. Participate genuinely in discussions—avoid spamming—and share your content where appropriate.
Monitoring and Adjusting
After launch, keep an eye on your analytics to see what’s working. Are visitors engaging with your content? Which channels drive the most traffic? Use this data to refine your strategy. Promotion is an ongoing process—stay active, keep your content fresh, and listen to your audience’s feedback.
10. Maintaining and Updating Your Media Website for Ongoing Success
Launching your media portal is just the beginning. To keep your website thriving, regular maintenance and updates are essential. Think of your site as a living project that needs continuous care to stay relevant, secure, and engaging.
Consistent Content Updates
One of the best ways to keep visitors returning is to regularly publish fresh content. Whether it’s news updates, feature articles, videos, or podcasts, consistent posting shows that your site is active and authoritative.
- Create a content calendar to plan upcoming posts.
- Stay current with industry news and trending topics.
- Encourage user-generated content or community contributions to foster engagement.
Technical Maintenance
Ensure your website runs smoothly by performing routine technical checks:
- Update WordPress core, themes, and plugins to patch security vulnerabilities.
- Backup your website regularly to prevent data loss.
- Optimize site speed by compressing images and using caching plugins.
- Fix broken links or outdated media to improve user experience.
Security Measures
Security should never be overlooked. Protect your site from threats by:
- Installing security plugins like Wordfence or Sucuri.
- Using strong, unique passwords for your admin accounts.
- Implementing SSL certificates to encrypt data.
- Monitoring login activity for suspicious behavior.
User Engagement and Feedback
Listen to your audience! Use comments, surveys, or social media to gather feedback. This insight can guide your content strategy, improve usability, and help you build a loyal community.
Analytics and Performance Tracking
Regularly review your analytics to understand your visitors better. Track metrics like:
| Metric | Why It Matters |
|---|---|
| Traffic Sources | Know where your visitors are coming from to optimize your promotional efforts. |
| Popular Content | Identify what topics resonate most and produce more of it. |
| User Engagement | Monitor time spent on pages and bounce rates to improve content quality and site usability. |
| Conversion Rates | Measure how well your site turns visitors into subscribers, followers, or customers. |
By staying proactive with maintenance and updates, you ensure your media portal remains a valuable, secure, and engaging platform for years to come. Remember, success isn’t just about launching—it’s about nurturing your site and community every step of the way.