Welcome! If you’re looking to make your WordPress website stand out, customizing your logo is a fantastic place to start. Your logo is more than just a pretty image; it’s the face of your brand and an essential element in building recognition and trust with your visitors. Whether you’re rebranding or creating a new site from scratch, tailoring your logo to reflect your unique identity can significantly boost your website’s professionalism and appeal. In this guide, we’ll explore how to customize your WordPress logo effectively and why it’s so crucial for your branding efforts.
Why a Custom Logo is Important for Your WordPress Website
Think of your logo as the visual ambassador of your brand. It’s often the first thing visitors notice when they land on your website, and it sets the tone for their entire experience. Here’s why having a custom logo is a game-changer:
- Builds Brand Recognition: A unique logo helps visitors remember your site. When people see your logo repeatedly across your website and marketing materials, it becomes a familiar symbol associated with your brand’s values and offerings.
- Establishes Professionalism: A well-designed, custom logo signals that you’re serious about your business. It shows that you’ve invested time and effort into creating a cohesive brand identity, which can build trust with your audience.
- Differentiates You from Competitors: In crowded markets, a distinctive logo helps you stand out. Instead of using a generic or off-the-shelf image, a custom logo ensures your brand has a unique visual identity that sets you apart.
- Supports Consistent Branding: Your logo is a cornerstone of your visual branding. When it’s customized and consistently used across your website, social media, and print materials, it creates a unified brand image that reinforces your message.
Additionally, a personalized logo can evoke the right emotions and communicate your brand’s personality—be it fun, professional, innovative, or trustworthy. It’s an investment that pays off by making your website more memorable and credible, encouraging visitors to explore what you have to offer and eventually become loyal customers.
3. Steps to Upload and Replace Your Logo in WordPress

So, you’ve designed a logo that perfectly captures your brand’s personality, and now you’re ready to showcase it on your website. Don’t worry—it’s easier than you might think! Here’s a simple step-by-step guide to upload and replace your logo in WordPress:
Step 1: Log into Your WordPress Dashboard
Start by logging into your WordPress admin area. This is where you’ll manage all your website’s content and appearance settings.
Step 2: Navigate to the Customizer
Once logged in, go to Appearance → Customize. This opens the theme customizer, which allows you to make real-time changes to your site’s look.
Step 3: Find the Logo or Site Identity Section
Within the customizer menu, look for the section labeled Site Identity. The exact wording might vary depending on your theme, but it’s usually where logos, site titles, and taglines are managed.
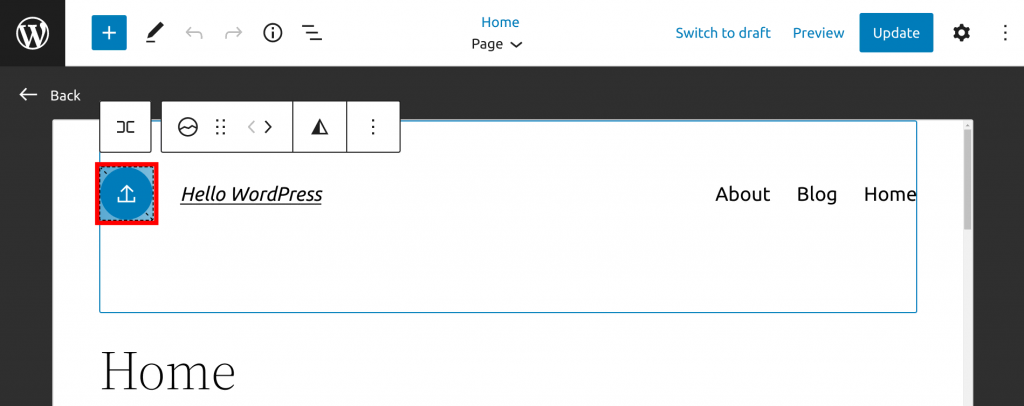
Step 4: Upload Your Logo
- Click on the Select Logo button.
- Choose your logo image file from your computer. Supported formats typically include PNG, JPEG, and SVG (if supported by your theme).
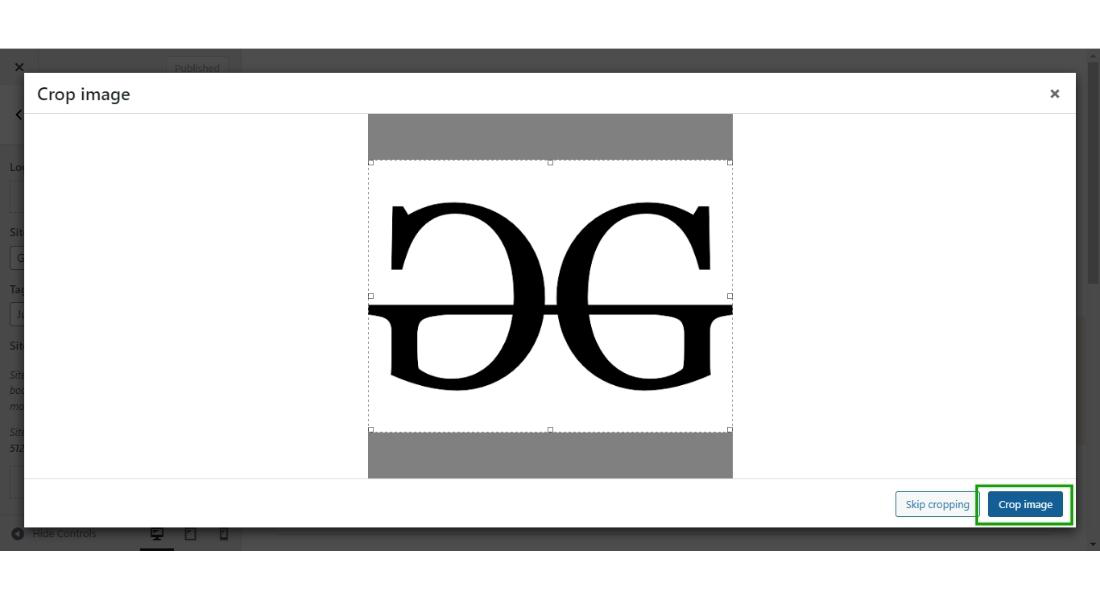
- Once uploaded, you can crop the image if necessary (some themes provide cropping options), then click Choose or Save & Publish.
Step 5: Adjust Logo Size and Position
Some themes let you tweak the logo size or alignment directly within the customizer. If your theme supports this, make the adjustments to ensure your logo looks perfect on desktop and mobile devices.
Step 6: Publish Your Changes
When you’re happy with how your logo looks, click the Publish button at the top of the customizer. Voila! Your new logo is live.
Bonus Tips:
- Always use a high-resolution image for crisp display.
- If your logo appears blurry or pixelated, try uploading a larger version.
- Check how your logo looks on different devices to ensure it scales well.
And that’s it! Replacing your logo in WordPress is straightforward, and it’s a crucial step in reinforcing your brand identity across your website. Now, let’s move on to making that logo unforgettable with some smart design tips.
4. Design Tips for Creating a Memorable and Unique Logo
Creating a logo that sticks in people’s minds is both an art and a science. Your logo is often the first impression visitors get of your brand, so making it memorable and unique is key. Here are some practical design tips to help you craft a logo that stands out:
Keep It Simple
Less is more! A clean, simple logo is easier to recognize and versatile across different platforms. Think of iconic logos like Apple or Nike—minimalist but instantly recognizable.
Make It Relevant
Your logo should reflect your brand’s personality and industry. Use symbols, colors, and fonts that align with what you do. For example, a health brand might use green and a leaf icon, while a tech startup could opt for sleek lines and modern fonts.
Choose the Right Colors
Colors evoke emotions and associations. Here’s a quick guide:
| Color | Emotion/Association |
|---|---|
| Blue | Trust, professionalism |
| Red | Energy, passion |
| Green | Growth, health |
| Yellow | Happiness, optimism |
Pick colors that resonate with your brand message and ensure good contrast for visibility.
Pick a Memorable Font
Typography plays a crucial role. Use fonts that are legible and align with your brand tone. Avoid overly decorative fonts that can be hard to read at small sizes. Consider customizing a font to make your logo even more unique.
Aim for Scalability
Your logo will appear in various sizes—from website headers to social media profiles. Make sure your design remains clear and effective whether it’s tiny or large. Vector formats like SVG are perfect for this purpose.
Be Unique and Original
Steer clear of clichés or copying other logos. Instead, focus on creating a design that’s distinctively yours. Think outside the box—using abstract shapes, clever negative space, or custom illustrations can make your logo one-of-a-kind.
Test and Get Feedback
Before finalizing, show your logo to friends, colleagues, or potential customers. Gather their impressions and see if it communicates your brand effectively. Sometimes, fresh eyes spot improvements you might miss.
Remember, a great logo isn’t just about aesthetics; it’s about creating a visual identity that people remember and trust. Take your time, experiment, and don’t be afraid to seek professional help if needed. Your logo is the face of your brand—make it count!
5. Using Plugins to Enhance Logo Customization Options

When it comes to customizing your WordPress logo, sometimes the built-in options just aren’t enough. That’s where plugins come into play! They can give you more control, more styles, and a lot more fun ways to make your logo stand out. Whether you want to add animations, create sticky headers, or just tweak the appearance without diving into code, there’s likely a plugin that can help.
One popular choice is Site Kit by Google, which integrates your site’s branding with analytics and other tools, making it easier to see how your logo impacts user engagement. But if you’re specifically after customization options, here are some plugins worth exploring:
- Custom Header & Footer Builder: Allows you to add custom logos and headers with drag-and-drop simplicity.
- WP Header Images: Lets you upload different logos for various pages or devices, giving you flexibility.
- Logo Carousel or Slider Plugins: If you want multiple logos or animated logo displays, these plugins can do the trick.
- Elementor or Beaver Builder: Page builders that come with extensive design controls, including logo customization, animations, and positioning.
Most of these plugins are beginner-friendly, and many offer free versions with premium upgrades for advanced features. Installing a plugin is straightforward: head to your WordPress dashboard, navigate to Plugins > Add New, search for the plugin name, and click Install & Activate. Once active, you’ll usually find settings or widgets that allow you to tweak the logo’s appearance, add effects, or adjust placement without touching any code.
Remember, while plugins are super helpful, it’s best to choose ones that are well-maintained and compatible with your current WordPress version. Too many plugins can also slow down your site, so pick what you really need and keep things streamlined. Using plugins effectively can elevate your branding game, making your logo more dynamic, memorable, and aligned with your site’s personality.
6. Best Practices for Logo Size and Placement on Your Site
Now that you’ve got your logo customized to your heart’s content, it’s crucial to think about size and placement. These might seem like small details, but they have a big impact on how visitors perceive your brand and navigate your website.
Logo Size: Aim for a size that’s clear and recognizable but not overwhelming. Typically, a logo width between 150px to 300px works well for most websites. If it’s too small, visitors might miss it; if it’s too large, it can dominate the page and distract from your content. Remember to test how your logo looks on different devices—what’s perfect on a desktop might be too big or small on a mobile screen.
Pro tip: Use high-resolution images (at least 72 DPI) to keep your logo sharp on Retina displays. Also, consider the aspect ratio; maintaining proportions ensures your logo doesn’t look stretched or squished.
Placement: The header is the most common spot for logos because it’s usually the first thing visitors see. Placing your logo on the top left corner is a classic choice—it aligns with natural reading patterns. However, some modern sites experiment with centered logos or even logos in the sidebar.
Here are some best practices for placement:
- Top-left corner: Keeps your branding consistent and easily recognizable.
- Centered at the top: Creates a balanced look, especially for minimalist designs.
- Sticky header: Keep your logo visible as users scroll down, reinforcing branding throughout their visit.
- Responsive positioning: Ensure your logo looks great on all screen sizes. Use media queries or responsive design tools to adjust size and placement as needed.
Lastly, don’t forget about spacing! Give your logo some breathing room—avoid placing it too close to the edges or other elements. Proper padding and margins make your site look clean and professional.
In summary, choosing the right size and placement for your logo isn’t just about aesthetics; it’s about creating a seamless, memorable experience for your visitors. Take some time to test different options, gather feedback, and make adjustments until your branding feels just right!
7. Testing and Optimizing Your Logo for Different Devices
Once you’ve designed your perfect logo, the next step is to make sure it looks fantastic everywhere — whether someone’s browsing on a desktop, tablet, or smartphone. After all, a logo that’s crisp and clear across all devices is key to maintaining a professional and cohesive brand image.
Start by previewing your website on various devices. Modern browsers often have built-in tools to simulate different screen sizes, which is super handy. But don’t just rely on virtual tests — if possible, view your site on actual devices to spot any issues firsthand.
Here are some tips to ensure your logo performs well across all platforms:
- Use scalable vector graphics (SVG): SVGs are resolution-independent, so they stay sharp no matter the size or device. If your logo is complex, SVGs are your best bet for maintaining quality.
- Optimize image sizes: For raster images like PNGs or JPEGs, keep file sizes small to reduce load times, but don’t sacrifice quality. Use tools like TinyPNG or ImageOptim to compress images effectively.
- Check responsiveness: Use CSS techniques to ensure your logo scales proportionally. For example, set the max-width to 100% so it doesn’t overflow its container.
- Test on different screen resolutions: A logo that looks great on a 1080p monitor might not fit perfectly on a mobile device. Adjust your logo’s dimensions and padding accordingly.
Additionally, pay attention to how your logo appears against different backgrounds. Sometimes, a logo might need a transparent background or a different color version to stand out. Consider creating multiple versions if necessary.
Don’t forget to test site performance after making adjustments. Slow-loading logos can frustrate visitors and hurt your SEO. Use tools like Google PageSpeed Insights to identify and fix any issues.
By thoroughly testing and optimizing your logo across all devices, you ensure a consistent, professional look that reinforces your brand identity wherever your audience encounters it.
8. Conclusion and Additional Resources for Logo Design and Branding
Congratulations! You’re now equipped with the knowledge to customize your WordPress logo effectively, creating a strong visual anchor for your brand. Remember, your logo is often the first impression visitors have — it should be memorable, versatile, and aligned with your brand’s personality.
Keep in mind that logo design is an ongoing process. As your brand evolves, don’t hesitate to revisit your logo to keep it fresh and relevant. Consistency is key, but so is adaptability. A well-crafted logo can grow with your business and help you stand out in a crowded marketplace.
If you’re looking to dive deeper into logo design and branding, here are some helpful resources:
- Smashing Magazine: Logo Design Trends
- 99designs Blog: Logo Design Tips
- Adobe Creative Cloud: Logo Creation Guide
- Canva Logo Maker — Easy-to-use tools for creating custom logos without professional design skills
- Entrepreneur: Logo Design Tips for Small Businesses
Remember, your logo is just one piece of your branding puzzle. Combine it with consistent messaging, quality content, and a user-friendly website to build a memorable brand that resonates with your audience. Happy branding!