If you’re managing a WordPress website, you’ve probably heard about backups and transfers, but what exactly do they entail? Simply put, backing up your WordPress database means creating a copy of all your site’s content and settings stored in the database. This is crucial in case something goes wrong—like a hack, server crash, or accidental deletion. Transferring your database, on the other hand, involves moving this data from one server to another, whether you’re migrating to a new host or setting up a staging site. Think of it as saving your work before moving to a new workspace. In this guide, we’ll walk through how to download your
Understanding the Importance of Regular Database Backups
In the world of website management, regular backups are your safety net. Your WordPress database contains all your posts, pages, comments, settings, and user information—basically, everything that makes your website unique. If you experience a security breach, server failure, or accidental data loss, having a recent backup means you can restore your site quickly without losing valuable content. Relying on a one-time backup isn’t enough; websites are dynamic and constantly changing, so your backup strategy should be ongoing.
Here’s why regular database backups matter:
- Protection Against Data Loss: Accidents happen—mistakes during updates, plugin conflicts, or hacking attempts can wipe out your data. Regular backups ensure you have a recent copy to restore from.
- Ease of Migration: Moving your site to a new hosting provider or server becomes much simpler if you have up-to-date backups of your database.
- Minimize Downtime: Fast recovery from issues means less downtime, keeping your visitors happy and maintaining your SEO rankings.
- Peace of Mind: Knowing you can restore your site at any moment reduces stress and allows you to focus on creating great content instead of worrying about potential disasters.
To keep your website safe, it’s recommended to set up a backup schedule—whether daily, weekly, or monthly—based on how often your content changes. Also, store your backups securely off-site or in cloud storage to prevent loss in case of server issues. Remember, the key to a resilient website is not just creating backups but making sure they are recent, reliable, and easily accessible when needed. Regular backups are your best defense against unexpected mishaps and a crucial part of good website maintenance.
3. Methods to Download Your WordPress Database
When it comes to backing up your WordPress site or transferring it to a new host, downloading your database is a crucial step. Your database contains all your posts, pages, comments, site settings, and more — basically, everything that makes your website unique. Luckily, there are several methods to do this, and you can choose the one that best fits your technical comfort level.
Here are some common methods to download your WordPress database:
- Using phpMyAdmin: A web-based tool provided by most hosting providers. It’s straightforward and user-friendly.
- Using a WordPress Plugin: Plugins like UpdraftPlus, WP Database Backup, or All-in-One WP Migration can simplify the process, especially for non-technical users.
- Using Command Line (WP-CLI): For developers or those comfortable with command-line interfaces, WP-CLI offers quick and powerful options.
- Direct Database Access via Hosting Control Panel: Some hosts provide direct access to databases through their custom control panels, allowing manual export.
Each method has its pros and cons, but for most users, phpMyAdmin and plugins are the easiest and most accessible options. The choice depends on your comfort with technical tools and what your hosting provider offers.
Key Tips Before Downloading Your Database
- Backup First: Always create a full backup of your site before exporting your database, just in case something goes wrong.
- Use Secure Connections: Ensure you’re using HTTPS or a secure connection to protect your data during transfer.
- Keep the Backup Safe: Store your database backups in a secure, off-site location—think cloud storage or an external drive.
Now, let’s explore the specific process using phpMyAdmin, which is one of the most popular and user-friendly methods.
4. Using phpMyAdmin to Export Your WordPress Database
phpMyAdmin is like the Swiss Army knife for managing your MySQL databases. Most hosting providers include it in their control panel, making it accessible with just a few clicks. Exporting your database with phpMyAdmin is simple, even if you’re not a tech whiz.
Step-by-Step Guide to Export Your Database via phpMyAdmin
- Log into your hosting control panel: This might be cPanel, Plesk, or another custom panel provided by your host.
- Locate phpMyAdmin: Usually found under the “Databases” section.
- Open phpMyAdmin: Click on it to launch the tool.
- Select your database: On the left sidebar, you’ll see a list of databases. Click on the one associated with your WordPress site. If you’re unsure which one it is, check your wp-config.php file for the database name.
- Navigate to the Export tab: Once your database is selected, click on the “Export” tab at the top of the page.
- Choose the export method: For most users, the default “Quick” method is sufficient. It exports the entire database with minimal fuss.
- Set the format: Ensure “SQL” is selected, as this is the standard format for backups and transfers.
- Start the export: Click the “Go” button. Your database will be processed, and a download will start automatically.
What Happens Next?
Once downloaded, your database will be saved as an .sql file. You can store this file securely and use it to restore or transfer your site later. Keep in mind:
- Keep multiple copies: Store backups in different locations.
- Regular backups: Schedule periodic exports to keep your data safe.
- Test your backups: Occasionally, restore your database to ensure the files are intact and usable.
Final Tips
Using phpMyAdmin is straightforward, but it’s important to handle your database carefully. Always double-check which database you’re exporting, and avoid making changes directly in phpMyAdmin unless you’re confident. When in doubt, consult your hosting provider’s documentation or support team. Regularly downloading your database ensures you’re prepared for any site issues or migrations down the line!
5. Backing Up Your Database with WordPress Plugins
One of the easiest and most popular ways to back up your WordPress database is by using dedicated plugins. If you’re not super comfortable with manual processes or cPanel, plugins can simplify everything with just a few clicks. Plus, many plugins also offer options to schedule automatic backups, so you don’t have to remember to do it manually each time.
Some of the top WordPress plugins for database backups include:
- UpdraftPlus — Known for its user-friendly interface, UpdraftPlus allows you to back up your database and files to cloud storage services like Dropbox, Google Drive, and more. You can schedule backups, restore easily, and even clone your site.
- BackupBuddy — A premium plugin that provides comprehensive backup options, including scheduled backups, one-click restores, and migration tools.
- WP Database Backup — A straightforward plugin focused solely on database backups, making it lightweight and easy to use.
How to Use a Backup Plugin
- Install and activate your chosen plugin through the WordPress dashboard.
- Navigate to the plugin’s settings page, usually found under the Tools or Settings menu.
- Select the database backup option—most plugins will automatically include the database in your backup.
- Choose where to store your backup—local server, cloud storage, or both.
- Click the button to initiate the backup. Some plugins also let you schedule regular backups for peace of mind.
Remember, backups are only as good as where you store them. Always keep a copy off-site or in the cloud, so if your server crashes or gets compromised, you still have your data safe and sound.
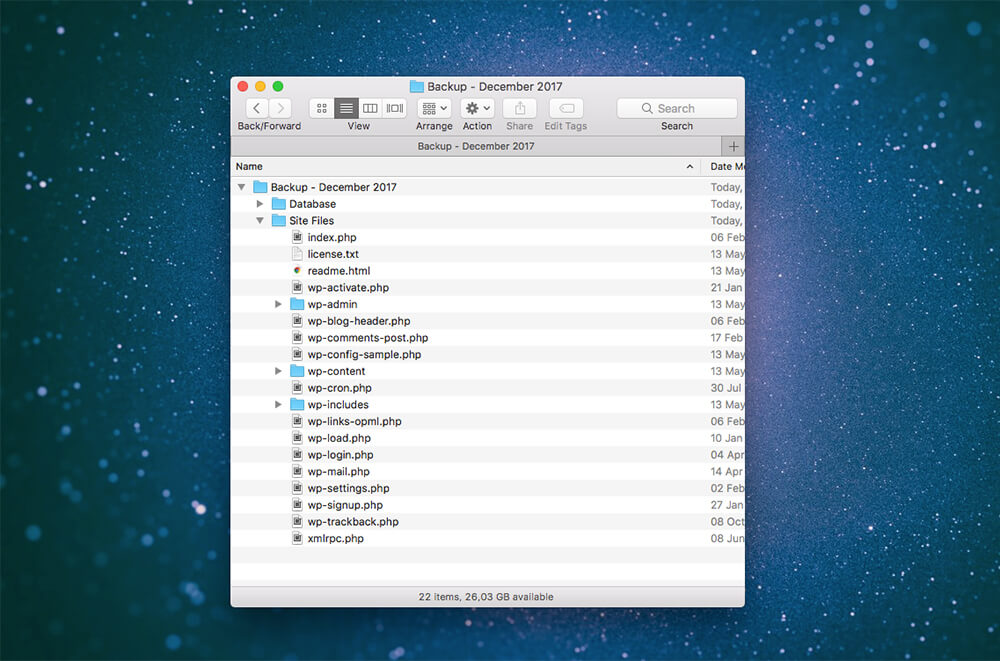
6. Downloading the Database Manually via cPanel
If you prefer a more hands-on approach or want to double-check your backups, downloading your database manually through cPanel is a solid method. It might sound technical at first, but with a little guidance, it’s straightforward and offers full control over your data.
Here’s a step-by-step guide:
Step 1: Log into Your cPanel Account
Access your hosting account and find the cPanel login link. Usually, it’s something like yourdomain.com/cpanel. Enter your credentials to log in.
Step 2: Locate phpMyAdmin
Once inside cPanel, look for the phpMyAdmin icon—this is your tool for managing MySQL databases. Click on it.
Step 3: Find Your WordPress Database
In phpMyAdmin, you’ll see a list of databases on the left sidebar. If you’re unsure which one belongs to your WordPress site, check your wp-config.php file for the database name. You can access this file via your file manager or FTP.
Step 4: Export Your Database
- Click on your database name in phpMyAdmin.
- Go to the Export tab at the top.
- Select the export method — Quick for a simple export or Custom if you want more control (like selecting specific tables).
- Choose the format — usually, SQL is best.
- Click Go to start the download.
Step 5: Save Your Backup
Your database will download as an .sql file. Save it somewhere safe—preferably in multiple locations or cloud storage to prevent loss.
That’s it! Downloading your database manually gives you a complete snapshot of your WordPress data, and you can restore it later if needed by importing it back into phpMyAdmin.
Remember, whether you choose a plugin or manual method, regular backups are your best defense against data loss. It’s a small effort that can save you a lot of headaches down the line!
7. Best Practices for Securely Storing Your Database Backups
When it comes to backing up your WordPress database, security should be at the top of your mind. Your database contains all your website’s vital information—content, user data, settings—and if it falls into the wrong hands, it can lead to serious issues like data breaches or website hijacking. So, how can you ensure your backups are stored safely? Let’s walk through some best practices.
1. Use Strong Encryption
First off, always encrypt your backups. This adds an extra layer of security, making it much harder for anyone to access your data without the decryption key. Many backup plugins and tools offer built-in encryption options. If you’re manually storing backups, consider using tools like GPG or VeraCrypt to encrypt files before storing them.
2. Store Backups in Multiple Locations
Don’t keep all your backups in just one place. Use a combination of local storage (like an external hard drive or a secure server) and off-site cloud storage (like Google Drive, Dropbox, or Amazon S3). This way, if one location is compromised or lost, you still have copies elsewhere.
3. Automate Regular Backups
Set up automatic backups to ensure you always have recent copies. Manual backups can be forgotten or delayed, which increases risk. Many backup plugins allow scheduling so you can choose daily, weekly, or monthly backups depending on your website’s activity level.
4. Use Strong Authentication and Access Controls
Limit access to your backup files. Only trusted personnel or accounts should have permissions to view or download backups. Use strong, unique passwords and enable two-factor authentication where possible.
5. Regularly Test Your Backups
Having backups is great, but you need to verify they work. Regularly test restoring your database from backups in a staging environment. This ensures that if you ever need to recover, your backups are reliable and complete.
6. Keep Backup Files Secure During Transfer
If you’re transferring backups between locations or to a new server, always use secure protocols like SFTP or SCP instead of plain FTP. This prevents interception of sensitive data during transit.
By following these best practices, you can significantly reduce the risk of data loss or compromise. Think of your backups as your safety net—protecting your website’s future and giving you peace of mind.
8. Transferring Your WordPress Database to a New Hosting Provider
Making the move to a new hosting provider can seem daunting, especially when it comes to transferring your WordPress database. But don’t worry—step-by-step, it’s quite manageable. Here’s a straightforward guide to help you navigate this process smoothly.
Step 1: Backup Your Current Database
Before anything else, create a fresh backup of your current database. Use your preferred plugin or export it manually via phpMyAdmin. This ensures you have a safe copy in case anything goes wrong during the transfer.
Step 2: Export Your Database
- Access your current hosting’s phpMyAdmin or database management tool.
- Select your WordPress database.
- Click on the Export tab.
- Choose the Quick export method and the SQL format.
- Download the exported file to your local computer.
Step 3: Prepare Your New Hosting Environment
Set up your new hosting account, ensuring that the database is created and accessible. Usually, your new host provides a database management interface similar to phpMyAdmin. Create a new database, user, and assign permissions accordingly.
Step 4: Import Your Database
- Log in to your new hosting’s phpMyAdmin.
- Select the new database you just created.
- Click on the Import tab.
- Choose the SQL file you exported earlier.
- Click Go to start the import process.
Step 5: Update Your wp-config.php File
On your new server, update the wp-config.php file with the new database details—database name, username, password, and host. This step is crucial for WordPress to connect to the correct database.
Step 6: Transfer Your Website Files
Don’t forget to move your WordPress files (themes, plugins, uploads) from your old host to the new one. Use FTP or a file manager provided by your hosting provider. Ensure the files are placed in the right directory.
Step 7: Test Your Website
Once everything is uploaded and configured, visit your website’s URL to see if it loads correctly. Check all pages, plugins, and functionalities. If something isn’t working, double-check your database connection details and file paths.
Transferring a WordPress database might seem technical, but with careful planning and following these steps, it can be done smoothly. Remember to keep backups handy throughout the process, and don’t hesitate to reach out to your new hosting provider’s support if you run into issues. Happy migrating!
9. Troubleshooting Common Issues During Database Download and Transfer
Let’s face it—working with your WordPress database can sometimes feel like navigating a maze. Issues can pop up unexpectedly, but don’t worry! Many common problems have straightforward solutions. Here are some of the typical hiccups you might encounter and how to handle them.
Slow Download Speeds or Timeouts
If your database download is taking forever or keeps timing out, it might be due to server limitations or large database size. Here’s what you can do:
- Optimize Your Database: Use plugins like WP-Optimize or WP-Sweep to clean up unnecessary data, which can significantly reduce size.
- Increase PHP Limits: Talk to your hosting provider about increasing PHP memory limits and execution time.
- Download in Smaller Parts: Export your database in smaller chunks if possible, especially for very large sites.
Permissions and Access Errors
If you get errors related to permissions, such as “Access Denied” or “Permission Denied,” it often means your user account lacks the necessary rights. To fix this:
- Check User Privileges: Ensure your database user has SELECT, LOCK, and FILE privileges.
- Use Correct Credentials: Double-check that your database connection details are accurate in your wp-config.php file or your database management plugin.
Corrupted or Incomplete Export Files
Sometimes, downloads can get interrupted, leading to incomplete files or corruption. To prevent this:
- Use Reliable Tools: Stick to reputable plugins or database management tools like phpMyAdmin or WP-CLI.
- Verify File Integrity: After download, check the file size and run a quick integrity check before proceeding with restores or transfers.
- Ensure Stable Connection: Use a wired connection or a reliable internet service to avoid interruptions.
Database Compatibility Issues During Transfer
If you’re moving your database to a different hosting environment and encounter compatibility errors, consider:
- Check MySQL Version Compatibility: Make sure the target server supports the same or newer MySQL version.
- Adjust SQL Modes: Some servers have strict SQL modes that might conflict with your dump. Adjust these settings temporarily if needed.
- Update URLs and Paths: Use search-and-replace tools like WP-CLI or plugins to update URLs or file paths in your database after transfer.
Remember, most issues boil down to permissions, server limits, or corrupted files. With patience and the right tools, you can troubleshoot effectively and keep your WordPress site running smoothly!
10. Conclusion and Additional Resources for WordPress Database Management
Managing your WordPress database might seem daunting at first, but with the right knowledge and tools, it becomes much more manageable. Regular backups, careful exports, and understanding common issues are key to maintaining a healthy website. Whether you’re a newbie or a seasoned developer, having a solid backup strategy ensures peace of mind and saves you from potential headaches down the road.
In this guide, we covered:
- How to download your database securely and efficiently
- The importance of choosing the right tools and methods
- Best practices for transferring databases between hosts
- Troubleshooting common issues that may arise during the process
As you continue your WordPress journey, here are some additional resources to deepen your understanding:
Useful Plugins and Tools
- UpdraftPlus: For scheduled backups, including database files
- WP-Optimize: To clean and optimize your database before export
- All-in-One WP Migration: Simplifies site and database transfers
Official Documentation and Tutorials
- WordPress Support: Using MySQL, phpMyAdmin, and WP-CLI
- phpMyAdmin Documentation
- WordPress Developer Resources on Databases
Stay Safe and Keep Learning
Always remember to keep backups before making any major changes, and don’t hesitate to seek help from community forums or professional support if you get stuck. With consistent practice, you’ll become more confident in managing your WordPress database.
Happy database managing! Your site’s health depends on it, and now you’re better equipped to handle backups and transfers like a pro.