If you’ve been exploring WordPress and want to add a touch of your own magic, editing modules is a great way to do it. Whether you’re customizing a plugin or tweaking your theme, understanding how modules work gives you the power to make your website truly your own. Don’t worry if you’re new to this—it’s easier than you might think! In this guide, we’ll walk through what modules are, why you might want to edit them, and how to do it safely so your site stays smooth and secure.
Understanding WordPress Modules and Their Role
Before diving into editing, it’s important to understand what modules are in the WordPress universe. Think of modules as building blocks or components that add specific features or functionalities to your website. They can be part of themes, plugins, or custom code, and each module usually handles a particular task—like displaying a gallery, managing contact forms, or adding social media buttons.
Here’s a quick breakdown of what modules do:
- Extend Functionality: Modules allow you to add new features without building everything from scratch.
- Modular Design: They keep your website organized by separating features into manageable pieces.
- Reusable Components: You can often reuse modules across different pages or projects.
In essence, modules are the backbone of customizable WordPress sites. When you want to change how a module behaves or looks, editing its code becomes necessary. But remember, not all modules are created equal—some are built with user-friendly interfaces, while others require a bit of coding know-how. Understanding their role helps you decide when and how to safely make edits, ensuring your site remains functional and secure.
3. Preparing to Edit a Module Safely
Before diving into editing any module in WordPress, it’s super important to take some precautions. Think of it like preparing your toolbox before fixing something — you want to make sure everything is in place so you don’t accidentally cause a bigger issue.
First off, always back up your website. This might sound like a no-brainer, but it’s the most important step. If something goes wrong while editing, you can easily restore your site to its previous state without losing any data. You can use plugins like UpdraftPlus or BackupBuddy to create a full backup with just a few clicks.
Next, consider setting up a staging environment. This is like a test zone where you can make changes without affecting your live site. Many hosting providers offer one-click staging sites, or you can set one up manually. Working in a staging environment ensures that your visitors won’t see any broken pages or errors while you tweak your modules.
Additionally, familiarize yourself with the code you’re about to edit. Whether it’s PHP, JavaScript, or CSS, understanding what each part does helps prevent accidental mishaps. If you’re not comfortable with coding, it might be worth consulting a developer or practicing in a local environment first.
Lastly, document your changes. Keep a simple log of what you plan to modify and why. This makes troubleshooting easier if something doesn’t work as expected later on.
By taking these preparatory steps — backing up, setting up a staging site, understanding your code, and documenting your changes — you’re setting yourself up for a smooth and safe editing experience. It’s all about making sure your site stays healthy and functional while you customize it to fit your needs.
4. Accessing Your WordPress Site Files
Now that you’re prepared, the next step is accessing your WordPress site files. Think of these files as the engine of your website — they contain all the code that makes your site tick. To make changes to a module, you’ll need to get into these files safely.
There are a few common ways to access your site files:
- Using cPanel File Manager: If your hosting provider offers cPanel, this is a straightforward way to access your files via a web interface. Just log into cPanel, find the File Manager, and navigate to your WordPress installation directory (usually in public_html).
- Using an FTP Client: Tools like FileZilla or Cyberduck allow you to connect to your server using FTP credentials. You’ll need your hostname, username, and password, which your hosting provider can provide. Once connected, you can browse, upload, and edit files directly.
- Using SSH (Secure Shell): For advanced users, SSH provides command-line access to your server. It’s powerful but requires some familiarity with terminal commands.
When accessing files, navigate to the wp-content folder. Here, you’ll find:
| Folder | Description |
|---|---|
| plugins | Contains all your plugin files, including custom modules you might want to edit. |
| Themedir | Houses your site’s themes; editing theme files can also be useful if your module is theme-related. |
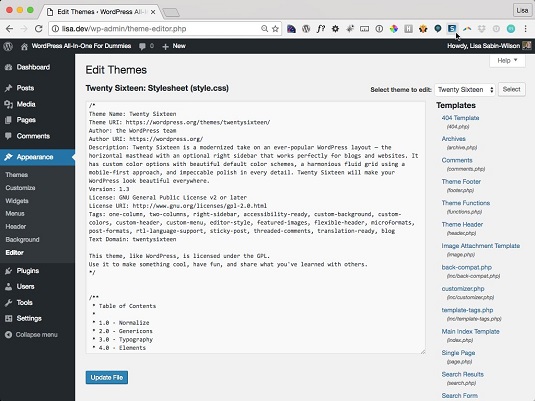
For safety, always download a copy of the file you plan to edit before making changes. This way, if something goes wrong, you can revert easily. Remember, editing core plugin or theme files directly is possible but not recommended for beginners. Instead, consider creating a child theme or custom plugin to keep your modifications safe during updates.
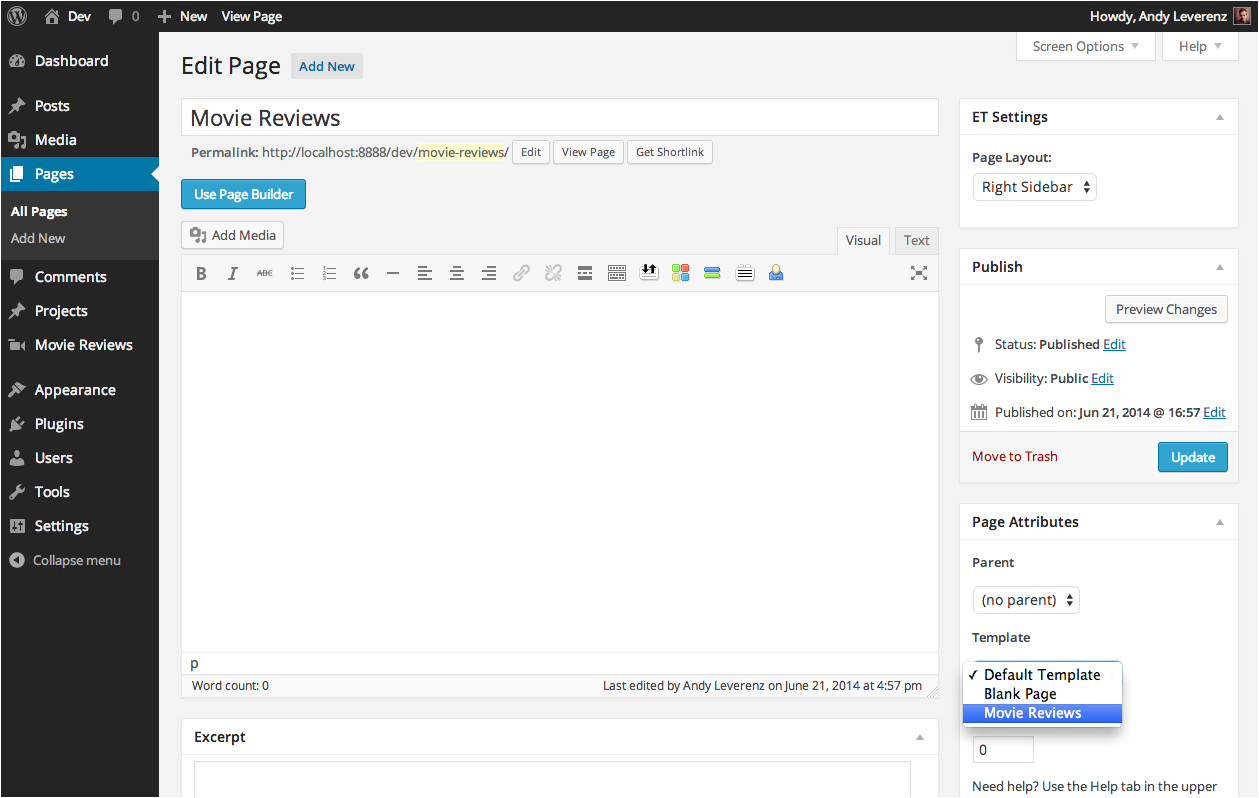
Once you have access, you can open the files with a code editor like Visual Studio Code, Sublime Text, or even a simple text editor. Make your changes carefully, save, and then test your site to ensure everything works smoothly.
5. Locating the Module You Want to Edit
Alright, so you’ve decided you want to tweak a module in your WordPress site to add some custom functionality. The first step is to find exactly where that module lives within your site’s structure. Think of this as searching for a needle in a haystack — but don’t worry, I’ll walk you through it!
WordPress modules, plugins, or themes can be stored in different places depending on what you’re working with. Here’s a quick rundown:
- Plugins: Usually found in the wp-content/plugins directory.
- Themes: Located in wp-content/themes.
- Custom Code: Sometimes added via custom plugin or directly into theme files.
To locate the specific module, follow these steps:
- Identify the Module Name or Functionality: Think about what the module does or its name. For example, if it’s a contact form, it might be part of a plugin like Contact Form 7.
- Access Your Hosting Files: Use an FTP client (like FileZilla) or your hosting control panel’s file manager to connect to your site.
- Navigate to the Relevant Directory: Go to wp-content/plugins for plugins or wp-content/themes/your-theme for theme files.
- Search for the Module: Look for folders named after the plugin or theme. Inside, you’ll find PHP files that define the module’s functionality.
- Use a Code Editor: Download the files and open them with a code editor (like VS Code or Sublime Text). Search for function names, class names, or comments that match what you’re looking for.
If you’re using a page builder or a plugin with a visual editor, sometimes the module is embedded in the WordPress admin area rather than a file. In such cases, inspect the page source or use browser developer tools to identify the module’s code or script.
Remember: Always back up your files before making any changes. That way, if something goes wrong, you can restore your site to its previous state without breaking a sweat.
6. Editing the Module for Custom Functionality
Once you’ve located the module’s code, it’s time to make your customizations. This part can be as simple or as complex as your needs require. The key is to understand what the code does and how to safely modify it.
Here’s a friendly step-by-step approach:
- Make a Backup: Before editing, save a copy of the original file. This way, you can revert if needed.
- Understand the Code: Spend a few minutes reading through the code. Look for functions, hooks, or classes that relate to what you want to change.
- Use Hooks and Filters Whenever Possible: WordPress is built around hooks (actions and filters). Instead of directly editing core plugin or theme files, see if you can add your custom code via functions.php or custom plugins. This keeps updates safe and your modifications clean.
- Add Your Custom Functionality: For example, if you want to change how a form behaves, you might add a filter or hook that modifies the output or behavior.
Suppose you want to add a custom message after a form submits. You might do something like this in your functions.php:
add_action('form_submission_success', 'my_custom_message');function my_custom_message() { echo '<p>Thank you for contacting us!</p>';}If you need to modify core code directly, do so with caution:
- Comment your changes: Leave comments explaining why you changed something.
- Test thoroughly: After editing, test the module on a staging site first if possible.
- Update Responsibly: Remember that updates to the plugin or theme might overwrite your changes. Consider creating a child theme or custom plugin to hold your custom code.
In summary, editing a module for custom functionality involves carefully locating the right code, understanding its purpose, and then making mindful modifications—preferably through hooks or custom code snippets rather than directly editing core files. Patience and caution go a long way here, but with practice, you’ll be customizing your WordPress modules like a pro in no time!
7. Testing Your Changes and Ensuring Compatibility
Once you’ve made your edits to a module in WordPress, the last thing you want is to introduce bugs or break your site’s functionality. That’s why testing is such a crucial step in the process. Think of it as giving your site a thorough check-up before you go live with the new tweaks.
Start by previewing your changes on a staging environment, if you have one. This isolates your modifications from your live site, so you can see how everything works without risking your visitors’ experience. If you don’t have a staging site set up, consider creating a local copy of your site using tools like Local by Flywheel, XAMPP, or MAMP. This way, you can test safely without affecting your live website.
Next, check your site across different browsers—Chrome, Firefox, Safari, Edge—to ensure compatibility. Sometimes, certain CSS styles or scripts may behave differently depending on the browser, so a quick review can save headaches later.
Test the module in various scenarios:
- On different devices (desktop, tablet, mobile)
- With different user roles (admin, editor, subscriber)
- With other plugins activated to see if there are conflicts
Look out for issues such as broken layouts, missing data, or JavaScript errors. Use your browser’s developer tools (like Chrome DevTools) to inspect elements, check console logs, and troubleshoot any issues.
If you’re making significant changes, consider running automated tests or at least manual testing for core functionalities. Remember, compatibility isn’t just about your module working in isolation—it’s about playing nicely with the rest of your site and plugins.
Finally, once everything looks good in your testing environment, you can confidently implement the changes on your live site. But keep in mind: always back up your site before deploying updates. That way, if something unexpected happens, you can restore your site to its previous state quickly.
8. Best Practices for Safe Module Editing
Editing modules in WordPress can be a powerful way to customize your site’s functionality, but it also comes with risks. To ensure your modifications are safe, maintain a set of best practices. Think of these as your safety net—helping you avoid common pitfalls and keeping your website stable.
1. Always Create Backups
Before diving into code changes, make sure to back up your entire website—files, database, everything. Plugins like UpdraftPlus, BackupBuddy, or even your hosting provider’s backup tools can make this process straightforward. If anything goes wrong, you’ll be able to restore your site to its previous state without headaches.
2. Use a Child Theme or Custom Plugin
Instead of editing core plugin files directly, create a child theme or custom plugin for your modifications. This way, your changes won’t be overwritten when the main plugin updates. It also keeps your custom code organized and easier to manage.
3. Document Your Changes
Keep track of what you’ve modified, why, and how. This documentation helps you troubleshoot issues later and makes it easier to update or revert changes if needed.
4. Test in a Safe Environment First
Never make live changes directly on your production site unless you’re confident. Use a staging site or local environment to test thoroughly before pushing updates live.
5. Follow Coding Standards
Stick to WordPress coding standards and best practices to ensure compatibility and maintainability. Clear, well-structured code reduces bugs and makes future updates smoother.
6. Keep Your Site and Plugins Updated
Regular updates often include security patches and improvements. After editing your modules, check that your WordPress core, themes, and plugins are all up to date to prevent conflicts.
7. Consider Version Control
If you’re comfortable, use version control systems like Git. This allows you to track changes, collaborate with others, and revert to previous versions easily.
By following these best practices, you’ll minimize the risk of breaking your site and ensure your customizations are robust and future-proof. Remember: patience and caution are your best friends when editing modules in WordPress. Happy customizing!
9. Using Child Themes and Plugins for Customizations
When it comes to customizing modules in WordPress, the best approach is to do it safely and sustainably. That’s where child themes and plugins come into play. Instead of directly editing core theme or plugin files—which can be overwritten during updates—using these tools allows you to make your changes stick around for the long haul.
Why Use Child Themes?
A child theme is essentially a mini-theme that inherits all the functionality and styling of its parent theme. By creating a child theme, you can add or override features without messing up the original files. It’s like having a safe sandbox to experiment in.
For example, if you want to modify a module’s layout or add custom code, you can place your modifications in your child theme’s functions.php file or create custom template files. This way, when the parent theme gets updates, your customizations remain untouched.
Using Plugins for Custom Functions
Plugins are another powerful way to add or modify functionality. Instead of editing plugin files directly, which is discouraged, you can create a custom plugin or use existing ones to extend features. This approach keeps your modifications separate from core code, making updates smoother and safer.
For instance, if you want to add a custom button or tweak a module’s behavior, consider writing a small custom plugin. It can include hooks, filters, or shortcodes that modify how modules work without altering the plugin itself.
Practical Tips for Using Child Themes and Plugins
- Start with a clean child theme: Use WordPress’s official starter themes like Twenty Twenty-Three or generate one using tools like Child Theme Generator.
- Organize your custom code: Keep your modifications in dedicated files within your child theme or plugin for easy maintenance.
- Leverage hooks and filters: Most plugins and themes offer hooks—these are specific points where you can inject your code to modify behavior without editing core files.
- Test thoroughly: Always test your customizations on a staging site before deploying to a live environment to avoid unexpected issues.
Using child themes and plugins for your customizations not only keeps your website safe during updates but also makes your modifications more manageable and portable. Remember, the goal is to enhance your site’s functionality while maintaining best practices for WordPress development.
10. Troubleshooting Common Issues During Module Editing
Editing modules in WordPress can sometimes lead to unexpected hiccups. Whether it’s a module not displaying correctly, errors popping up, or changes not taking effect, troubleshooting is a vital skill. Let’s walk through some common issues and how to fix them.
1. Changes Not Showing Up
This is a common problem—your edits seem to be saved, but the frontend doesn’t reflect them. The most usual cause is caching.
- Clear cache: Clear your browser cache, WordPress cache plugins, and server cache if applicable.
- Disable caching temporarily: Turn off caching plugins or CDN caching to see if that resolves the issue.
If cache isn’t the culprit, double-check that you’re editing the correct files or modules. Sometimes, you might be working on a staging site or a different version than live.
2. Syntax Errors or PHP Errors
Introducing new code can sometimes cause PHP errors, leading to broken pages or white screens. To troubleshoot:
- Enable debugging: Add
define('WP_DEBUG', true);to yourwp-config.phpfile to see error messages. - Check error logs: Review your server’s error logs for clues.
- Fix syntax issues: Use code editors with syntax highlighting to catch errors early.
3. Module Conflicts or Broken Layouts
If your module looks off or conflicts with other parts of your site:
- Disable other plugins: Temporarily deactivate plugins to identify conflicts.
- Switch themes: Switch to a default WordPress theme like Twenty Twenty-Three to see if your theme is causing issues.
- Review custom code: Check your custom code snippets for errors or misplaced hooks.
4. Backup Before Making Changes
Always back up your site before making significant edits. This way, if something goes wrong, you can restore your site to its previous state quickly.
Final Tips
- Keep a record of all changes you make—document your code snippets and modifications.
- Test changes on a staging site first when possible.
- Don’t hesitate to seek help from the WordPress community forums or professional developers if you hit a wall.
Remember, troubleshooting takes patience. By systematically ruling out potential issues—cache, syntax errors, conflicts—you’ll become more confident in managing your customizations and ensuring your modules work perfectly.
Conclusion and Final Tips for Customizing WordPress Modules
Customizing modules in WordPress is a powerful way to enhance your website’s functionality and tailor it to your specific needs. As you experiment with different modifications, keep in mind that a well-planned approach ensures a smooth process and optimal results. Always remember to back up your site before making significant changes to prevent data loss or site downtime.
Here are some final tips to help you succeed:
- Use Child Themes: When editing theme files or modules, always work within a child theme to preserve your customizations during theme updates.
- Leverage Plugins and Hooks: Take advantage of WordPress hooks (actions and filters) to modify module behavior without directly editing core files.
- Test in a Staging Environment: Before deploying changes live, test your modifications on a staging site to identify and fix potential issues.
- Document Your Changes: Keep a record of what modifications you’ve made for easier troubleshooting and future updates.
- Stay Updated: Keep your WordPress core, themes, and plugins up to date to ensure compatibility and security.
In summary, thoughtful customization of WordPress modules can significantly boost your website’s performance and user experience. Approach each change with caution, utilize best practices, and always prioritize backups to ensure a smooth editing process. With these tips, you’ll be well-equipped to create a highly functional, personalized WordPress site.