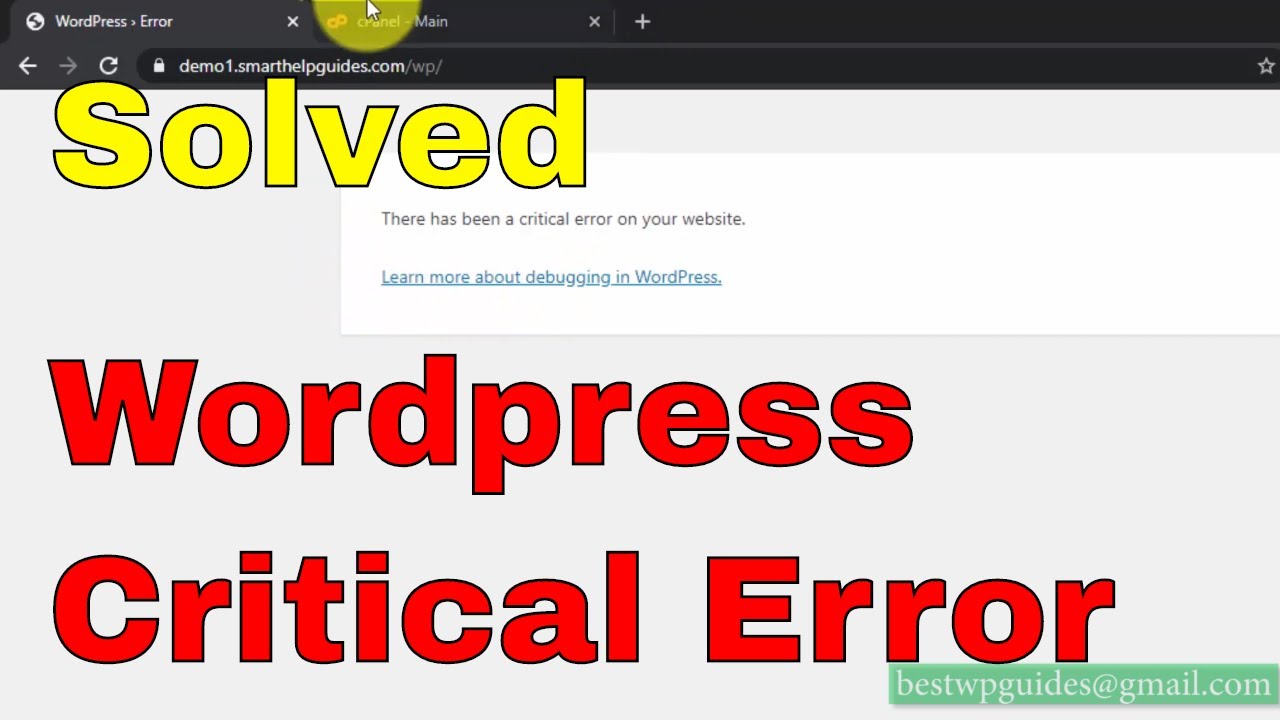
If you’re a WordPress user, chances are you’ve come across the dreaded “Critical Error” message at some point. It’s frustrating because it usually leaves your site inaccessible, and it’s not always clear what went wrong. But don’t worry! This guide is here to help you understand what this error is and how you can fix it quickly and easily. Whether you’re a beginner or have some experience, these simple steps will help you get your website back up and running smoothly in no time.
Common Causes of the Critical Error in WordPress
The critical error in WordPress can be caused by a variety of issues, and understanding the common culprits can help you troubleshoot effectively. Here are some of the most frequent reasons why your site might display this error:
- Plugin Conflicts: Sometimes, a plugin update or a new plugin installation can clash with your existing setup, causing errors that crash your site.
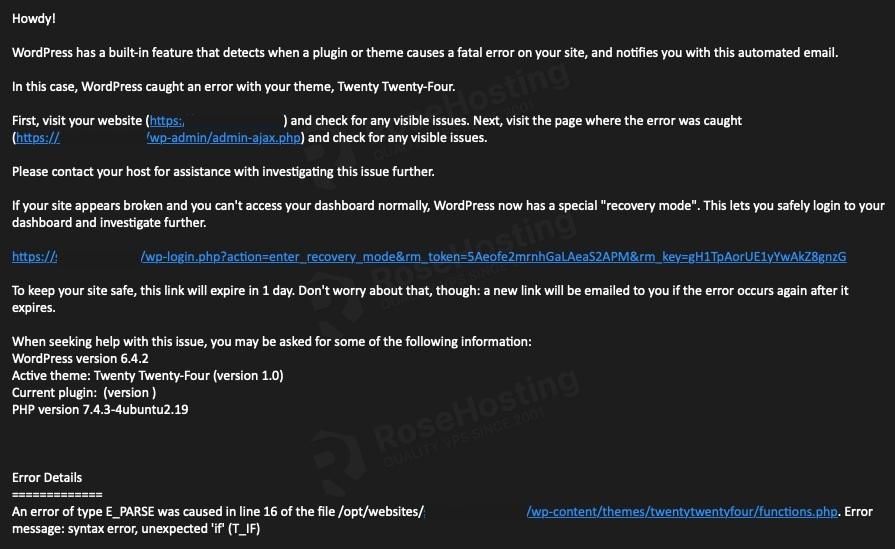
- Theming Issues: An incompatible or corrupted theme can also trigger critical errors, especially if it’s not properly maintained or updated.
- PHP Errors: WordPress relies on PHP, and if there’s a syntax error, outdated PHP version, or server misconfiguration, it can lead to a critical error.
- Corrupted Core Files: Files essential to WordPress operation might get corrupted due to failed updates or hacking attempts, resulting in a critical error.
- Memory Limit Exhaustion: If your site exceeds the allocated memory limit set by your hosting environment, it can cause the critical error to appear.
- Hosting Environment Issues: Server misconfigurations, outdated server software, or other hosting-related problems can also be culprits.
Knowing these common causes can help you narrow down the source of the problem and choose the right fix. Stay calm—most critical errors are fixable with a bit of patience and the right approach!
3. Step 1: Enable Debugging Mode to Identify the Issue
Before diving into fixing the WordPress critical error, it’s essential to understand what’s causing it. One of the best ways to do this is by enabling debugging mode. Think of debugging as turning on a flashlight in a dark room—it helps you see exactly what’s going wrong behind the scenes.
Enabling debugging mode in WordPress is pretty straightforward. You just need to access your website’s files via FTP or a file manager provided by your hosting provider. Here’s what you do:
- Locate the wp-config.php file in your WordPress root directory.
- Download a backup copy of this file before making any changes—better safe than sorry!
- Open the wp-config.php file in a text editor.
- Find the line that says / That’s all, stop editing! Happy publishing. /
- Just above that line, add the following code:
define('WP_DEBUG', true);define('WP_DEBUG_LOG', true);define('WP_DEBUG_DISPLAY', false);
This setup does a few things:
- WP_DEBUG: Turns on debugging mode.
- WP_DEBUG_LOG: Saves all error messages to a debug log file located in wp-content/debug.log.
- WP_DEBUG_DISPLAY: Hides error messages from displaying on your site—useful for live sites to prevent showing visitors error details.
Once you’ve saved and uploaded the updated wp-config.php file, visit your website. If there’s a critical error, check the debug log file to see detailed error messages. This log can point you directly to the plugin, theme, or code snippet causing the problem, making troubleshooting much easier.
Remember to turn debugging off after you’re done testing by changing WP_DEBUG back to false. This keeps your site clean and professional-looking for visitors.
4. Step 2: Deactivate All Plugins to Troubleshoot Conflicts
Plugins are a major part of WordPress’s functionality, but sometimes, they can clash with each other or with your theme, leading to a critical error. If debugging shows a plugin is at fault, or if you’re unsure, the next step is to deactivate all plugins at once.
Here’s a simple way to do it:
- Access your website files via FTP or your hosting file manager.
- Navigate to the wp-content folder.
- Rename the plugins folder to something like plugins_backup.
By renaming the folder, WordPress automatically deactivates all plugins because it can’t find them under their usual directory. Now, try visiting your website again. If the critical error disappears, it confirms that one of your plugins was the culprit.
To identify the specific plugin causing problems:
- Rename the folder back to plugins.
- Go into the plugins folder and deactivate plugins one by one by renaming each plugin’s folder (e.g., add _deactivated to the end).
- After each deactivation, refresh your website to see if the error persists.
When the error reappears after activating a particular plugin, you’ve found the troublemaker. From there, you can decide to:
- Look for an alternative plugin.
- Update the plugin if an update is available, as developers often fix bugs in newer versions.
- Contact the plugin developer for support.
Once you’ve identified and addressed the problematic plugin, don’t forget to restore your plugins folder name to its original state. Also, always keep your plugins updated and only install those from reputable sources to minimize conflicts and errors.
5. Step 3: Switch to a Default WordPress Theme
Sometimes, the culprit behind a critical error is your current WordPress theme. Themes are like the wardrobe for your website — change it, and everything can look different. But if there’s a glitch or incompatibility, it might cause errors that prevent your site from loading properly.
Here’s what you can do: temporarily switch to a default WordPress theme, like Twenty Twenty-Three or Twenty Twenty-Two. Doing this helps you identify if your theme is causing the problem. If switching themes resolves the error, then you know the issue lies there, and you can dig deeper or seek support for your theme.
How to Switch to a Default Theme:
- Access your WordPress Dashboard: Normally, you’d do this through your website, but if your site is down, you’ll need to access your server files via FTP or your hosting cPanel.
- Navigate to the Themes folder: Locate the wp-content/themes directory.
- Rename your current theme folder: For example, change ‘your-theme-name’ to ‘your-theme-name-old’. This action forces WordPress to revert to a default theme if it’s available.
- Ensure a default theme is installed: If not, you can upload one manually or install it via FTP.
- Check your site: Visit your website to see if the critical error is gone.
If your site loads without issues, you’ve identified the theme as the problem. You can then troubleshoot the theme further, update it, or contact the theme developer for support. If the error persists, move on to the next step.
6. Step 4: Increase PHP Memory Limit to Resolve Memory Exhaustion
Another common reason for the critical error is that your website has run out of PHP memory. Think of PHP memory as the workspace your website needs to run smoothly. When it’s exhausted, your site throws a fit — resulting in a critical error.
Increasing the PHP memory limit is straightforward and can often fix the issue quickly. Here’s how you can do it:
Methods to Increase PHP Memory Limit:
- Using wp-config.php: This is a simple way to allocate more memory directly from your site files.
- Editing php.ini: If you have access, you can modify the server’s PHP configuration.
- Using .htaccess: For Apache servers, you can add specific directives to boost memory.
How to Increase PHP Memory via wp-config.php:
- Access your website files: Use FTP or your hosting control panel’s file manager.
- Locate wp-config.php: It’s in the root directory of your WordPress installation.
- Edit the file: Open wp-config.php and add the following line just before the line that says “That’s all, stop editing!”:
- Save and upload: Save your changes and re-upload the file if necessary.
define('WP_MEMORY_LIMIT', '256M');Setting the memory limit to 256MB is usually enough, but if you still encounter issues, you can increase it further (e.g., 512M). Remember to always back up your files before making changes.
Check if the Issue Is Resolved:
Once you’ve increased the memory limit, refresh your website. If the critical error disappears, you’ve successfully addressed the problem! If not, ensure there are no other underlying issues, and consider consulting your hosting provider or a developer for advanced troubleshooting.
By following these steps — switching to a default theme and increasing PHP memory — you’re tackling two of the most common causes of WordPress critical errors. Stay patient, and remember: troubleshooting is all about elimination and persistence. You’ve got this!
7. Step 5: Check and Restore Corrupted Files Using Backup
If you’ve gone through the previous steps and still find yourself stuck with the critical error, it might be time to look into your website’s files. Sometimes, files can become corrupted due to failed updates, hacking attempts, or hosting issues. The good news? If you have a recent backup, restoring your files can be a quick fix!
First, locate your backup — hopefully, you’ve been backing up your site regularly. Most hosting providers offer one-click backup options, or you might use a plugin like UpdraftPlus or BackupBuddy. Once you have your backup ready, follow these simple steps:
- Download the backup files to your local computer, or access them via your hosting control panel.
- Use an FTP client (like FileZilla) or your hosting file manager to connect to your website’s server.
- Navigate to your WordPress root directory, usually named ‘public_html’ or similar.
- Upload your backup files to overwrite the existing, potentially corrupted files. Be cautious with this step—if you’re unsure, consult your backup provider’s instructions or a developer.
- Replace only the core WordPress files or specific plugin/theme files if you know which ones are corrupted. This targeted approach minimizes risk.
Once the files are restored, clear your browser cache or use a different browser to test your site. If everything looks good and the error is gone, fantastic! If not, don’t worry — restoring from backup is a powerful step to get your site back up and running.
Remember: regular backups are your safety net. They can save you hours of headache when things go wrong. So, consider setting up automated backups if you haven’t already done so.
8. Step 6: Update WordPress, Themes, and Plugins to the Latest Versions
Outdated software is one of the most common causes of critical errors on WordPress sites. Developers regularly release updates to fix bugs, patch security vulnerabilities, and improve performance. Running outdated themes, plugins, or WordPress core files can lead to compatibility issues that trigger errors.
The good news? Updating is straightforward, and it often solves the problem quickly. Here’s how you can safely update your site:
- Backup your website before making any updates. This step ensures you can restore your site if something goes wrong.
- Log in to your WordPress admin dashboard.
- Navigate to Updates under the Dashboard menu. You’ll see notifications if any updates are available for WordPress core, themes, or plugins.
- Update WordPress core first. Click the ‘Update Now’ button to get the latest version. This often includes important security patches and bug fixes.
- Update your themes and plugins. You can do this individually or in bulk. Select the items you want to update and click the ‘Update’ button.
Here are some tips to keep updates smooth:
- Test updates on a staging site if possible, especially for large or complex sites.
- Read changelogs when available, so you know what’s being fixed or changed.
- Deactivate and delete unused plugins or themes to reduce potential conflicts.
After updating, visit your website to ensure everything is functioning correctly. Clear your browser cache if you notice any discrepancies. If the critical error persists, revisit the earlier troubleshooting steps or consider consulting a developer.
Staying up-to-date is one of the best ways to prevent critical errors and keep your website secure. Make it a habit to check for updates regularly — your site will thank you!
9. Additional Tips to Prevent Future Critical Errors
Dealing with a critical error can be frustrating, but the good news is that with a few proactive steps, you can significantly reduce the chances of it happening again. Here are some handy tips to keep your WordPress site healthy and error-free:
- Regular Backups: Make it a habit to back up your website regularly. This way, if something does go wrong, you can restore your site to a previous working state without losing too much data. Use reliable backup plugins like UpdraftPlus or BackupBuddy.
- Keep Everything Updated: Outdated themes, plugins, or WordPress core files are common culprits for errors. Set up automatic updates if possible, or schedule regular manual checks to ensure everything stays current and compatible.
- Use Trusted Plugins and Themes: Not all plugins or themes are created equal. Stick to reputable sources like the official WordPress repository or well-known premium providers. Before installing new extensions, read reviews and check compatibility with your version of WordPress.
- Limit Plugin Usage: The more plugins you add, the higher the risk of conflicts and errors. Audit your plugins periodically and deactivate or delete any that aren’t essential. Aim for a lean, optimized setup.
- Enable Debugging Sparingly: While debugging mode helps identify issues during development, keep it disabled on your live site to avoid exposing sensitive error messages to visitors. Use it only when troubleshooting specific problems.
- Monitor Your Site: Use tools like Google Analytics or performance monitoring plugins to keep an eye on your website’s health. Noticing unusual drops in traffic or performance issues early can help you catch errors before they escalate.
Implementing these tips creates a proactive approach to website maintenance, helping you catch potential issues early and maintain a stable, reliable site. Remember, prevention is always better than cure!
10. Conclusion and When to Seek Professional Help
Fixing the WordPress critical error can be straightforward if you follow the right steps, but sometimes, things can get tricky. If you’ve tried the common solutions—like disabling plugins, switching themes, or restoring backups—and you’re still facing issues, it might be time to call in the professionals.
When should you seek professional help? Consider reaching out to a WordPress developer or support service if:
- The error persists despite your troubleshooting efforts.
- You’re uncomfortable editing code or accessing server files.
- Important data or custom configurations are at risk, and you want to avoid making things worse.
- The site is heavily customized, and errors are complex or hard to diagnose.
- You feel overwhelmed and need expert guidance to ensure your site’s stability and security.
Remember, sometimes investing in professional help can save you time, preserve your data, and ensure your website runs smoothly without further issues. Whether it’s a small fix or a complex problem, no shame in asking for help—your website’s health is worth it!
To wrap up, staying vigilant with maintenance, keeping your plugins and themes updated, and having a plan for troubleshooting can go a long way in preventing critical errors. But if you find yourself stuck, don’t hesitate to reach out to experts. Happy WordPress managing!