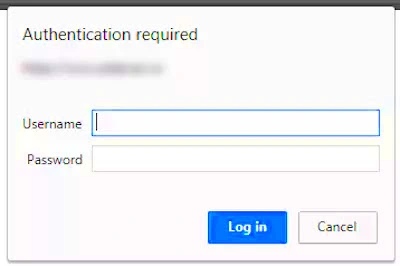
In today’s digital age, ensuring the security of your WordPress website is more important than ever. One effective way to boost your site’s defenses is by implementing Basic Authentication. This straightforward method adds an extra layer of protection by requiring users to enter a username and password before accessing your site. While it may sound technical, setting up Basic Authentication is quite simple and can be a game-changer for your site’s security. Let’s delve into what Basic Authentication is and how it can benefit your WordPress site!
Why Use Basic Authentication for WordPress Security?
You’re probably wondering, “Why should I bother with Basic Authentication?” Well, there are several compelling reasons. Here’s a breakdown:
- Simple to Implement: Basic Authentication is easy to set up. You don’t need advanced coding skills to get started.
- Enhanced Security: By requiring login credentials, it creates an added barrier for unauthorized access, making it harder for malicious users to reach your site.
- Protects Sensitive Areas: You can use Basic Authentication to secure your admin area or staging sites, keeping your most valuable information safe.
- Cost-Effective: This method can be configured without purchasing expensive plugins or subscriptions, making it friendly for every budget.
Here’s a quick summary:
| Benefits | Details |
|---|---|
| Ease of Setup | No technical skills required |
| Increased Security | Prevents unauthorized access |
| Targeted Protection | Safeguard admin and sensitive areas |
| Budget-Friendly | No hidden costs or subscriptions |
So, if you’re keen on making your WordPress site more secure, Basic Authentication might just be the perfect fit for you! Let’s explore how you can set it up effectively.
Prerequisites for Setting Up Basic Authentication
Before diving into the nitty-gritty of setting up Basic Authentication in WordPress, there are a few essential prerequisites you need to check off your list. Trust me, getting these sorted will make your experience smooth and hassle-free!
- A WordPress Site: First and foremost, you need to have a working WordPress installation. If you haven’t set up a site yet, make sure you do that first.
- Access to Your Server: You will need access to your web server via FTP or a file manager. This is crucial because you’ll need to upload or edit files.
- Basic Knowledge of Code: Don’t worry, you don’t have to be a coding guru, but some familiarity with HTML and PHP can be really helpful.
- Authentication (Username and Password): For setting up Basic Authentication, you’ll need to create a username and password. Make sure they are strong and unique to enhance security.
- SSL Certificate: It’s highly recommended to have an SSL certificate installed on your site. Basic Authentication sends credentials in an encoded format, but it’s still more secure when you’re on HTTPS.
Once you’ve got these prerequisites nailed down, you’re in a great position to implement Basic Authentication. It’s all about ensuring your site is as secure as it can be, right from the get-go!
Step-by-Step Guide to Implement Basic Authentication
Alright, now that you have everything in place, let’s roll up our sleeves and get started with implementing Basic Authentication in WordPress. Follow these steps carefully, and you’ll be bolstering your site’s security in no time!
- Connect to Your Server: Use an FTP client (like FileZilla) or your host’s file manager to connect to your website’s server.
- Locate the .htaccess File: Navigate to the root directory (usually the public_html folder) and find the .htaccess file. If it doesn’t exist, you might need to create one.
- Add Authentication Code: Open the .htaccess file and add the following code to it:
    AuthType Basic
    AuthName "Restricted Access"
    AuthUserFile /full/path/to/.htpasswd
    Require valid-user
Make sure to replace “/full/path/to/.htpasswd” with the actual path to your .htpasswd file (which we’ll create later).
- Create the .htpasswd File: This file will store your credentials. You can create it using an online generator or by manually creating a file with the format:
username:encryptedpasswordJust ensure it’s saved in a secure location on your server.
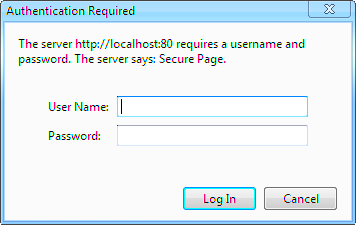
- Test Your Setup: Finally, navigate to your WordPress site. You should be prompted to enter the username and password you set up. If everything looks good, congratulations!
- Consider Additional Security Measures: While Basic Authentication is a fantastic step, consider adding more layers of security to your WordPress site, such as two-factor authentication or security plugins.
And there you have it! By following these steps, you have effectively implemented Basic Authentication in your WordPress site. This small but crucial measure goes a long way in safeguarding your online presence.
Using .htaccess to Enable Basic Authentication
When it comes to securing your WordPress site, using .htaccess to enable Basic Authentication is one of the most effective methods. It allows you to require a username and password before users can access your website’s admin area. This adds an extra layer of security that is particularly useful if you’re running a site with sensitive data or if you’re concerned about unauthorized access.
Here’s a step-by-step guide to setting it up:
- Access Your Website’s Files: You’ll need to connect to your server using an FTP client like FileZilla or through your web hosting control panel.
- Locate the .htaccess File: This file is typically found in the root directory of your WordPress installation. If you don’t see it, make sure your FTP client is set to show hidden files.
- Edit the .htaccess File: Open the .htaccess file in a code editor and add the following lines at the beginning:
AuthType BasicAuthName "Restricted Area"AuthUserFile /path/to/.htpasswdRequire valid-user
In this code snippet, replace /path/to/.htpasswd with the actual path to your .htpasswd file, which stores your username and password.
- Create the .htpasswd File: This file contains your credentials. You can generate it using various online services that create .htpasswd files. Place the .htpasswd file in a secure location not accessible via the web.
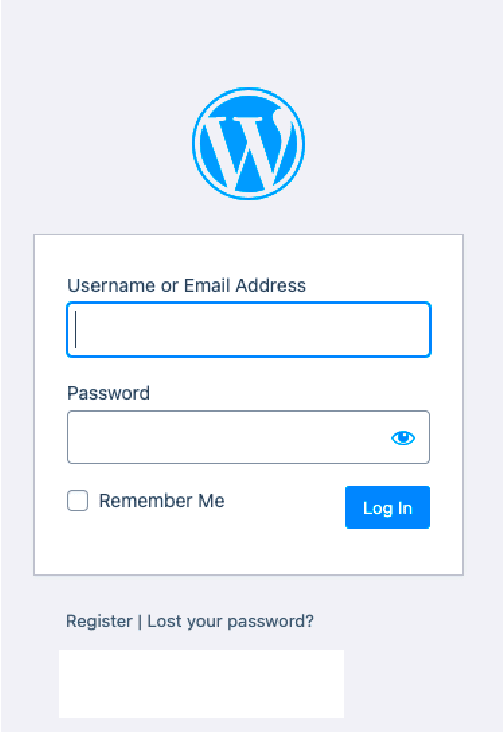
- Test Your Configuration: Visit your WordPress admin URL to see if the authentication prompt appears. Enter the credentials you set to ensure everything works correctly.
By following these steps, you can effectively add Basic Authentication to your WordPress site, bolstering your security and keeping unauthorized users at bay!
Alternative Methods for Setting Up Basic Authentication
If modifying your .htaccess file isn’t your cup of tea or if you’re looking for ways to set up Basic Authentication without diving into code, don’t worry! There are several alternative methods you can use to achieve this goal in WordPress.
Here are some user-friendly options:
- Plugins: The simplest way to implement Basic Authentication is to use a plugin. Popular plugins like WP Basic Authentication or can handle this for you. Just install the plugin, configure the settings, and you’re good to go!
- Web Hosting Control Panel: Many hosting providers, such as cPanel or Plesk, offer built-in features to enable Basic Authentication. Look for the “Directory Privacy” or “Password Protection” section and follow the prompts to protect your desired directory.
- Custom Functions: If you’re comfortable with a little bit of PHP, you can snip some code directly into your theme’s functions.php file. This method lets you enforce login prompts for specific areas or pages without messing with the .htaccess file.
- Firewall Options: Some security and firewall services, like Cloudflare or Sucuri, can offer options to layer Basic Authentication on top of your admin area. Check their respective dashboards for settings related to HTTP Authentication.
Each of these methods can provide the security benefits of Basic Authentication, so choose the one that feels right for your skill level and needs. Remember, the more secure you make your site, the better you’ll protect your hard work!
7. Testing Your Basic Authentication Setup
Once you’ve set up basic authentication in WordPress, it’s crucial to ensure everything is working correctly. A well-configured authentication system not only keeps your site secure but also gives you peace of mind knowing that only authorized users can access sensitive areas of your site. So, let’s dive into how you can test your basic authentication setup effectively!
Here are the steps to test your configuration:
- Access the Login Page: Navigate to your WordPress login page (typically yourdomain.com/wp-admin). If you’ve set up basic authentication correctly, you should see a prompt for a username and password.
- Enter Credentials: Input the username and password you configured earlier. Make sure to use the exact credentials to see if they work as intended.
- Check Access: Once you submit your credentials, check if you’re granted access to your WordPress dashboard. If you can log in successfully, congratulations! Your basic authentication is working.
- Try Incorrect Credentials: To further test it, try logging in with incorrect credentials. You should receive a prompt indicating that your authentication has failed. This confirms that your setup is secure.
- Test Different Browsers and Devices: To ensure that your authentication works across various platforms, try logging in from different browsers and devices. Compatibility is key!
If you pass all these tests, you can be pretty confident that your basic authentication setup is functioning properly. But don’t rush it—always double-check!
8. Troubleshooting Common Issues
Even with a straightforward process, issues may arise when setting up basic authentication in WordPress. But don’t worry! Most problems are fixable with a little guidance. Below are some common issues you might encounter and how to resolve them.
Here are some typical problems and their solutions:
| Issue | Solution |
|---|---|
| 401 Unauthorized Error | Check if the username and password are correctly entered. If you’ve recently changed them, ensure you’re using the current credentials. |
| Unable to Access WP-Admin | Make sure your authentication code is placing correctly in the .htaccess file. Misplacement can result in no access. |
| Browser Caching Issues | Clear your browser cache or try accessing the site in incognito mode. |
| Web Host Restrictions | Some web hosts may have security settings that conflict with your basic authentication setup. Contact your hosting provider for assistance. |
After following these troubleshooting steps, you should be well on your way to resolving any issues with your basic authentication setup. Remember, it’s all part of the process to keep your WordPress site secure and well-protected!
9. Additional Security Measures for WordPress
While setting up Basic Authentication in WordPress is a fantastic first step toward securing your website, it shouldn’t be the only line of defense you implement. Here are some extra security measures to consider that can significantly enhance your WordPress security:
- Keep Everything Updated: Always ensure your WordPress core, themes, and plugins are up-to-date. Updates often include security enhancements that protect against new vulnerabilities.
- Utilize Security Plugins: Implementing a comprehensive security plugin, like Wordfence or Sucuri, can help monitor your site for suspicious activities and provide firewall protection.
- Limit Login Attempts: By restricting the number of login attempts from a single IP address, you can thwart brute-force attacks effectively.
- Change Default Login URL: Instead of using the default /wp-admin or /wp-login.php, consider changing your login URL to something less common to obscure it from potential attackers.
- Employ Two-Factor Authentication (2FA): Adding an extra layer of security during the login process can dramatically reduce unauthorized access.
- Regular Backups: Always have a backup in place! Use plugins like UpdraftPlus or BackupBuddy for scheduled backups to restore your site quickly if needed.
- Use Strong Passwords: Ensure that all users of your site utilize complex passwords—leveraging password managers can help in generating and storing these securely.
- Disable File Editing: Prevent attackers from editing your files through the WordPress dashboard by disabling the file editing function in your wp-config.php file.
By incorporating these additional security measures with Basic Authentication, you can create a robust defense against potential threats to your WordPress site.
10. Conclusion: Enhancing WordPress Security with Basic Authentication
In today’s digital landscape, security should be a top priority for anyone managing a WordPress site. Basic Authentication is an effective way to safeguard your content and user data, but it’s not a standalone solution. By integrating Basic Authentication with other protective strategies, you pick up more than just a shield; you create a comprehensive security ecosystem.
Implementing such measures not only protects against unauthorized access but also instills trust in your users. Here’s a quick recap of what we’ve covered:
- Basic Authentication: Adds an additional layer to your login page.
- Additional Security Measures: Regular updates, strong passwords, security plugins, and more can save you from countless headaches down the line.
- Vigilance: Always stay informed about the latest security trends and threats facing WordPress sites.
Ultimately, security is an ongoing effort. Regularly auditing your practices and being proactive with updates and strategy implementations will help keep your WordPress site safe and secure. So don’t wait! Start setting up Basic Authentication today and complement it with these additional security measures to enjoy a peace of mind while managing your site. Your content deserves it!

