If you’ve ever uploaded images to your WordPress site only to find them blurry, not showing up, or displaying incorrectly, you’re not alone. Many website owners face these frustrating hiccups, but the good news is that most image problems are fixable with a little troubleshooting. Whether it’s slow loading images, distorted visuals, or missing files, understanding the common issues can save you time and headaches. In this guide, we’ll walk through the typical image problems encountered in WordPress, help you identify what’s going wrong, and show you how to get your images looking sharp and functioning perfectly again.
Identifying the Causes of Image Problems in WordPress
Before diving into solutions, it’s important to understand what might be causing your image issues. There are several common culprits:
- Incorrect Image Uploads: Sometimes, images are uploaded in the wrong format or with improper settings, leading to display problems.
- File Size and Compression: Large images can slow down your site, and overly compressed images may look pixelated or blurry.
- Theme or Plugin Conflicts: Certain themes or plugins might interfere with how images are displayed or loaded.
- Incorrect Image URLs or Paths: Broken links or wrong file paths can cause images to not appear at all.
- Server or Hosting Issues: Server misconfigurations or limitations can prevent images from loading properly.
- Browser Caching Problems: Sometimes your browser holds onto old versions of images, making it seem like your fixes aren’t working.
By recognizing these potential causes, you can more effectively troubleshoot and pinpoint the exact issue affecting your WordPress images. The next steps involve checking these factors one by one to identify the root of the problem and then applying the appropriate fix.
3. Step-by-Step Troubleshooting for Image Upload Errors
Uploading images to your WordPress site should be straightforward, but sometimes things go awry. If you’re facing errors when trying to upload images, don’t worry — there are clear steps you can follow to identify and fix the issue. Let’s walk through a simple troubleshooting process.
Step 1: Check Your File Size and Format
First, ensure your image meets the upload requirements. WordPress typically supports common formats like JPEG, PNG, GIF, and WebP. Also, verify that your image isn’t too large. Many hosting environments have upload size limits, often set at 2MB or 8MB by default.
- File Format: Is your image in a supported format?
- File Size: Is the image under the maximum upload size?
If your image exceeds size limits, try resizing it using an image editor or online tool before uploading again.
Step 2: Check Your Permissions
Next, ensure that your WordPress user role has permission to upload images. Usually, administrators and editors can upload freely, but contributors and subscribers may have restrictions.
If permissions are restricted, contact your site administrator or adjust user roles accordingly.
Step 3: Verify the Uploads Directory Permissions
The wp-content/uploads directory needs proper permissions to allow uploads. Typically, permissions should be set to 755.
Use an FTP client or your hosting control panel to check the permissions. If they are incorrect, set them to 755 for folders and 644 for files.
Step 4: Disable Plugins and Switch Themes
Sometimes, plugins or themes can interfere with uploads. To test this:
- Deactivate all plugins temporarily.
- Switch to a default WordPress theme like Twenty Twenty-Three.
If the upload works after this, reactivate plugins one by one to identify the culprit.
Step 5: Check for PHP Errors and Limits
Hosting environments have PHP configurations that might limit upload size or execution time. Check your php.ini file or ask your host for support to ensure:
- upload_max_filesize is set high enough (e.g., 16MB)
- post_max_size is larger than upload_max_filesize
- max_execution_time is sufficient (e.g., 300 seconds)
Adjust these settings if necessary, or contact your hosting provider for assistance.
Step 6: Clear Cache and Retry
If you’re using caching plugins or a CDN, clear your cache. Sometimes, cached errors can prevent images from uploading or appearing correctly.
After clearing cache, try to upload again. If issues persist, proceed to more advanced troubleshooting.
When to Seek Help
If none of these steps resolve your upload errors, consider reaching out to your hosting provider or checking the WordPress support forums. Sometimes, server issues or deeper configuration problems require expert help. Remember, troubleshooting is a process of elimination — stay patient and methodical, and you’ll get your images uploading smoothly again!
4. Resolving Broken Image Links on Your WordPress Site
Broken image links are a common frustration for website owners. They can make your site look unprofessional and negatively impact user experience. But don’t worry — fixing these issues can often be simple once you understand the cause. In this section, we’ll explore how to identify and resolve broken image links effectively.
Understanding Why Images Break
Broken images typically occur because the image file has been moved, deleted, or the URL has changed. Other causes include incorrect file paths, issues with your hosting server, or problems with your site’s database.
Step 1: Identify Broken Image Links
Start by locating broken images. You can do this manually by inspecting your pages or use tools like:
- Browser Developer Tools: Right-click on the broken image icon and select “Inspect” to see the image URL.
- Broken Link Checkers: Online tools like Broken Link Checker or Screaming Frog can scan your whole site and report broken images.
Once identified, note down the URLs or image locations that are causing issues.
Step 2: Verify Image Files Exist
Using FTP or your hosting file manager, navigate to the location specified in the broken link. Does the image file still exist? If not, you’ll need to:
- Re-upload the missing image
- Use a backup if available
If the file is there but the link is broken, move to the next step.
Step 3: Correct the Image URL or Path
Often, broken links are due to incorrect URLs or file paths. To fix this:
- Go to the post or page editor where the image is embedded.
- Click on the image and check the URL in the editor.
- Update it to the correct path if it’s wrong.
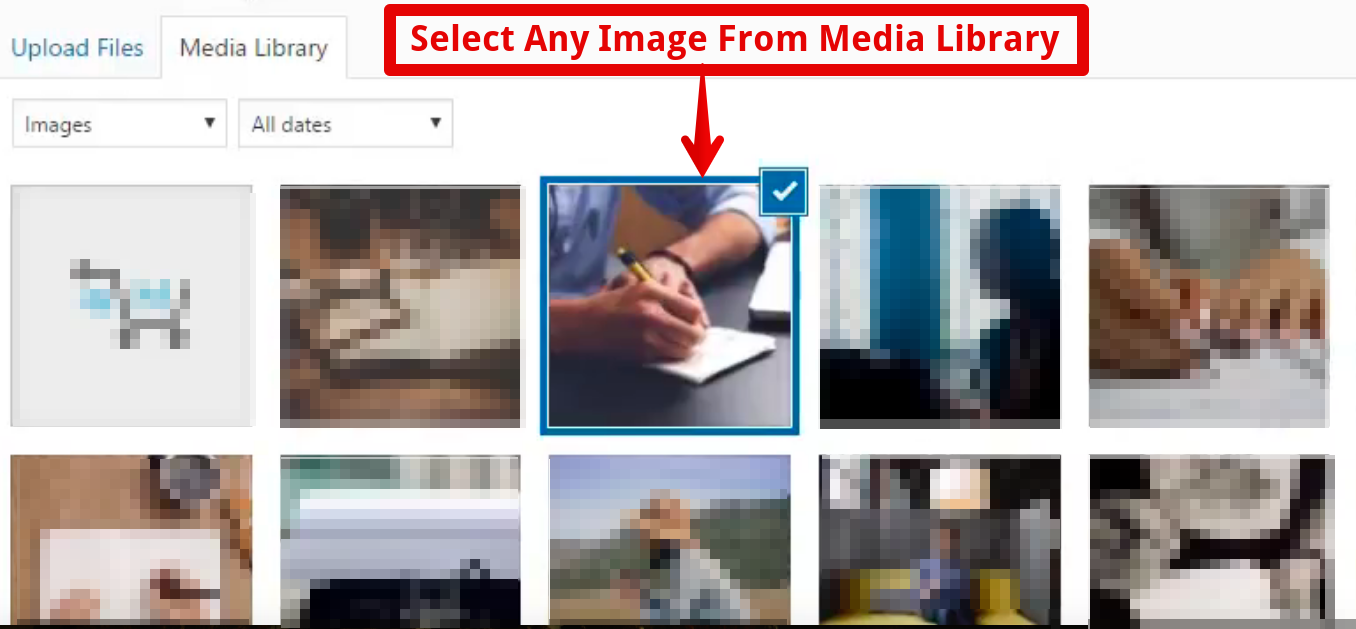
If you’re using the WordPress media library, ensure that the image URL corresponds to the correct location within your site’s uploads directory.
Step 4: Update Image References in the Database
If images have been moved or renamed outside of WordPress (e.g., via FTP), your database might still have outdated links. You can:
- Use plugins like Better Search Replace to update URLs in the database.
- Or manually edit posts/pages to update image links.
Always back up your database before making bulk changes.
Step 5: Check for CDN or Caching Issues
If you’re using a CDN, cached versions of pages might still show broken images even after fixing the links. Clear your CDN cache and browser cache, then reload your site to see if the images appear correctly.
Additional Tips to Prevent Broken Images
- Organize your media library: Keep images in well-structured folders.
- Use relative URLs carefully: Absolute URLs are safer for avoiding broken links when moving sites.
- Regularly audit your site: Check for broken links periodically to catch issues early.
Final Thoughts
Fixing broken image links might seem tedious at first, but once you understand the root causes, it becomes much easier. Keep your media organized, verify URLs regularly, and stay on top of your site’s health. With a little effort, your site will look polished and professional — free of broken images!
5. Fixing Image Display Issues and Alignment Problems
Have you ever inserted an image into your WordPress post, only to find that it doesn’t display correctly? Maybe it’s too large, blurry, or just not aligned the way you want. These display issues can be frustrating, but the good news is that most of them are straightforward to fix. Let’s walk through some common problems and how to resolve them.
Common Image Display Problems
- Images appear too large or too small
- Images are blurry or pixelated
- Images are misaligned or not centered
- Images are overflowing or breaking the layout
- Images are cut off or cropped unexpectedly
How to Fix These Issues
First, always start with the basics. When editing your post or page, click on the image to see the toolbar. You’ll see options like alignment, size, and caption. Here’s what to do:
Adjust Image Size
- Click on the image to select it.
- Use the corner handles to resize manually. Drag inward to make it smaller, outward to enlarge, but avoid stretching images excessively.
- Alternatively, click the pencil/edit icon, then choose the “Size” dropdown to select predefined sizes like Thumbnail, Medium, Large, or Full Size.
Set Proper Alignment
If your image isn’t aligned as you’d like, you can quickly fix it:
- Left aligned: Click the “Align left” button.
- Centered: Click “Align center”.
- Right aligned: Click “Align right”.
- For text wrapping around images, choose “Left” or “Right” alignment, then add your text accordingly.
Fixing Layout and Overflow Issues
If images break your layout or overflow their containers, consider these tips:
- Use the “Responsive” or “Max Width” settings in your theme or page builder to ensure images resize on different devices.
- Apply CSS styles like
max-width: 100%; height: auto;to make images adapt to container widths. - If your theme supports it, utilize built-in image alignment or layout options to better control how images interact with your content.
Additional Tips
- Always preview your changes before publishing to see how images look on different devices.
- If images look pixelated or blurry, check the original image resolution. Upload high-quality images to prevent this issue.
- Use tools like the Gutenberg block editor or page builders for more precise control over image placement and alignment.
6. Repairing Corrupted Images and Re-uploading Files
Sometimes, images can get corrupted—perhaps due to incomplete uploads, file transfer errors, or storage issues. When you encounter a corrupted image, it might display as a broken link or show strange artifacts. Don’t worry; fixing this is usually as simple as re-uploading the original file or repairing it externally.
Identifying a Corrupted Image
The first sign is often a broken image icon or an error message indicating the image can’t load. You might also see weird artifacts or distorted visuals when viewing the image in your media library or on your site.
Steps to Repair and Re-upload Images
- Check the original file: Open the image on your computer using an image viewer or editor. If it doesn’t open properly, the file itself might be corrupted. Try to recover or re-download the original image.
- Edit or repair externally: Use photo editing tools like Photoshop, GIMP, or online repair tools to fix minor issues or save a new version of the image.
- Re-upload the corrected image:
- Navigate to your WordPress dashboard.
- Go to Media > Add New.
- Upload the fixed image file.
- Edit your post or page.
- Remove the corrupted image block or replace the image URL with the new one from your media library.
Additional Tips for Managing Images
- Always keep backups of your original images before editing or compressing them.
- Use reliable image editing tools to avoid introducing new corruption.
- If repeated upload issues occur, check your server storage and permissions. Sometimes, server limits or restrictions can interfere with uploads.
Preventing Future Image Problems
To minimize image issues down the line:
- Upload images in web-optimized formats like JPEG or PNG with appropriate resolution.
- Use consistent naming conventions and organize images into folders.
- Regularly update your WordPress and plugins to ensure compatibility and security.
By following these troubleshooting steps, you can keep your WordPress site looking sharp and functioning smoothly, with images displaying exactly as you intend. Whether fixing display glitches or repairing corrupted files, a little attention goes a long way in maintaining a professional and engaging website.
7. Improving Image Optimization for Faster Loading
Let’s face it—nobody likes a slow website, especially when it comes to images. Large or poorly optimized images can seriously drag down your site’s loading speed, which not only frustrates visitors but can also hurt your SEO rankings. So, what’s the secret to keeping your images crisp and quick to load? It’s all about proper image optimization.
First things first: choose the right file format. For photographs and complex images, JPEG is usually your best bet because it balances quality and file size. For graphics with fewer colors, like logos or icons, PNG works well because it preserves sharp lines and transparency. And if you want ultra-compressed images with minimal loss of quality, consider WebP — it’s supported by most modern browsers and offers smaller file sizes.
Next, resize your images before uploading. Don’t upload a giant photo and rely on HTML or CSS to resize it—this just wastes bandwidth. Use photo editing tools or plugins to crop and resize images to the dimensions you actually need on your site. This step alone can shave a significant amount of weight off your images.
Another useful tip is to leverage image compression tools. There are plenty of options out there, like TinyPNG, ShortPixel, or Smush, which can compress images without noticeable quality loss. Many of these tools offer bulk compression, saving you time and effort.
Additionally, implement lazy loading. This means images only load when they are about to enter the viewport (the part of the page visible to the user). Lazy loading reduces initial page load time, especially on pages with lots of images. WordPress now includes native lazy loading support, but you can also use plugins to enhance or customize this feature.
| Optimization Tip | Benefit |
|---|---|
| Choose the right format (JPEG, PNG, WebP) | Reduces file size while maintaining quality |
| Resize images before upload | Prevents unnecessary data transfer |
| Compress images with tools/plugins | Minimizes file size without sacrificing visible quality |
| Enable lazy loading | Speeds up page load times especially on image-heavy pages |
By following these tips, you’ll notice a significant improvement in your website’s performance. Faster-loading images not only make your site feel snappier but also boost your SEO rankings, as search engines favor quick-loading websites. So, take the time to optimize your images—the benefits are totally worth it!
8. Using Plugins and Tools to Detect and Resolve Image Problems
Sometimes, despite your best efforts, image issues can still crop up—images not displaying correctly, slow load times, or even broken links. That’s where plugins and tools come to the rescue. They help you quickly identify and fix problems, saving you a ton of time and headaches.
First, let’s talk about detection. There are several WordPress plugins designed specifically for this purpose. For example, Broken Link Checker scans your site for broken images and links, alerting you so you can fix or replace them. Another popular tool is Image Optimization & Lazy Load plugins like Smush or EWWW Image Optimizer, which not only optimize images but also notify you about images that still need compression or resizing.
Using these tools, you can generate comprehensive reports on:
- Images that are too large or unoptimized
- Broken or missing images
- Slow-loading images
- Images with incorrect dimensions
Once issues are identified, resolving them becomes straightforward. Most plugins allow bulk actions—like compressing multiple images at once or replacing broken images with correct ones. Some plugins also include features to automatically optimize images on upload, ensuring you don’t have to worry about future problems.
Beyond plugins, there are external tools that can help you analyze your site’s images more deeply. Tools like Google PageSpeed Insights, GTmetrix, or Pingdom give detailed reports about your website’s load performance, highlighting image-related issues and offering tailored suggestions. They can tell you which images are slowing down your site and recommend specific actions, such as resizing or compressing.
In addition, consider using online image audit tools like Screaming Frog or SEMrush’s Site Audit feature. These can crawl your entire site and flag problematic images, broken links, or improperly optimized media files.
To sum it up:
- Use detection plugins to monitor your images regularly
- Leverage external analysis tools for detailed insights
- Fix issues promptly—whether that’s resizing, compressing, or replacing images
- Automate where possible with plugins that optimize images on upload
By integrating these tools into your workflow, you ensure your website maintains healthy, optimized images that load quickly and display correctly. It’s a proactive approach to prevent problems before they impact your visitors’ experience. Remember, keeping an eye on your images is an ongoing process—regular checks with these tools will keep your site running smoothly and looking professional.
9. Best Practices to Prevent Future Image Issues in WordPress
Now that we’ve tackled common image problems and learned how to fix them, it’s a good idea to focus on preventing these issues from happening in the first place. Prevention is always better than cure, especially when it comes to maintaining a smooth and professional-looking website. Here are some practical best practices to keep your WordPress images healthy and your site running seamlessly.
Use the Right Image Formats
Choosing the appropriate image format can make a big difference. For photographs and images with complex colors, JPEG is usually the best choice because it balances quality and file size. For images with transparency or sharp edges like logos and icons, PNG is more suitable. Avoid using uncompressed formats or overly large images that can slow down your site.
Optimize Images Before Upload
Before uploading images to WordPress, take a moment to optimize them. You can use tools like Adobe Photoshop, GIMP, or online compressors such as TinyPNG or ImageOptim. Optimized images load faster, reduce server load, and minimize the risk of display issues.
Implement a Consistent File Organization System
Keeping your media library organized helps prevent accidental overwrites or misplaced files. Use descriptive filenames and folder structures. For example, create folders like product-images, blog-headers, or team-photos. This way, you always know where your images are and can easily update or replace them when needed.
Use Reliable Themes and Plugins
Choose themes and plugins from reputable sources with good reviews. Sometimes, poorly coded themes or plugins can interfere with image display or cause conflicts. Regularly update your themes and plugins to benefit from bug fixes and security patches.
Implement Lazy Loading
Lazy loading delays the loading of images until they are about to enter the viewport. This improves page load times and reduces server strain. WordPress now includes native lazy loading, but you can also use plugins like Lazy Load by WP Rocket or a3 Lazy Load to enhance performance.
Regularly Backup Your Website
Having recent backups of your WordPress site ensures that if something goes wrong—like corrupted images or plugin conflicts—you can restore your site to a healthy state quickly. Use plugins like UpdraftPlus or BackupBuddy for automated backups.
Keep WordPress and Media Libraries Clean
Remove unused images and media files periodically. Excess clutter can cause confusion and accidentally lead to broken links or outdated visuals. Use media cleanup plugins or manually review your media library.
10. Conclusion and Additional Resources for WordPress Image Troubleshooting
Dealing with image issues in WordPress might seem daunting at first, but with the right approach, you can troubleshoot effectively and prevent many problems from occurring. Remember, understanding the root causes—whether it’s file corruption, incorrect permissions, or plugin conflicts—empowers you to act swiftly and confidently.
To recap, always start by checking file integrity and permissions, optimize images before uploading, and keep your themes and plugins up to date. Implementing best practices like proper file organization, lazy loading, and regular backups will go a long way in maintaining a healthy media library.
If you ever find yourself stuck, don’t hesitate to consult the wealth of resources available online. The WordPress community forums, official documentation, and reputable tutorials can provide invaluable guidance. Additionally, consider using diagnostic tools like browser developer consoles or image inspection plugins to pinpoint issues quickly.
Remember, a well-maintained media library not only improves your site’s appearance but also enhances loading speed and user experience. Keep experimenting, stay updated with the latest WordPress developments, and your website will stay vibrant and problem-free!