If you’re managing a WordPress site that targets a specific geographic audience—like a local business, regional service, or community hub—then knowing how to effectively handle location data is a game-changer. That’s where Ubigeo comes in! Originally developed for managing geographic codes in Peru, Ubigeo helps organize location data in a structured way, making your site more intelligent and user-friendly. Integrating Ubigeo with WordPress allows you to add location-based filters, improve SEO, and deliver a more personalized experience to your visitors. It’s an excellent tool for anyone looking to enhance their site’s regional relevance and streamline location management.
Step-by-Step Guide to Installing the Ubigeo Plugin on WordPress
Getting started with the Ubigeo plugin on WordPress is pretty straightforward, even if you’re not a tech wizard. Here’s a simple, step-by-step guide to help you set it up:
- Log into your WordPress Dashboard: Head over to your website’s admin area at yourwebsite.com/wp-admin.
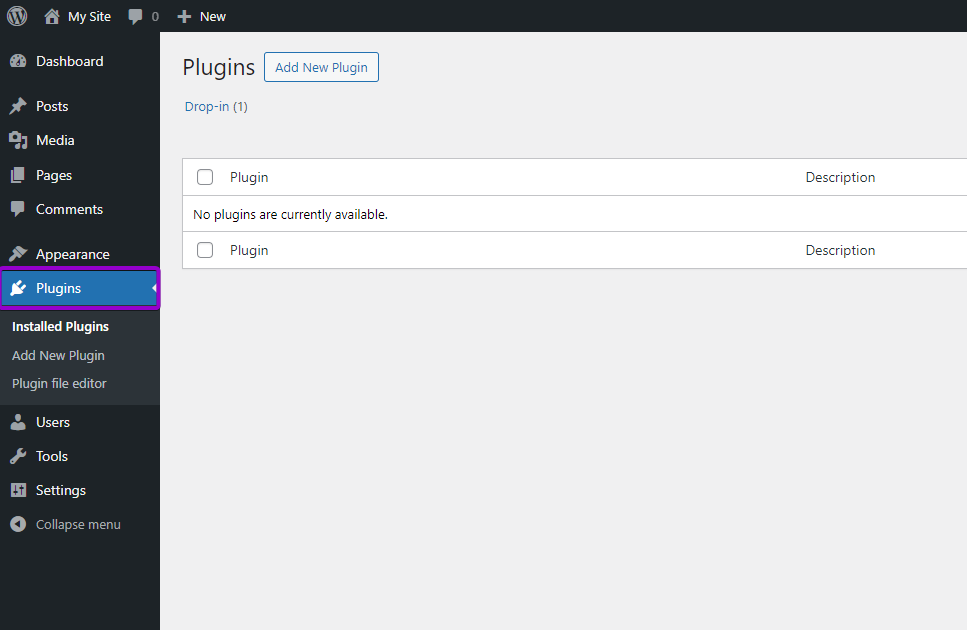
- Navigate to Plugins: On the left sidebar, click on Plugins and then select Add New.
- Search for the Ubigeo Plugin: In the search bar, type Ubigeo or Ubigeo Plugin. Look for the official or most trusted version.
- Install the Plugin: Once you find it, click on the Install Now button. Wait a few moments as WordPress downloads and installs the plugin.
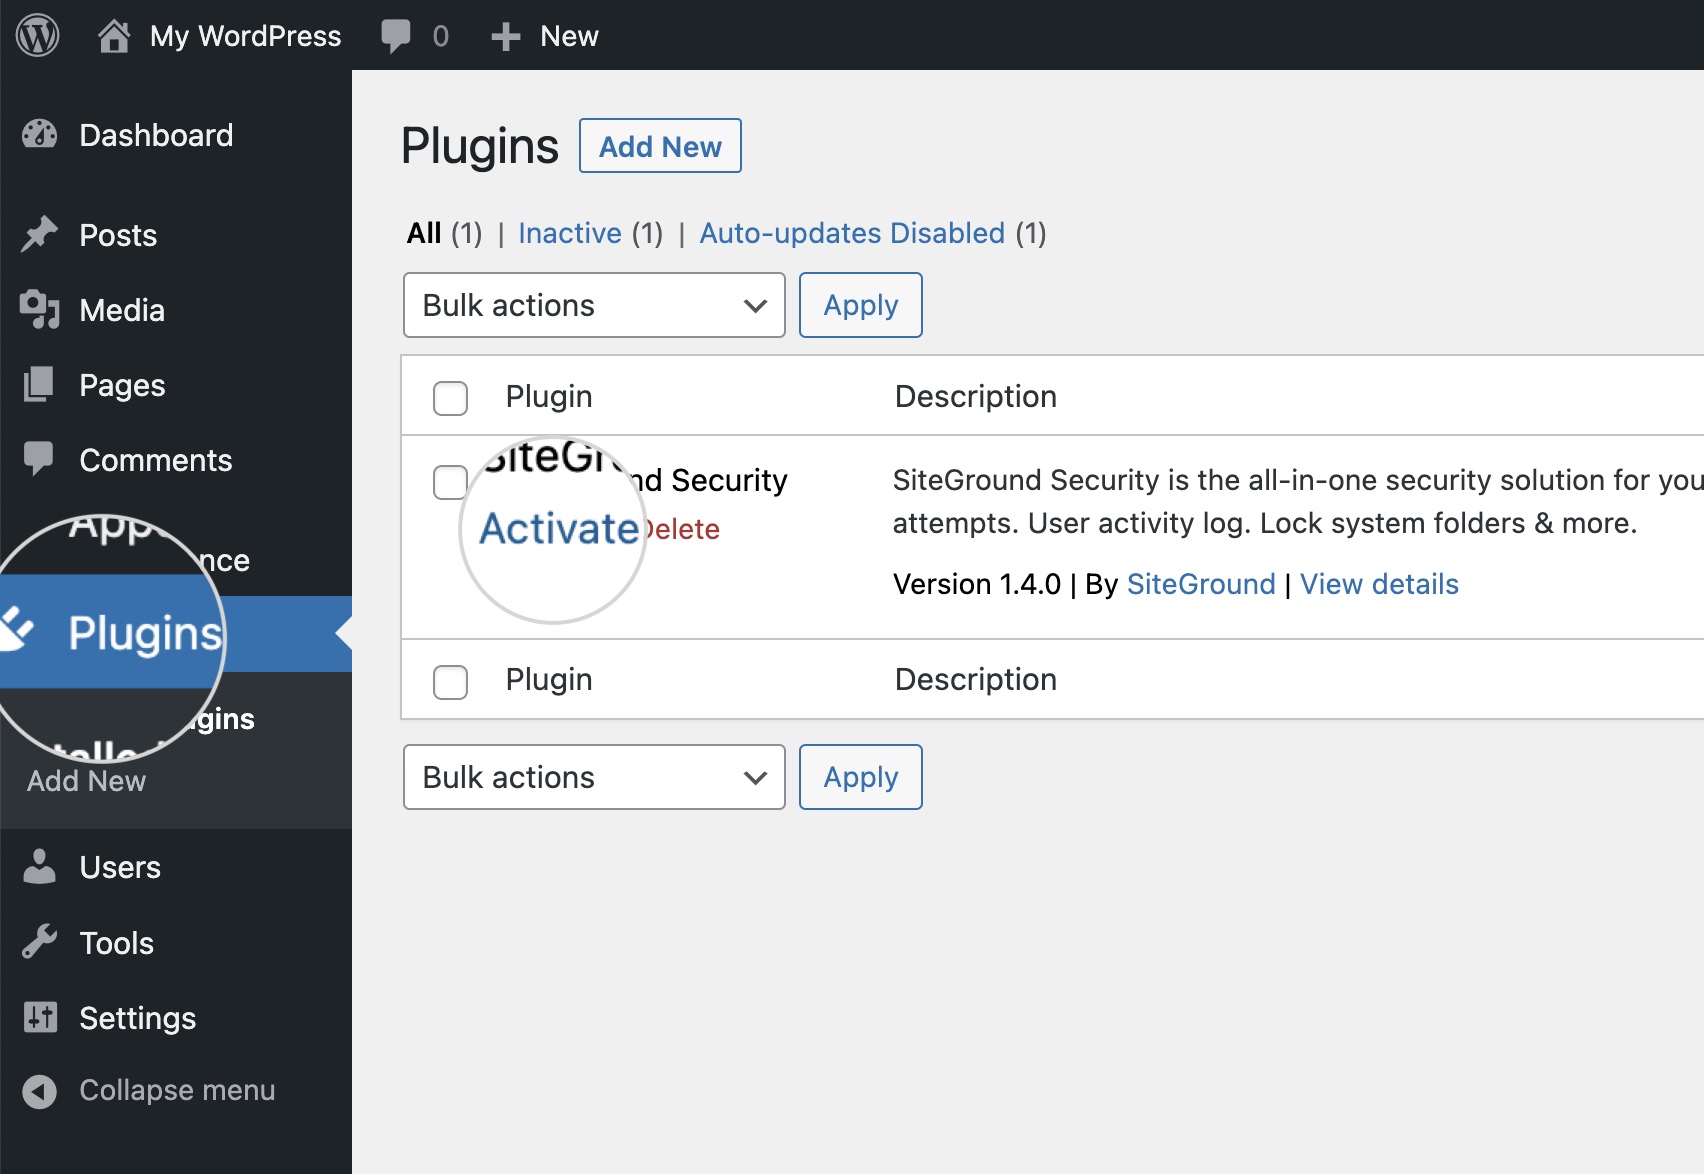
- Activate the Plugin: After installation, click on Activate. You should see a confirmation message indicating the plugin is now active.
- Configure the Plugin Settings: Usually, a new menu item or settings link will appear in your dashboard sidebar. Click on it to access Ubigeo’s configuration options.
- Import or Input Location Data: Depending on the plugin version, you might need to import geographic data or input it manually. Follow the plugin’s instructions to set up your location hierarchy.
And that’s it! With these simple steps, you’ve integrated Ubigeo into your WordPress site, paving the way for smarter location management and a better user experience. Don’t forget to explore the plugin’s settings and documentation to make the most out of its features. Happy geotagging!
3. Configuring Ubigeo Settings for Optimal Performance
Once you’ve installed the Ubigeo plugin on your WordPress site, the next step is to make sure it’s configured properly so it works smoothly and efficiently. Proper setup not only ensures accurate location data but also helps your website run faster and more reliably. Here’s how you can fine-tune the settings for the best results.
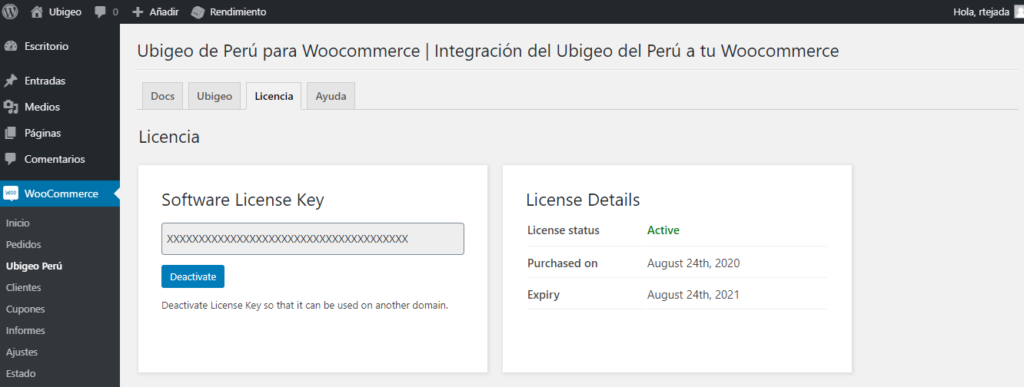
First, navigate to the plugin settings in your WordPress dashboard. You’ll usually find this under Settings → Ubigeo. Here, you’ll see several options to customize:
- Data Source Selection: Choose whether you want to load data from local files or fetch it dynamically from an external API. For faster load times, using local data is often better, especially if your site doesn’t need real-time updates.
- Cache Settings: Enable caching to store location data temporarily. This reduces server requests and speeds up user interactions. Set an appropriate cache duration—perhaps a few days—to balance freshness and performance.
- Default Location: Specify a default location that appears when users visit your site. This can improve user experience by displaying relevant content immediately.
- Language and Localization: Select the language for location names. If your website targets a specific region, setting the correct language enhances clarity for your visitors.
- Data Update Frequency: Decide how often the plugin should check for updates to the Ubigeo database. Regular updates ensure accuracy but may require more server resources.
Another tip is to review the performance settings. Disable any features you don’t need—such as unnecessary scripts or styles—to keep your site lean. Also, test your site after changing settings to verify that data loads correctly and that there are no conflicts with other plugins or themes.
Remember, the goal is to strike a balance between accuracy, performance, and user experience. Take your time to tweak these options, and don’t hesitate to consult the plugin documentation or support if you encounter any issues. With the right setup, Ubigeo will serve as a powerful tool to make your location-based features both fast and reliable.
4. How to Use Ubigeo to Enhance Location-Based Features on Your Website
Now that your plugin is set up properly, it’s time to start leveraging Ubigeo to elevate your website’s location-based capabilities. Whether you’re running an e-commerce store, a directory site, or a service provider platform, Ubigeo can help you deliver personalized, relevant content based on where your visitors are.
Here are some practical ways to make the most of Ubigeo:
- Adding Location Selectors: Use the plugin to create dropdown menus or autocomplete fields that let users select their location easily. For example, if you run an online store, you can ask customers to choose their region to display appropriate products or services.
- Filtering Content by Location: Integrate Ubigeo data with your custom queries to show only relevant posts, products, or services based on the user’s location. This creates a more tailored experience and can boost engagement and conversions.
- Personalized User Experiences: Detect the visitor’s location automatically using Ubigeo and customize content accordingly. For instance, display local news, events, or special offers relevant to their area.
- Optimizing Shipping and Delivery: If you’re running an e-commerce site, use Ubigeo to calculate shipping costs or delivery times based on the customer’s location. This reduces cart abandonment caused by unexpected costs or delays.
- Creating Location-Based Forms: Embed forms that pre-fill location fields using Ubigeo data. This simplifies the signup or contact process, encouraging more completions.
Here’s a quick example of how to implement location filtering:
| Step | Description |
|---|---|
| 1 | Create a location dropdown using Ubigeo data. |
| 2 | Capture user selection and store it in a session or cookie. |
| 3 | Modify your queries to display content matching the selected location. |
| 4 | Update the page dynamically to show relevant content without needing to reload. |
By integrating Ubigeo into these features, you make your website more intuitive and user-centric. Visitors appreciate when they see content that’s relevant to their location, which can lead to higher engagement, increased conversions, and better user satisfaction. So don’t hesitate to experiment with different ways to incorporate Ubigeo data—your users will thank you for it!
5. Troubleshooting Common Issues When Integrating Ubigeo with WordPress
Getting Ubigeo up and running on your WordPress site can sometimes come with a few hiccups. Don’t worry—most issues are manageable once you know what to look for. Here are some common problems and how to troubleshoot them:
1. The Ubigeo Dropdowns Aren’t Populating Correctly
If your dropdown menus for departments, provinces, or districts aren’t showing the correct options, double-check that you’ve imported the Ubigeo data correctly. Sometimes, the CSV or JSON files don’t upload properly or get corrupted. To fix this:
- Ensure the data files are properly uploaded to the plugin’s data folder.
- Re-import the data using the plugin’s import tool.
- Verify that your data files are complete and correctly formatted.
2. JavaScript Conflicts
Sometimes, other plugins or themes can interfere with the JavaScript used by Ubigeo, causing dropdowns to malfunction or not appear at all. To troubleshoot:
- Switch to a default theme like Twenty Twenty-One temporarily to see if the issue persists.
- Deactivate other plugins one by one to identify conflicts.
- Check your browser console for JavaScript errors and resolve any conflicts accordingly.
3. Data Not Saving or Displaying Properly
If users select their location but it doesn’t save or display correctly:
- Ensure that your form plugin (if used) is compatible with Ubigeo and configured properly.
- Verify that your form’s submission handler captures the data correctly.
- Check database permissions and ensure no errors occur during data saving.
4. Compatibility Issues
Make sure your WordPress version and the Ubigeo plugin are compatible. Always keep your plugins and themes updated to avoid conflicts. If you experience issues after an update, consider rolling back to previous versions or reaching out to the plugin support.
5. Debugging Tips
When in doubt, enable WP_DEBUG in your wp-config.php file to get detailed error messages. Also, consult the plugin’s documentation and support forums—they often contain solutions for common problems.
6. Conclusion and Additional Resources for Using Ubigeo in WordPress
Integrating Ubigeo with your WordPress site opens up a world of possibilities for localizing content, tailoring user experiences, and making your site more user-friendly for visitors across different regions. While the process might present some challenges initially, with patience and a bit of troubleshooting, you’ll have a seamless setup in no time.
Remember, the key to a successful integration is ensuring your data is accurate, your plugin is up to date, and you’re attentive to any conflicts that might arise. Don’t hesitate to explore additional resources to deepen your understanding and enhance your implementation:
- Official Ubigeo Plugin Documentation: [Link to documentation]
- WordPress Support Forums: [Link to forums]
- Community Tutorials and Guides: Search for community-created tutorials on platforms like YouTube or WordPress blogs.
- Developer Support: If you encounter complex issues, consider reaching out to the plugin developer or hiring a developer familiar with WordPress and Ubigeo.
By leveraging these resources and staying patient, you’ll be able to provide a more localized, engaging experience for your visitors, making your website truly stand out. Happy integrating!