Ever wondered if you could customize your WordPress site a bit further? Maybe you’ve got some posts that don’t quite fit the usual header style, or you’re looking to create a more streamlined look for your content. Well, you’re in luck! In this post, we’re diving into the world of free WordPress plugins that allow you to turn off headers for specific posts. Whether you want to enhance the readability or just give your site a unique flair, knowing how to tweak headers can be a game-changer!
Why Turn Off Headers for Specific Posts?

Turning off headers for specific posts can seem trivial at first glance, but it can actually serve several important purposes. Here’s why you might consider doing it:
- Enhanced Focus on Content: Without headers, your readers can focus directly on the text without distractions. This is particularly useful for long articles or tutorials where clarity is key.
- Streamlined Aesthetics: Some posts may require a cleaner look. Removing headers can give your site a more professional and polished appearance, especially for formal content.
- Improved Reader Experience: Readers who’ve come for a specific topic can benefit from a layout that feels more approachable, reducing visual clutter.
- Customization for Different Audiences: You might have various types of posts catering to different audiences. Turning off headers can help create a tailored experience for each group.
Here’s a quick overview of scenarios where turning off headers can benefit your content:
| Scenario | Benefit |
|---|---|
| Long Tutorials | Focus on steps rather than layout. |
| Personal Stories | Create an intimate reading experience. |
| Informative Posts | Streamlined delivery of information. |
In short, turning off headers for specific posts isn’t just a minor tweak; it’s a chance to enhance your readers’ experience while aligning your content presentation with its purpose.
Overview of Free WordPress Plugins

When it comes to customizing your WordPress site, plugins are your best friends. They extend the functionality of your site without requiring any coding skills. Free WordPress plugins are particularly popular because they offer a wide range of features that can help you modify your posts, improve performance, and enhance user experience without breaking the bank. In this section, we’ll take a closer look at the free plugins that can help you turn off headers for specific posts.
Many free plugins are available in the WordPress Plugin Directory. You can browse and install them directly from your dashboard. The beauty of these plugins lies in their diversity—there’s pretty much a plugin for every need! For instance, if you want to remove headers from select posts, there are plugins designed specifically for that purpose that can do it without affecting the rest of your site.
Some popular options include:
- Header Footer Code Manager: Lets you manage and disable headers on a post-by-post basis.
- WP Post Headers: Offers an easy way to customize headers according to post type.
- Conditional Headers: Allows you to set conditions under which headers will be displayed.
These plugins not only remove headers but also provide additional features, such as styling options and code snippets for customizations. Remember, installing too many plugins can slow your site down, so it’s essential to choose wisely!
Choosing the Right Plugin

With so many free WordPress plugins available, how do you choose the right one for your needs? This can be overwhelming, especially if you’re new to the WordPress ecosystem. Here are some tips to help you navigate your choices and find a plugin that ticks all the right boxes:
1. Identify Your Needs: Start by clearly defining your purpose. Do you want a plugin that only disables headers, or do you need more advanced features like custom styling? Knowing your specific requirements can narrow down your options.
2. Check User Ratings: One of the easiest ways to gauge the quality of a plugin is to look at user reviews and ratings. A plugin with a high rating and positive feedback is generally a safe bet.
3. Evaluate Compatibility: Ensure that the plugin is compatible with your current version of WordPress and any other plugins you may be using. Check the last updated date to avoid outdated plugins that may not work well with new WordPress installations.
4. Support and Documentation: Good plugins provide excellent support and documentation. If you run into issues, it’s crucial to have access to help or tutorials to guide you.
5. Test Before You Invest: Many free plugins are easy to install and can be tested right from your WordPress dashboard. Try a few options to see which one works best for your specific situation.
6. Consider Future Needs: Think long-term! Choose a plugin that not only meets your immediate needs but also allows for future modifications. Some plugins are easier to upgrade than others.
By taking these factors into account, you can confidently select a plugin that suits your specific needs and enhances your WordPress experience.
5. Step-by-Step Guide to Turning Off Headers
Turning off headers for specific posts in WordPress can really enhance the reading experience for your audience. If you want to dive into the nitty-gritty of this task, follow this step-by-step guide. It’s easier than it sounds!
- Log in to Your WordPress Dashboard: To get started, log into your WordPress account. You’ll find a user-friendly interface where all the magic happens.
- Navigate to Posts: On the left sidebar, click on ‘Posts’. Here, you can see all your existing posts listed out.
- Select the Post: Choose the post for which you want to turn off the header. Click on the title of the post to edit it.
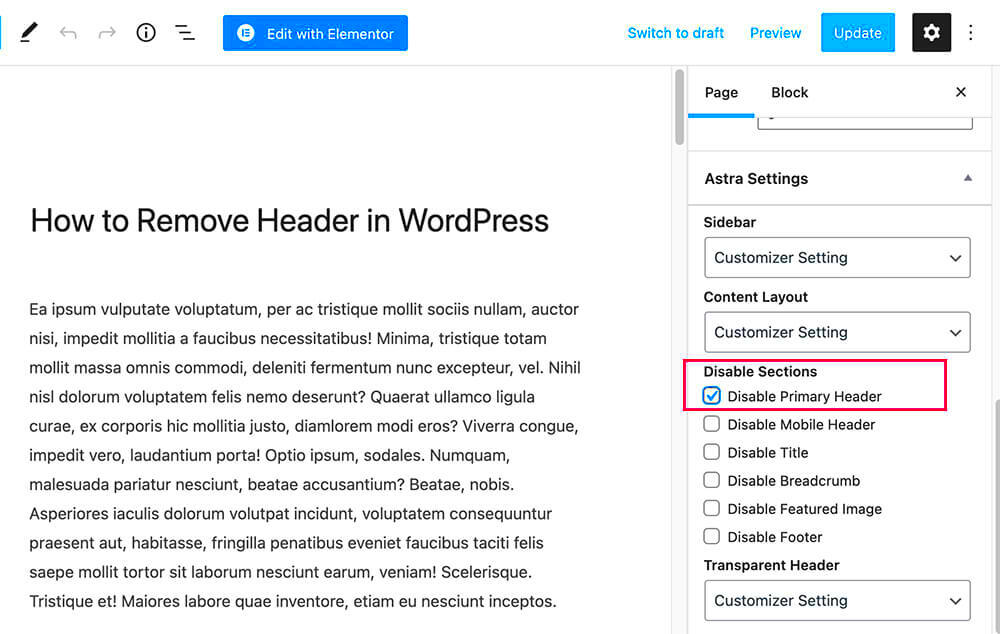
- Scroll Down to Post Settings: Once you’re in the post editor, scroll down to find the post settings. This is usually located beneath the main content area.
- Look for Header Options: Depending on the plugin you’ve installed (like the “Custom Post Type” plugin), you may see an option to disable the header for that specific post.
- Toggle Off the Header: Change the setting to “off” or “deactivate.” Typically, this will be in the form of a checkbox or a toggle switch.
- Update the Post: Once you have adjusted the settings, don’t forget to click on the ‘Update’ button on the right. This will save all your changes!
- Preview the Changes: Finally, it’s always a good idea to preview your post. Click on ‘View Post’ to confirm that the header has been successfully removed.
And that’s it! By following these steps, you’ve now learned how to turn off headers for specific posts. It’s a small but impactful tweak that can make a big difference!
6. Using the “Custom Post Type” Plugin
If you want to take your customization a step further, the “Custom Post Type” plugin is a fantastic option. This plugin allows you to create custom post types and tailor the headers or lack thereof as per your needs.
Here’s how to get started with the “Custom Post Type” plugin:
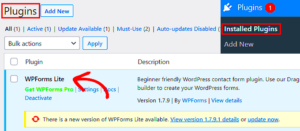
- Install the Plugin: Navigate to the Plugins section in your WordPress dashboard. Click ‘Add New’ and search for “Custom Post Type.” Install and activate it.
- Create a New Custom Post Type: Once activated, you will find a new menu item. Click on it to create a post type that suits your goals. This could be something specific like “Quotes” or “Testimonials.”
- Custom Header Settings: As you set up your custom post type, you will often come across advanced settings. Look for options related to headers. Here, you can select to disable headers for that specific post type.
- Add New Posts: Now, start creating new posts under the custom post type you’ve just created. Use the ‘Add New’ option under your newly created post type menu.
- Customize Each Post: When creating or editing a post, you can further refine your header settings just like we discussed earlier. You’ll have the option to turn off the header for each individual post as needed.
Using the “Custom Post Type” plugin not only helps you manage how your headers appear but also enriches your content strategy by providing unique post types. This approach gives you more control and can really enhance user experience on your website.
7. Using the “WP Hide Post” Plugin
If you’re looking for a straightforward way to turn off headers for specific posts in WordPress, the “WP Hide Post” plugin is a great option! This plugin is designed to give you complete control over how your posts appear on your site. With just a few clicks, you can easily hide headers or even entire posts from certain views, enhancing your site’s appearance and user experience.
Here’s a quick guide on how to use the WP Hide Post plugin:
- Install the Plugin: First, head over to your WordPress dashboard. Navigate to Plugins > Add New and search for “WP Hide Post”. Install and activate it.
- Access Post Settings: Open the post you want to modify. You’ll notice a new meta box usually located beneath the post editor.
- Select Visibility Options: In the WP Hide Post settings for that post, you can choose to hide it from categories and archives, or specifically disable the header display.
- Save Your Changes: Once you’ve made your selections, make sure to save or update the post. Voila! The header should be hidden according to your settings.
This plugin is user-friendly and highly customizable. If you want to experiment with how your posts appear without altering your theme’s code, WP Hide Post is an excellent tool to consider!
8. Additional Plugins Worth Considering
While “WP Hide Post” is a fantastic choice for hiding headers, there are several other plugins you might find useful in your quest for a cleaner, more tailored post appearance. Let’s dive into a few of them:
- Advanced Post Types Order: A versatile plugin that allows you to customize the order of posts and different post types. You can manage display settings, including headers.
- Header Footer Code Manager: If you want more flexibility with headers, this plugin lets you control header and footer scripts across different posts or pages.
- Content Control: By using this plugin, you can restrict content visibility, which includes controlling which posts show headers based on user roles and conditions.
Each of these plugins offers unique features that can enhance your site’s customization. Before jumping into installation, it’s always a good idea to read user reviews and documentation to see if these plugins align with your needs. The world of WordPress plugins is vast, and experimenting with them can lead to a more personalized and engaging blog experience!
Testing Your Changes
Once you’ve configured your WordPress installation to turn off headers for specific posts, it’s essential to test your changes to ensure everything works smoothly. Testing is a critical step; it helps you verify that your updates have taken effect without causing any unforeseen issues.
Here’s how you can effectively test your changes:
- Preview Your Posts: Start by navigating to the posts for which you’ve turned off headers. Use the preview function, which allows you to see how the post appears without making it live. This step can give you an idea of how the final layout looks.
- Clear Your Cache: If you’re using a caching plugin, be sure to clear your cache after making changes. Caching can sometimes store an older version of your posts, preventing you from viewing your most recent edits.
- Check on Different Devices: It’s important to view your posts on various devices and browsers. A header-free layout may look different on a mobile device versus a desktop browser, so make sure to test across platforms.
- Ask for Feedback: If you have friends or colleagues who can help, ask them to review the posts. Fresh eyes can catch issues you might overlook.
By following these steps, you’ll be confident that your changes are effective and visually appealing. Plus, testing helps ensure that your readers have a smooth experience when visiting your site.
Common Issues and Troubleshooting
Even the most straightforward changes can lead to unexpected issues. When turning off headers for specific posts, you might encounter a few common hiccups. Being aware of these issues can streamline your troubleshooting process and help you find solutions more quickly.
| Issue | Possible Solution |
|---|---|
| No Changes Visible | Clear your cache and refresh your browser. Check if the caching plugin needs to be deactivated temporarily. |
| Header Removed from All Posts | Double-check the settings in your chosen plugin. Ensure you’ve targeted specific posts correctly. |
| Layout Issues | Inspect your theme’s style sheets. Sometimes the removal of headers may lead to unintended layout shifts that require CSS adjustments. |
| Plugin Conflicts | Disable other plugins one by one to identify any conflicts. Once identified, consider reaching out to the plugin developer for guidance. |
By being proactive and knowing the common issues, you can quickly resolve them and maintain a smooth experience for your site visitors. Remember, troubleshooting is just part of the process, and each fix brings you one step closer to a perfectly functioning website!
Conclusion
In summary, utilizing free WordPress plugins to turn off headers for specific posts can significantly enhance your website’s appearance and user experience. By customizing post layouts, you can create a more focused and engaging presentation of your content. This flexibility is especially useful for:
- Landing Pages: Creating dedicated pages for marketing campaigns without unnecessary distractions.
- Portfolio Items: Showcasing your work in a clean, streamlined manner.
- Content Upgrades: Offering resources like eBooks or checklists in a minimalistic format.
Here are a few popular free plugins that can help you achieve this:
| Plugin Name | Features | Rating |
|---|---|---|
| Header Footer Code Manager | Manage header and footer scripts easily; selectively turn off headers. | 4.8/5 |
| WP Hide & Security Enhancer | Hide specific elements including headers; offers security features. | 4.5/5 |
| Remove Page Title | Remove titles from specific pages and posts effortlessly. | 4.6/5 |
By employing these plugins effectively, you can maintain a visually appealing and functional website that aligns with your branding and goals. Take advantage of these tools and transform the way your content is presented!


