Ever uploaded a stunning photo to your website or social media, only to find it looks blurry, cropped, or awkward? You’re not alone! Social image sizes matter a lot—they influence how your content appears across platforms and can really impact engagement. Whether you’re sharing a blog post, a product, or a personal update, using the right image size ensures your visuals look sharp, professional, and inviting. In this guide, we’ll explore why social image sizes matter and give you the key dimensions you need to make your WordPress site and Elementor pages look their best everywhere.
Recommended Social Image Sizes for WordPress Websites
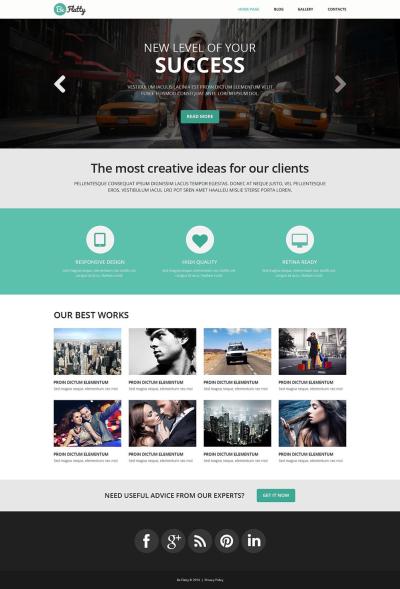
Getting your images just right on your WordPress site is crucial for a polished, professional look. While different social platforms have their own preferred sizes, there are some general guidelines you can follow to ensure your images are optimized for sharing and display. Here’s a breakdown of the most common image types and their recommended dimensions:
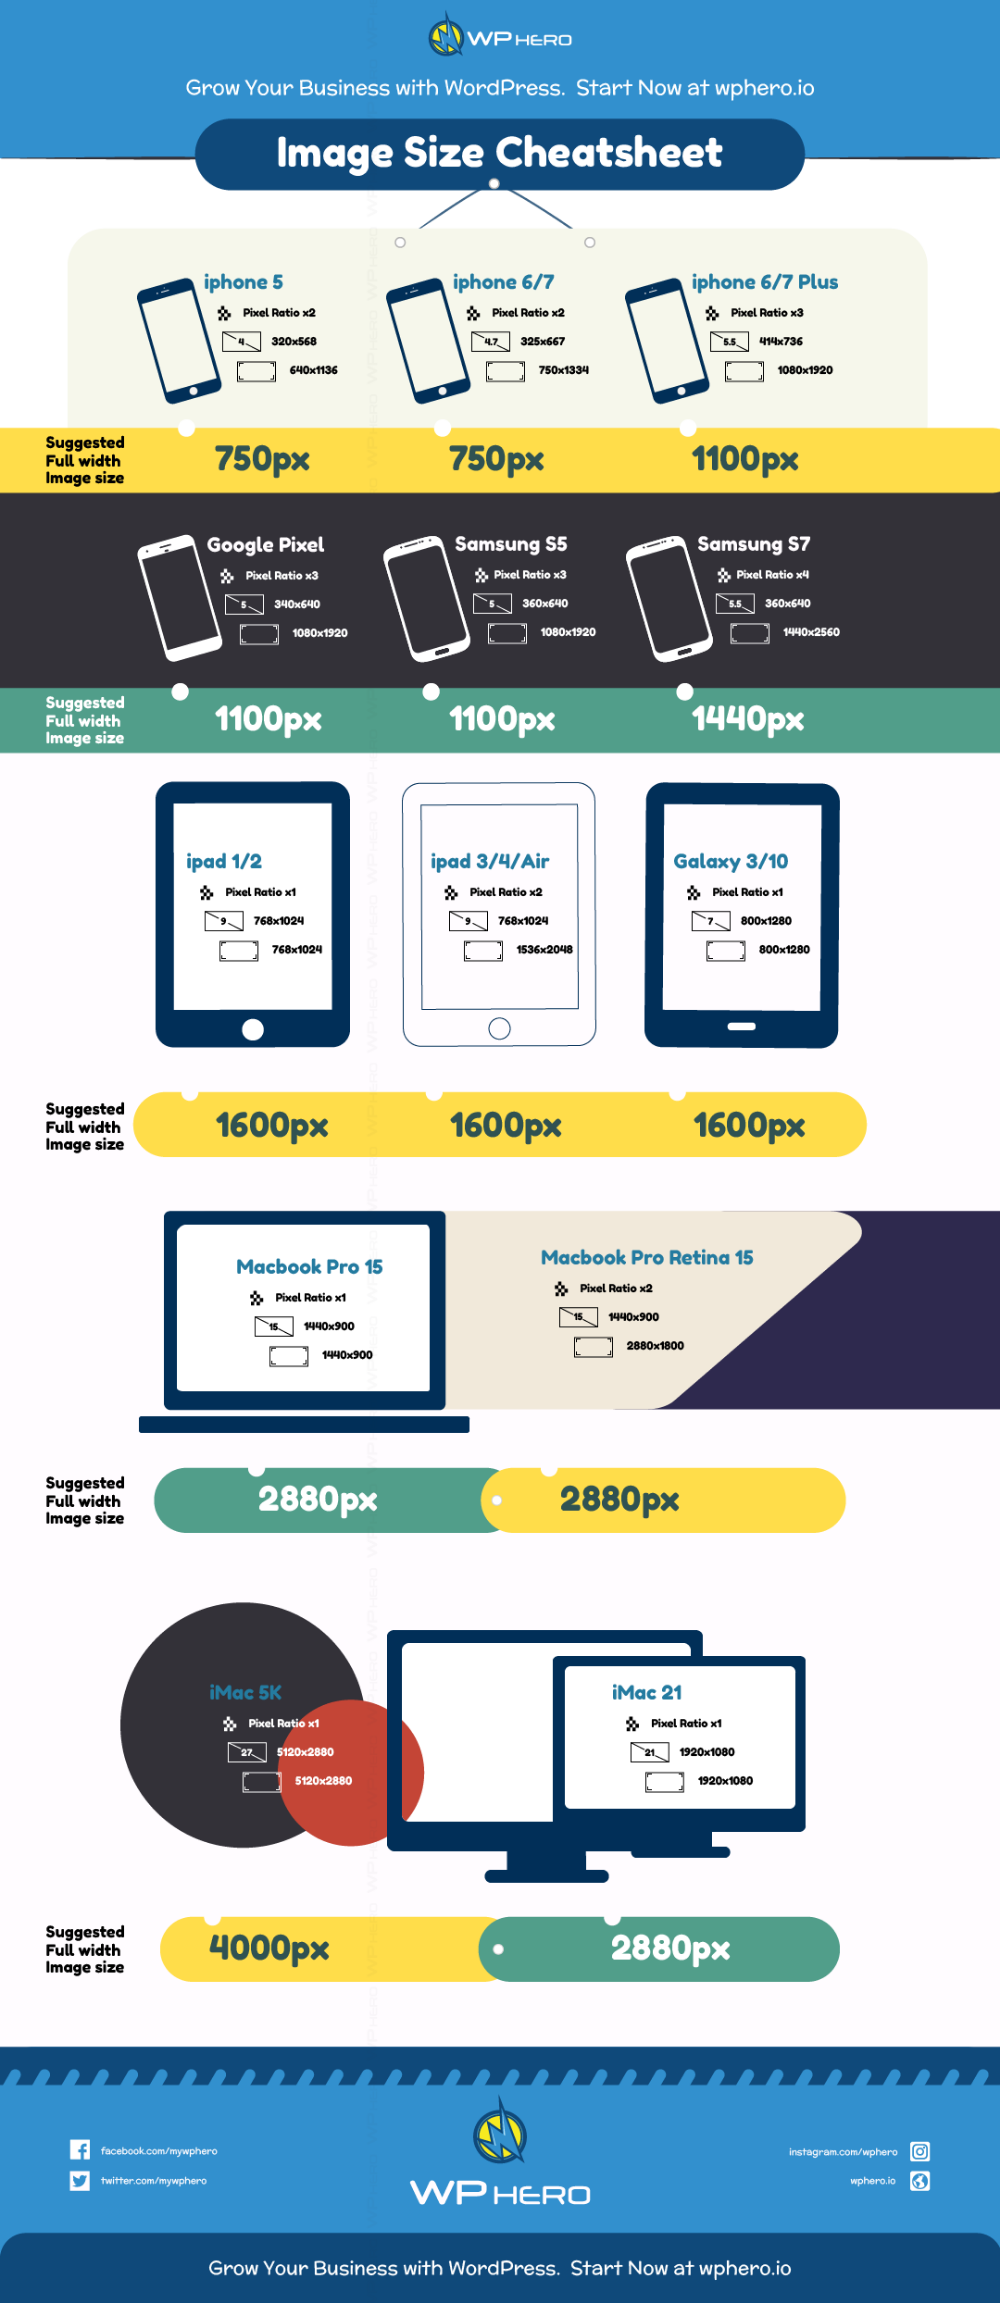
| Image Type | Recommended Size | Notes |
|---|---|---|
| Homepage Banner / Hero Image | 1200 x 600 pixels | Use wide images to make a strong visual impact at the top of your site. |
| Featured Images / Post Thumbnails | 1200 x 628 pixels | This size works well for sharing on social media and fits most themes. |
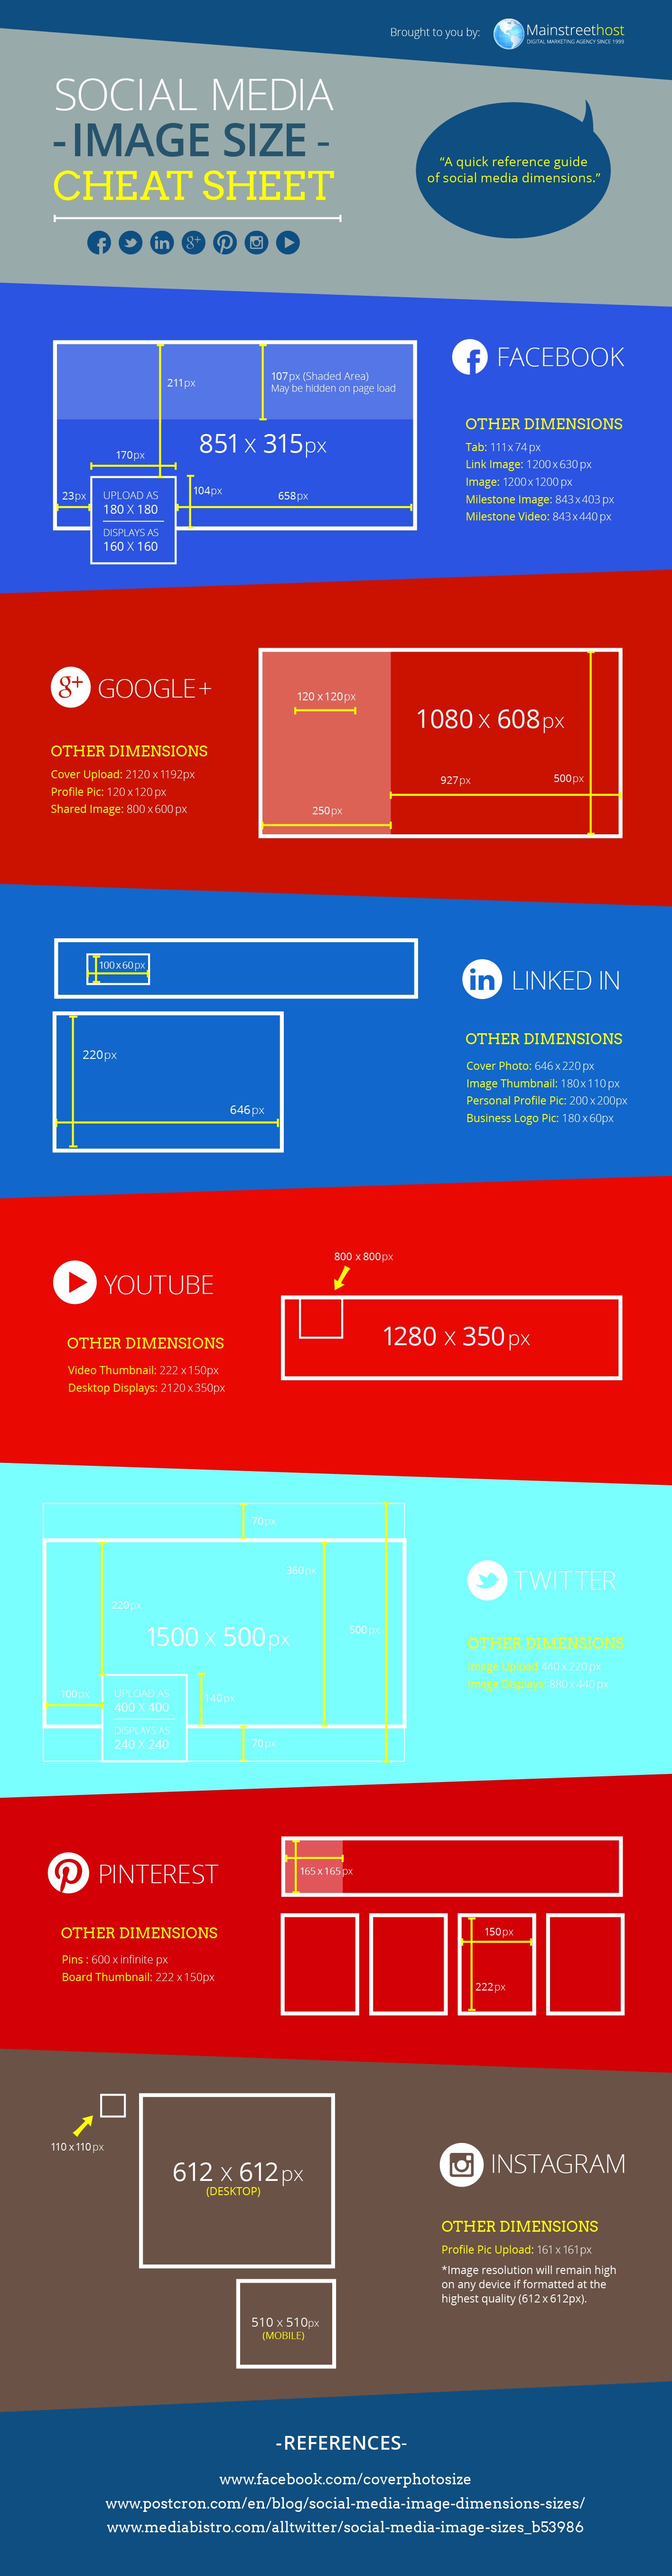
| Social Sharing Images | 1200 x 630 pixels | Optimal for Facebook and Twitter preview images to appear crisp and clear. |
| Instagram Posts | 1080 x 1080 pixels | Square images work well; keep your focal point centered. |
| Facebook Cover Photo | 820 x 312 pixels | Ensure important info isn’t near the edges, as they may be cropped. |
| Twitter Header Image | 1500 x 500 pixels | Make sure text or logos are within the safe zone to avoid cropping. |
| Pinterest Pin | 735 x 1102 pixels | Vertical images perform better; keep your main content centered. |
Remember, these sizes are guidelines—it’s always a good idea to check the latest platform recommendations since social media sites frequently update their layouts. When uploading images to your WordPress site or designing with Elementor, aim for these dimensions to ensure your visuals look sharp, load quickly, and display perfectly across all devices.
3. Optimal Image Dimensions for Elementor Pages
When you’re designing your website with Elementor, one of the biggest factors that influence how your pages look and load is the size of your images. Using images that are too small can make your site look pixelated or blurry, while oversized images can slow down your page load times and negatively impact user experience. So, what are the optimal image dimensions for Elementor pages?
While there’s no one-size-fits-all answer because it depends on the specific section or widget you’re working with, there are some general guidelines to follow to ensure your images look sharp and load efficiently:
Hero Images & Full-Width Banners
- Recommended Size: 1920 pixels wide by 1080 pixels high (or similar aspect ratios like 16:9)
- Why: This size ensures your hero images look crisp on large screens and are optimized for full-width display without stretching or pixelation.
Standard Content Images & Thumbnails
- Recommended Size: 800–1200 pixels wide
- Why: These sizes are perfect for inline images within your content or smaller banners, balancing quality and load speed.
Background Images
- Recommended Size: 1920 pixels wide, height varies based on design but typically around 1080 pixels
- Why: To ensure backgrounds fill the space nicely on large screens without repeating or stretching.
Widgets & Specific Elements
- Check the dimensions specified by Elementor for each widget, but generally aim for 600–800 pixels wide for smaller components.
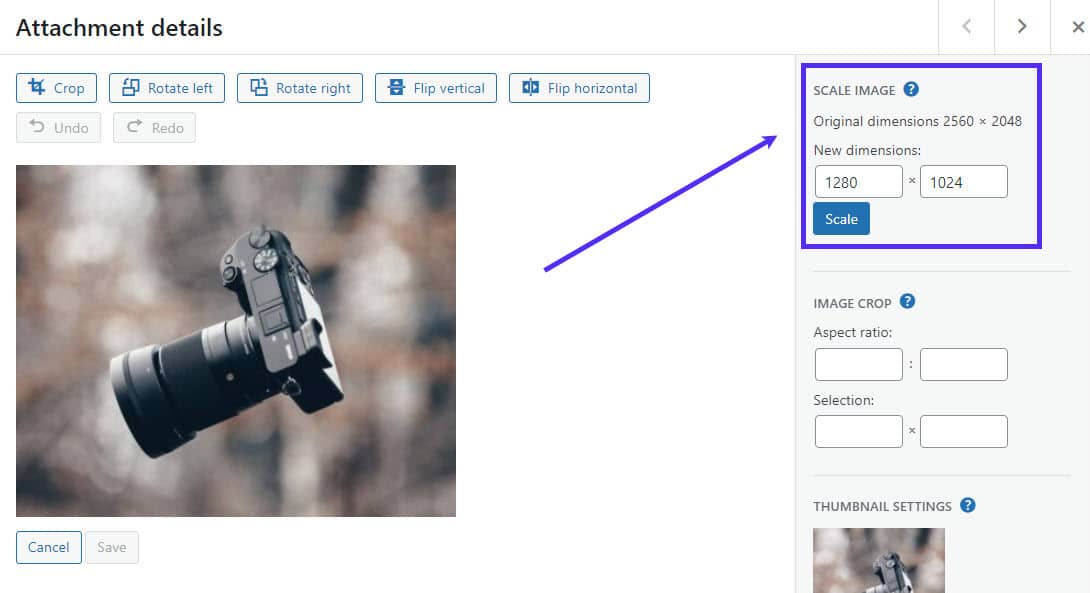
Remember, the goal is to find a balance between image quality and page load speed. Using images that are too large can make your site sluggish, while too small images might look unprofessional. Also, consider using tools like Photoshop, TinyPNG, or ImageOptim to compress your images without losing quality.
4. How to Adjust and Optimize Social Images for Better Engagement
Social media is often the first point of contact your audience has with your content, so making sure your images are optimized for sharing is crucial. A well-optimized social image can increase click-through rates, engagement, and even shares. Here’s how you can adjust and optimize your images for social media:
1. Use the Correct Dimensions
Each social platform has its preferred image sizes:
| Platform | Optimal Image Size |
|---|---|
| 1200 x 630 pixels | |
| 1024 x 512 pixels | |
| 1200 x 627 pixels | |
| 1000 x 1500 pixels | |
| 1080 x 1080 pixels (for posts) |
2. Use High-Quality, Eye-Catching Images
Choose images that are clear, vibrant, and relevant to your content. Avoid pixelated or blurry images, as they can diminish your credibility.
3. Add Text Overlays and Branding
If appropriate, overlay your images with concise text, your logo, or branding elements to make them more recognizable and engaging. Use bold fonts and contrasting colors to ensure readability across devices.
4. Optimize File Size
Large images can slow down your page and social sharing. Compress your images using tools like TinyPNG, ImageOptim, or Adobe Photoshop’s “Save for Web” feature to reduce file size without sacrificing quality.
5. Include Alt Text and Descriptive Titles
Adding descriptive alt text helps with accessibility and improves SEO. When your image is shared, social platforms often pull metadata to display alongside the image — make sure your titles and descriptions are compelling and relevant.
6. Test and Preview
Before publishing, preview how your images will appear on different social platforms. Many tools and plugins, like Open Graph Debugger or Twitter Card Validator, can help you see how your images will display when shared.
By paying attention to these details, you’ll boost your social media engagement and ensure your images make a strong visual impact. Remember, social images are your chance to attract attention and communicate your message quickly — so take the time to get them just right!
5. Tools and Resources for Creating Perfect Social Images
Creating eye-catching social images that look great across all platforms can feel overwhelming, but luckily, there are plenty of tools out there to make the process easier and more fun. Whether you’re a beginner or a seasoned designer, these resources can help you craft images that not only fit the size requirements but also grab attention and boost engagement.
Design Tools:
- Canva: A user-friendly online design platform with tons of customizable templates tailored for social media. Just pick a template, swap in your images and text, and you’re good to go! Canva also offers size presets for Facebook, Instagram, Twitter, LinkedIn, and more.
- Adobe Spark: Similar to Canva, Adobe Spark helps you create stunning visuals quickly. It’s perfect for making branded images with minimal effort.
- Figma: A powerful collaborative design tool that’s great if you want more control and flexibility, especially for teams.
Photo Editing & Optimization:
- Pixlr: An easy-to-use online photo editor to enhance your images, add overlays, or adjust colors before uploading.
- GIMP: A free, open-source alternative to Photoshop for more advanced editing needs.
Stock Image Resources:
- Unsplash: Free high-resolution photos that can be used commercially. Perfect for adding authentic visuals to your social images.
- Pexels: Another great resource for free stock photos and videos.
- Canva Pro & Adobe Stock: Paid options offering a vast library of professional images and illustrations.
Additional Tips:
- Use tools like ImageOptim or Squoosh for compressing images without losing quality, ensuring your social images load quickly.
- Leverage online tutorials and templates—many are free or affordable—that help you adhere to current best practices.
By combining these tools, you can streamline your workflow, ensure your images are optimized for each platform, and keep your social media feeds looking fresh and professional. Remember, the key is consistency—use your brand colors, fonts, and style across all your visuals to create a cohesive online presence.
6. Conclusion and Best Practices for Social Image Optimization
Optimizing your social images isn’t just about meeting size requirements—it’s about creating visuals that resonate, engage, and drive action. With the right tools, understanding platform-specific needs, and a few best practices, you can elevate your social media game to new heights.
Here are some essential best practices to keep in mind:
- Always check platform-specific dimensions: Sizes can vary, so refer back to updated guidelines regularly. Use the tools mentioned earlier to create images that fit perfectly.
- Maintain brand consistency: Use your brand colors, logo, and fonts consistently across all images to reinforce your identity.
- Prioritize quality over quantity: High-quality, professional-looking images tend to perform better than cluttered or pixelated visuals.
- Keep it simple: Avoid overcrowding your images with too much text or graphics. Clear, concise visuals work best.
- Optimize for fast loading: Compress images to reduce load times, especially for mobile users. Slow-loading images can hurt engagement and SEO.
- Use engaging visuals: Incorporate vibrant colors, interesting compositions, and relevant imagery to catch users’ eyes as they scroll.
- Test and analyze: Experiment with different image styles and monitor performance metrics to see what resonates with your audience.
Remember, social media is a visual-first world. When you put effort into creating optimized, attractive images, you’re more likely to increase shares, likes, and overall engagement. Keep learning, stay updated on platform changes, and don’t be afraid to get creative. Your audience will thank you!