Ever wondered how some websites seem to come alive as you scroll through them? Those eye-catching animations, images that change when hovered over, or dynamic info boxes—these are all thanks to scroll-over interactive elements. In WordPress, adding these effects is easier than you might think, even if you’re not a coding expert. They make your website more engaging, fun, and memorable for visitors. Whether you’re showcasing a portfolio, highlighting features, or just want to add some flair, scroll-over effects can elevate your site to the next level. Let’s dive into what they are and how to create them!
Benefits of Using Scroll-Over Effects for Website Engagement
In today’s competitive online world, capturing your visitors’ attention is key. Scroll-over effects are a fantastic way to do just that, offering several benefits:
- Enhanced Visual Appeal: They make your website look modern and polished, giving visitors a smooth, interactive experience.
- Increased User Interaction: By encouraging users to hover or scroll, you keep them engaged longer, which can lead to better conversion rates.
- Clearer Content Presentation: Instead of overwhelming visitors with all information at once, scroll-over effects can reveal details only when needed—clean and user-friendly.
- Showcase Creativity and Brand Personality: Unique effects can reflect your brand’s style, making your site stand out from the crowd.
- Better Storytelling: Use interactive elements to guide visitors through your content, creating a more compelling narrative.
Plus, with the right implementation, these effects can improve your site’s usability and accessibility, making it easier for visitors to find and interact with key information. Overall, scroll-over effects aren’t just about looking good—they’re about creating a dynamic, engaging experience that keeps visitors coming back.
3. Step-by-Step Guide to Adding Scroll-Over Interactions in WordPress
So, you’re excited to make your website more engaging with scroll-over effects, but not sure where to start? Don’t worry! I’ll walk you through a simple, step-by-step process to add these interactive elements to your WordPress site. Whether you’re a beginner or have some experience, this guide is designed to be straightforward and easy to follow.
Step 1: Plan Your Scroll-Over Effect
Before diving into the technical stuff, take a moment to brainstorm what kind of scroll-over interactions you want. Do you want images to change when hovered over? Text to appear as you scroll? Or maybe animated buttons? Having a clear idea helps you choose the right tools and design accordingly.
Step 2: Choose Your Content and Layout
Decide which sections or elements will feature the scroll-over effects. You might want to add effects to images in a gallery, headings, or call-to-action buttons. Sketching out a rough layout or noting down where you want these interactions will make the process smoother.
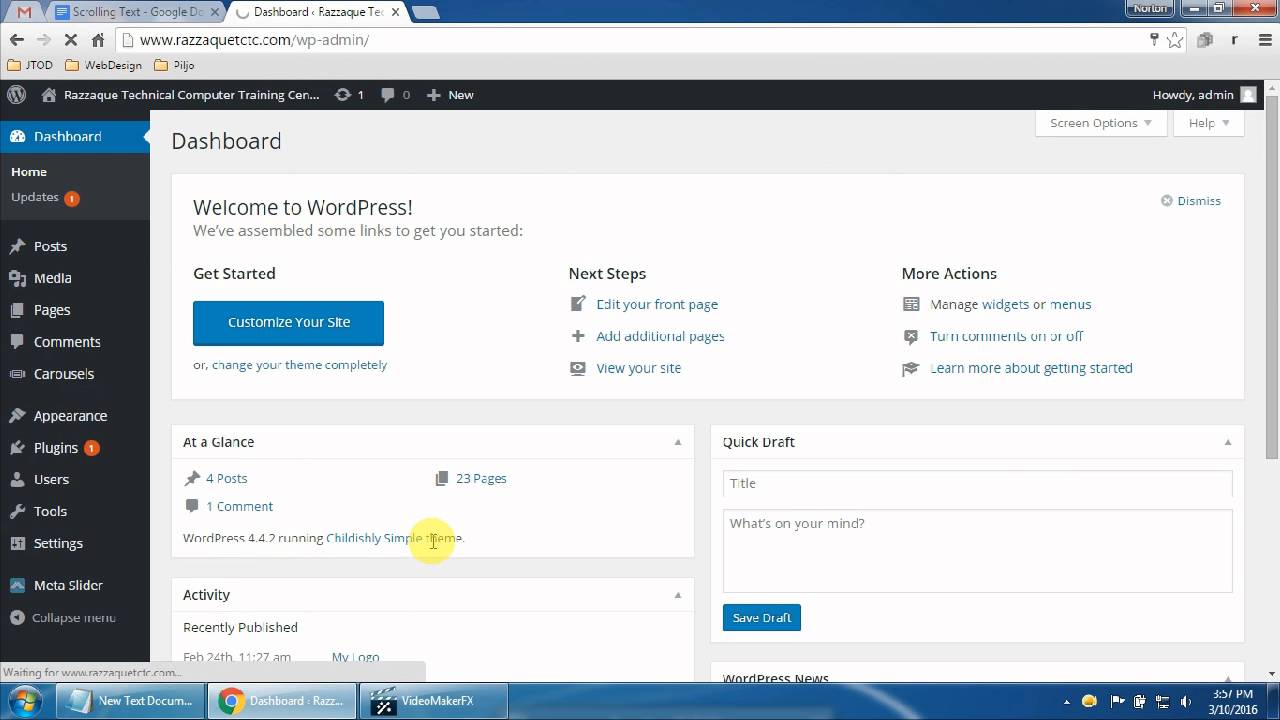
Step 3: Install a Suitable Plugin
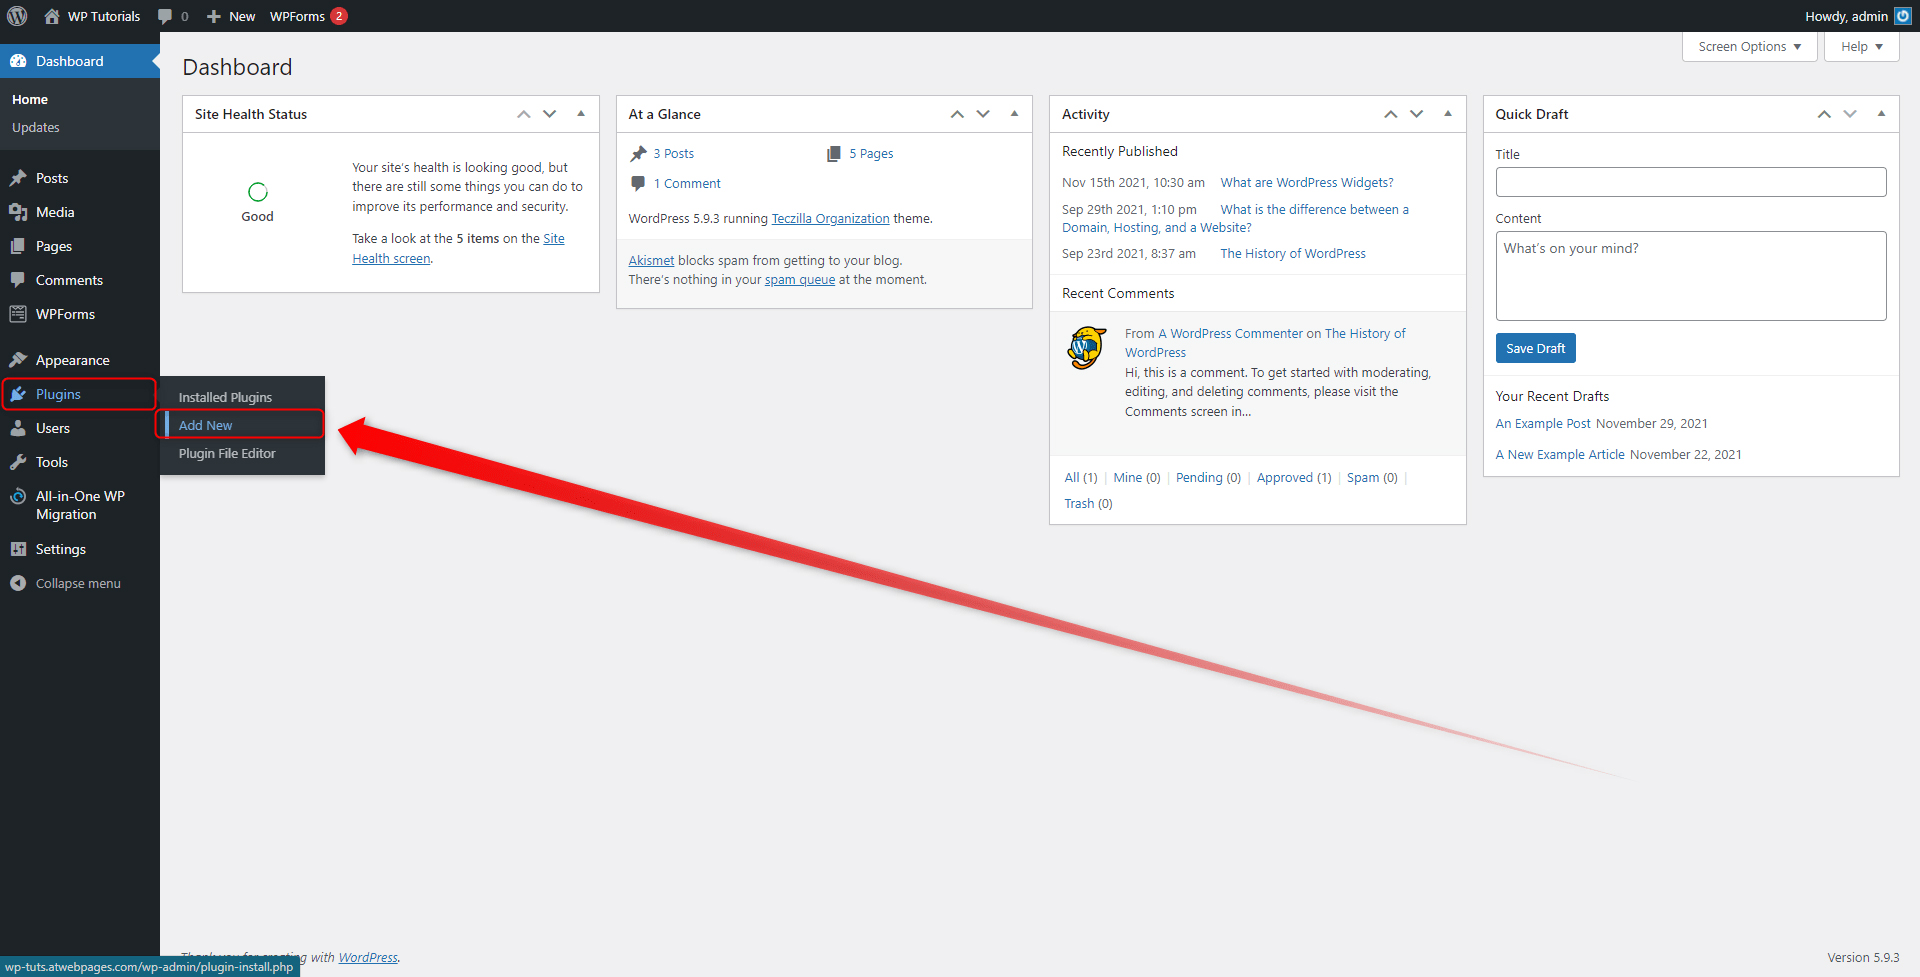
Most scroll-over effects in WordPress are achieved through plugins. Head over to your WordPress dashboard, click on Plugins > Add New, and search for a plugin like Scroll Magic, Elementor (if you’re using the pro version), or a dedicated scroll effects plugin like WP Scroll Effects. Once you find one that suits your needs, click Install Now and then Activate.
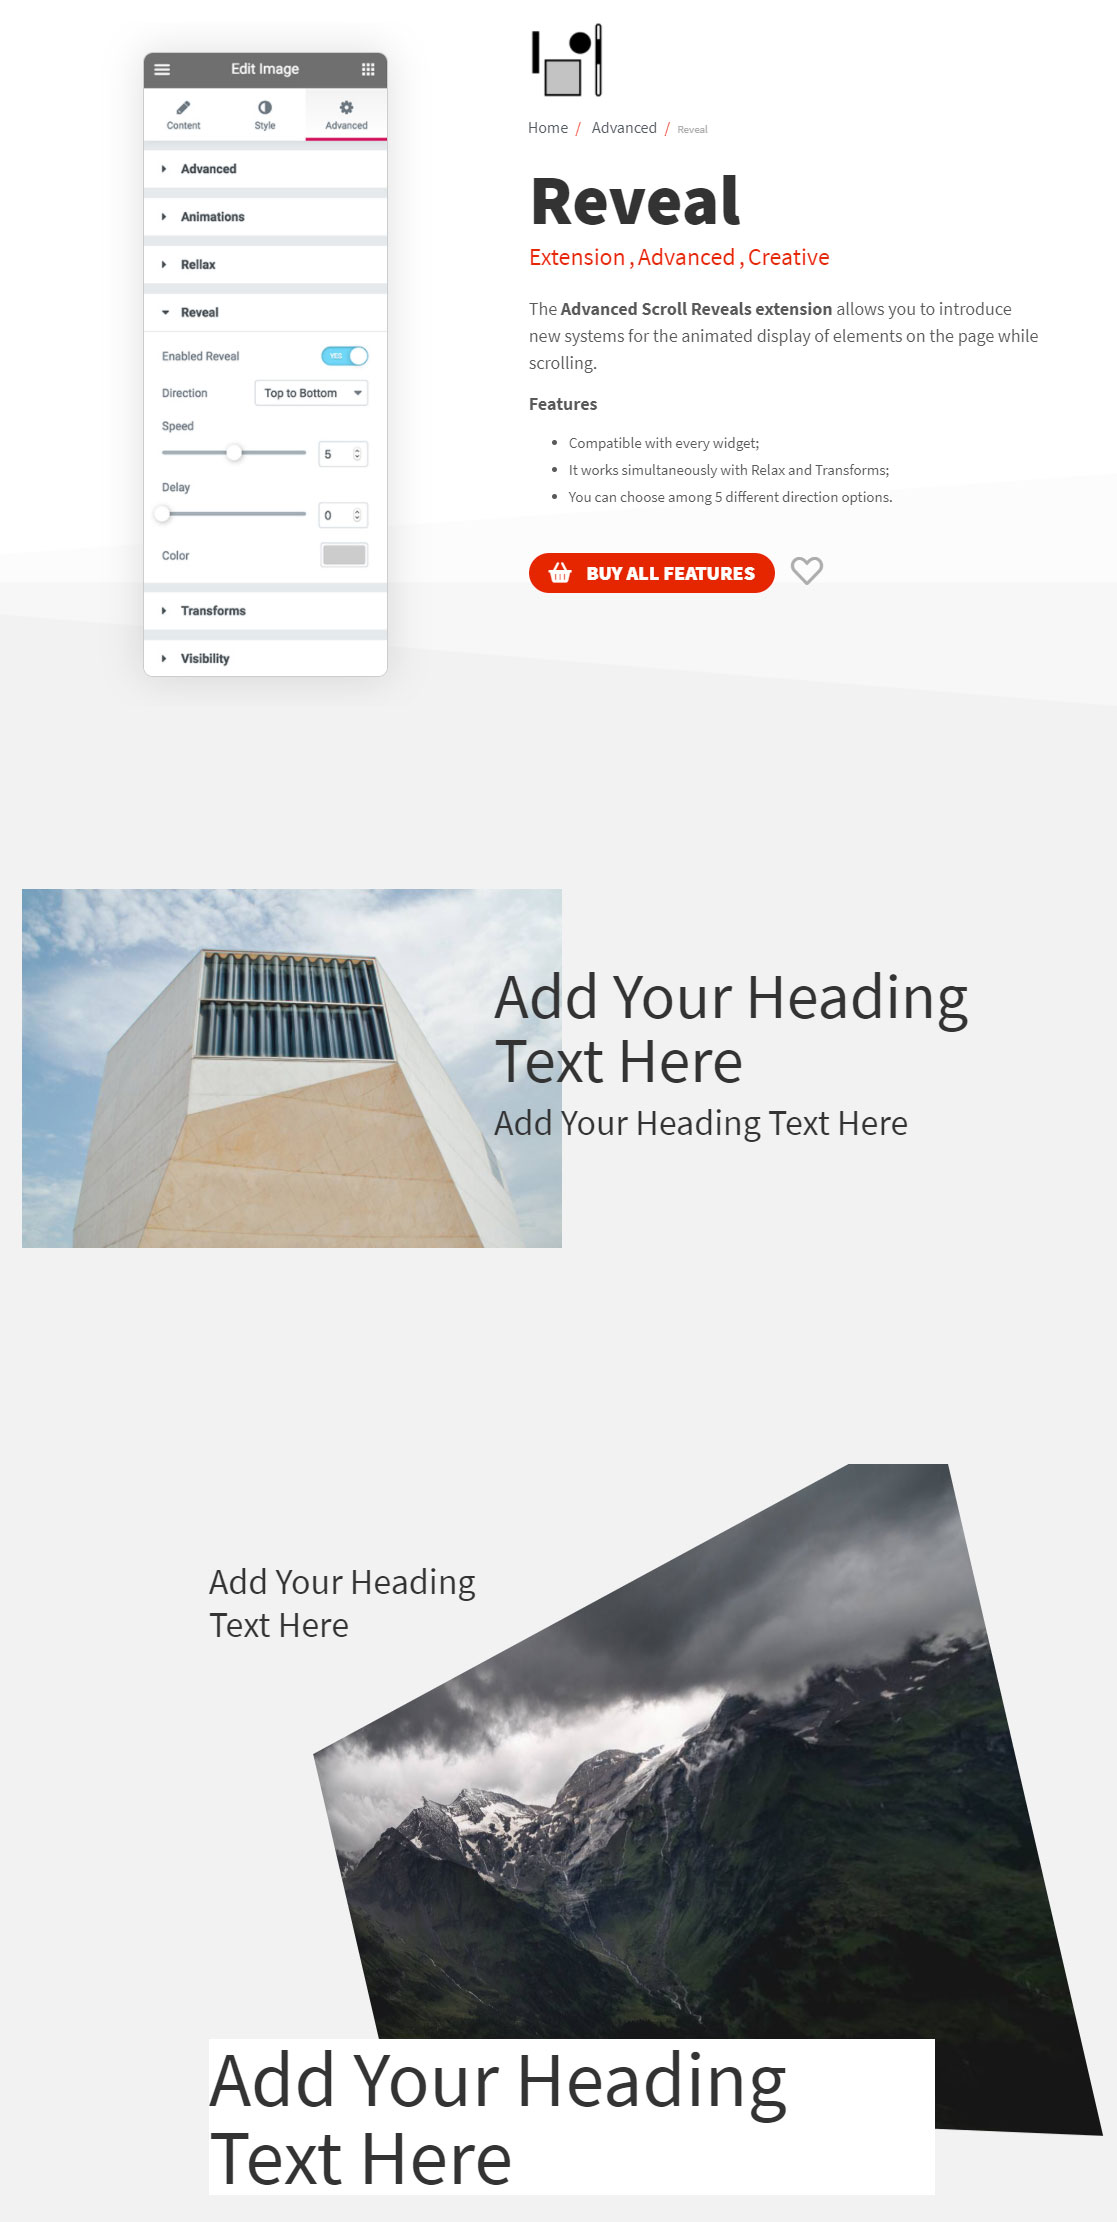
Step 4: Configure the Plugin Settings
Every plugin has its own interface, but generally, you’ll want to:
- Navigate to the plugin’s settings page in your dashboard.
- Choose which elements you want to animate or add scroll effects to.
- Set the trigger points — for example, when the element comes into view or reaches a certain scroll position.
- Customize the animation styles, such as fade-in, slide, or zoom.
Take your time to experiment with different options. Many plugins provide live previews, so you can see how your effects will look before publishing.
Step 5: Add Effects to Your Content
If your plugin requires you to add specific classes or shortcodes, do that now. For example, you might wrap an image or text with a shortcode or assign a CSS class that the plugin recognizes. This step often involves editing your page or post content but is usually straightforward with the plugin’s instructions.
Step 6: Preview and Tweak
Always preview your page to see the scroll-over effects in action. Adjust the animation speed, trigger points, or styles as needed. It’s a good idea to test on different devices to ensure your interactions look great everywhere.
Step 7: Publish and Monitor
Once satisfied, publish your changes! Keep an eye on your site’s performance and user engagement. If you notice any issues or want to try new effects, revisit your plugin settings and experiment further.
Adding scroll-over interactions might seem complex at first, but with a step-by-step approach, it becomes a fun way to spice up your website and keep visitors engaged. Just remember: start simple, test often, and enjoy the creative process!
4. Choosing the Right Plugins and Tools for Scroll-Over Effects
Now that you know the basics of adding scroll-over effects, it’s essential to pick the right tools to make your life easier and your website stunning. There are plenty of plugins and tools out there, but not all are created equal. Let’s talk about what to look for and some of the best options to consider.
What to Look for in a Scroll-Over Plugin
- Ease of Use: A beginner-friendly interface with clear instructions makes setup less stressful.
- Compatibility: Ensure the plugin works well with your current WordPress theme and other plugins.
- Customization Options: Look for plugins that allow you to tweak animations, trigger points, and styles to match your design.
- Performance: Opt for lightweight plugins that won’t slow down your website.
- Support & Updates: Choose plugins that are regularly updated and supported by their developers for security and compatibility.
Popular Plugins and Tools for Scroll-Over Effects
| Plugin Name | Features | Best For | Link |
|---|---|---|---|
| Elementor Pro | Advanced scroll effects, animations, and visual builder | Users who want all-in-one page building with effects | Official Website |
| Scroll Magic | Robust JavaScript library for scroll animations, highly customizable | Developers or tech-savvy users wanting custom effects | Official Website |
| WP Scroll Effects | Multiple predefined scroll effects, simple interface | Beginners looking for quick setup | WordPress Plugin Repository |
| CSS & JavaScript Libraries (e.g., AOS, WOW.js) | Lightweight, customizable animations via code | Developers comfortable with code | AOS, WOW.js |
Consider Your Website’s Needs
Think about what kind of effects you want. For simple hover effects or fade-ins, a straightforward plugin like WP Scroll Effects might be enough. If you’re after more complex, scroll-triggered animations, then a powerful tool like Scroll Magic or Elementor Pro could be better.
Test Before Committing
Always test a plugin on a staging site or in a controlled environment before deploying it live. Check for any conflicts, performance issues, or bugs. Read reviews and look for recent updates to ensure reliability.
Conclusion
Choosing the right plugin or tool is crucial for creating engaging scroll-over interactions that enhance your user experience without bogging down your site. Focus on ease of use, compatibility, and customization options, and you’ll be well on your way to building a dynamic, interactive website that visitors love to explore!
5. Design Tips for Effective and Attractive Scroll-Over Elements
Creating scroll-over elements that are both eye-catching and user-friendly is an art. When done right, they can significantly enhance your website’s interactivity and keep visitors engaged. Here are some practical design tips to help you craft scroll-over effects that look great and work seamlessly:
Keep It Simple
Less is often more when it comes to scroll-over designs. Avoid cluttering your elements with too much information or complex animations. A clean, minimal look not only looks modern but also ensures users aren’t overwhelmed. For example, a simple color change, subtle shadow, or a slight zoom effect can be very effective without being distracting.
Use Consistent Styles
Consistency is key to a professional-looking site. Use a unified color palette, font style, and animation style for all your scroll-over elements. This helps users intuitively understand what’s clickable or interactive, creating a cohesive experience across your website.
Choose Complementary Colors and Effects
Color plays a big role in attracting attention. When designing scroll-over effects, select hover colors that complement your overall color scheme. If your site has a calm, neutral palette, a gentle highlight or a soft glow can work well. For a more energetic vibe, bold color changes or animated effects can be appealing.
Prioritize Readability and Accessibility
Make sure your scroll-over text or details are easy to read. Use sufficient contrast between text and background, and avoid tiny fonts. Additionally, consider users with visual impairments—use accessible effects like high contrast or ARIA labels to make interactions inclusive.
Incorporate Subtle Animations
Animations add interactivity, but they shouldn’t be overwhelming. Gentle fades, slides, or scaling effects can make your scroll-over elements feel smooth and polished. Keep animations brief and natural to maintain a seamless experience.
Test Responsiveness on Different Devices
What looks great on a desktop might not work well on a mobile device. Adjust your scroll-over effects to be touch-friendly and ensure they don’t interfere with scrolling. Use media queries and responsive design principles to adapt effects for various screen sizes.
6. Testing and Optimizing Scroll-Over Interactions for Better User Experience
Once you’ve designed your scroll-over elements, the next crucial step is testing. You want to ensure these interactions work perfectly across different browsers, devices, and user scenarios. Here’s how to effectively test and optimize your scroll-over effects for a top-notch user experience:
Test Across Multiple Browsers and Devices
Browsers can interpret CSS and JavaScript differently, so it’s essential to check your effects in Chrome, Firefox, Safari, Edge, and others. Don’t forget to test on various devices—smartphones, tablets, desktops—to see how your scroll-over interactions behave. Tools like BrowserStack or Sauce Labs can help simulate different environments if you don’t have all devices handy.
Gather User Feedback
Real users can provide invaluable insights. Consider launching a beta version or conducting usability tests with friends, colleagues, or a small segment of your audience. Ask whether the scroll-over effects are intuitive, attractive, and add value to their browsing experience. Their feedback can highlight issues or suggest improvements you might not have noticed.
Monitor Performance and Load Times
Heavy animations or large images can slow down your website, leading to frustration. Use tools like Google PageSpeed Insights or GTmetrix to analyze your site’s performance. Optimize images, minify CSS and JavaScript, and limit the complexity of animations to ensure smooth interactions without sacrificing speed.
Use Analytics to Track Engagement
Integrate analytics tools like Google Analytics or Hotjar to monitor how users interact with your scroll-over elements. Are they clicking or hovering as expected? Which effects get the most engagement? This data helps you identify what works and what might need tweaking.
Iterate and Refine
Design is an ongoing process. Based on your testing and feedback, refine your scroll-over effects by adjusting timings, colors, or animations. Small tweaks can make a big difference in usability and aesthetics. Regularly revisit your interactions to keep them fresh and effective as your site evolves.
By carefully designing and thoroughly testing your scroll-over elements, you’ll create a dynamic user experience that feels intuitive and engaging. Remember, the goal is to make interactions seamless and enjoyable—so don’t be afraid to experiment and fine-tune until everything feels just right!
7. Common Challenges and How to Overcome Them
As exciting as creating scroll-over interactive elements can be, it’s not without its hurdles. You might run into some common challenges along the way, but don’t worry — with a little troubleshooting, you’ll be able to smooth out those bumps and achieve the stunning effects you’re after.
Challenge 1: Performance Issues
One of the biggest concerns with interactive elements is site performance. If your scroll-over effects are too heavy or poorly optimized, they can slow down your website, leading to a frustrating user experience. To avoid this, keep these tips in mind:
- Use optimized images and avoid large, uncompressed files.
- Limit the use of complex animations or scripts that can bog down page load times.
- Leverage lazy loading for images and assets that aren’t immediately visible.
Challenge 2: Compatibility Across Browsers and Devices
Your beautiful scroll-over effects might look fantastic on your desktop but could behave differently on mobile devices or older browsers. To minimize this issue:
- Test your site on multiple browsers (Chrome, Firefox, Safari, Edge) and devices.
- Use responsive design principles to ensure elements adapt well to various screen sizes.
- Consider fallback options, like static images or simplified effects, for browsers that don’t support certain CSS or JavaScript features.
Challenge 3: Managing Overlapping Effects
Sometimes, multiple scroll-over elements may overlap or interfere with each other, creating a cluttered or confusing experience. To manage this:
- Plan your layout carefully, keeping a clear hierarchy of interactive zones.
- Use z-index thoughtfully to control stacking order.
- Test interactions thoroughly to ensure they don’t conflict or cause unintended behavior.
Challenge 4: Maintaining Accessibility
Remember, not all users navigate with a mouse or keyboard. Some may rely on screen readers or other assistive technologies. To make sure your scroll-over effects are accessible:
- Provide alternative content or descriptions for visual effects.
- Ensure interactive elements are focusable and usable via keyboard navigation.
- Use sufficient color contrasts and avoid relying solely on color cues.
By being aware of these common challenges and applying best practices, you’ll be well on your way to creating engaging, smooth, and accessible scroll-over interactions that enhance your site’s user experience.
8. Conclusion and Final Tips for Enhancing Your WordPress Site with Scroll-Over Effects
Congratulations! You now have a solid understanding of how to add dynamic scroll-over interactive elements to your WordPress site. These effects can truly transform your website from static to engaging, encouraging visitors to explore more and stay longer.
To wrap things up, here are some final tips to help you make the most of scroll-over effects:
- Keep it Balanced: Use scroll-over effects sparingly. Too many can overwhelm visitors and dilute the impact. Focus on key areas where interaction adds value.
- Prioritize User Experience: Ensure that effects are smooth and don’t hinder navigation. Always test on different devices and browsers.
- Optimize Performance: Compress images, minify scripts, and leverage caching to maintain speedy load times.
- Maintain Accessibility: Make sure all users can enjoy your site’s interactive features, regardless of their abilities or devices.
- Keep Learning: The web is always evolving. Stay updated with new techniques, plugins, and best practices to keep your site fresh and engaging.
Remember, creating engaging scroll-over interactions isn’t just about visual flair — it’s about enhancing user engagement and delivering a memorable experience. With patience and practice, you’ll be crafting a website that not only looks great but also provides a seamless, interactive journey for your visitors. Happy designing!