If you’re running a website on WordPress.com, making it easy for visitors to reach out to you is essential. One of the simplest and most effective ways to do this is by adding a contact button. It’s a quick way to boost engagement, answer questions, or even generate leads. Whether you’re a blogger, small business owner, or portfolio creator, a contact button can be a game-changer. In this guide, we’ll walk you through how to add a contact button step-by-step, so your visitors always have a way to connect with you effortlessly.
Why a Contact Button Is Important for Your Website
Having a contact button on your website isn’t just about making your site look complete — it’s about building trust and encouraging interaction. Here’s why it’s so important:
- Enhances Accessibility: Visitors don’t want to hunt around for your contact info. A visible button makes it easy for them to get in touch instantly.
- Boosts Engagement: When visitors see a clear way to contact you, they’re more likely to reach out, ask questions, or provide feedback.
- Increases Credibility: A professional-looking contact button shows that you’re approachable and open for communication, which can boost your credibility.
- Supports Business Growth: Whether you’re selling products, offering services, or just sharing ideas, a contact button can lead to new opportunities and collaborations.
- Improves Customer Service: Quick access to contact info can help resolve issues faster, leading to happier visitors and customers.
Plus, a well-placed contact button simplifies the process for visitors to reach out, which can be crucial for converting casual visitors into loyal followers or customers. It’s a simple addition that can make a big difference in how your website interacts with its audience.
3. Step 1: Log Into Your WordPress.com Account
Alright, let’s start at the very beginning. To add that contact button, the first thing you need to do is log into your WordPress.com account. It’s pretty straightforward, but make sure you’re using the right credentials so you can access your site without any hiccups.
Here’s what you should do:
- Open your preferred web browser and go to wordpress.com.
- Click on the “Log In” button located at the top right corner of the page.
- Enter your username or email address associated with your WordPress account.
- Type in your password carefully—remember, passwords are case-sensitive!
- Hit the “Log In” button.
If you’ve enabled two-factor authentication or have a security plugin, you might need to verify your identity with a code sent to your email or phone. Once you’re logged in, you’ll be taken to your WordPress.com dashboard, which is like your control center for managing your website.
Pro tip: If you’re planning to add the contact button frequently, consider bookmarking your dashboard for quick access next time. Also, ensure you’re logged in with the correct account that has editing permissions for your site.
4. Step 2: Choose the Page or Post Where You Want the Contact Button
Now that you’re logged in, it’s time to decide where you want that shiny new contact button to appear. Whether it’s your homepage, a contact page, or a specific post, choosing the right spot makes all the difference in encouraging visitors to reach out.
Here’s how to select your page or post:
- From your WordPress.com dashboard, navigate to the sidebar menu and click on “Site”.
- Under “Site,” select “Pages” to see a list of existing pages, or click on “Posts” if you want to add the button within a blog post.
- Browse through your list and find the page or post where you want to add the contact button. If you haven’t created the page yet, click “Add New” to create one from scratch.
- Click on the title of the page or post to open it in the editor. This is where the magic happens!
Tip: Consider the user experience when choosing the location. For example, if visitors often land on your homepage, placing the contact button there can lead to more inquiries. If you’re writing a detailed blog post, embedding the button within the content or at the end can also work well.
Once you’ve selected and opened your page or post, you’re all set to move on to the next step: actually adding the contact button. But first, take a moment to preview your page to see how it looks so far—this helps you plan exactly where the button will go for maximum impact.
5. Step 3: Use the Block Editor to Insert a Button Block
Now that you’ve got your page or post open in the WordPress.com Block Editor, it’s time to add that contact button. Think of the Block Editor as your creative workspace—it’s super flexible and easy to use once you get the hang of it. To insert a button, you’ll want to locate the spot where you want it to appear. Here’s how:
- Click on the plus (+) sign that appears when you hover between blocks or at the top of your editor. This opens the block inserter menu.
- In the search bar, type “Button”. You should see the Button block pop up. If you don’t see it immediately, scroll through the options or browse the “Common Blocks” section.
- Click on the Button block. It will instantly add a placeholder button into your content area.
Once inserted, you’ll see a simple button with default text like “Click me.” Don’t worry—this is just a placeholder. Now, you can move it around, resize it, and most importantly, customize it to fit your website’s style and purpose.
Pro tip: You can add multiple buttons if you want to create a contact menu or a set of options. The Block Editor makes it straightforward—just repeat the process to insert more button blocks wherever needed.
6. Step 4: Customize the Button Text and Link
With your button in place, it’s time to make it meaningful. Customizing the text and link will turn that plain button into a functional contact tool for your visitors. Here’s how to do it:
- Click on the button to select it. Once selected, you’ll see a small toolbar pop up directly above or below the button.
- Change the button text: Click inside the button, delete the placeholder text, and type something like “Contact Us”, “Get in Touch”, or anything that clearly indicates its purpose.
- Set the link: On the toolbar, you’ll see a link icon (looks like a chain). Click on it, and a field will appear where you can enter your contact method.
What kind of links can you add?
- Email link: Type
mailto:[email protected]. When visitors click it, their email client will open with your email pre-filled. - Phone link: Use
tel:+1234567890for mobile-friendly click-to-call functionality. - Contact page URL: Link directly to your dedicated contact page, like
https://yourwebsite.com/contact.
After entering the link, hit Enter or click the Apply button (usually a right arrow). Your button is now functional! Visitors can click it to email you, call you, or visit your contact page depending on what you set.
Tip: Make sure your links are correct! A broken link can frustrate visitors and reduce trust. Double-check the URL or email address before publishing.
And that’s it! You’ve successfully added and customized a contact button on your WordPress.com website. Next, you might want to style it further or add icons, but this basic setup is a perfect starting point. Happy customizing!
7. Step 5: Style Your Contact Button for Better Visibility
Great job! You’ve added your contact button, and now it’s time to make sure it catches the eye. A well-styled button not only looks good but also encourages visitors to click and get in touch. Let’s walk through some simple ways to style your button for maximum impact.
First, consider the color scheme. Use a color that stands out from your website’s background but still complements your overall design. If your site has a lot of blue tones, a bright orange or green button can create a nice contrast. You can set this in the button’s style settings or customize it with CSS if you’re comfortable with that.
Here are some tips for styling:
- Size: Make your button large enough to be noticeable but not overwhelming. Usually, a padding of 10-20px works well.
- Font: Use a clear, easy-to-read font. Bold text can help your call-to-action stand out.
- Hover Effects: Add a hover effect like a color change or shadow to give users visual feedback when they hover over the button.
- Spacing: Ensure there’s enough space around the button so it doesn’t look cluttered.
If you’re using the WordPress Customizer or a page builder like Elementor, you can usually find options to customize these styles directly. But if you want to get a little more advanced, adding some custom CSS can really make your button pop. Here’s a simple example:
Apply this class to your button, and voilà — your contact button will look professional and inviting! Remember, small styling tweaks can make a big difference in how visitors perceive your site and whether they decide to reach out.
8. Alternative Methods for Adding a Contact Button
While the method we’ve discussed so far works great for most WordPress.com sites, there are other ways to add a contact button if you want more options or different styles. Let’s explore some popular alternatives.
Using a Plugin or Widget
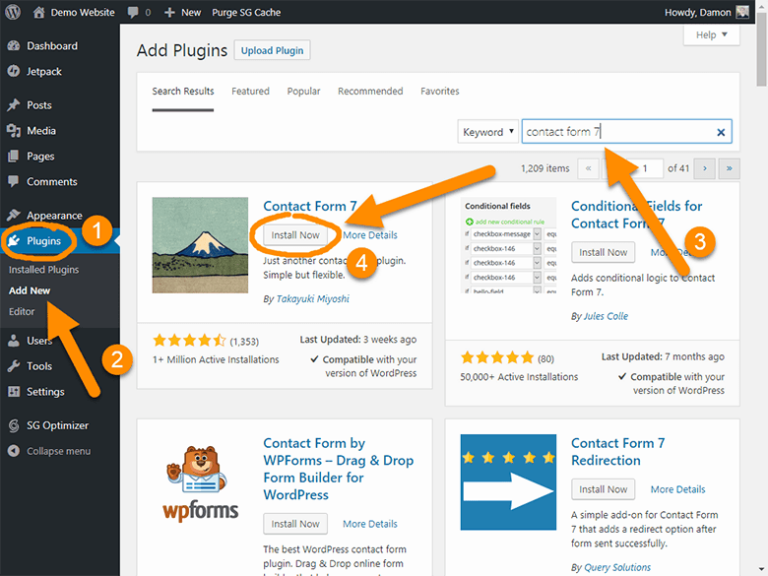
WordPress has a wide range of plugins designed specifically for contact forms and buttons. For example, plugins like WPForms or Contact Form 7 allow you to create customizable contact forms with a button integrated directly into your site. These plugins often come with built-in styling options, so you can match the button to your theme easily.
Embedding a Third-Party Service
If you prefer using external services, platforms like WhatsApp Chat or Facebook Messenger offer embeddable chat buttons. These can be added as HTML snippets or via plugins, giving your visitors a quick way to contact you through messaging apps they already use.
Using Gutenberg Blocks
WordPress.com’s block editor (Gutenberg) makes it straightforward to add a button without any coding. You can insert a Button Block directly into your post or page, then customize its text, link, and style using the block settings. This is a quick and user-friendly way to add a contact button without fussing with code.
Custom HTML and CSS
If you’re comfortable with coding, you can always craft your own button using custom HTML and CSS. This method gives you full control over appearance and placement. Just insert your HTML code into a Custom HTML block, and style it with CSS to match your site’s look.
Summary
| Method | Best For | Ease of Use |
|---|---|---|
| Using a plugin | Custom forms, advanced styling | Easy with many options |
| Embedding third-party service | Messaging integrations | Moderate, depends on service |
| Gutenberg Button Block | Simple, no coding | Very easy |
| Custom HTML/CSS | Full control over design | Requires coding knowledge |
So, whether you want a quick solution with the block editor or a fully customized button with code, there’s an option that fits your needs. The key is to choose the method that matches your comfort level and the look you’re aiming for. With these alternatives, you can easily create a contact button that seamlessly blends with your site and helps visitors reach out effortlessly.
9. Tips for Optimizing Your Contact Button for Better Engagement
Once you’ve added a contact button to your WordPress.com website, the next step is making sure it actually encourages visitors to reach out. An optimized contact button isn’t just about placement or design — it’s about making it irresistible and easy to use. Here are some handy tips to boost engagement:
Use Clear and Action-Oriented Text
Instead of generic labels like “Contact,” try more inviting and specific phrases such as “Get in Touch,” “Ask a Question,” or “Start Your Project”. This gives visitors a clear idea of what to expect and motivates them to click.
Make It Stand Out
- Color: Use a contrasting color that matches your branding but still pops against your site background.
- Size: Ensure the button is large enough to notice but not overwhelming.
- Shape: Rounded corners or unique shapes can make your button more inviting.
Position Strategically
Place your contact button where visitors naturally look — typically in the top right corner, floating on the side, or at the end of blog posts. Test different locations to see what gets the most clicks.
Use Persuasive Microcopy
Adding a brief encouraging message near the button, like “We’re here to help — reach out anytime!” can make visitors feel more comfortable reaching out.
Optimize for Mobile
Ensure your button looks good and functions smoothly on smartphones and tablets. Use responsive design settings, and test the button on different devices to confirm it’s easy to tap without zooming or accidental clicks.
Leverage Visual Cues
Icons like an envelope or chat bubble can quickly convey the purpose of the button, making it more recognizable at a glance.
A/B Testing
If you’re serious about maximizing engagement, try different button styles, copy, and placements. Use analytics to see which version performs best and refine accordingly.
10. Conclusion and Next Steps to Improve Your Website’s Contact Options
Adding a contact button is a fantastic first step towards making your website more approachable and user-friendly. But remember, it’s just one part of a broader strategy to enhance communication with your visitors. To truly make the most of your contact options, consider these next steps:
- Offer Multiple Contact Methods: Provide options like email, phone, live chat, or even social media links to cater to different preferences.
- Set Up Automated Responses: Use email autoresponders to acknowledge inquiries instantly, showing your visitors that you value their communication.
- Monitor and Analyze: Keep an eye on your contact form submissions and button clicks. Tools like Google Analytics or WordPress plugins can help track engagement and identify areas for improvement.
- Keep Your Contact Info Up-to-Date: Regularly review and update your contact details to prevent missed opportunities or frustration.
- Encourage Feedback: Ask visitors for their input on your contact process, and make adjustments based on their suggestions.
Remember, the goal is to make reaching out as easy and inviting as possible. By continuously refining your contact options and engaging with your visitors, you’ll build stronger relationships, boost trust, and ultimately grow your website’s success. So, go ahead — experiment, analyze, and keep improving your contact experience!