Making your website accessible isn’t just a nice-to-have; it’s essential for reaching a wider audience and ensuring everyone can enjoy your content. One common challenge is ensuring text is easy to read for all visitors, including those with visual impairments or reading difficulties. That’s where font resizers come in—they give users control over text size, improving readability and overall user experience. If you’re using WordPress, adding a font resizer is a simple way to boost accessibility. In this post, we’ll explore what font resizers are, why they’re important, and how to add Zeno Font Resizer to your site for maximum benefit.
What Is Zeno Font Resizer and How Does It Improve Website Accessibility

Zeno Font Resizer is a handy plugin designed to give your website visitors the ability to easily adjust the font size on your pages. Think of it as a flexible tool that empowers users to customize their reading experience without needing to fiddle with browser settings or zoom in and out repeatedly. Once installed and activated, Zeno adds simple controls—usually buttons or links—that allow visitors to increase or decrease text size with just a click.
So, how does this improve accessibility? Well, many users, especially those with visual impairments, find small text hard to read. By offering a straightforward way to enlarge text, Zeno helps make your website more inclusive. It ensures that your content is legible for elderly users, people with dyslexia, or anyone who simply prefers larger fonts for comfort. Plus, the plugin is lightweight and easy to set up, meaning you can enhance your site’s accessibility without complicated coding or design changes.
Beyond improving readability, Zeno Font Resizer also benefits your site’s SEO and user engagement. Visitors are more likely to stay longer and interact if they can comfortably read your content. Overall, it’s a simple yet powerful addition that demonstrates your commitment to accessibility and user-centered design. Whether you run a blog, e-commerce site, or corporate website, giving users control over font size makes your website more welcoming and user-friendly for everyone.
3. Step-by-Step Guide to Installing Zeno Font Resizer on Your WordPress Site
Adding the Zeno Font Resizer to your WordPress site is a straightforward process, even if you’re not a tech wizard. Let’s walk through the steps together so you can make your website more accessible today.
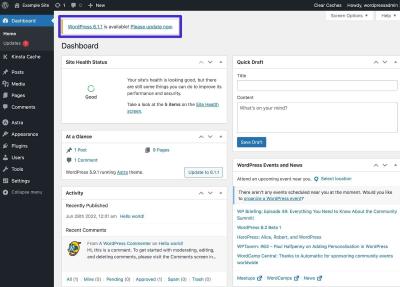
Step 1: Log into Your WordPress Dashboard
Start by signing into your WordPress admin area. This is where all the magic happens. Once logged in, you’ll see the dashboard with various menu options.
Step 2: Navigate to Plugins
On the left-hand menu, hover over or click on Plugins, then select Add New. This takes you to the plugin repository where you can search for new plugins.
Step 3: Search for Zeno Font Resizer
In the search bar at the top right, type Zeno Font Resizer. The plugin should appear in the list. Make sure it’s the official plugin or one with good reviews and active support.
Step 4: Install the Plugin
- Click the Install Now button next to the Zeno Font Resizer plugin.
- Wait a few moments while WordPress downloads and installs the plugin.
Step 5: Activate the Plugin
- Once installed, the Install Now button will change to Activate.
- Click on Activate to enable the plugin on your site.
And just like that, you’ve taken the first step toward making your website more user-friendly for visitors who need to adjust text size. Now, let’s move on to fine-tuning those settings for the best experience.
4. Configuring Zeno Font Resizer Settings for Optimal User Experience
After installing and activating Zeno Font Resizer, it’s essential to configure its settings properly. Proper setup ensures visitors can easily resize text without disrupting your site’s design. Here’s how to do it:
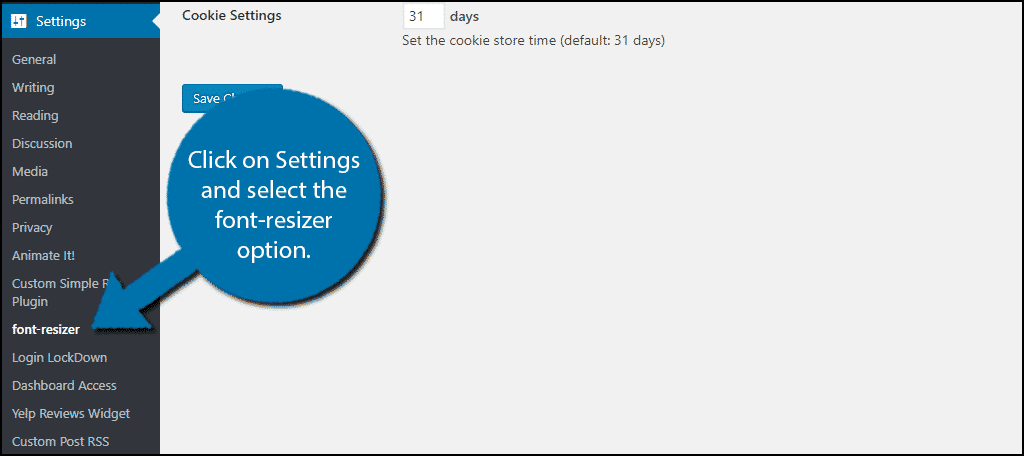
Step 1: Access the Plugin Settings
In your WordPress dashboard, look for Zeno Font Resizer in the left menu or under the Settings section. Click on it to open the configuration page.
Step 2: Choose the Placement of Resizer Controls
You can decide where the font resizer buttons appear:
- Header or footer: for site-wide accessibility.
- Within content: for specific posts or pages.
- As a floating widget: for easy access from any part of the site.
Select the option that best fits your site’s layout and user needs.
Step 3: Customize Resize Options
Configure how many size options you want to offer visitors. Typically, a good setup includes:
- Small
- Normal
- Large
- Extra Large
You can also set the default font size and the maximum/minimum sizes allowed.
Step 4: Style the Buttons
Make sure the font resize buttons blend well with your website’s design. You can often choose from preset styles or add custom CSS for a seamless look. Prioritize clarity and accessibility—buttons should be large enough to click easily and clearly labeled.
Step 5: Enable Accessibility Features
Check options like:
- Keyboard navigation: allow users to resize fonts using keyboard shortcuts.
- Screen reader compatibility: ensure screen readers can announce the controls properly.
Step 6: Save and Test Your Settings
Once you’ve configured everything, click Save Settings. Visit your website as a visitor and test out the font resizer controls. Make sure they appear correctly and function smoothly without breaking your layout.
By taking these steps to customize Zeno Font Resizer, you’re providing a better browsing experience for all visitors, especially those with visual impairments or reading difficulties. Accessibility isn’t just a feature—it’s a way to make your website welcoming to everyone!
5. Testing the Font Resizer on Your Website
So, you’ve installed the Zeno Font Resizer plugin on your WordPress site — great job! Now, the next step is to make sure everything works smoothly and that your visitors can easily adjust font sizes without any hiccups. Testing is crucial because it helps you catch any issues before your users do and ensures that your website remains user-friendly and accessible.
Start by visiting your website in different browsers and devices. Open your site on Chrome, Firefox, Safari, and even on mobile phones or tablets. Look for the font resizer widget—usually a small set of buttons labeled “A+” and “A−” or similar icons. Click on these buttons to see if the font size increases or decreases smoothly. Check that the changes are noticeable but not disruptive to the overall layout.
While testing:
- Check for consistency: Does the font resize as expected across all pages?
- Observe layout stability: Are elements shifting unexpectedly? For example, images or menus overlapping or breaking?
- Test accessibility: Use keyboard navigation (Tab key) to focus on the resizer controls. Can you activate them without a mouse?
- Use screen readers: If you have access, test with screen reader software to see if the font resizing improves readability for users with visual impairments.
Don’t forget to clear your browser cache or use incognito mode to ensure you’re seeing the latest version of your site after making changes. If you notice any issues, revisit your plugin settings or check for conflicts with other plugins or themes. Sometimes, CSS conflicts can cause font resizing to behave unexpectedly, so inspecting elements with your browser’s developer tools can help identify problems.
Finally, invite a few friends, colleagues, or even users with accessibility needs to test the font resizer. Their feedback can be invaluable in spotting usability issues you might overlook. Remember, accessibility is about making your website usable for everyone, so thorough testing is your best friend here.
6. Best Practices for Enhancing Accessibility with Font Resizers
Adding a font resizer is a fantastic step toward making your website more accessible, but to truly maximize its benefits, you should follow some best practices. Accessibility isn’t a one-and-done task; it’s an ongoing effort to ensure your content is inclusive and easy to read for all visitors.
Here are some key best practices to keep in mind:
- Place the Resizer in a Visible and Consistent Location: Make sure the font resizer controls are easy to find on every page, typically in the header or near the main navigation. Consistency helps users know where to look, especially those relying on assistive technologies.
- Use Clear Labels and Icons: Labels like “Adjust Text Size” or simple icons like “A+” and “A−” are effective. Avoid vague symbols that might confuse users.
- Ensure Keyboard Accessibility: Users navigating with keyboards should be able to focus on and activate the resizer controls easily. Test with Tab and Enter keys to confirm.
- Maintain Layout Integrity: When font sizes change, your site’s layout should adapt gracefully. Use relative units like ’em’ or ‘%’ in your CSS, which respond better to resizing than fixed units like pixels.
- Combine with Other Accessibility Features: Font resizers are great, but they work best when paired with other practices, such as high-contrast modes, alt text for images, and logical heading structures.
- Test Regularly: Accessibility isn’t a set-and-forget task. Regularly test your site with tools like WAVE, Lighthouse, or screen readers to identify areas for improvement.
- Educate Your Users: Consider adding a brief explanation about how to use the font resizer, especially if your audience might not be familiar with accessibility features.
By following these best practices, you ensure that your font resizer genuinely enhances accessibility rather than just being a visual feature. Remember, the goal is to create a website where everyone, regardless of their abilities or devices, can comfortably access your content. Every small step counts toward a more inclusive digital space!
7. Additional Accessibility Tips for WordPress Websites
While adding the Zeno Font Resizer plugin is a fantastic step toward making your WordPress site more accessible, there are several other strategies you can implement to further improve usability for all visitors. Accessibility isn’t just about font size—it’s about creating an inclusive environment where everyone can navigate and enjoy your content comfortably.
Here are some additional tips to consider:
- Use Clear and Legible Fonts: Choose fonts that are easy to read, such as Arial, Verdana, or Open Sans. Avoid overly decorative fonts that can be difficult to decipher, especially at smaller sizes.
- Ensure Sufficient Color Contrast: Make sure text contrasts well with its background. Tools like WebAIM’s Contrast Checker can help you verify that your color combinations meet accessibility standards.
- Provide Text Alternatives for Media: Use descriptive alt text for images, and captions or transcripts for videos. This benefits users who rely on screen readers.
- Use Heading Hierarchies Properly: Structure your content with appropriate heading levels (h1, h2, h3, etc.) to help screen readers navigate your site more efficiently.
- Implement Keyboard Navigation: Ensure all interactive elements—menus, forms, buttons—can be accessed and operated using a keyboard alone. Test your site with Tab and Enter keys to verify navigation.
- Test with Accessibility Tools: Utilize tools like WAVE, Lighthouse, or axe to scan your website for accessibility issues. These tools can identify problems you might overlook.
- Keep Content Simple and Clear: Use straightforward language and organize information logically. Avoid clutter and unnecessary complexity to make your content more approachable.
Remember, accessibility is an ongoing process. Regularly review your website, gather feedback from users with different needs, and stay updated with best practices. By combining Zeno Font Resizer with these additional tips, you’re well on your way to creating a website that’s welcoming and usable for everyone.
8. Conclusion and Final Thoughts on Improving Accessibility with Zeno Font Resizer
Making your WordPress site accessible isn’t just a good practice—it’s a responsibility. Visitors come to your site with diverse needs, and providing tools like the Zeno Font Resizer can make a significant difference in how they experience your content. By empowering users to adjust font sizes easily, you remove barriers that might prevent someone from fully engaging with your website.
Integrating Zeno Font Resizer is straightforward, and it complements other accessibility efforts perfectly. When combined with clear design, proper semantic structure, high contrast, and keyboard navigability, your site becomes much more inclusive.
Remember, accessibility benefits everyone. Even users without specific needs appreciate the ability to customize their viewing experience—whether they’re on a small mobile device or have visual preferences. It’s about creating a user-friendly environment that respects and accommodates all visitors.
So, as you continue to improve your website, keep these principles in mind:
- Prioritize user control: Let visitors decide how they want to view your content.
- Stay informed: Keep up with accessibility standards and new tools.
- Test regularly: Use accessibility testing tools and gather feedback for ongoing improvements.
In summary, adding the Zeno Font Resizer plugin is a proactive step toward better accessibility, but it’s most effective when part of a comprehensive approach. Your efforts can make a lasting impact, ensuring your website is welcoming to everyone, regardless of their abilities. Happy optimizing!