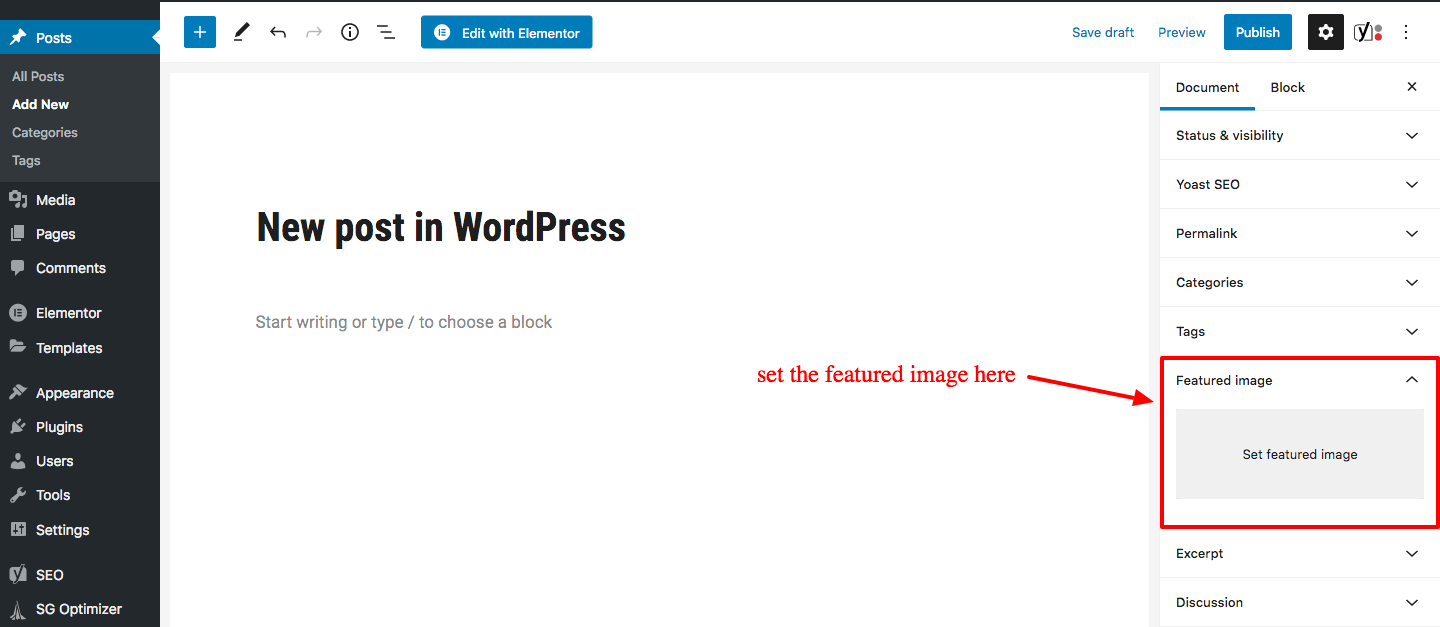
If you’ve spent any time customizing your WordPress site, you’ve probably come across the term “featured images.” These are the standout images you set for your posts or pages, acting as visual cues that grab visitors’ attention and give a sneak peek of your content. Featured images are more than just pretty pictures—they play a vital role in your site’s overall aesthetic and user experience. Whether you’re running a blog, an online store, or a portfolio site, understanding how to choose and optimize these images can make a big difference in how your content looks and performs.
Why Choosing the Right Image Size Matters for Your Website
Picking the right size for your featured images isn’t just about aesthetics—it’s a crucial factor that impacts your website’s loading speed, responsiveness, and SEO. Here’s why it truly matters:
- Loading Speed: Large images can slow down your site, leading to higher bounce rates. Optimized image sizes ensure your pages load quickly, keeping visitors engaged.
- Responsive Design: Your site looks great on desktops, tablets, and smartphones. Properly sized images adapt seamlessly across devices without distortion or pixelation.
- Visual Clarity: Using images that are too small can result in pixelation or blurriness, reducing professionalism. Conversely, overly large images can be unnecessary and cumbersome.
- SEO Benefits: Search engines favor well-optimized images. Proper sizing, combined with descriptive alt text, can boost your visibility in image searches and overall rankings.
Think of your featured images as the first impression visitors get of your content. Just like a good cover photo draws people in, the right image size ensures your site looks polished, loads swiftly, and provides a great user experience. So, taking the time to select and resize your images appropriately is a small effort with big rewards for your website’s performance and appeal.
3. Recommended Standard Image Sizes for WordPress Featured Images

Choosing the right size for your featured images can make a big difference in how your website looks and performs. While WordPress is pretty flexible, there are some standard dimensions that tend to work well across most themes and devices. Let’s break down what you should aim for.
General Guidelines:
- Keep images between 1200 pixels and 1920 pixels wide for full-width displays.
- For blog post thumbnails or smaller featured images, sizes around 800 x 600 pixels are usually sufficient.
- Ensure your images are optimized for fast loading — aim for under 100 KB when possible without sacrificing quality.
Specific Size Recommendations:
| Use Case | Recommended Size | Notes |
|---|---|---|
| Full-width header or large featured image | 1920 x 1080 pixels | Great for modern, high-resolution displays. Keep file size optimized. |
| Standard blog post featured image | 1200 x 628 pixels | Ideal for social sharing and looks good on most devices. |
| Thumbnail or small featured image | 600 x 400 pixels | Perfect for sidebar widgets or grid layouts. |
Remember, these are starting points. The best size depends on your theme’s layout. Many themes specify recommended image sizes, so it’s worth checking their documentation. Also, always preview your images on different devices to ensure they look sharp and load quickly.
4. How to Resize Images for WordPress Featured Images
Resizing your images properly is key to maintaining a fast, attractive website. You don’t need fancy tools—just a bit of know-how! Here’s a simple guide to help you resize images effectively for your WordPress featured images.
Step 1: Choose the Right Tool
- Online tools: Canva, Pixlr, or Fotor are user-friendly and free.
- Photo editing software: Photoshop, GIMP (free), or Paint.NET can give you more control.
- WordPress plugins: Plugins like Smush or EWWW Image Optimizer can resize and compress images automatically.
Step 2: Determine the Size You Need
Refer back to the recommended sizes above. Decide which size fits your theme and purpose best. For example, if you’re creating a large header, aim for around 1920 pixels wide.
Step 3: Resize the Image
- Open your chosen tool or software.
- Upload your original image.
- Look for the resize or image size option.
- Enter the desired dimensions, maintaining the aspect ratio to avoid distortion.
- Save the image in JPEG or PNG format, optimizing for web use.
Step 4: Compress the Image
Before uploading, compress your image to reduce file size without losing quality. Tools like TinyPNG or ImageOptim are great for this.
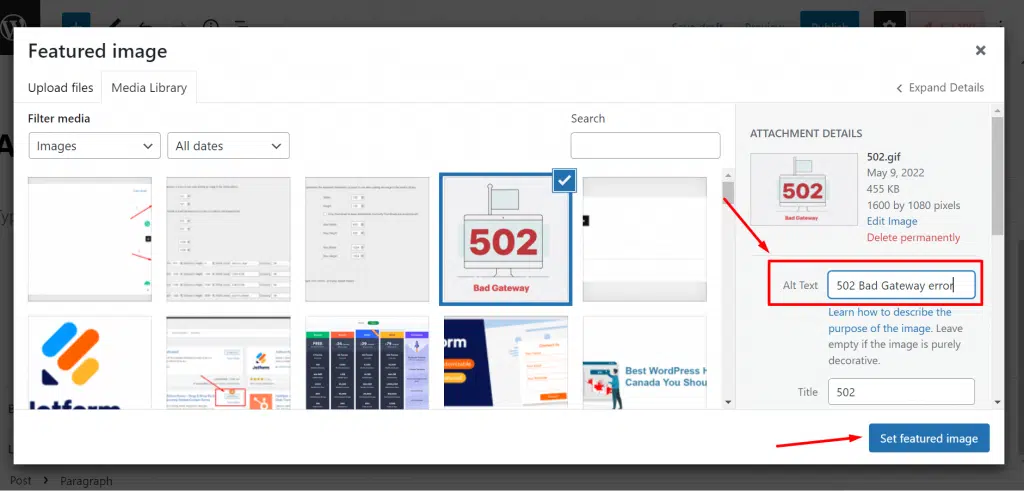
Step 5: Upload to WordPress
Once your image is resized and compressed, go to your WordPress dashboard, navigate to your post or page, and set the resized image as your featured image. Remember, choosing the right image size helps your site load faster and look more professional.
And that’s it! With a little practice, resizing images will become second nature, ensuring your website always looks sharp and loads quickly. Happy optimizing!
5. Best Practices for Uploading and Managing Featured Images
When it comes to making your WordPress site look polished and professional, the way you handle your featured images is key. Here are some best practices to ensure your featured images are optimized, consistent, and easy to manage:
Use High-Quality, Relevant Images
Start with choosing images that are crisp, clear, and relevant to your content. A high-quality image grabs attention and adds credibility to your post. Remember, the featured image often sets the first impression, so invest time in selecting the right visuals.
Maintain Consistent Dimensions
Consistency is crucial for a cohesive look. Decide on a standard size for your featured images—say, 1200 x 628 pixels for a typical blog post—and stick to it. This helps your site look uniform and prevents layout issues.
Optimize Image Size Before Upload
Before uploading, resize your images to your chosen dimensions using photo editing tools. This reduces load times and ensures images are not unnecessarily large, improving your site’s performance.
Use Descriptive File Names and Alt Text
Rename your image files with descriptive, keyword-rich names. Also, fill out the alt text field with relevant descriptions. This boosts SEO and makes your site more accessible for users relying on screen readers.
Organize Your Media Library
Keep your media library tidy by creating folders or categories if your CMS allows. This way, you can easily locate and update featured images later, saving you time and frustration.
Regularly Update and Refresh Images
As your site evolves, revisit your featured images. Refresh outdated visuals or replace low-quality images to keep your content engaging and up-to-date.
Use Version Control for Images
If you often update images, consider keeping different versions saved locally. This way, you can revert to previous images if needed or track changes over time.
Summary
- Choose high-quality, relevant images
- Keep consistent dimensions across posts
- Resize images before uploading
- Use descriptive file names and alt text
- Organize your media library for easy management
- Regularly update your images to stay current
Following these best practices helps ensure your featured images not only look great but also contribute positively to your site’s performance and SEO. Remember, a well-managed media library can save you headaches down the line!
6. Tools and Plugins to Optimize Featured Image Sizes
Optimizing images is an ongoing process, but luckily, there are plenty of tools and plugins that make it a breeze. Whether you want to compress images, automatically resize them, or manage multiple versions, these resources can help you keep your featured images in tip-top shape:
Image Optimization Plugins
- Smush – This popular plugin automatically compresses your images without losing quality. It works on existing images and optimizes new uploads in real-time.
- EWWW Image Optimizer – Offers lossless and lossy compression, plus lazy loading features to improve page load times.
- ShortPixel – Provides high-quality compression and supports WebP conversion, which is great for faster loading times.
Automatic Resizing and Generation of Multiple Image Sizes
- Regenerate Thumbnails – This plugin helps you regenerate thumbnail sizes after changing your image dimensions, ensuring consistency across your site.
- WP Resized Image Editor – Allows you to resize images directly within WordPress, giving you control over image dimensions without leaving your dashboard.
Web-Based Tools for Image Optimization
| Tool | Features | Website |
|---|---|---|
| Canva | Easy resizing, editing, and design templates | canva.com |
| Pixlr | Advanced editing, resizing, and effects | pixlr.com |
| TinyPNG / TinyJPG | Simple compression for PNG and JPEG images | tinypng.com |
Best Practices for Using Tools and Plugins
When using these tools:
- Always back up your images before bulk editing.
- Use lossless compression when image quality is critical.
- Set your preferred image dimensions before resizing to ensure consistency.
- Test your site’s speed after optimization to confirm improvements.
Final Tip
Combining the right tools with good management habits can significantly enhance your website’s user experience. Optimized featured images load faster, look sharper, and contribute to better SEO rankings. So, explore these tools, set up your workflow, and watch your site’s visuals shine!
Conclusion and Tips for Maintaining Consistent Image Quality
Ensuring your featured images look professional and cohesive across your WordPress site is essential for creating a polished user experience. To achieve this, always start with high-resolution images that are appropriately sized for your theme’s specifications. This helps prevent pixelation and maintains clarity, especially on high-DPI screens. Consistency is key—use a standard aspect ratio and similar styling for all featured images to create a uniform appearance.
Here are some practical tips to maintain consistent image quality:
- Use the right dimensions: Refer to your theme’s recommended sizes, typically found in documentation or theme settings.
- Optimize images: Compress images to reduce load times without sacrificing quality, using tools like TinyPNG or ImageOptim.
- Maintain aspect ratios: Crop or resize images to consistent ratios to ensure uniformity across posts.
- Choose high-quality images: Use images with sufficient resolution and clarity to prevent blurriness.
- Implement a standard editing workflow: Develop a process for resizing, cropping, and exporting images to maintain consistency.
Additionally, regularly review your website’s featured images to ensure they align with your brand’s visual standards. By following these tips, you’ll enhance your site’s aesthetic appeal and provide a seamless experience for your visitors. Consistent, high-quality images not only improve the overall look but also reinforce your site’s professionalism and credibility.